I was standing in the grocery store parking lot last November, fumbling for my keys, when the wind shifted and carried the scent of someone’s woodsmoke and something sweet and spiced across the asphalt. It hit me so hard I stopped mid-step. I was eight years old, standing in my Aunt Clara’s tiny kitchen, watching her pour a gallon of apple cider into a giant stockpot. She was muttering about the price of cinnamon sticks that year, and I was mesmerized by the way the cider swirled and caught the light. She passed away a few years back, and I haven’t tasted turkey quite like hers since. That parking lot moment—honestly, it was a little embarrassing, standing there with my cart full of canned cranberry—but it set me on a mission. I had to figure out how she got that turkey so impossibly juicy and subtly sweet, without it tasting like dessert. I knew it started with the brine, but my attempts always fell flat. They were either too salty or not flavorful enough. Then it clicked. It wasn’t just about the apple cider. It was the balance. The gentle warmth of the spices against the acidity of the cider. The way the salt worked with the sugar, not against it. This is the brine I spent two years perfecting. It’s the one that finally made me close my eyes on Thanksgiving and feel like I was back in that warm kitchen. Maybe you’ve been there, chasing a flavor you can almost remember but can’t quite name. Let me tell you, this is the one.
This Best Apple Cider Turkey Brine is the secret to a turkey that stays moist even if you accidentally leave it in the oven a few minutes too long (we’ve all been there). It’s not complicated, it doesn’t require a dozen fancy ingredients, and it uses things you probably already have in your pantry around the holidays. The payoff is a bird that’s seasoned all the way through, with golden-brown skin and meat so tender it almost falls off the bone. You’ll never go back to a dry turkey again.
Why You’ll Love This Recipe
I’ve tested a lot of brines over the years. Some were too salty, some were too sweet, and some just didn’t do much at all. This one hits the sweet spot. It’s the brine I now use for every holiday bird, and my family has given it the official stamp of approval. Here’s why it works so well:
- Simple Ingredients: No need to hunt down obscure spices. You likely have everything—apple cider, kosher salt, brown sugar, peppercorns, and a few whole spices—already in your kitchen.
- Perfect for Busy Holidays: The active prep time is about 10 minutes. You just simmer, cool, and soak. It’s hands-off, which is exactly what you need when you’re juggling side dishes and pie.
- Crowd-Pleaser: This brine doesn’t make the turkey taste like a dessert. Instead, it enhances the natural flavor of the bird, adding a subtle warmth and sweetness that everyone—from the kids to the in-laws—will love.
- Extra Juicy Guaranteed: The salt in the brine helps the turkey retain moisture as it cooks. The apple cider adds a gentle acidity that tenderizes the meat. The result is a turkey that’s practically foolproof.
- Budget-Friendly: A gallon of apple cider costs a fraction of what you’d pay for a pre-made brine or a specialty injection. This recipe stretches your grocery budget without skimping on flavor.
What makes this different from other brines is the ratio. I spent a long time figuring out the right balance of salt to sugar to cider. Too much salt and you get a salty bird. Too much sugar and the skin burns before the inside is done. This recipe gives you that perfect golden-brown skin and meat that’s seasoned all the way through. It’s comfort food at its finest—a little bit of work upfront for a whole lot of reward at the table.
What Ingredients You Will Need
This brine uses simple, wholesome ingredients to deliver bold flavor and a perfectly juicy turkey. Most of these are pantry staples, especially if you do any fall baking. Let’s break down what each one does.
- 1 gallon apple cider (not apple juice): This is the star of the show. Apple cider has a deeper, more complex flavor than apple juice because it’s less filtered. It brings a natural sweetness and a touch of acidity that helps tenderize the meat. I prefer a local, unfiltered cider for the best flavor.
- 1 cup kosher salt (Diamond Crystal preferred): This is non-negotiable. Do not use table salt, as it’s much saltier and can ruin your brine. Kosher salt dissolves easily and seasons the turkey evenly. Diamond Crystal is my go-to because it’s less dense, giving you more control.
- 1/2 cup light brown sugar, packed: The brown sugar balances the salt and adds a subtle molasses note that complements the apple cider. It also helps the skin caramelize to a beautiful golden-brown. Don’t skip it—it’s not just for sweetness.
- 4-5 sprigs fresh rosemary: Rosemary adds an earthy, pine-like aroma that pairs beautifully with the apple and poultry. If you only have dried, use about 2 teaspoons.
- 4-5 sprigs fresh thyme: Thyme is a classic poultry herb. It’s subtle but adds a layer of savory depth that keeps the brine from being too sweet. You can use 1 teaspoon of dried thyme if that’s what you have.
- 2 tablespoons whole black peppercorns: These add a gentle warmth and a little bit of heat. They’re essential for a well-rounded flavor profile. I don’t recommend using pre-ground pepper here, as it can make the brine cloudy and bitter.
- 6-8 whole cloves: Cloves are potent, so a little goes a long way. They add that unmistakable holiday spice aroma that makes the whole house smell amazing. Be careful not to overdo it, or they can overpower the other flavors.
- 4 cinnamon sticks: Cinnamon adds warmth and sweetness without making the brine taste like a pie. It’s the bridge between the savory herbs and the sweet cider. I use whole sticks, not ground, for a cleaner brine.
- 2 bay leaves: Bay leaves add a subtle, almost floral note that rounds out the other flavors. They’re a background player, but you’ll notice if they’re missing.
- 8 cups ice water: This is used to cool the brine down quickly after you simmer it. You want the brine to be completely cold before you add the turkey. Cold brine is key for food safety.
- 1 (12-14 pound) turkey, completely thawed: This recipe is designed for a standard-sized turkey. If your bird is larger or smaller, you’ll need to adjust the brine volume. The turkey must be fully thawed for the brine to work its magic.
Ingredient Selection Tips: When buying your apple cider, look for one that’s unfiltered and has no added sugars or preservatives. The ingredients list should just say “apple cider.” For the freshest herbs, look for rosemary and thyme that are bright green and not wilting. If you’re on a tight budget, you can use dried herbs, but the fresh ones really do make a difference in the final aroma.
Substitution Guidance: If you don’t have brown sugar, you can use maple syrup or honey. Reduce the liquid in the brine slightly to account for the extra moisture. For a lower-sugar option, you can cut the brown sugar in half, but the skin won’t brown quite as deeply. If you’re out of whole cloves, you can use a pinch (1/8 teaspoon) of ground cloves, but be careful—it’s very strong.
Equipment Needed
You don’t need any fancy gadgets for this brine, which is part of the beauty of it. Here’s what you’ll need to get the job done.
- Large stockpot (at least 8 quarts): You’ll need this to simmer the brine ingredients. A heavy-bottomed pot is best to prevent the sugar from scorching.
- Large brining bag or food-grade bucket: This is where the turkey will soak. A heavy-duty 2-gallon zip-top bag works perfectly and takes up less space in the fridge. A food-grade 5-gallon bucket is also a great option if you have the room.
- Large roasting pan or baking dish: You’ll need this to hold the brining bag and catch any leaks. Trust me on this one—a leaky bag is a mess you don’t want to clean up.
- Measuring cups and spoons: For accurate salt and sugar measurements. I can’t stress enough how important it is to use the right amount of salt.
- Sharp knife and cutting board: For prepping the herbs. A dull knife can bruise the herbs and release bitter flavors.
- Long-handled spoon: For stirring the brine as it simmers. A wooden spoon is ideal because it won’t scratch your pot.
- Kitchen shears: Optional, but helpful for trimming any excess fat or skin from the turkey before brining.
Budget-Friendly Options: If you don’t have a stockpot, you can simmer the brine in a large Dutch oven or even a deep skillet. For the brining container, a clean, food-grade 5-gallon bucket from a hardware store costs about $5 and works wonderfully. Just make sure it’s never been used for chemicals.
Preparation Method
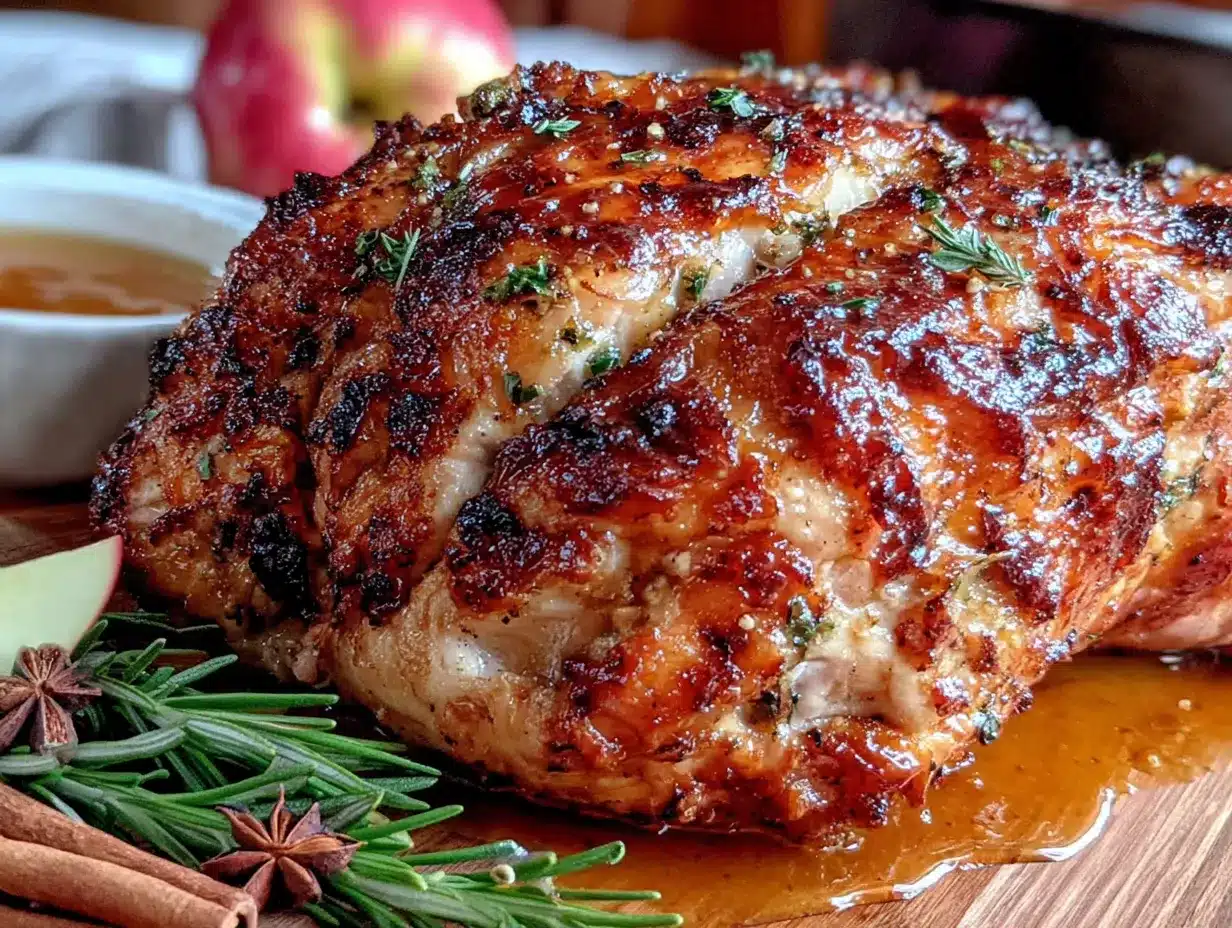
This process is straightforward, but there are a few key steps to get right. Follow these instructions, and you’ll have a perfectly brined turkey ready for the oven.
- Prepare the brine base: In your large stockpot, combine the gallon of apple cider, 1 cup of kosher salt, and 1/2 cup of packed brown sugar. Place the pot over medium-high heat and stir occasionally. You want the salt and sugar to fully dissolve. This usually takes about 5-7 minutes. Don’t walk away—if the sugar scorches on the bottom, it’ll leave a bitter taste.
- Add the aromatics: Once the salt and sugar have dissolved, add the fresh rosemary sprigs, fresh thyme sprigs, whole black peppercorns, whole cloves, cinnamon sticks, and bay leaves. Stir everything together. Bring the mixture to a gentle simmer, then immediately reduce the heat to low. You don’t want a rolling boil—just a gentle bubble.
- Simmer the brine: Let the brine simmer for 10 minutes. This allows the spices and herbs to infuse the liquid with their flavors. Your kitchen will start to smell incredible at this point—like a cozy fall day. After 10 minutes, remove the pot from the heat.
- Cool the brine completely: This is the most important step for food safety. You cannot put a warm brine over a raw turkey. Add the 8 cups of ice water to the pot. Stir gently to combine. The ice water will bring the temperature down quickly. Let the brine sit until it’s completely cool to the touch. If it’s still warm, you can add a few more ice cubes. The brine must be below 40°F (4°C) before you add the turkey.
- Prepare the turkey: While the brine is cooling, prepare your turkey. Remove the giblets and neck from the cavities. Rinse the turkey inside and out with cold water and pat it dry with paper towels. A dry turkey absorbs the brine better than a wet one. If you have time, let the turkey sit uncovered in the fridge for an hour to dry the skin slightly.
- Brine the turkey: Place your brining bag inside your large roasting pan (this is your leak insurance). Carefully place the turkey inside the bag. Pour the completely cooled brine over the turkey. It should cover the turkey completely. If it doesn’t, you can add a bit more cold water and a little extra salt (1 tablespoon per quart of water).
- Seal and refrigerate: Squeeze as much air out of the bag as possible and seal it tightly. Rotate the bag gently to make sure the brine is distributed evenly. Place the roasting pan with the bagged turkey in the refrigerator. Brine for 12 to 24 hours. I find that 18 hours is the sweet spot for a 14-pound bird. Do not brine for longer than 24 hours, or the meat can become mushy and overly salty.
- Remove and rinse: After brining, remove the turkey from the bag. Discard the brine—do not reuse it. Rinse the turkey thoroughly inside and out with cold water to remove any excess salt from the surface. This step is crucial. If you skip it, your turkey will be too salty.
- Pat dry and rest: Pat the turkey completely dry with paper towels, inside and out. Place it on a wire rack set over a baking sheet and let it rest, uncovered, in the refrigerator for at least 2 hours, or overnight. This allows the skin to dry out, which is the secret to getting that perfectly crispy, golden-brown skin.
Troubleshooting Tip: If your brine doesn’t fully cover the turkey, don’t panic. You can make a quick supplemental brine by mixing 4 cups of cold water with 2 tablespoons of kosher salt and 1 tablespoon of brown sugar. Pour this into the bag to top it off.
Cooking Tips & Techniques
After dozens of turkeys, I’ve learned a few things the hard way. Here are my best tips to make sure your brined turkey turns out perfect every time.
Don’t skip the rinse. I know it feels counterintuitive to rinse off all that flavor, but trust me on this. The brine seasons the meat deeply, all the way to the bone. The surface, however, will have concentrated salt. If you don’t rinse it, your gravy and the outer layer of meat will be unpleasantly salty. I learned this the hard way my first year. The turkey was juicy, but the skin was almost inedible.
Dry the skin well. This is the number one tip for crispy skin. After rinsing, pat the turkey dry with paper towels, then let it sit uncovered in the fridge. The cold air circulating around the bird dries out the skin. When it hits the hot oven, that dry skin crisps up beautifully. If you’re short on time, you can use a hair dryer on the cool setting to speed things up. I’m not joking—it works.
Use a meat thermometer. A brined turkey cooks a little faster than an unbrined one because the brine helps conduct heat. Don’t rely on the pop-up timer that comes with the bird. Insert an instant-read thermometer into the thickest part of the thigh, without touching the bone. You’re looking for 165°F (74°C). I start checking the temperature about 30 minutes before the recipe says the turkey should be done.
Let it rest. This is the hardest part of the whole process. Once the turkey comes out of the oven, let it rest for at least 30 minutes before you start carving. This allows the juices to redistribute throughout the meat. If you cut into it too soon, all that beautiful moisture will end up on the cutting board instead of on your plate.
Timing is everything. I like to start my brine the morning of the day before Thanksgiving. That way, I can pull the turkey out of the brine in the morning, rinse it, and let it dry in the fridge all day. By the time I’m ready to roast it that evening or the next morning, the skin is perfectly dry and ready to crisp up.
Variations & Adaptations
This brine is fantastic as written, but it’s also a great base for experimentation. Here are a few ways to make it your own.
Herb Swap: If you’re not a fan of rosemary, you can swap it out for sage. Sage is a classic Thanksgiving herb that pairs wonderfully with apple. Use 4-5 fresh sage leaves in place of the rosemary. The flavor will be a little more earthy and less piney.
Citrus Twist: For a brighter, more acidic brine, add the zest and juice of two oranges to the simmering liquid. The orange complements the apple cider beautifully and adds a fresh note that cuts through the richness of the dark meat. This is my personal favorite variation for a change of pace.
Spicy Kick: If you like a little heat, add 1-2 dried chipotle peppers or a teaspoon of red pepper flakes to the brine. The smokiness of the chipotle works surprisingly well with the sweet apple cider. It won’t make the turkey spicy, just adds a subtle warmth in the background.
Maple Bourbon: For a truly decadent holiday bird, replace the brown sugar with 1/2 cup of maple syrup and add 1/4 cup of bourbon to the simmering brine. The bourbon adds a depth of flavor that’s hard to beat. Just be sure to simmer it long enough to cook off the alcohol, leaving only the flavor behind.
Dietary Adaptations: This brine is naturally gluten-free and dairy-free. If you’re watching your sodium intake, you can reduce the salt to 3/4 cup, but the turkey won’t be quite as juicy. For a lower-sugar option, use a sugar substitute like Swerve Brown, but note that the skin may not caramelize as deeply.
Serving & Storage Suggestions
This brined turkey is the star of the show, but what you serve with it matters too. Here’s how to make the most of your bird.
Serving Temperature: Serve the turkey hot, right after its 30-minute rest. The skin will be at its crispiest, and the meat will be at its most tender. If you need to hold it for a bit, tent it loosely with foil. Don’t wrap it tightly, or the steam will soften the skin.
Presentation: Transfer the turkey to a large platter. Garnish with fresh rosemary sprigs, apple slices, and a few whole cinnamon sticks for a beautiful, rustic presentation. It’s a feast for the eyes as much as the stomach.
Complementary Dishes: This turkey pairs beautifully with classic sides like creamy mashed potatoes, green bean casserole, and a tangy cranberry sauce. The subtle sweetness of the brine also works well with roasted root vegetables like carrots and parsnips. For drinks, a crisp hard cider or a buttery Chardonnay is a perfect match.
Storage Instructions: Store leftover turkey in an airtight container in the refrigerator for up to 4 days. The meat will stay moist thanks to the brine. For longer storage, you can freeze the carved turkey in freezer-safe bags for up to 3 months. Thaw it overnight in the fridge before reheating.
Reheating Tips: The best way to reheat leftover turkey is to add a splash of turkey or chicken broth to a baking dish, place the turkey in a single layer, cover with foil, and warm in a 300°F (150°C) oven for about 15-20 minutes. This prevents the meat from drying out. Avoid the microwave if you can—it tends to make the meat rubbery.
Flavor Development: One thing I love about this brine is that the flavors continue to develop over time. Day-old turkey sandwiches are even better than the fresh bird. The spices and apple have had more time to meld with the meat. It’s a gift that keeps on giving.
Nutritional Information & Benefits
While turkey is the centerpiece of the meal, the brine itself doesn’t add significant calories. Most of the salt and sugar are rinsed off before cooking. Here’s a quick look at what you’re getting.
- Estimated Nutritional Values (per 4 oz serving of cooked white meat, without skin):
- Calories: 180
- Protein: 25g
- Fat: 8g
- Saturated Fat: 2.5g
- Sodium: 320mg (varies based on rinsing)
- Carbohydrates: 0g
Health Benefits: Turkey is a lean source of high-quality protein, which is essential for muscle health and repair. It’s also rich in B vitamins, particularly B6 and B12, which support energy metabolism. The apple cider in the brine provides a small amount of antioxidants, though most of the sugars are not absorbed by the meat.
Dietary Considerations: This recipe is naturally gluten-free, dairy-free, and nut-free. It is not low-sodium due to the brining process, but you can reduce the salt if you’re on a strict low-sodium diet. The turkey is also a great option for those following a keto or paleo diet, as the brine doesn’t add any significant carbohydrates to the final meat.
Potential Allergens: None of the common allergens (milk, eggs, peanuts, tree nuts, fish, shellfish, soy, wheat) are present in this brine. However, always check the labels on your spices and cider to ensure they are processed in a facility free from cross-contamination if allergies are a concern.
Conclusion
This Best Apple Cider Turkey Brine is more than just a recipe—it’s the key to a stress-free, delicious holiday meal. It takes about 10 minutes of active work and delivers a turkey that’s juicy, flavorful, and beautiful. It’s the kind of recipe that makes you look like a pro, even if it’s your first time hosting. I love this brine because it brings back that feeling of standing in my aunt’s kitchen, watching her work her magic. Now, I get to create that same magic for my own family.
I’d love to hear how this brine works for you! Did you make any substitutions? Did your family love it? Drop a comment below and let me know. And if you snap a photo of your golden-brown turkey, share it on Pinterest and tag me—I want to see your masterpiece! Happy cooking, and here’s to a holiday table full of joy and perfectly juicy turkey.
Frequently Asked Questions
Can I brine a frozen turkey with this recipe?
No, you should not brine a frozen turkey. The turkey must be completely thawed for the brine to penetrate the meat evenly. Brining a partially frozen turkey can lead to uneven seasoning and potential food safety issues. Plan ahead and allow 24 hours of thawing time in the refrigerator for every 4-5 pounds of turkey.
How long should I brine a turkey?
For best results, brine your turkey for 12 to 24 hours. I find 18 hours is the sweet spot for a 12-14 pound bird. If you brine for less than 12 hours, the flavor won’t penetrate deeply. If you brine for more than 24 hours, the meat can become too salty and develop a spongy texture.
Do I have to rinse the brine off the turkey before cooking?
Yes, you absolutely must rinse the turkey thoroughly with cold water after brining. This removes the excess salt from the surface of the skin and the cavity. If you skip this step, your turkey will be unpleasantly salty, and your gravy may be ruined. Pat it dry after rinsing for the crispiest skin.
Can I reuse the brine for another turkey?
No, you should never reuse brine. Once a raw turkey has been soaked in the brine, the liquid is contaminated with raw poultry juices. Discard the brine immediately after removing the turkey. If you need to brine a second bird, make a fresh batch of brine.
What size turkey does this brine recipe work for?
This recipe is designed for a 12 to 14 pound turkey. If your turkey is larger, you may need to increase the brine ingredients by 50%. If it’s smaller, this amount will still work, but you may have leftover brine. The key is that the turkey must be fully submerged in the liquid.
Pin This Recipe!
Best Apple Cider Turkey Brine for Extra Juicy Turkey

This apple cider turkey brine is the secret to a turkey that stays moist and flavorful, with golden-brown skin and tender meat. It uses simple ingredients and takes just 10 minutes of active prep time.
- Prep Time: 10 minutes
- Cook Time: 10 minutes (for brine)
- Total Time: 12-24 hours (including brining time)
- Yield: 12-14 servings 1x
- Category: Main Course
- Cuisine: American
Ingredients
- 1 gallon apple cider (not apple juice)
- 1 cup kosher salt (Diamond Crystal preferred)
- 1/2 cup light brown sugar, packed
- 4–5 sprigs fresh rosemary
- 4–5 sprigs fresh thyme
- 2 tablespoons whole black peppercorns
- 6–8 whole cloves
- 4 cinnamon sticks
- 2 bay leaves
- 8 cups ice water
- 1 (12-14 pound) turkey, completely thawed
Instructions
- In a large stockpot, combine the apple cider, kosher salt, and brown sugar. Place over medium-high heat and stir occasionally until the salt and sugar are fully dissolved, about 5-7 minutes.
- Add the rosemary, thyme, peppercorns, cloves, cinnamon sticks, and bay leaves. Stir to combine. Bring to a gentle simmer, then reduce heat to low and simmer for 10 minutes.
- Remove the pot from heat. Add the ice water and stir gently to cool the brine quickly. Let the brine cool completely to below 40°F (4°C).
- While the brine cools, prepare the turkey: Remove giblets and neck, rinse inside and out with cold water, and pat dry with paper towels.
- Place a brining bag inside a large roasting pan. Place the turkey in the bag and pour the cooled brine over it, ensuring the turkey is fully submerged. Add more cold water and 1 tablespoon salt per quart if needed.
- Seal the bag, squeezing out excess air. Refrigerate for 12 to 24 hours (18 hours is ideal for a 14-pound turkey). Do not exceed 24 hours.
- After brining, remove the turkey from the bag and discard the brine. Rinse the turkey thoroughly inside and out with cold water.
- Pat the turkey completely dry with paper towels. Place on a wire rack over a baking sheet and refrigerate, uncovered, for at least 2 hours or overnight to dry the skin.
- Roast the turkey according to your preferred method, using a meat thermometer to ensure the thickest part of the thigh reaches 165°F (74°C). Let rest for 30 minutes before carving.
Notes
Do not brine for more than 24 hours or the meat may become mushy. Always rinse the turkey after brining to remove excess salt. For crispy skin, dry the turkey thoroughly in the refrigerator before roasting. Use a meat thermometer for best results.
Nutrition
- Serving Size: 4 oz cooked white me
- Calories: 180
- Sodium: 320
- Fat: 8
- Saturated Fat: 2.5
- Protein: 25
Keywords: apple cider turkey brine, juicy turkey, Thanksgiving brine, turkey brine recipe, holiday turkey


