I was standing in the middle aisle of a grocery store last December, reaching for a box of cereal, when a woman walked past me holding a tray of store-bought cookies wrapped in plastic. And suddenly I was seven years old at my Aunt Lena’s kitchen table, watching her press a shimmering, jewel-toned slab of something onto a sheet of wax paper. The smell hit me before I even knew what it was — butter, marshmallow, and something sharp and minty cutting through the sweetness like a winter wind. I didn’t even like mint as a kid, but I remember leaning over the counter anyway, my chin barely clearing the edge, just to watch her work. She hummed while she pressed the mixture flat with her palms, her rings leaving little indentations in the surface. I never asked her what she was making. I just remember the way the light from the window caught the red and green flecks, making them glow like tiny stained glass pieces.
Honestly, I forgot about that moment for years. It wasn’t until I tried making these myself — standing in my own kitchen, a bag of marshmallows in one hand and a box of Rice Krispies in the other — that I realized I was chasing something I couldn’t quite name. It wasn’t the recipe itself. It was the feeling of watching someone make something simple feel special. Aunt Lena passed away a long time ago, and I don’t even know if she ever wrote down what she did that day. But I’ve spent a few Decembers trying to get it right. And I think I finally did. These Easy Christmas Rice Krispie Treats are exactly what I remember — bright, festive, and just a little bit extra, the way holiday treats should be. Maybe you’ve had that moment too, where a recipe feels like it belongs to a memory you can’t quite hold onto. This one is my way of keeping hers alive.
Why You’ll Love This Recipe
Let me tell you why these Easy Christmas Rice Krispie Treats have become my go-to for every holiday gathering. I’ve tested this recipe more times than I care to admit — through sticky fingers, burnt marshmallow disasters, and one particularly memorable incident where I forgot the butter entirely (don’t ask). So trust me when I say this version works.
- Incredibly Easy: You need exactly five main ingredients and about 15 minutes of active time. No oven required, no complicated techniques. If you can stir, you can make these.
- Perfect for Parties: These treats are a showstopper on any dessert table. The red and green colors scream Christmas, and they’re easy to grab and go — no plates or forks needed.
- Make-Ahead Friendly: You can prep these a day or two before your party. They actually taste better after sitting overnight, which takes so much stress off your hosting schedule.
- Customizable for Any Crowd: I’ve made versions with chocolate drizzle, crushed candy canes, and even a gluten-free batch that disappeared faster than the regular ones.
- Nostalgic with a Twist: Everyone loves a classic Rice Krispie treat. But adding mint extract and festive mix-ins makes them feel special without being fussy.
What sets this recipe apart is the balance. Most versions I’ve tried are either too sweet or too bland. I add a tiny pinch of salt and a splash of vanilla to round out the sweetness, and the mint gives it that holiday freshness without overpowering the marshmallow. Honestly, I’ve had guests ask for the recipe before they even finished their first bite. It’s that kind of treat — the one that makes people close their eyes for a second and just enjoy.
What Ingredients You Will Need
This recipe uses simple pantry staples, but each one plays an important role. Here’s what you’ll need and why each ingredient matters.
For the Base:
- 6 cups Rice Krispies cereal — Make sure you use the original brand for the best texture. Generic versions can get soggy faster. You want that signature snap when you bite into them.
- 3 tablespoons unsalted butter — I use salted butter in a pinch, but unsalted lets you control the salt level. Cut it into pieces so it melts evenly.
- 1 package (10 oz) mini marshmallows — Regular marshmallows work too, but mini ones melt faster and more evenly. Jet-Puffed is my go-to brand.
- 1/2 teaspoon vanilla extract — Pure vanilla makes a difference here. The imitation stuff has a chemical aftertaste that stands out in such a simple recipe.
- 1/4 teaspoon mint extract — This is optional but highly recommended. It gives the treats that cool, festive flavor without being toothpaste-y. Start with less and taste as you go.
- Pinch of salt — Just a tiny pinch. It balances the sweetness and makes the flavors pop.
For the Festive Touch:
- 1/2 cup red and green candy melts or white chocolate chips — I use Wilton candy melts for the best color payoff. White chocolate chips work too, but add a teaspoon of coconut oil to thin them out for drizzling.
- 1/4 cup crushed candy canes — Optional, but the crunch and peppermint flavor take these over the top. Crush them in a bag with a rolling pin — it’s oddly satisfying.
- Festive sprinkles — Go wild here. I love the little holly-shaped sprinkles or classic red and green jimmies. Add them right after drizzling so they stick.
Ingredient Tips from My Kitchen:
I’ve learned a few things the hard way. First, always use fresh marshmallows. Stale ones don’t melt properly and leave you with lumpy treats. Second, don’t skimp on the butter — it’s what keeps the treats soft and prevents them from turning into hockey pucks. And if you’re making these for a crowd with dietary restrictions, use gluten-free Rice Krispies (the original formula is gluten-free, but check the label) and dairy-free butter like Miyoko’s. They still turn out amazing.
Equipment Needed
You don’t need fancy equipment for these Easy Christmas Rice Krispie Treats, but having the right tools makes the process smoother.
- Large pot (at least 4-quart) — You need room to stir everything without spilling. A nonstick pot is ideal, but any heavy-bottomed pot works.
- Rubber spatula — Silicone is best because it won’t scratch your pot and it scrapes every last bit of marshmallow. I have three and I use them all.
- 9×13-inch baking dish — Glass or metal both work. Line it with parchment paper for easy removal. Leave overhang on two sides to use as handles.
- Parchment paper — Trust me on this. Wax paper works in a pinch, but parchment is nonstick and holds up better.
- Sharp knife — Use a chef’s knife for clean cuts. Spray it with cooking spray between cuts to prevent sticking.
- Rolling pin or zip-top bag — For crushing candy canes. A meat mallet works too if you’re feeling aggressive.
- Small microwave-safe bowl — For melting the candy melts or white chocolate. Glass is best.
If you don’t have a 9×13 dish, you can use a rimmed baking sheet. The treats will be thinner, so reduce the pressing time. And if you’re making a double batch for a party, use a 10×15 jelly roll pan — it’s the perfect size for feeding a crowd.
Preparation Method
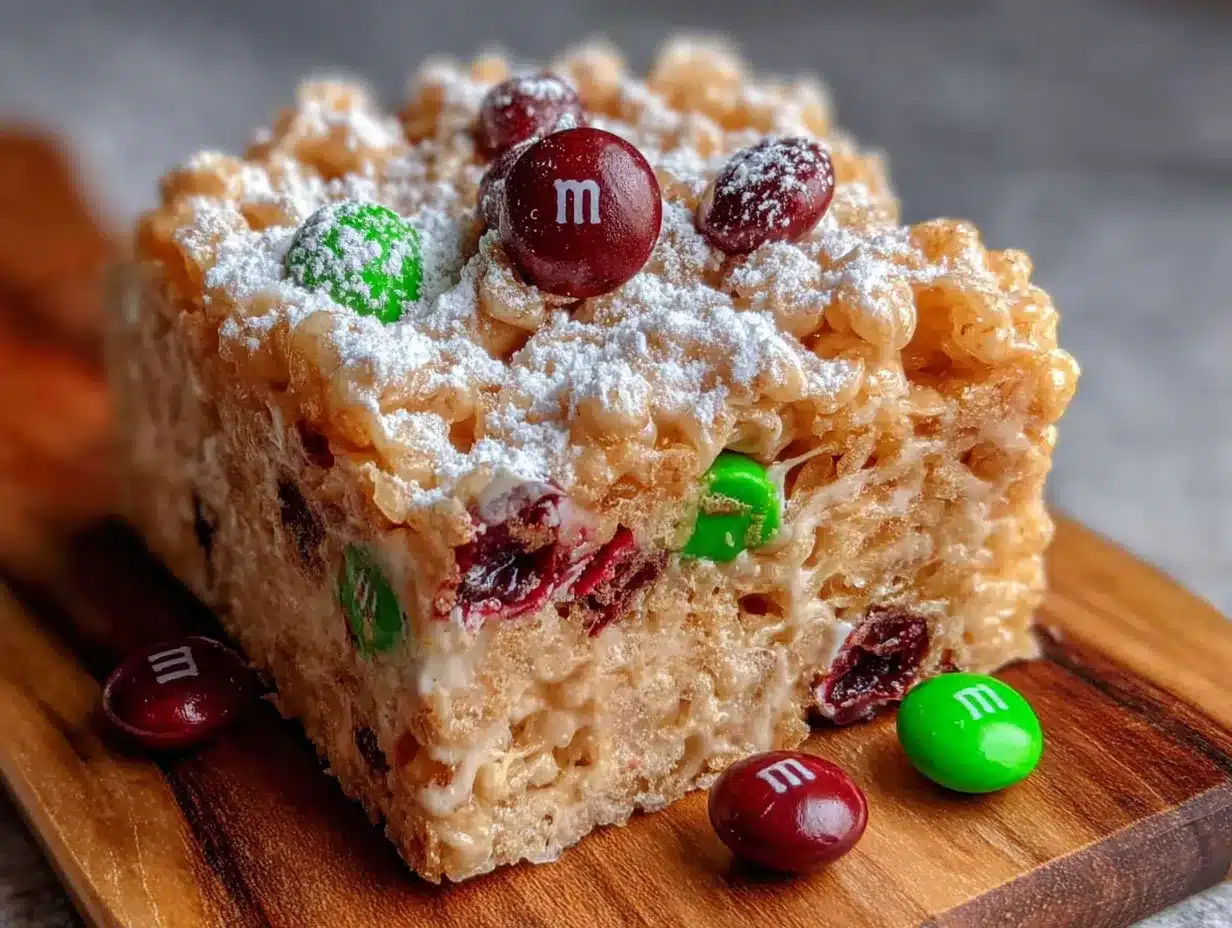
Making these treats is straightforward, but a few key steps make all the difference. Follow these carefully and you’ll get perfect results every time.
Step 1: Prep Your Pan
Line your 9×13-inch baking dish with parchment paper, leaving about 2 inches of overhang on the long sides. Lightly spray the parchment with cooking spray. This step is non-negotiable — without it, you’ll be chiseling treats out of the pan. I learned this the hard way during a particularly frustrating Christmas Eve.
Step 2: Melt the Butter
Place the 3 tablespoons of unsalted butter in a large pot over medium-low heat. Stir occasionally until it’s completely melted. Don’t rush this — if the butter burns, the whole batch is ruined. You want it golden and fragrant, not brown and bitter. (Ask me how I know.)
Step 3: Add the Marshmallows
Pour the entire 10-ounce bag of mini marshmallows into the pot. Stir constantly with your rubber spatula until the marshmallows are completely melted and smooth. This takes about 3-4 minutes. Keep the heat on low — high heat will scorch the marshmallows and give you a grainy texture. The mixture should look glossy and stretchy when you lift the spatula.
Step 4: Add Flavorings
Remove the pot from heat immediately. Stir in the 1/2 teaspoon vanilla extract, 1/4 teaspoon mint extract (if using), and a pinch of salt. Mix until everything is incorporated. Taste a tiny bit — the flavor should be sweet with a cool mint finish. If it tastes too sweet, add another tiny pinch of salt. If the mint is too strong, add a drop more vanilla to balance it.
Step 5: Add the Cereal
Pour the 6 cups of Rice Krispies cereal into the pot. Fold gently with your spatula until the cereal is evenly coated. Be careful not to crush the cereal — you want those little puffs to stay intact. It takes about 1-2 minutes of gentle folding. The mixture will look sticky and a little messy, which is exactly right.
Step 6: Press Into the Pan
Scrape the mixture into your prepared pan. Use a second piece of parchment paper or lightly greased hands to press it into an even layer. Press firmly but don’t smash it flat — you want some texture. Work quickly because the mixture sets fast. I usually press for about 30 seconds, then let it rest.
Step 7: Cool Completely
Let the treats cool at room temperature for at least 1 hour. Don’t put them in the fridge — condensation will make them soggy. They should feel firm to the touch but still slightly soft when you press them.
Step 8: Add the Festive Toppings
Once the treats are cool, melt your candy melts or white chocolate chips in a microwave-safe bowl. Microwave in 30-second intervals, stirring between each, until smooth. Drizzle the melted chocolate over the treats using a fork or a piping bag. Sprinkle crushed candy canes and festive sprinkles on top while the chocolate is still wet. Let the chocolate set for about 15 minutes at room temperature.
Step 9: Cut and Serve
Lift the treats out of the pan using the parchment overhang. Place on a cutting board and cut into squares using a sharp knife. Wipe the knife clean between cuts for neat edges. I like to cut 24 small squares for parties — they’re easier to grab and less messy.
Cooking Tips & Techniques
After making these Easy Christmas Rice Krispie Treats more times than I can count, I’ve picked up a few tricks that make a real difference. Let me share them so you don’t have to learn the hard way.
Don’t Overheat the Marshmallows. This is the number one mistake I see. If you cook the marshmallows too long or on too high heat, they turn into hard, chewy bricks. Keep the heat low and stir constantly. Remove from heat as soon as they’re smooth. Your treats will stay soft and tender for days.
Use a Light Hand When Pressing. I used to press the mixture into the pan with all my strength, thinking I was making them compact and neat. Turns out, that just makes them dense and tough. Press gently and evenly — you want them to hold together without feeling like you’re biting into a floor tile.
Add the Extracts Off Heat. If you add vanilla or mint extract while the mixture is still on the burner, the alcohol in the extract evaporates and you lose flavor. Always take the pot off the heat first, then stir in your flavorings. This little habit changed my baking game completely.
Crush Candy Canes the Right Way. Put the candy canes in a zip-top bag and smash them with a rolling pin until you have a mix of fine powder and small chunks. The powder sticks to the chocolate, and the chunks add crunch. Don’t crush them too fine — you want some texture.
Time Your Toppings. Drizzle the melted chocolate and add sprinkles while the chocolate is still wet. If you wait too long, the sprinkles won’t stick and you’ll have a sad little pile of sprinkles at the bottom of your serving dish. Trust me, I’ve been there.
Make Ahead for Better Flavor. These treats actually taste better the next day. The flavors meld together and the texture softens slightly. Make them a day before your party and store them in an airtight container at room temperature. Your future self will thank you.
Variations & Adaptations
One of the best things about this recipe is how easy it is to adapt. Here are some of my favorite variations.
Chocolate Peppermint Twist: Melt 1 cup of semi-sweet chocolate chips with 1 tablespoon of coconut oil. Spread it over the cooled treats instead of drizzling. Top with crushed candy canes. The rich chocolate and cool mint are a match made in heaven. I made this version for a cookie exchange last year and came home with an empty platter.
Gingerbread Spice Version: Skip the mint extract and add 1 teaspoon of ground ginger, 1/2 teaspoon of cinnamon, and a pinch of cloves. Stir these into the melted marshmallow mixture before adding the cereal. Top with a drizzle of white chocolate and a sprinkle of cinnamon sugar. It tastes like Christmas in a bite.
Vegan and Dairy-Free: Use vegan butter (I like Earth Balance) and vegan marshmallows (Dandies are my go-to). Everything else stays the same. These turn out just as soft and delicious — I’ve served them to mixed crowds and nobody noticed the difference.
Gluten-Free Option: Most Rice Krispies are gluten-free, but check the label to be safe. There are also several gluten-free crispy rice cereal brands available. The recipe works exactly the same way.
Extra Festive Layers: Press half the mixture into the pan, add a layer of melted white chocolate or crushed candy canes, then press the remaining mixture on top. It creates a surprise layer in the middle that looks gorgeous when you cut into it.
Spiked Adult Version: Add 2 tablespoons of peppermint schnapps or bourbon to the melted marshmallow mixture. The alcohol cooks off slightly, but the flavor remains. Just make sure to label these clearly if kids are around.
Serving & Storage Suggestions
These treats are designed for parties, so let’s talk about how to serve and store them like a pro.
Serving Temperature: Serve at room temperature. Cold treats are firmer and less enjoyable. If you’ve stored them in the fridge, let them sit out for 20-30 minutes before serving. The texture softens and the flavors become more pronounced.
Presentation Ideas: Arrange the treats on a festive platter or tiered stand. I like to stack them in a pyramid shape for visual impact. Sprinkle extra crushed candy canes or festive sprinkles around the base for a polished look. If you’re serving at a buffet, place them on a cake stand — it elevates them literally and figuratively.
What to Serve Alongside: These treats pair beautifully with hot cocoa, mulled wine, or eggnog. For a dessert table, I serve them alongside sugar cookies, gingerbread, and chocolate bark. They’re also great with a scoop of vanilla ice cream for an indulgent dessert.
Storage: Store in an airtight container at room temperature for up to 5 days. Layer them between sheets of parchment paper to prevent sticking. Do not refrigerate — the cold air dries them out and makes them hard. If you’re making them ahead, store them in a single layer or with parchment between layers.
Freezing: These treats freeze beautifully. Wrap each square individually in plastic wrap, then place in a freezer-safe bag. Freeze for up to 3 months. Thaw at room temperature for about 30 minutes before serving. The texture stays soft and fresh.
Flavor Development: I’ve noticed these treats actually improve after a day or two. The marshmallow softens slightly, and the mint and vanilla flavors meld together. If you’re planning ahead, make them 1-2 days before your event for the best taste.
Nutritional Information & Benefits
Let’s be honest — these are a treat, not a health food. But here’s what you need to know.
Estimated Nutrition Per Serving (1 square, based on 24 servings):
- Calories: 145
- Fat: 5g
- Carbohydrates: 25g
- Sugar: 14g
- Protein: 1g
- Sodium: 95mg
Ingredient Benefits: Rice Krispies are fortified with iron and B vitamins, so there’s a tiny nutritional boost. The butter adds vitamin A, and if you use dark chocolate for the drizzle, you get a small dose of antioxidants. Mostly, though, this is about joy and celebration — and there’s nothing wrong with that.
Dietary Considerations: This recipe can be made gluten-free and dairy-free with simple swaps. It’s naturally nut-free (check labels for cross-contamination if needed). If you’re watching sugar, you can reduce the candy cane topping or skip the drizzle. The treats are still delicious without them.
My Perspective: I believe in balance. These treats are for parties and holidays — special occasions where food is part of the celebration. Enjoy them without guilt, and pair them with healthier options on the table. A few squares won’t derail anyone’s wellness goals.
Conclusion
These Easy Christmas Rice Krispie Treats have become my signature holiday recipe, and I think they’ll become yours too. They’re simple enough to make with kids, impressive enough to serve at a fancy party, and forgiving enough to survive a few mistakes along the way. Every time I make them, I think about Aunt Lena and that afternoon in her kitchen. I never got to ask her for the recipe, but I like to think she’d approve of this version.
I hope you’ll try these for your next holiday gathering. Customize them however you like — add more sprinkles, swap the mint for orange extract, or go all out with a chocolate layer. That’s the beauty of a simple recipe. It leaves room for your own memories to take shape.
If you make these, I’d love to hear about it. Leave a comment below and tell me how they turned out, or share a photo of your creation. And if you have your own twist on these treats, I’m all ears. Happy holidays, and happy cooking!
Frequently Asked Questions
Can I use regular marshmallows instead of mini marshmallows?
Yes, you can. Use about 40 regular marshmallows (one 10-ounce bag). Cut them into smaller pieces before melting so they melt evenly. Mini marshmallows are easier, but regular ones work fine.
Why did my Rice Krispie treats turn out hard?
This usually happens when the marshmallows are overcooked or the mixture is pressed too firmly. Keep the heat low, remove from heat as soon as the marshmallows melt, and press gently into the pan. Soft and chewy is the goal.
Can I make these treats ahead of time?
Absolutely. Make them 1-2 days before your party. Store in an airtight container at room temperature. They actually taste better the next day as the flavors meld together.
How do I cut clean squares without sticking?
Spray your knife with cooking spray before each cut. Wipe the blade clean between cuts. For the cleanest edges, let the treats cool completely before cutting.
Can I freeze these treats?
Yes, they freeze well for up to 3 months. Wrap each square individually in plastic wrap, then place in a freezer bag. Thaw at room temperature for about 30 minutes before serving.
Pin This Recipe!
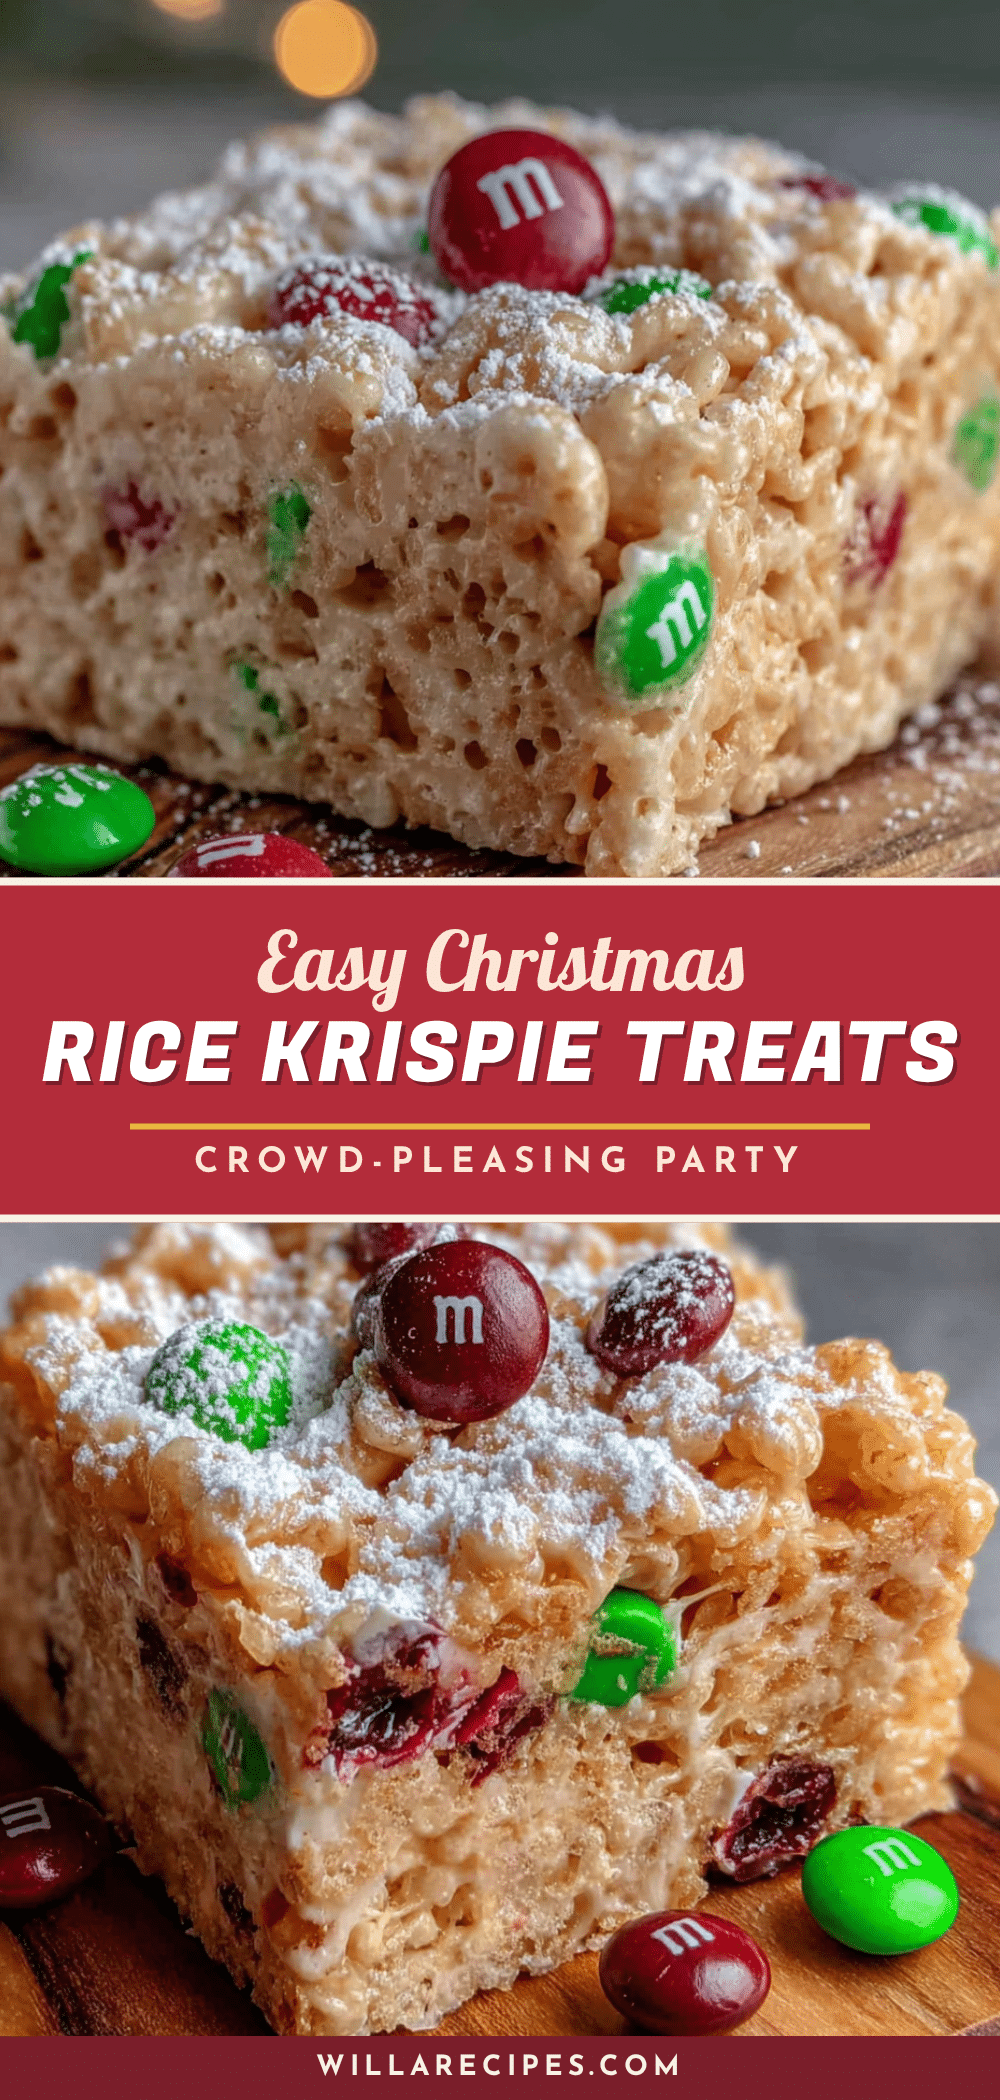
Best Easy Christmas Rice Krispie Treats Recipe
These Easy Christmas Rice Krispie Treats are bright, festive, and just a little bit extra, the way holiday treats should be. With a hint of mint and colorful toppings, they’re a nostalgic twist on a classic that’s perfect for holiday gatherings.
- Prep Time: 15 minutes
- Cook Time: 5 minutes
- Total Time: 1 hour 20 minutes
- Yield: 24 servings 1x
- Category: Dessert
- Cuisine: American
Ingredients
- 6 cups Rice Krispies cereal
- 3 tablespoons unsalted butter
- 1 package (10 oz) mini marshmallows
- 1/2 teaspoon vanilla extract
- 1/4 teaspoon mint extract (optional)
- Pinch of salt
- 1/2 cup red and green candy melts or white chocolate chips
- 1/4 cup crushed candy canes (optional)
- Festive sprinkles
Instructions
- Line a 9×13-inch baking dish with parchment paper, leaving about 2 inches of overhang on the long sides. Lightly spray the parchment with cooking spray.
- Place 3 tablespoons unsalted butter in a large pot over medium-low heat. Stir occasionally until completely melted.
- Pour the entire 10-ounce bag of mini marshmallows into the pot. Stir constantly with a rubber spatula until completely melted and smooth, about 3-4 minutes. Keep heat on low.
- Remove the pot from heat immediately. Stir in 1/2 teaspoon vanilla extract, 1/4 teaspoon mint extract (if using), and a pinch of salt until incorporated.
- Pour 6 cups Rice Krispies cereal into the pot. Fold gently with a spatula until the cereal is evenly coated, about 1-2 minutes. Be careful not to crush the cereal.
- Scrape the mixture into the prepared pan. Use a second piece of parchment paper or lightly greased hands to press it into an even layer. Press firmly but gently.
- Let the treats cool at room temperature for at least 1 hour until firm.
- Once cool, melt candy melts or white chocolate chips in a microwave-safe bowl in 30-second intervals, stirring between each, until smooth. Drizzle over the treats.
- Sprinkle crushed candy canes and festive sprinkles on top while the chocolate is still wet. Let the chocolate set for about 15 minutes at room temperature.
- Lift the treats out of the pan using the parchment overhang. Place on a cutting board and cut into squares using a sharp knife. Wipe the knife clean between cuts for neat edges.
Notes
Use fresh marshmallows for best results. Don’t overheat the marshmallows or they’ll become hard. Press gently into the pan to keep treats soft. These actually taste better the next day as flavors meld. Store in an airtight container at room temperature for up to 5 days. Freeze for up to 3 months.
Nutrition
- Serving Size: 1 square
- Calories: 145
- Sugar: 14
- Sodium: 95
- Fat: 5
- Saturated Fat: 3
- Carbohydrates: 25
- Protein: 1
Keywords: Christmas Rice Krispie treats, holiday treats, no-bake dessert, easy dessert, festive dessert, mint Rice Krispie treats


