This was supposed to be a classic French-style deviled egg—the kind with a little tarragon and a perfectly piped filling that looks like it belongs in a patisserie window. I had the eggs boiling, the ice bath ready, and I was feeling pretty good about myself. Then my niece decided to “help” by grabbing the paprika and the black food coloring at the exact same moment. I turned around just in time to see a cloud of black smoke—okay, not smoke, but a fine mist of charcoal powder—settle over my pristine bowl of filling. I stood there, spatula in hand, staring at what looked like a culinary crime scene. Honestly, I was already stressed because the party was in two hours and I’d promised my sister-in-law I’d bring “something elegant.”
I almost threw the whole thing out. I mean, I had my hand on the trash bag. But then I remembered I didn’t have time to boil more eggs, and I definitely didn’t have the energy to start over. So I did what any reasonable person would do: I leaned into the disaster. I stirred the black coloring through the rest of the filling, grabbed a bag of pre-made black olives from the fridge, and started cutting little spider shapes. My husband walked in, saw me arranging tiny olive legs on top of charcoal-colored eggs, and just said, “Are those… spiders?” I told him they were “spooky deviled eggs” and dared him to say another word. He didn’t.
That night at the party, those eggs disappeared in fifteen minutes. People kept coming back for “just one more spider,” and I spent the whole evening explaining how they were a total accident. Maybe you’ve been there—when a kitchen mishap turns into the thing everyone talks about. That’s this recipe. It’s the guest-favorite that started with a mistake, and now I make it every Halloween without fail. It’s the reason I stopped panicking when things go wrong in the kitchen. Sometimes the happy accident is better than the plan.
Why You’ll Love This Recipe
Let me tell you why these spooky spider deviled eggs have become my most-requested party dish. They’re not just cute—they’re genuinely delicious, and they come together way faster than you’d think for something that looks this impressive.
- Quick & Easy: You can have these ready in under 30 minutes of active prep time. The eggs do most of the work while they boil and chill.
- Simple Ingredients: Eggs, mayo, mustard, paprika, and black olives. That’s it. No weird specialty items or trips to three different stores.
- Perfect for Halloween Parties: These are the star of any spooky spread. Kids love them, adults love them, and everyone takes a photo before they eat one.
- Crowd-Pleaser: I’ve brought these to potlucks, Halloween dinners, and even a casual get-together in October. They always get rave reviews and people ask for the recipe.
- Unbelievably Delicious: The filling is creamy, tangy, and perfectly seasoned. The black color comes from food coloring, not anything weird, so it tastes exactly like a classic deviled egg.
What makes this recipe different from the hundreds of other deviled egg recipes out there? It’s the presentation. The spider design is clever without being fussy, and it uses ingredients you already have. I’ve tested this with different brands of mayo and mustard, and I can tell you that Duke’s mayo gives the creamiest texture, but any good quality mayo works. The key is getting the filling smooth enough to pipe or spoon neatly, and I’ll show you exactly how to do that.
This recipe isn’t just good—it is the kind that makes you close your eyes after the first bite. It’s comfort food reimagined for a spooky occasion, and it’s perfect for impressing guests without stress. You can make these a day ahead, which is a lifesaver when you’re hosting.
What Ingredients You Will Need
This recipe uses simple, mostly pantry-staple ingredients to deliver that classic deviled egg flavor with a spooky twist. Here’s everything you need:
For the Eggs
- 12 large eggs (room temperature for easier peeling—trust me on this)
- Ice water bath (for shocking the eggs after boiling)
For the Filling
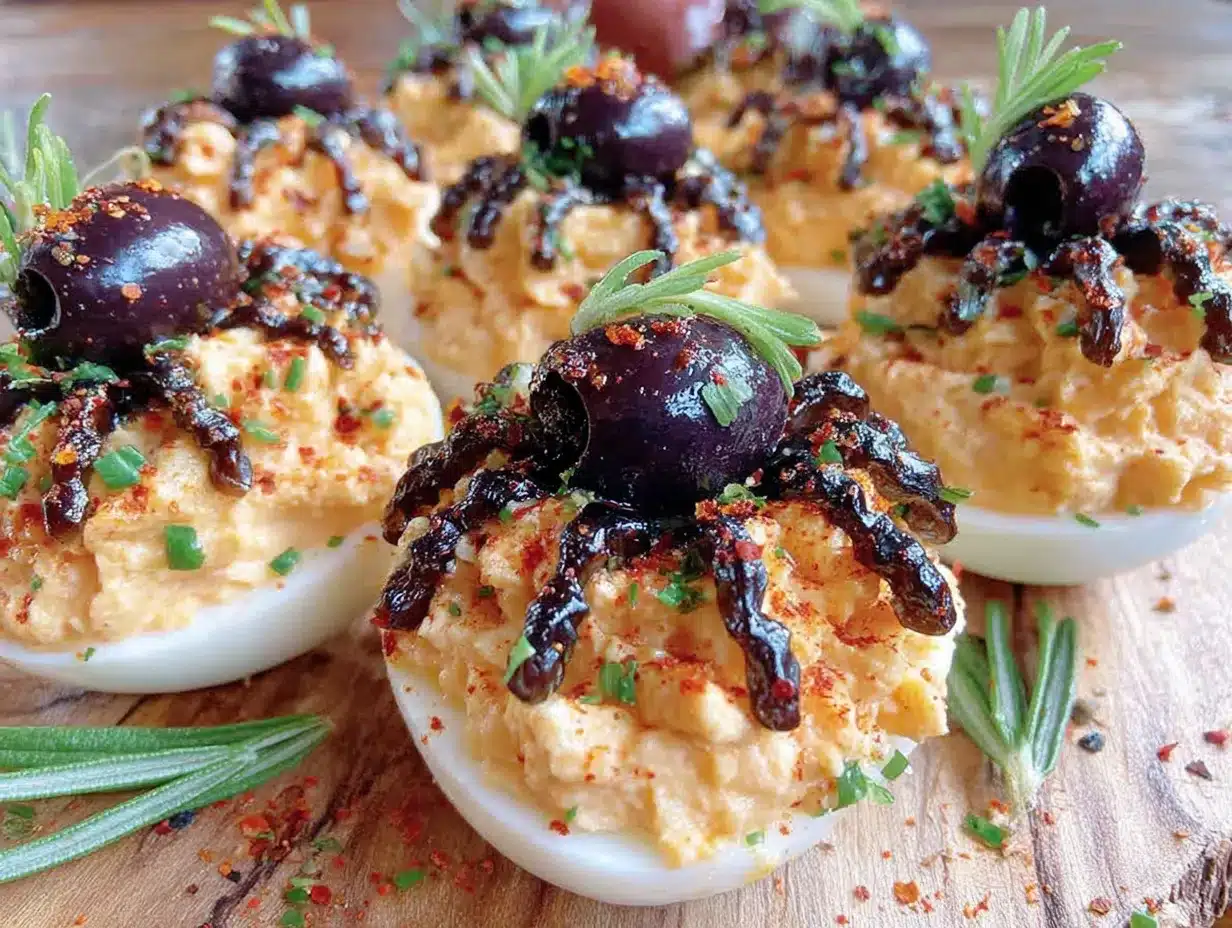
- 1/3 cup mayonnaise (I prefer Duke’s for its tangy flavor, but Hellmann’s works great too)
- 1 tablespoon yellow mustard (or Dijon if you want a sharper kick)
- 1 teaspoon white vinegar (adds brightness and helps balance richness)
- 1/4 teaspoon salt (plus more to taste)
- 1/8 teaspoon black pepper (freshly ground is best)
- 1/2 teaspoon paprika (smoked paprika adds a lovely depth, but sweet works fine)
- Black gel food coloring (I use Americolor Super Black—a little goes a long way)
For the Spider Decorations
- 1 can (6 oz) large black olives (pitted, whole olives—not sliced)
- 1/4 cup cream cheese (softened, to help stick olive legs to the filling—optional but helpful)
A few notes on ingredients: The black gel food coloring is non-negotiable for that spooky look. Liquid food coloring won’t give you the same deep, dark color without thinning the filling too much. I’ve tried it, and it was a watery mess. Also, make sure your eggs are at least a week old for easier peeling. Fresh eggs are a nightmare to peel—I learned that the hard way when I used eggs from my neighbor’s chickens.
For the olives, look for the largest ones you can find. Smaller olives make it harder to cut the spider shapes. I’ve used both California black olives and Greek black olives—the Greek ones are firmer and easier to cut, but the California ones are more affordable and work just fine.
Equipment Needed
You don’t need fancy equipment for this recipe, but having the right tools makes everything smoother:
- Large pot (big enough to hold 12 eggs in a single layer)
- Slotted spoon (for lowering eggs into boiling water and transferring them to ice bath)
- Large bowl (for the ice water bath)
- Sharp paring knife (for cutting olives into spider shapes—a dull knife will crush them)
- Cutting board (small one works fine)
- Medium bowl (for mashing the yolks)
- Fork or potato masher (for breaking up yolks)
- Piping bag with star tip (or a zip-top bag with the corner snipped off—I use the zip-top bag method 90% of the time)
- Small offset spatula (for smoothing filling if you’re not piping)
- Paper towels (for drying eggs and cleaning up olive juice)
If you don’t have a piping bag, don’t stress. A zip-top bag works perfectly. Just fill it, seal it, and snip a 1/2-inch corner. For the star tip, it gives a nice decorative edge, but a plain round tip or even a spoon works if you want a simpler look. I’ve used a butter knife in a pinch, and nobody complained.
Preparation Method
Here’s how to make these spooky spider deviled eggs from start to finish. I’ve broken it down into clear steps with all my best tips.
Step 1: Boil the Eggs
Place your 12 eggs in a large pot in a single layer. Cover them with cold water by about an inch. Bring the water to a rolling boil over high heat. Once it’s boiling, cover the pot, turn off the heat, and let it sit for exactly 12 minutes. This gives you hard-boiled eggs with firm whites and creamy yolks—no green ring around the yolk, I promise.
Step 2: Ice Bath
While the eggs are sitting, fill a large bowl with ice and cold water. After the 12 minutes are up, use a slotted spoon to transfer the eggs to the ice bath. Let them cool for at least 10 minutes. This stops the cooking process and makes peeling much easier. I once skipped this step and spent 20 minutes picking shell fragments off my eggs. Don’t be me.
Step 3: Peel the Eggs
Gently tap each egg on the counter to crack the shell, then roll it between your palms to loosen the shell. Start peeling from the wider end where the air pocket is—that’s the easiest spot to get under the shell. Rinse the peeled eggs under cold water to remove any tiny shell bits. Pat them dry with paper towels.
Step 4: Cut and Separate
Using a sharp knife, slice each egg in half lengthwise. Carefully pop out the yolks into a medium bowl. Arrange the egg white halves on a serving platter, cut side up. I like to put them on a paper towel-lined plate first to absorb any excess moisture.
Step 5: Make the Filling
Mash the yolks with a fork until they’re crumbly with no large chunks. Add the mayonnaise, mustard, vinegar, salt, pepper, and paprika. Stir until smooth and creamy. This is where you taste it—adjust the salt, pepper, or mustard to your liking. I always add a tiny pinch more paprika because I love that smoky flavor.
Step 6: Add the Black Color
Add black gel food coloring one small drop at a time. Stir thoroughly after each drop. You want a deep, charcoal gray color—it will darken slightly as it sits. I usually use about 4-5 drops for this amount of filling. Go slowly; you can always add more, but you can’t take it away. I learned this when I turned a batch of filling into something that looked like asphalt.
Step 7: Pipe the Filling
Spoon the black filling into a piping bag or zip-top bag. If using a zip-top bag, snip off a corner. Pipe the filling into each egg white half, mounding it slightly. You want it to look generous, not skimpy. If you don’t have a piping bag, use a small spoon to fill each egg, then smooth the top with an offset spatula.
Step 8: Make the Spider Decorations
This is the fun part. Drain the olives and pat them dry. For each spider, you’ll need one whole olive for the body and one olive cut into thin strips for the legs. To cut the legs: slice an olive lengthwise into 4-6 thin strips. Each strip becomes one leg. For the body, use a whole olive, or cut an olive in half crosswise if you want smaller spiders.
Step 9: Assemble the Spiders
Place one whole olive (or half olive) on top of the filling on each egg. Arrange 4-6 olive leg strips around each body, pressing them gently into the filling so they stay. If the legs won’t stick, dab a tiny bit of cream cheese on the end before pressing them in. I use a toothpick to position the legs exactly where I want them.
Step 10: Chill and Serve
Refrigerate the finished deviled eggs for at least 30 minutes before serving. This helps the filling firm up and the flavors meld together. They’re best served cold, straight from the fridge. Sprinkle a tiny pinch of paprika over the top for contrast if you want—it looks striking against the black.
Cooking Tips & Techniques
Over the years, I’ve made these eggs for countless parties, and I’ve learned a few things the hard way. Here are my best tips:
Perfect hard-boiled eggs every time: The 12-minute sit method I shared above is foolproof. But here’s the secret: don’t use fresh eggs. Eggs that are a week or two old peel much easier. I know it sounds counterintuitive, but fresh eggs have a lower pH, which makes the whites cling to the shell. Older eggs have a higher pH, and the whites separate more easily.
Getting the filling smooth: The key is mashing the yolks thoroughly before adding any wet ingredients. If you add mayo to lumpy yolks, you’ll have lumpy filling. I use a fork and really work the yolks until they’re like fine sand. Some people use a food processor, but I find that makes the filling too airy and it doesn’t pipe as nicely.
Working with black food coloring: Gel coloring is concentrated, so a little goes a long way. Start with one drop and stir. The color will deepen as it sits, so don’t panic if it looks light gray at first. If you add too much, the filling can taste slightly bitter. I’ve done that, and it’s not great. Better to err on the side of too light—you can always add more.
Multitasking strategy: While the eggs are boiling and cooling, prep your olives. Cut all the leg strips and bodies before you start assembling. This makes the assembly process smooth and fast. I lay everything out on a cutting board so I can grab and place without stopping.
Consistency tip: If your filling seems too thick, add a tiny splash of milk or pickle juice. If it’s too thin, add a little more mashed yolk or a pinch of breadcrumbs. I once added too much vinegar and had to rescue the filling with extra egg yolks. It worked, but it was a close call.
Variations & Adaptations
This recipe is flexible, and I’ve experimented with several versions over the years. Here are some of my favorites:
Spicy Spider Eggs: Add 1/2 teaspoon of sriracha or a pinch of cayenne pepper to the filling. The heat pairs surprisingly well with the creamy texture. I made these for a Halloween party where everyone wanted “something with a kick,” and they were a hit.
Herb-Infused Version: Mix in 1 tablespoon of finely chopped fresh dill or chives into the filling. The green flecks against the black filling look really cool, and the fresh herb flavor brightens the richness. I tried this with dill from my garden, and it was fantastic.
Avocado Spider Eggs: Replace half the mayonnaise with mashed avocado. The filling turns a slightly different shade of dark green-black, and it’s creamier. This is a great option if you’re trying to make the recipe a little healthier. Just note that avocado-based filling won’t keep as long—serve within a few hours.
Gluten-Free Adaptation: This recipe is naturally gluten-free, so no changes needed. Just double-check your mustard and mayonnaise labels to make sure they’re certified gluten-free if that’s a concern.
Dairy-Free Option: Use a dairy-free mayonnaise and skip the cream cheese for sticking the legs. The legs will still stay in place if you press them firmly into the filling. I’ve tested this with vegan mayo, and it works perfectly.
Mini Spider Eggs: Use quail eggs instead of chicken eggs for bite-sized spiders. You’ll need about 24 quail eggs, and the cooking time is shorter—about 5 minutes in the boiling water, then an ice bath. These are adorable for parties where people want to grab and go.
Serving & Storage Suggestions
These spooky spider deviled eggs are best served cold, straight from the refrigerator. I recommend arranging them on a black or dark-colored platter to make the spiders pop. A white platter works too, but the contrast isn’t as dramatic. I use a round black slate board from a kitchen supply store, and it looks incredible.
For a Halloween party, I like to serve these alongside other spooky appetizers like mummy hot dogs, ghost-shaped cheese crackers, and a bowl of “witches’ brew” punch. They also pair beautifully with a crisp white wine or a light beer—the tangy filling cuts through the richness of other party foods.
Storage: Store leftover deviled eggs in an airtight container in the refrigerator for up to 2 days. The filling may darken slightly as it sits, but that’s fine. I don’t recommend freezing them—the texture of the egg whites becomes rubbery after thawing.
Make-Ahead Tips: You can boil and peel the eggs up to 3 days in advance. Store them unpeeled in the refrigerator until you’re ready to use them. The filling can be made a day ahead and stored in a piping bag in the fridge. Assemble the spiders the day of your event for the best presentation—the olive legs can dry out if they sit too long.
Reheating: Don’t. These are meant to be served cold. If you’ve refrigerated them, just take them out 10 minutes before serving to take the chill off, but keep them cold.
One note on flavor development: The filling actually tastes better after a few hours in the fridge. The flavors meld together and the sharpness of the mustard and vinegar softens. So if you can, make the filling a few hours ahead of time.
Nutritional Information & Benefits
Here’s the approximate nutritional breakdown for one spider deviled egg (based on 24 servings from 12 eggs):
- Calories: 65
- Protein: 5g
- Fat: 4.5g
- Carbohydrates: 1g
- Fiber: 0g
- Sugar: 0.5g
- Sodium: 120mg
Eggs are a fantastic source of high-quality protein and contain important nutrients like choline, which supports brain health, and lutein, which is good for your eyes. The mayonnaise adds healthy fats, and the olives provide a small amount of iron and vitamin E.
This recipe is naturally low-carb and keto-friendly, making it a great option for guests with dietary restrictions. It’s also gluten-free and can be made dairy-free with simple substitutions. The only potential allergen is eggs, so be sure to label them clearly if you’re serving at a party where someone might have an allergy.
I personally love that these are a “fun” food that still has some nutritional value. They’re not health food, but they’re not empty calories either. It’s a win-win for a party appetizer.
Conclusion
These spooky spider deviled eggs have become my signature Halloween dish, and they started as a complete accident. That’s the thing about cooking—sometimes the best recipes come from mistakes. I love that this recipe is both delicious and fun, and it always gets people talking. There’s something satisfying about watching someone’s face light up when they see the little olive spiders on top.
I encourage you to customize this recipe based on what you have in your kitchen. Add a little hot sauce if you like spice, swap the olives for capers if you’re feeling adventurous, or use different food coloring for a different spooky theme. The base recipe is solid, and the possibilities are endless.
I’d love to hear how these turn out for you. Drop a comment below and let me know if your guests loved them as much as mine do. Share a photo on Pinterest and tag me—I always love seeing your creations. And if you have your own spooky twist on deviled eggs, I’m all ears. Happy Halloween, and happy cooking!
Frequently Asked Questions
Can I make these spider deviled eggs a day ahead?
Yes, absolutely! You can boil and peel the eggs up to 3 days ahead. The filling can be made a day in advance and stored in a piping bag in the fridge. I recommend assembling the spiders the day of your event for the best presentation, but they’ll hold up fine for 24 hours if needed.
What if I can’t find black gel food coloring?
Black gel food coloring is available at most craft stores, baking supply shops, and online. If you can’t find it, you can use a combination of red, blue, and green liquid food coloring to achieve a dark charcoal color. Just go slowly and mix thoroughly. The color won’t be as deep, but it will still look spooky.
How do I get the olive legs to stay in place?
Press the olive leg strips gently into the filling. If they still won’t stay, dab a tiny bit of cream cheese on the end of each leg before pressing it in. The cream cheese acts like glue. You can also use a toothpick to position the legs exactly where you want them.
Can I use a different type of olive?
You can, but large black olives work best because they’re easy to cut into spider shapes. Green olives work in a pinch, but they have a brinier flavor that might clash with the filling. Kalamata olives are too soft and tend to fall apart when you cut them. Stick with large, firm black olives for the best results.
How long do these deviled eggs last in the refrigerator?
These spider deviled eggs will keep in an airtight container in the refrigerator for up to 2 days. After that, the filling can start to separate and the egg whites can become rubbery. I don’t recommend freezing them—the texture suffers too much. They’re best enjoyed within 24 hours of assembly.
Pin This Recipe!
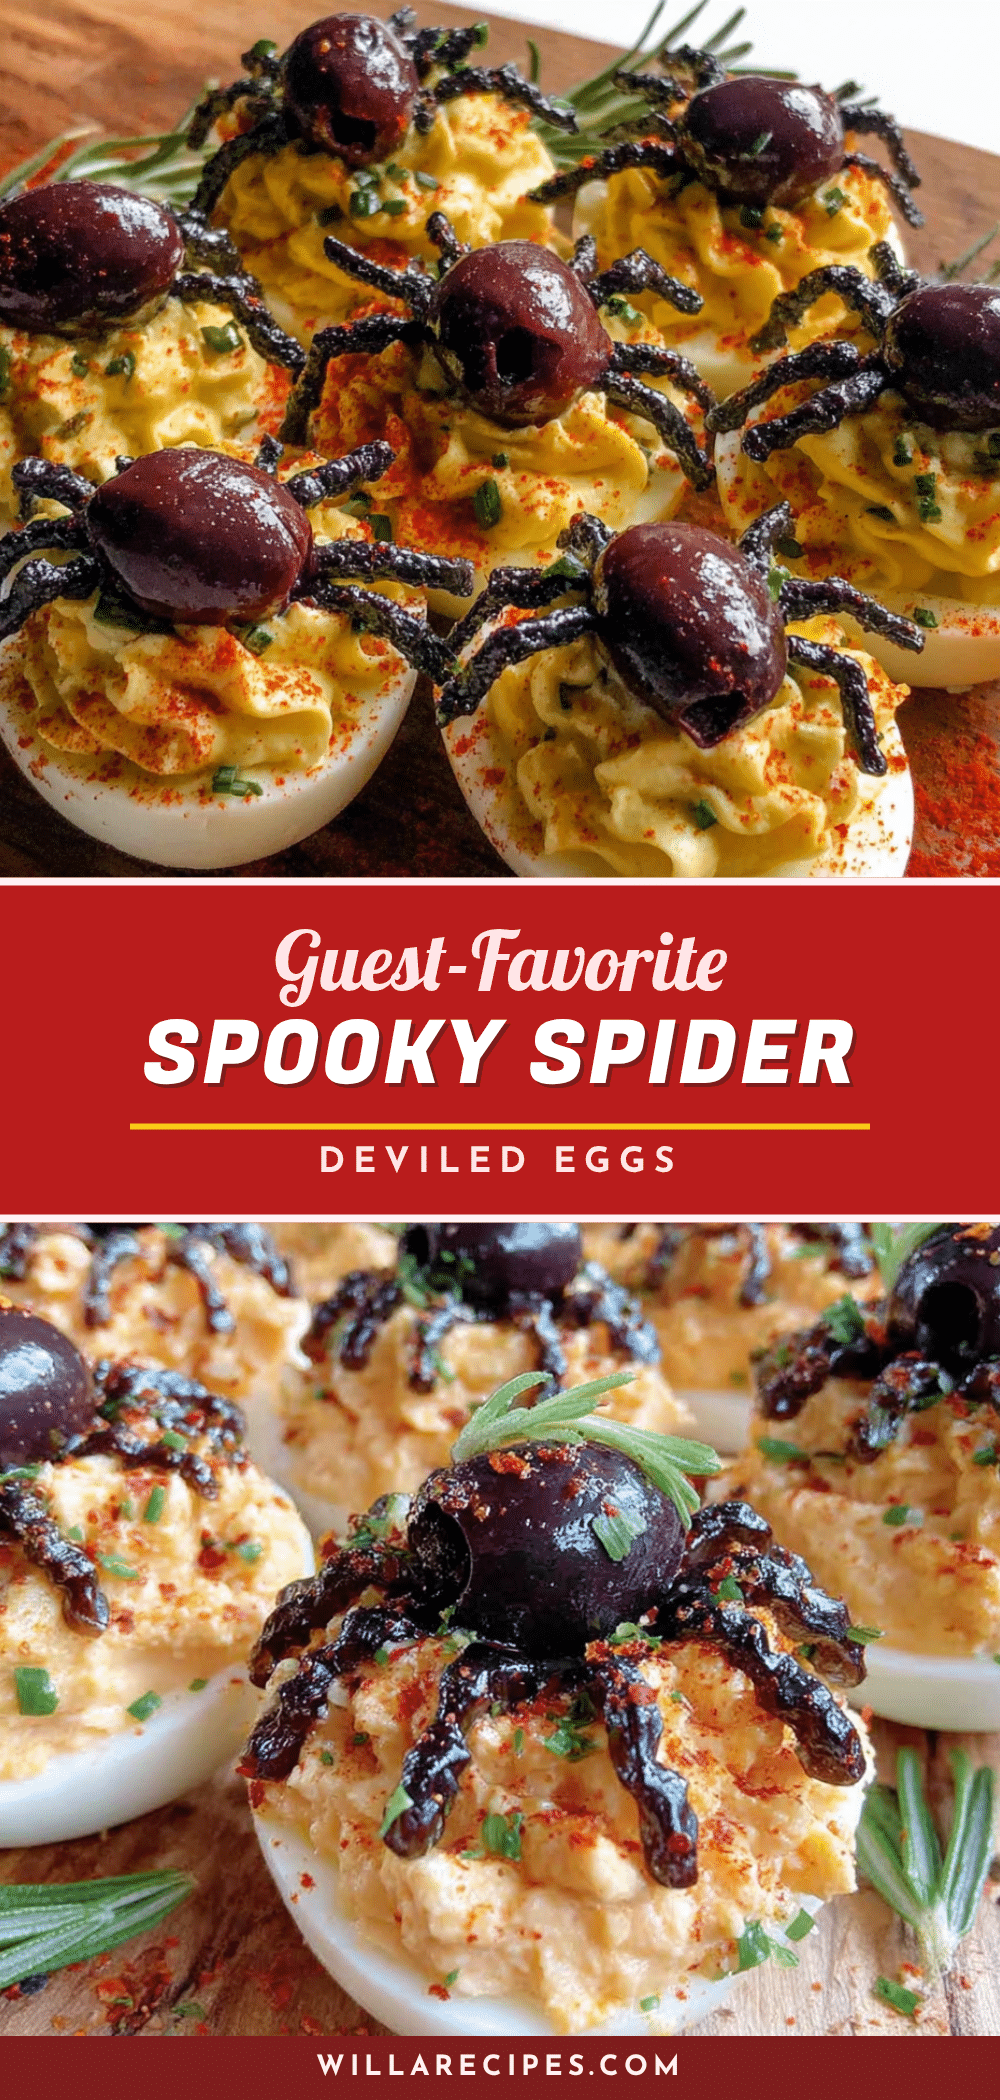
Best Easy Spooky Spider Deviled Eggs Recipe
These spooky spider deviled eggs are a Halloween party favorite, featuring a creamy black-colored filling and olive spiders on top. They’re quick, easy, and made with simple ingredients for a deliciously fun appetizer.
- Prep Time: 30 minutes
- Cook Time: 12 minutes
- Total Time: 42 minutes
- Yield: 24 servings 1x
- Category: Appetizer
- Cuisine: American
Ingredients
- 12 large eggs (room temperature)
- Ice water bath (for shocking the eggs)
- 1/3 cup mayonnaise (preferably Duke’s or Hellmann’s)
- 1 tablespoon yellow mustard (or Dijon mustard)
- 1 teaspoon white vinegar
- 1/4 teaspoon salt (plus more to taste)
- 1/8 teaspoon black pepper (freshly ground)
- 1/2 teaspoon paprika (smoked or sweet)
- Black gel food coloring (e.g., Americolor Super Black)
- 1 can (6 oz) large black olives (pitted, whole)
- 1/4 cup cream cheese (softened, optional for sticking legs)
Instructions
- Place 12 eggs in a large pot in a single layer. Cover with cold water by about an inch. Bring to a rolling boil over high heat. Once boiling, cover the pot, turn off the heat, and let sit for exactly 12 minutes.
- While eggs are sitting, fill a large bowl with ice and cold water. After 12 minutes, use a slotted spoon to transfer eggs to the ice bath. Let cool for at least 10 minutes.
- Gently tap each egg on the counter to crack the shell, then roll between palms to loosen. Peel starting from the wider end. Rinse under cold water and pat dry with paper towels.
- Slice each egg in half lengthwise. Pop out yolks into a medium bowl. Arrange egg white halves on a serving platter, cut side up.
- Mash yolks with a fork until crumbly. Add mayonnaise, mustard, vinegar, salt, pepper, and paprika. Stir until smooth and creamy. Taste and adjust seasoning.
- Add black gel food coloring one small drop at a time, stirring thoroughly after each drop, until you achieve a deep charcoal gray color (about 4-5 drops).
- Spoon the black filling into a piping bag or zip-top bag. If using a zip-top bag, snip off a corner. Pipe filling into each egg white half, mounding slightly.
- Drain olives and pat dry. For each spider, use one whole olive for the body and one olive cut lengthwise into 4-6 thin strips for legs.
- Place one whole olive (or half olive) on top of the filling on each egg. Arrange 4-6 olive leg strips around each body, pressing gently into the filling. Use a dab of cream cheese if needed to help legs stick.
- Refrigerate finished deviled eggs for at least 30 minutes before serving. Serve cold. Optionally sprinkle a tiny pinch of paprika over the top for contrast.
Notes
Use eggs that are at least a week old for easier peeling. Black gel food coloring is non-negotiable for the deep color; liquid food coloring will thin the filling. The filling tastes better after a few hours in the fridge. Store in an airtight container for up to 2 days; do not freeze.
Nutrition
- Serving Size: 1 spider deviled egg
- Calories: 65
- Sugar: 0.5
- Sodium: 120
- Fat: 4.5
- Saturated Fat: 1
- Carbohydrates: 1
- Protein: 5
Keywords: spider deviled eggs, Halloween deviled eggs, spooky deviled eggs, easy deviled eggs, Halloween appetizer


