The first time I made these Halloween sugar cookies, I was standing in my tiny apartment kitchen with flour dusted across my nose and a very serious expression on my face. My neighbor, Mrs. Kowalski, watched me through her open window—the one that faced my kitchen—and didn’t say anything at first. Then she appeared at my door with a worn cookie cutter shaped like a spider and a jar of homemade vanilla extract that smelled like heaven. She had been making these cookies for her grandchildren every Halloween for forty years, and she figured I needed all the help I could get. I mean, she wasn’t wrong—my first attempt at royal icing had looked like a melted snowman situation.
Honestly, that conversation on my doorstep changed everything about how I approach holiday baking. Mrs. Kowalski didn’t give me a formal recipe with precise measurements. She told me about the dough feeling right when it no longer stuck to her fingers, about the way royal icing should hold a ribbon trail for exactly three seconds before disappearing. She talked about her late husband who loved the spiders best, and how she always saved the biggest cookie for him even though he pretended not to notice. That’s when I realized these cookies weren’t just about Halloween—they were about the people you share them with.
These guest-favorite Halloween sugar cookies with royal icing spiders have become my signature contribution to every fall gathering. They’re the ones that disappear first from the dessert table, the ones people ask about weeks in advance. Maybe you’ve been there—standing in the baking aisle wondering if you should attempt something impressive or stick with what you know. Let me tell you, these cookies are both. They look like you spent hours at a pastry school, but they come together with ingredients you probably already have. The trick is in the technique, and I’m about to share everything Mrs. Kowalski taught me, plus a few things I figured out through trial and error.
Why You’ll Love This Recipe
Look, I’ve tested a lot of sugar cookie recipes in my time. Some are too soft, some spread into blobs, and some taste like sweet cardboard. These Halloween sugar cookies with royal icing spiders hit that perfect sweet spot—crisp edges, tender centers, and a flavor that makes people close their eyes on the first bite. Here’s why this recipe stands out from the hundred others you might find online:
- Foolproof Dough : No chilling required for hours. This dough comes together in under fifteen minutes and rolls out like a dream. You won’t fight with sticky dough or end up adding too much flour and ruining the texture.
- Royal Icing That Actually Works : I’ve had my share of royal icing disasters—runny, too thick, cracked, or just plain ugly. This recipe gives you a consistency that pipes clean lines and floods smoothly. It’s the kind of icing that makes you feel like a professional.
- Perfect for Halloween Gatherings : These cookies are designed to impress a crowd. They hold their shape beautifully, stack without sticking, and the spider design is surprisingly easy to master. Your guests will think you ordered them from a fancy bakery.
- Make-Ahead Friendly : You can bake the cookies days in advance and decorate them when you have time. The royal icing sets hard, so you can stack them in containers without worrying about smudging. Perfect for busy hosts.
- Crowd-Pleasing Flavor : The butter-vanilla combination is classic for a reason. These cookies have that nostalgic taste that reminds people of their grandmother’s kitchen, but with a professional finish that feels special.
What makes this recipe different from the rest? It’s the balance between firm dough and tender crumb. Most sugar cookie recipes sacrifice one for the other, but this one uses a combination of butter and shortening that gives you the best of both worlds. The royal icing formula is also tested to perfection—it dries shiny, not matte, and it doesn’t crack or crumble when you bite into it. I’ve had guests literally argue over who gets the last spider cookie, and that’s not something I say lightly.
These cookies are the kind that make you proud to be the host. They’re the centerpiece of the dessert table, the conversation starter, the thing people text you about the next day asking for the recipe. And honestly? They’re not as hard as they look. You’ve got this.
What Ingredients You Will Need
This recipe uses simple, pantry-friendly ingredients to create cookies that taste anything but basic. The magic is in how these everyday items come together with the right technique. Here’s everything you need for both the cookies and the royal icing spiders:
For the Sugar Cookies
- 3 cups all-purpose flour (spooned and leveled—don’t scoop directly from the bag or you’ll pack in too much flour)
- 1 teaspoon baking powder (make sure it’s fresh; old baking powder won’t give you the right lift)
- ½ teaspoon salt (I use fine sea salt; it dissolves more evenly than kosher salt in baking)
- 1 cup unsalted butter, softened to room temperature (if you forget to take it out ahead of time, cut it into small cubes and let it sit for 15 minutes)
- ½ cup vegetable shortening (I prefer Crisco; this is the secret to cookies that hold their shape without spreading)
- 1½ cups granulated sugar
- 2 large eggs, room temperature
- 2 teaspoons vanilla extract (use real vanilla, not imitation—it makes a real difference in the flavor)
- ½ teaspoon almond extract (optional but highly recommended; it adds that bakery-style flavor that makes people ask what your secret is)
For the Royal Icing Spiders
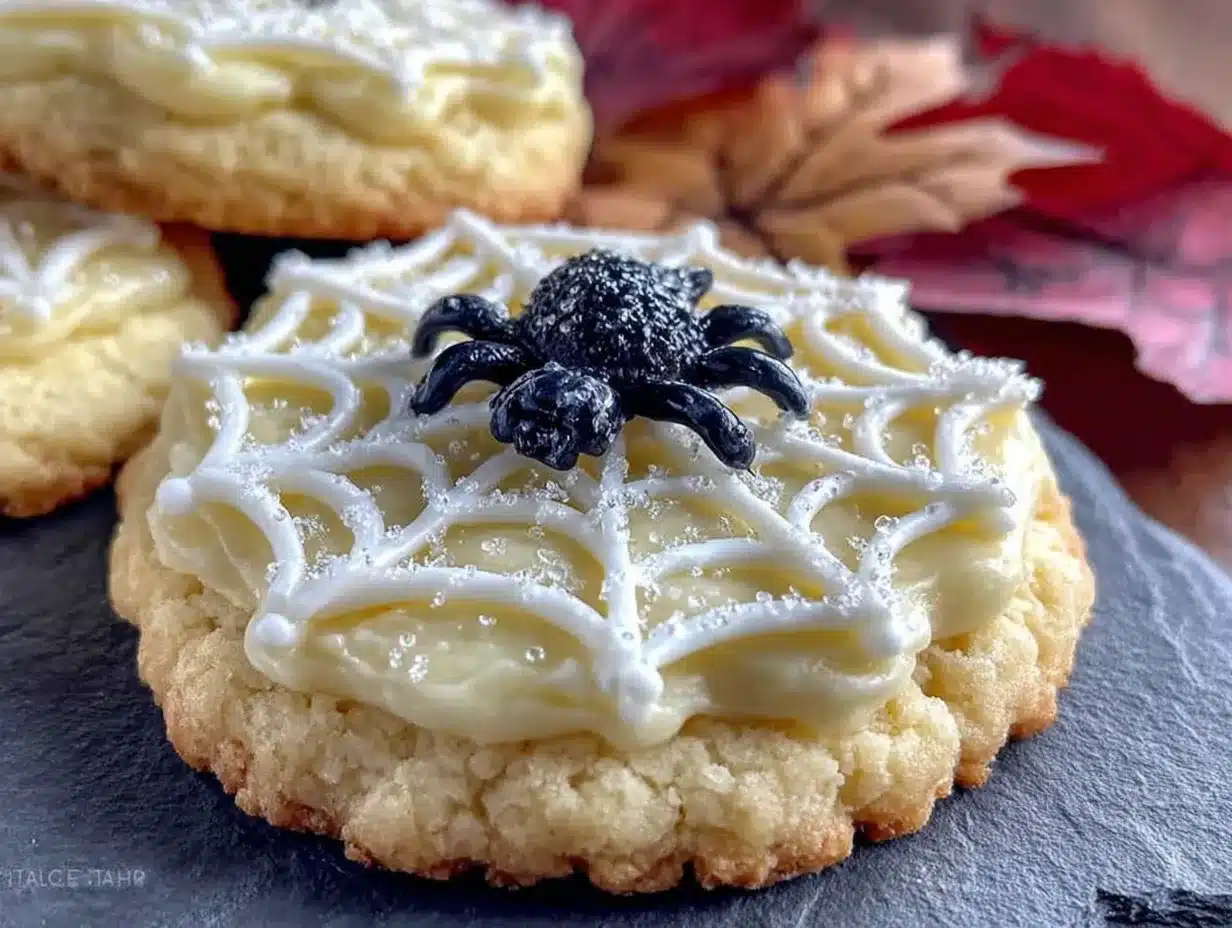
- 4 cups powdered sugar, sifted (sifting is non-negotiable here; lumps will ruin your smooth icing)
- 3 tablespoons meringue powder (I use Wilton brand; it gives the most consistent results)
- 6-7 tablespoons warm water (start with 6 and add more as needed)
- 1 teaspoon vanilla extract (or clear vanilla extract if you want pure white icing)
- Black gel food coloring (regular liquid food coloring will thin out your icing too much)
- Orange gel food coloring (for the spider bodies, optional but adds a nice pop of color)
For Decoration
- Black sanding sugar or black sprinkles (for extra sparkle on the spider bodies)
- Edible glitter in orange or black (optional, but guests love the shimmer)
- Piping bags (disposable ones work great; you’ll need several for different colors)
- Small round piping tips (size 2 or 3 for the spider legs, size 4 for the bodies)
- Couplers (makes switching between tips much easier)
When it comes to ingredient sourcing, I recommend using a good-quality butter like Kerrygold or Plugrà for the best flavor. The shortening is non-negotiable for the texture—don’t try to substitute all butter or your cookies will spread into puddles. For the meringue powder, Wilton is my go-to because it’s widely available and consistently produces stiff peaks. If you can’t find meringue powder, you can substitute 3 large egg whites, but the icing won’t be as stable and you’ll need to use the cookies within a day or two.
One thing I learned the hard way: don’t skip the almond extract. It’s subtle enough that nobody will identify it, but everyone will notice that something tastes extra special. It’s the kind of detail that makes people think you went to culinary school.
Equipment Needed
You don’t need a professional bakery setup to make these Halloween sugar cookies with royal icing spiders, but having the right tools makes the process smoother. Here’s what you’ll need:
- Stand mixer or hand mixer : A stand mixer with the paddle attachment is ideal for creaming the butter and sugar, but a hand mixer works perfectly fine. You’ll just need to cream for a minute or two longer.
- Rolling pin : I prefer a French rolling pin (the tapered kind without handles) because it gives me better control over thickness. But any rolling pin will do—even a wine bottle in a pinch, though I don’t recommend it for precision.
- Spider cookie cutter : You can find these at craft stores or online. If you can’t find one, a round cutter works too—you’ll just draw the legs on with icing. Honestly, the round version looks even more dramatic.
- Baking sheets : Heavy-duty aluminum baking sheets work best. Thin, dark sheets can cause the bottoms to burn before the tops are done.
- Parchment paper or silicone baking mats : Parchment paper is cheaper and disposable; silicone mats are reusable and give slightly more even baking. Both work great.
- Cooling racks : Essential for letting cookies cool completely before decorating. If you try to ice warm cookies, the royal icing will slide right off.
- Piping bags and tips : Disposable piping bags are easiest for cleanup. You’ll need round tips in sizes 2, 3, and 4. A set of couplers makes switching tips much easier.
- Small offset spatula : Not strictly necessary, but helpful for spreading icing or moving decorated cookies around.
- Toothpicks : These are your best friends for popping air bubbles in the icing and drawing the icing into corners.
If you’re on a budget, skip the fancy piping bags and use sturdy zip-top bags with a corner snipped off. It’s not as precise, but it works in a pinch. I’ve done it more times than I’d like to admit. Just make sure the hole is small enough—you can always make it bigger, but you can’t make it smaller once it’s cut.
Preparation Method
Let’s get into the actual process. I’ve broken this down into manageable steps so you can follow along without feeling overwhelmed. Take your time with each stage—rushing is the number one reason cookies don’t turn out right.
Making the Cookie Dough
- Cream the butter and shortening : In your stand mixer fitted with the paddle attachment, beat the softened butter and shortening together on medium speed until smooth and combined, about 2 minutes. You’re looking for a uniform, pale yellow mixture without any streaks.
- Add the sugar : Gradually add the granulated sugar while mixing on medium speed. Continue beating for 3-4 minutes until the mixture is light and fluffy. Scrape down the sides of the bowl halfway through. This step is crucial—proper creaming incorporates air that gives the cookies their tender texture.
- Incorporate the eggs and vanilla : Add the eggs one at a time, beating well after each addition. Then add the vanilla extract and almond extract (if using). Mix until just combined. The mixture might look slightly curdled at this point—that’s normal, especially if your eggs were cold.
- Combine the dry ingredients : In a separate bowl, whisk together the flour, baking powder, and salt. This ensures the leavening is evenly distributed throughout the dough.
- Add dry ingredients to wet : With the mixer on low speed, gradually add the flour mixture to the butter mixture. Mix until just combined—stop as soon as you no longer see streaks of flour. Overmixing at this stage develops gluten, which makes cookies tough.
- Divide and chill : Divide the dough into two equal portions, flatten each into a disk about 1 inch thick, wrap in plastic wrap, and refrigerate for at least 30 minutes. This rest period allows the gluten to relax and the butter to firm up, which prevents spreading during baking.
Rolling and Cutting
- Prepare your work surface : Lightly flour your work surface and rolling pin. Don’t go overboard—too much flour will dry out the dough.
- Roll to even thickness : Roll the dough to about ¼ inch thickness. I use two wooden dowels or rolling pin rings to ensure even thickness, but you can eyeball it. The key is consistency across the entire sheet of dough.
- Cut your shapes : Dip your spider cookie cutter in flour before each cut to prevent sticking. Press straight down and lift straight up—no twisting, which can seal the edges and prevent the cookies from rising evenly.
- Transfer to baking sheets : Use a thin spatula to transfer the cut cookies to parchment-lined baking sheets, spacing them about 2 inches apart. They won’t spread much, but they need some breathing room.
- Chill again : Pop the baking sheets in the refrigerator for 15 minutes before baking. This is non-negotiable—chilled dough holds its shape better and gives you those clean, sharp edges.
Baking
- Preheat your oven : Set your oven to 350°F (175°C). Make sure it’s fully preheated before you put the cookies in. An oven thermometer is worth its weight in gold here—my oven runs 25 degrees hot, and I never would have known without one.
- Bake in batches : Bake one sheet at a time on the center rack. This ensures even baking. Bake for 8-10 minutes, rotating the pan halfway through. The cookies are done when the edges are just barely golden brown—the centers will look pale and slightly underdone.
- Cool completely : Let the cookies cool on the baking sheet for 5 minutes, then transfer to a wire rack to cool completely. Do not skip this step—warm cookies will ruin your royal icing. I made this mistake once and ended up with a puddle of white goo instead of spider legs.
Making the Royal Icing
- Combine dry ingredients : In the bowl of your stand mixer, whisk together the sifted powdered sugar and meringue powder.
- Add water and vanilla : Add 6 tablespoons of warm water and the vanilla extract. Mix on low speed until the sugar is moistened, then increase to medium speed and beat for 4-5 minutes. The icing should be thick and glossy, with stiff peaks that hold their shape.
- Check consistency : Lift the beater—the icing should form a ribbon that slowly sinks back into the bowl. If it’s too thick, add water one teaspoon at a time. If it’s too thin, add more sifted powdered sugar a tablespoon at a time.
- Divide and color : Divide the icing into portions. Leave one portion white (or tint it orange for spider bodies). Tint another portion black using black gel food coloring. Remember that gel colors are concentrated—a little goes a long way. Start with a toothpick amount and add more if needed.
- Adjust consistency for flooding : For the black icing you’ll use for flooding (filling in the spider bodies), thin it slightly by adding water a few drops at a time until it reaches a 10-second consistency—when you drizzle a ribbon of icing back into the bowl, it should take about 10 seconds to disappear.
Decorating the Spider Cookies
- Pipe the spider bodies : Using the thicker orange or white icing with a size 4 tip, pipe a round circle in the center of each cookie. This is the spider’s body. Don’t worry about perfection—the legs will cover any imperfections.
- Flood the bodies : Using the thinner black icing with a size 3 tip, pipe around the edge of the spider body, then fill in the center. Use a toothpick to spread the icing into any gaps and pop any air bubbles.
- Add the legs : While the black icing is still wet, use the thicker black icing with a size 2 tip to pipe eight legs coming out from the spider body. Pipe four on each side, curving them slightly for a realistic look. The legs should extend beyond the edge of the cookie for maximum drama.
- Add eyes : Using white icing, pipe two small dots on the spider’s head (the front of the body). Then use black icing to pipe tiny dots on top of the white for pupils. This gives your spiders personality.
- Sprinkle while wet : If using black sanding sugar or edible glitter, sprinkle it over the wet icing immediately. Once the icing sets, the sprinkles won’t stick.
- Let dry completely : Allow the decorated cookies to dry at room temperature for at least 4 hours, or overnight. The icing should be completely hard to the touch before you stack or store them.
Cooking Tips & Techniques
I’ve made these Halloween sugar cookies with royal icing spiders more times than I can count, and I’ve learned some things the hard way. Here are the tips that will save you from my mistakes:
Temperature is everything. Your butter should be soft enough that you can press it with your finger and it leaves an indent, but not so soft that it’s greasy or melted. If your kitchen is warm, chill your dough for an extra 15 minutes before rolling. I once made these on a hot summer day without chilling, and my spiders looked more like melted blobs than arachnids. Not a good look.
Don’t skip the parchment paper. I know it seems like an extra step, but parchment paper prevents sticking, promotes even browning, and makes cleanup a breeze. Silicone mats work too, but they can cause cookies to spread slightly more. For these cookies, parchment is my preference.
Royal icing consistency is a journey. The biggest mistake beginners make is getting the icing too thin. Start with a thicker consistency than you think you need—you can always thin it out, but you can’t thicken it back up. The 10-second rule is your friend: when you lift the spoon, the ribbon of icing should take 10 seconds to disappear back into the bowl. If it disappears in 5 seconds, it’s too thin.
Work in an assembly line. When decorating, pipe all the spider bodies first, then go back and flood them all, then add all the legs. This keeps your workflow efficient and ensures the icing stays at the right consistency throughout. If you try to decorate one cookie completely before moving to the next, your icing might thicken or dry out before you’re done.
Use a toothpick for details. For the spider eyes, dip a toothpick in white icing and dot it onto the cookie. It’s more precise than trying to pipe tiny dots, and you have more control. I use this trick for all my royal icing details now.
Let them dry overnight. I know it’s tempting to pack them up right away, but royal icing needs time to set completely. If you stack them too soon, the icing will smudge and stick together. Trust me, I’ve ruined an entire batch this way. Give them at least 8 hours, preferably overnight.
Variations & Adaptations
One of the best things about these Halloween sugar cookies with royal icing spiders is how adaptable they are. Here are some variations I’ve tried and loved:
Gluten-Free Version : Substitute the all-purpose flour with a 1:1 gluten-free baking flour blend. I’ve had good results with King Arthur Measure for Measure. Add an extra tablespoon of flour to the dough since gluten-free blends tend to absorb less moisture. The texture will be slightly more delicate, so handle the cookies gently when transferring them to the baking sheet.
Vegan Adaptation : Replace the butter with vegan butter (I like Miyoko’s or Earth Balance) and use a flax egg (1 tablespoon ground flaxseed mixed with 3 tablespoons water per egg) instead of regular eggs. For the royal icing, use aquafaba (the liquid from a can of chickpeas) instead of meringue powder—3 tablespoons of aquafaba whipped to stiff peaks replaces the meringue powder and water. The icing won’t be quite as stable, but it works.
Different Spider Designs : Instead of the traditional spider shape, try making round cookies and piping the legs directly onto the cookie. This gives you more flexibility with the spider placement and creates a dramatic effect. You can also make smaller spiders by using a smaller round cutter and adjusting the icing amounts.
Flavor Variations : Add 1 teaspoon of peppermint extract instead of vanilla for a minty twist that’s surprisingly good with the chocolate or black icing. Or try lemon extract for a bright, citrusy version that cuts through the sweetness. I made a batch with orange extract last year, and they were gone before the spiders even had a chance to dry.
Color Variations : Instead of black and orange, try purple and green for a witchy theme, or red and black for a more dramatic look. You can also make gradient spiders by piping different shades of the same color for the body and legs. The possibilities are endless, which is why these cookies never get boring.
Serving & Storage Suggestions
These Halloween sugar cookies with royal icing spiders are designed to be the star of your Halloween spread. Here’s how to serve and store them for maximum impact:
Serving Temperature : Serve at room temperature. The cookies taste best when they’ve had a chance to come to room temperature after being stored in the fridge. If you’re serving them at a party, arrange them on a decorative platter or cake stand. I like to use a black platter to make the orange and white spiders pop.
Presentation Ideas : Create a spooky dessert table by arranging the cookies on a bed of black tissue paper or fake spider webs. Add some plastic spiders for extra drama. For a more elegant look, stack them on a three-tiered stand with other Halloween treats like pumpkin cupcakes or ghost-shaped brownies.
Complementary Dishes : These cookies pair beautifully with warm apple cider, hot chocolate, or a pumpkin spice latte. For a full Halloween dessert spread, serve them alongside my pumpkin cheesecake bars and caramel apple cupcakes. The combination of flavors and textures will have your guests coming back for seconds.
Storage Instructions : Store the decorated cookies in an airtight container at room temperature for up to 2 weeks. Layer them between sheets of parchment paper to prevent the icing from sticking. Do not refrigerate—the moisture in the fridge can cause the royal icing to become sticky or soften.
Freezing Instructions : You can freeze the undecorated cookies for up to 3 months. Place them in a single layer on a baking sheet and freeze until solid, then transfer to a freezer-safe bag or container. Thaw at room temperature before decorating. The royal icing itself does not freeze well, so always decorate after thawing.
Flavor Development : Here’s a secret—these cookies actually taste better on day two or three. The flavors meld together, and the cookies become slightly softer while still holding their shape. If you’re planning for a party, bake the cookies a day or two in advance and decorate them the day before. Your future self will thank you.
Nutritional Information & Benefits
Let’s be real—these are sugar cookies with royal icing, so they’re not exactly health food. But they’re made for celebration, not everyday snacking. Here’s the estimated nutritional breakdown per cookie (based on a 3-inch spider cookie):
| Nutrient | Amount per Cookie |
|---|---|
| Calories | 185 |
| Total Fat | 8g |
| Saturated Fat | 4g |
| Cholesterol | 25mg |
| Sodium | 85mg |
| Total Carbohydrates | 28g |
| Sugars | 18g |
| Protein | 2g |
On the positive side, these cookies do contain butter, which provides a small amount of vitamin A, and eggs, which offer protein and B vitamins. The almond extract adds a touch of vitamin E. But honestly, these cookies are about joy, not nutrition. They’re meant to be enjoyed in moderation as a special treat.
Dietary Considerations : This recipe contains gluten, dairy, and eggs. For gluten-free and vegan options, see the variations section above. The cookies are nut-free if you omit the almond extract, making them safe for most nut allergies. Always check your ingredients for potential cross-contamination if serving to someone with severe allergies.
From a wellness perspective, I believe that food should bring people together and create memories. These cookies do exactly that. They’re the kind of treat that makes Halloween feel special, that makes kids (and adults) light up with excitement. And that’s worth every calorie.
Conclusion
These Halloween sugar cookies with royal icing spiders have become a tradition in my house, and I hope they become one in yours too. They’re the kind of recipe that looks impressive but is totally achievable, even if you’re new to decorating with royal icing. The spiders are forgiving—honestly, the slightly imperfect ones look even more realistic. Mrs. Kowalski would approve.
I love that this recipe lets you be creative. You can make the spiders cute or creepy, colorful or monochrome, simple or elaborate. They’re a blank canvas for your Halloween imagination. And the best part? They taste incredible. That buttery, vanilla-scented cookie with the crisp royal icing shell is a combination that never gets old.
So go ahead—preheat your oven, dust off your rolling pin, and make some magic. Your guests will be impressed, your kids will be thrilled, and you’ll have a new Halloween tradition to look forward to every year. And when you make them, come back and tell me how they turned out. I want to hear about your spider creations, your decorating triumphs, and even your royal icing mishaps. That’s how we learn, after all.
Happy Halloween, and happy baking!
Frequently Asked Questions
Can I make the dough ahead of time?
Absolutely. The sugar cookie dough can be made up to 3 days in advance and stored in the refrigerator. Just wrap it tightly in plastic wrap and let it sit at room temperature for about 10 minutes before rolling. You can also freeze the dough for up to 3 months—just thaw it in the refrigerator overnight before using.
Why did my cookies spread too much?
Cookie spreading usually happens for one of three reasons: the dough wasn’t chilled long enough, the butter was too soft, or the baking sheet was too warm. Make sure you chill the cut cookies for at least 15 minutes before baking, and always use a cool baking sheet. If you’re baking multiple batches, let the sheet cool completely between batches.
How do I get the royal icing consistency right?
The key is to start thick and thin gradually. Begin with the stiff peak consistency, then add water a few drops at a time until you reach the 10-second consistency. If you accidentally make it too thin, add more sifted powdered sugar a tablespoon at a time. Practice makes perfect—don’t get discouraged if your first batch isn’t perfect.
Can I use store-bought royal icing?
You can, but I don’t recommend it for this recipe. Store-bought royal icing often has a different consistency and doesn’t dry as hard or shiny as homemade. Plus, it’s easy to make and you have full control over the flavor and color. The homemade version tastes better and gives you more professional results.
How far in advance can I decorate these cookies?
You can decorate them up to 2 weeks in advance as long as you store them properly. Let the royal icing dry completely (overnight is best), then store the cookies in an airtight container at room temperature with parchment paper between layers. They’ll stay fresh and beautiful for your Halloween party.
Pin This Recipe!
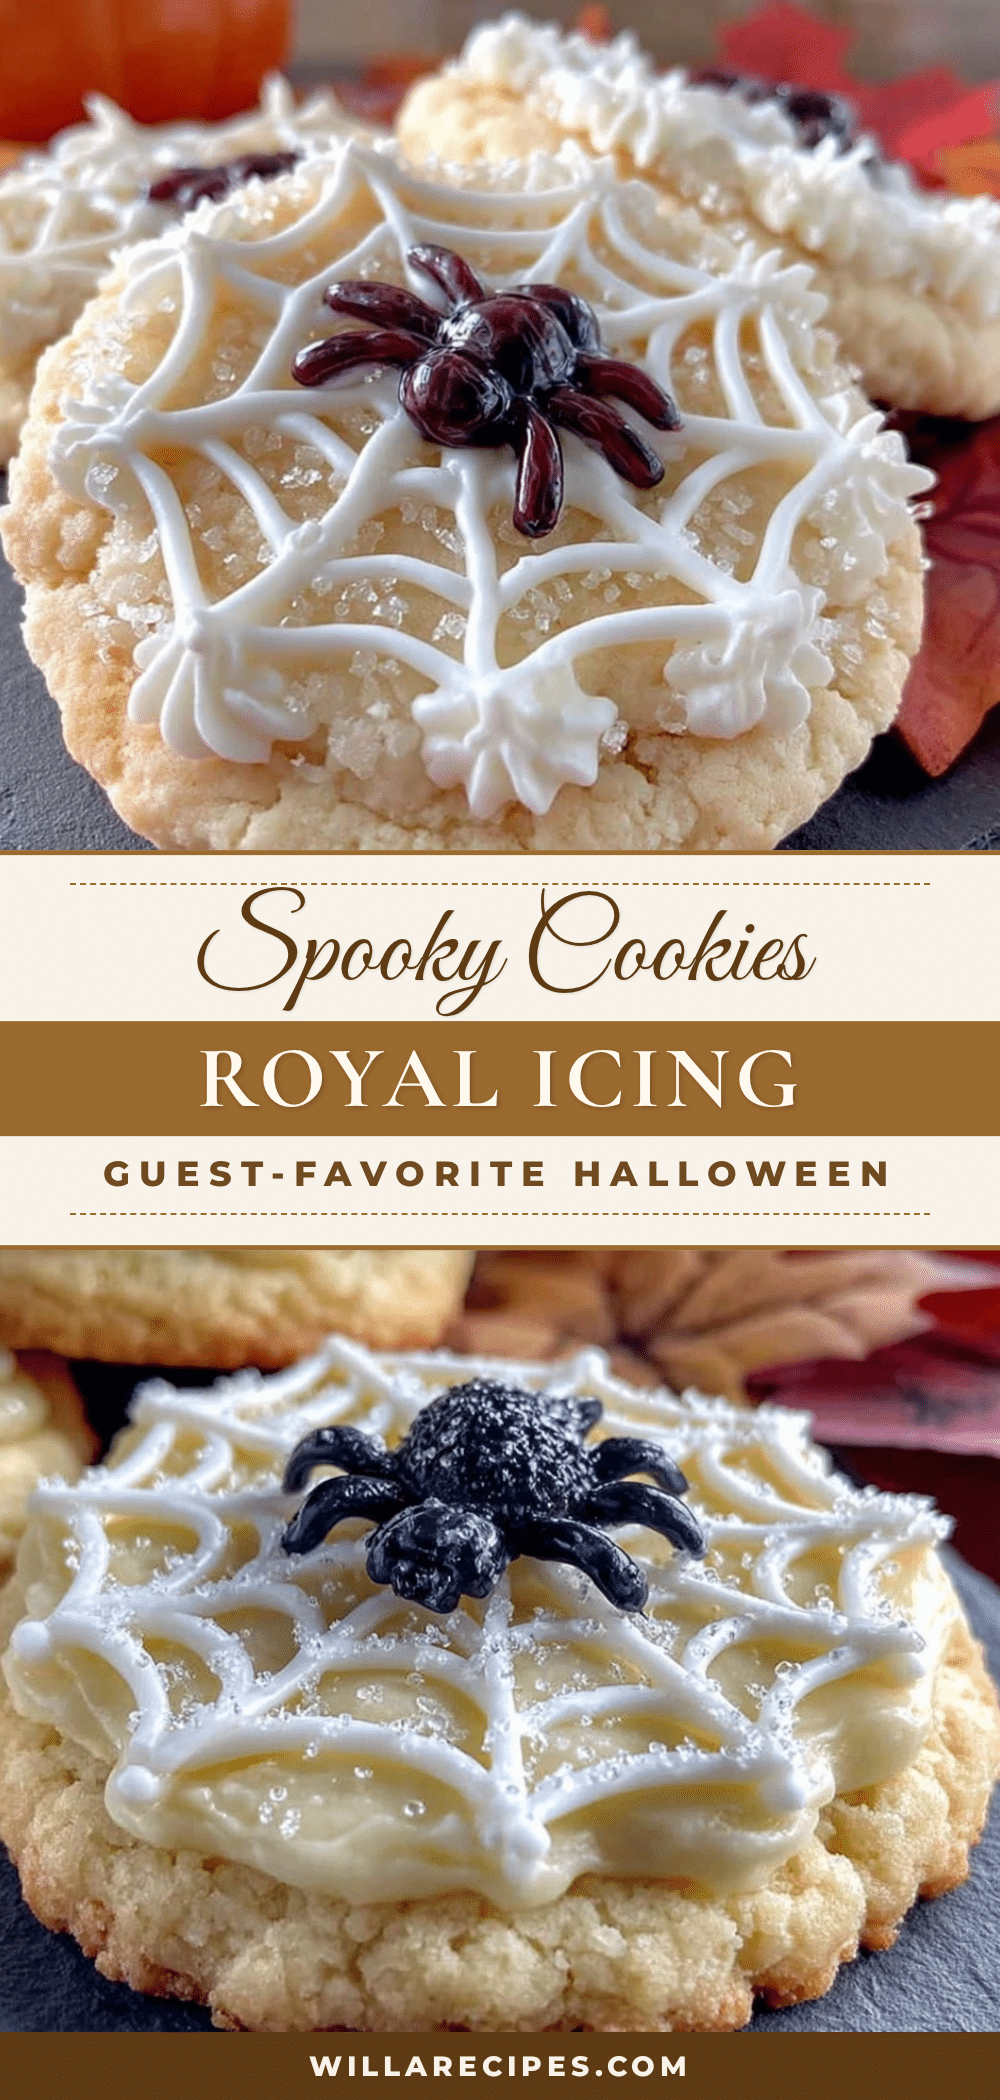
Best Halloween Sugar Cookies with Royal Icing Spiders
These Halloween sugar cookies with royal icing spiders are the perfect treat for fall gatherings. With crisp edges, tender centers, and a foolproof royal icing that pipes clean lines, they look like they came from a fancy bakery but are surprisingly easy to make.
- Prep Time: 30 minutes
- Cook Time: 10 minutes
- Total Time: 45 minutes (plus chilling and drying time)
- Yield: 24 servings 1x
- Category: Dessert
- Cuisine: American
Ingredients
- 3 cups all-purpose flour (spooned and leveled)
- 1 teaspoon baking powder
- ½ teaspoon fine sea salt
- 1 cup unsalted butter, softened to room temperature
- ½ cup vegetable shortening (e.g., Crisco)
- 1½ cups granulated sugar
- 2 large eggs, room temperature
- 2 teaspoons vanilla extract (real vanilla)
- ½ teaspoon almond extract (optional)
- 4 cups powdered sugar, sifted
- 3 tablespoons meringue powder (e.g., Wilton)
- 6–7 tablespoons warm water
- 1 teaspoon vanilla extract (or clear vanilla extract)
- Black gel food coloring
- Orange gel food coloring (optional)
- Black sanding sugar or black sprinkles (optional)
- Edible glitter in orange or black (optional)
- Piping bags (disposable)
- Small round piping tips (sizes 2, 3, and 4)
- Couplers
Instructions
- Cream the butter and shortening: In a stand mixer fitted with the paddle attachment, beat the softened butter and shortening together on medium speed until smooth and combined, about 2 minutes.
- Add the sugar: Gradually add the granulated sugar while mixing on medium speed. Continue beating for 3-4 minutes until light and fluffy. Scrape down the sides of the bowl halfway through.
- Incorporate the eggs and vanilla: Add the eggs one at a time, beating well after each addition. Then add the vanilla extract and almond extract (if using). Mix until just combined.
- Combine the dry ingredients: In a separate bowl, whisk together the flour, baking powder, and salt.
- Add dry ingredients to wet: With the mixer on low speed, gradually add the flour mixture to the butter mixture. Mix until just combined—stop as soon as no streaks of flour remain.
- Divide and chill: Divide the dough into two equal portions, flatten each into a disk about 1 inch thick, wrap in plastic wrap, and refrigerate for at least 30 minutes.
- Prepare your work surface: Lightly flour your work surface and rolling pin.
- Roll to even thickness: Roll the dough to about ¼ inch thickness.
- Cut your shapes: Dip your spider cookie cutter in flour before each cut. Press straight down and lift straight up—no twisting.
- Transfer to baking sheets: Use a thin spatula to transfer the cut cookies to parchment-lined baking sheets, spacing them about 2 inches apart.
- Chill again: Refrigerate the baking sheets for 15 minutes before baking.
- Preheat your oven: Set your oven to 350°F (175°C).
- Bake in batches: Bake one sheet at a time on the center rack for 8-10 minutes, rotating the pan halfway through. Cookies are done when edges are just barely golden brown.
- Cool completely: Let cookies cool on the baking sheet for 5 minutes, then transfer to a wire rack to cool completely.
- Make the royal icing: In the bowl of your stand mixer, whisk together the sifted powdered sugar and meringue powder. Add 6 tablespoons of warm water and the vanilla extract. Mix on low speed until moistened, then increase to medium speed and beat for 4-5 minutes until thick and glossy with stiff peaks.
- Check consistency: Lift the beater—the icing should form a ribbon that slowly sinks back into the bowl. Adjust with water or powdered sugar as needed.
- Divide and color: Divide the icing into portions. Leave one portion white (or tint it orange for spider bodies). Tint another portion black using black gel food coloring.
- Adjust consistency for flooding: For the black icing used for flooding, thin it slightly by adding water a few drops at a time until it reaches a 10-second consistency.
- Pipe the spider bodies: Using the thicker orange or white icing with a size 4 tip, pipe a round circle in the center of each cookie.
- Flood the bodies: Using the thinner black icing with a size 3 tip, pipe around the edge of the spider body, then fill in the center. Use a toothpick to spread the icing into any gaps and pop air bubbles.
- Add the legs: While the black icing is still wet, use the thicker black icing with a size 2 tip to pipe eight legs coming out from the spider body—four on each side, curving slightly.
- Add eyes: Using white icing, pipe two small dots on the spider’s head. Then use black icing to pipe tiny dots on top for pupils.
- Sprinkle while wet: If using black sanding sugar or edible glitter, sprinkle it over the wet icing immediately.
- Let dry completely: Allow the decorated cookies to dry at room temperature for at least 4 hours, or overnight.
Notes
Temperature is everything—butter should be soft but not melted. Chill dough before baking to prevent spreading. Royal icing consistency is key: start thick and thin gradually. Let cookies dry overnight for best results. Cookies taste even better on day two or three.
Nutrition
- Serving Size: 1 cookie
- Calories: 185
- Sugar: 18
- Sodium: 85
- Fat: 8
- Saturated Fat: 4
- Carbohydrates: 28
- Protein: 2
Keywords: Halloween sugar cookies, royal icing spiders, spider cookies, Halloween baking, sugar cookie recipe, royal icing recipe, holiday cookies


