My son had refused oatmeal for three years. Three years. I tried steel-cut, rolled, instant, overnight—he’d push the bowl away like I’d offered him a plate of soggy cardboard. Then, last October, I made a batch of these pumpkin baked oatmeal cups “just for myself” on a rainy Tuesday morning, and I found him standing on a stool, reaching for the cooling rack, a crumb already on his cheek. He didn’t ask permission. He just ate one. Then another. I didn’t say a word—I just watched, trying not to look too surprised.
Honestly, I was shocked. The kid who turned his nose up at anything that wasn’t a chicken nugget was now voluntarily eating something with pumpkin puree and flaxseed. Let me tell you, that moment felt like winning the parenting lottery. I mean, I’d spent years hiding spinach in smoothies and sneaking zucchini into muffins, but this was different. This was him choosing the healthy thing because it actually tasted good. Maybe you’ve been there—that feeling when you finally find a breakfast that doesn’t require a bribe or a negotiation.
These pumpkin baked oatmeal cups weren’t supposed to be a kid thing. I was just trying to use up a can of pumpkin that had been sitting in my pantry since last Thanksgiving. But something clicked with these little handheld cups. They’re soft, slightly sweet, and smell like fall in a way that makes the whole kitchen feel cozy. And the best part? They freeze beautifully, so I can pull one out on crazy school mornings when we’re running late and I need something that isn’t a granola bar. That’s why this recipe stayed with me—it solved a real problem without making me feel like a short-order cook.
Why You’ll Love This Recipe
Let’s be real for a second. Finding a breakfast that kids actually want to eat and that makes you feel good about feeding them is like finding a unicorn. But these pumpkin baked oatmeal cups? They’re that unicorn. I’ve tested this recipe more times than I can count—tweaking the sweetness, adjusting the texture, making sure they hold together without crumbling into a mess. And after all that trial and error, I can confidently say these are the best version I’ve ever made.
- Quick & Easy: From start to finish, you’re looking at about 30 minutes. Mix the batter in one bowl, scoop into a muffin tin, and bake. No fuss, no complicated steps.
- Simple Ingredients: You probably have most of this stuff already—oats, eggs, pumpkin puree, a little maple syrup. No trips to a specialty store required.
- Perfect for Busy Mornings: Make a batch on Sunday, and you’ve got breakfast sorted for the week. Grab one, warm it up for 15 seconds, and you’re out the door.
- Crowd-Pleaser: I’ve served these at playdates, brunches, and holiday mornings. Kids eat them. Adults eat them. Even my mother-in-law, who claims to hate oatmeal, asked for the recipe.
- Unbelievably Delicious: The texture is soft and tender, like a muffin but heartier. The pumpkin keeps them moist, and the warm spices make the whole house smell incredible.
What makes these different from all the other oatmeal cup recipes out there? It’s the balance. I spent a lot of time figuring out how to keep them sweet enough for little taste buds without loading them with sugar. The secret is using just enough maple syrup to bring out the natural sweetness of the pumpkin, plus a little vanilla extract to round it all out. And the texture? I use a mix of rolled oats and oat flour (just oats blitzed in a blender) to give them structure without making them dense or dry. It’s not rocket science, but it works.
This is the kind of recipe that makes you close your eyes after the first bite. It’s comfort food that happens to be good for you—faster, healthier, but with the same soul-soothing satisfaction. Perfect for impressing guests without stress, or turning a chaotic weekday morning into something a little more manageable.
What Ingredients You Will Need
This recipe uses simple, wholesome ingredients that come together to create something truly special. Most of these are pantry staples, so you likely won’t need to make a special trip to the store. Here’s what you’ll need:
For the Oatmeal Cups
- Rolled oats, 2 cups (use certified gluten-free if needed) – These give the cups their hearty texture. I prefer old-fashioned rolled oats over quick oats because they hold up better during baking.
- Oat flour, 1/2 cup – You can buy this or make your own by pulsing rolled oats in a blender until fine. It helps bind everything together without using regular flour.
- Pumpkin puree, 1 cup (not pumpkin pie filling) – Make sure you grab the plain stuff. The puree adds moisture, fiber, and that gorgeous orange color.
- Eggs, 2 large, room temperature – They help bind the cups and add a little protein. If you need an egg-free version, try flax eggs (1 tablespoon flaxseed meal + 3 tablespoons water per egg).
- Milk, 1/2 cup – Any milk works here. I usually use whole milk for richness, but almond milk or oat milk are great dairy-free options.
- Maple syrup, 1/3 cup – This adds just enough sweetness without being overpowering. You can substitute honey or agave if that’s what you have.
- Coconut oil, 2 tablespoons, melted – Or any neutral oil like avocado or melted butter. It keeps the cups moist and tender.
- Vanilla extract, 1 teaspoon – A little goes a long way in rounding out the flavors.
- Pumpkin pie spice, 1 1/2 teaspoons – If you don’t have this, mix 1 teaspoon cinnamon, 1/4 teaspoon nutmeg, 1/4 teaspoon ginger, and a pinch of cloves.
- Cinnamon, 1 teaspoon – Because you can never have too much cinnamon.
- Baking powder, 1 teaspoon – This gives them a little lift so they’re not too dense.
- Salt, 1/4 teaspoon – Just to balance the sweetness.
Optional Mix-Ins
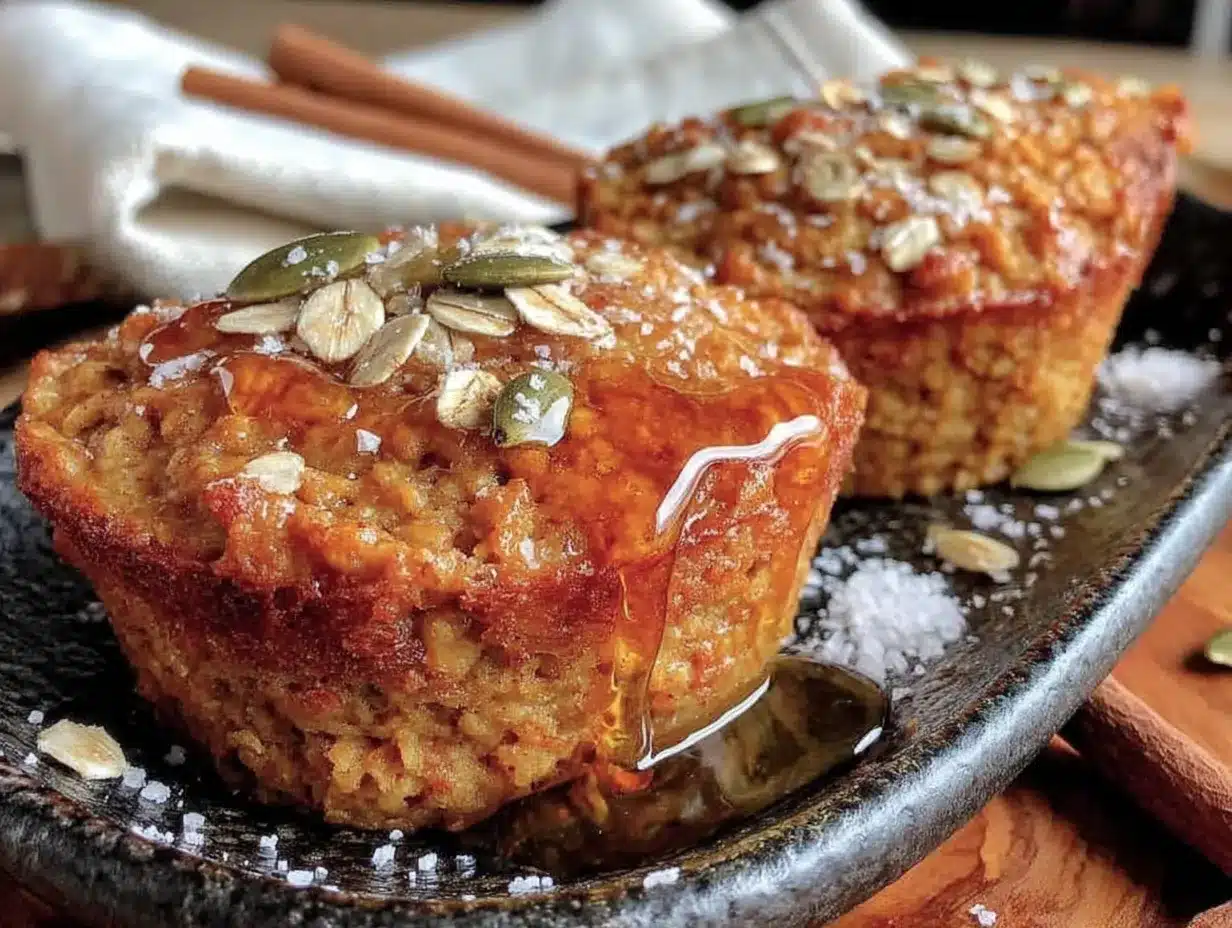
- Chocolate chips, 1/4 cup – Mini chocolate chips are perfect for kids. They melt into little pockets of sweetness.
- Chopped pecans or walnuts, 1/4 cup – Adds a nice crunch if your kids are into that.
- Dried cranberries, 1/4 cup – For a little tartness that pairs beautifully with the pumpkin.
I recommend using canned pumpkin puree from Libby’s or Farmer’s Market brands for consistent results. Fresh pumpkin puree works too, but it tends to be more watery, so you might need to drain it slightly. And for the oats, I’m partial to Bob’s Red Mill rolled oats—they have a nice chewy texture that holds up well in baking.
Equipment Needed
You don’t need a fancy kitchen to make these pumpkin baked oatmeal cups. Here’s what you’ll need:
- Muffin tin – A standard 12-cup muffin tin works perfectly. I’ve used both metal and silicone, and both work fine. Silicone cups make removal easier, but metal tins give a nicer golden bottom.
- Muffin liners – Paper or silicone liners make cleanup a breeze. If you’re using a silicone muffin tin, you can skip these.
- Large mixing bowl – Any big bowl will do. I use a glass mixing bowl because it’s easy to see when everything’s combined.
- Whisk – For mixing the wet ingredients together smoothly.
- Rubber spatula – For folding everything together without overmixing.
- Measuring cups and spoons – Accuracy matters in baking, even for something this forgiving.
- Blender or food processor – Only if you’re making your own oat flour. Otherwise, you can buy it pre-made.
- Cooling rack – Helps the cups cool evenly so they don’t get soggy on the bottom.
If you don’t have oat flour, don’t worry. Just grab your blender, throw in some rolled oats, and pulse until they resemble a fine powder. It takes about 30 seconds. And if you’re using paper liners, give them a quick spray with non-stick cooking spray—trust me on this one. I learned the hard way that pumpkin baked goods have a tendency to stick.
Preparation Method
Alright, let’s get cooking. This recipe is straightforward, but I’ll walk you through each step with a few tips I’ve picked up along the way.
- Preheat your oven to 350°F (175°C). Line a 12-cup muffin tin with paper liners or lightly grease each cup with coconut oil. I like to spray the liners too—it makes peeling them off so much easier.
- Make the oat flour (if needed). Measure out 1/2 cup of rolled oats and pulse them in a blender or food processor until they turn into a fine powder. It should take about 20-30 seconds. Don’t overdo it, or you’ll end up with oat butter. Yes, that’s a thing, and no, it doesn’t work here.
- Mix the dry ingredients. In a large bowl, whisk together the rolled oats, oat flour, pumpkin pie spice, cinnamon, baking powder, and salt. Make sure there are no clumps of baking powder hiding in there. I use a fork to break up any stubborn bits.
- Mix the wet ingredients. In a separate bowl (or the same one if you’re trying to save dishes like me), whisk together the pumpkin puree, eggs, milk, maple syrup, melted coconut oil, and vanilla extract. Whisk until everything is smooth and well combined. The mixture should look like a thick, creamy orange batter.
- Combine wet and dry. Pour the wet ingredients into the dry ingredients. Use a rubber spatula to fold everything together gently. Mix just until there are no dry streaks of flour left. Overmixing will make the cups tough, so stop as soon as it comes together. The batter will be thick and scoopable—like a very chunky muffin batter.
- Fold in mix-ins. If you’re using chocolate chips, nuts, or dried fruit, fold them in now. I usually save a few chocolate chips to press into the tops of the cups before baking—it makes them look prettier and gives each cup a little surprise on top.
- Fill the muffin cups. Divide the batter evenly among the 12 muffin cups. I use a cookie scoop or a large spoon. Each cup should be about 3/4 full. Don’t overfill them—they’ll puff up a little in the oven, and you don’t want them spilling over.
- Bake for 18-22 minutes. The cups are done when the tops are set and golden brown, and a toothpick inserted into the center comes out clean or with a few moist crumbs. My oven runs a little hot, so I start checking at 18 minutes. The smell alone will tell you they’re close—the whole kitchen will smell like fall.
- Cool in the pan for 5 minutes. This is important. Let them rest in the muffin tin for about 5 minutes before transferring them to a wire rack. If you try to take them out too soon, they might fall apart. After 5 minutes, gently lift them out and let them cool completely on the rack.
- Enjoy warm or at room temperature. These are delicious straight out of the oven, but they also hold up beautifully at room temperature. My kids actually prefer them cold from the fridge—go figure.
A few notes from my kitchen to yours: If your batter looks too thick, add a splash more milk. If it looks too thin, add a tablespoon of oats. Pumpkin puree can vary in moisture content, so trust your eyes more than the recipe. And if you forget to grease the liners, don’t panic—run a butter knife around the edge of each cup, and they should pop right out.
Cooking Tips & Techniques
I’ve made these pumpkin baked oatmeal cups at least a dozen times now, and I’ve learned a few things the hard way. Let me save you some trouble.
Don’t overmix the batter. This is probably the most common mistake. When you overmix, you develop the starches in the oats and flour, which makes the cups dense and rubbery. Mix until everything is just combined, and then stop. A few lumps are totally fine.
Use room temperature ingredients. Cold eggs or cold milk can cause the coconut oil to solidify into little chunks when you mix everything together. If that happens, don’t worry—just let the batter sit for 5 minutes to warm up, then give it a quick stir. But it’s easier to just pull your eggs and milk out of the fridge 15 minutes before you start.
Check your pumpkin puree. I once grabbed a can of pumpkin pie filling by mistake. The cups turned out way too sweet and had a weird texture. Always check the label—you want 100% pure pumpkin, not the pre-sweetened stuff.
Let them cool completely before storing. If you put warm oatmeal cups into a container, the steam will make them soggy. I know it’s tempting to pack them up right away, but give them a full 30 minutes on the cooling rack first. Your future self will thank you.
Use a cookie scoop for even portions. This is one of those small tools that makes a big difference. A #20 or #24 cookie scoop gives you perfectly even cups that all bake at the same rate. Plus, it’s way less messy than using two spoons.
Toast your oats first. If you have an extra 5 minutes, spread the rolled oats on a baking sheet and toast them in the oven at 350°F for 5-7 minutes. It brings out a nutty flavor that makes the cups taste even better. I do this when I’m feeling fancy, but it’s totally optional.
One time, I forgot to add the baking powder. The cups came out flat and dense—like little hockey pucks. They still tasted okay, but the texture was all wrong. So double-check your ingredients list before you start mixing. It’s an easy thing to overlook, especially if you’re making these with a toddler “helping” you.
Variations & Adaptations
One of the best things about this recipe is how flexible it is. Here are a few ways to change it up depending on what you have in your pantry or what your family likes.
Dairy-Free Version: Swap the milk for almond milk, oat milk, or coconut milk. Use melted coconut oil instead of butter. Everything else stays the same. I’ve made this version for a friend who’s lactose intolerant, and she couldn’t tell the difference.
Gluten-Free Version: Use certified gluten-free rolled oats and oat flour. That’s it. Oats are naturally gluten-free, but they can be cross-contaminated during processing, so look for the certified label if you’re sensitive.
Egg-Free Version: Replace each egg with a flax egg (1 tablespoon flaxseed meal mixed with 3 tablespoons water, let sit for 5 minutes). The texture will be slightly denser, but they still taste great. I tested this version for a friend whose kid has an egg allergy, and her son ate three in one sitting.
Lower Sugar Option: Reduce the maple syrup to 1/4 cup. The cups will be less sweet, but the pumpkin and spices still give plenty of flavor. You can also add a mashed banana for natural sweetness—just reduce the pumpkin puree by 1/4 cup to keep the moisture balance right.
Pumpkin Chocolate Chip: This is my kids’ favorite version. Fold in 1/3 cup mini chocolate chips and sprinkle a few on top before baking. The chocolate melts into little pools of goodness. I tell myself the pumpkin cancels out the chocolate. That’s how nutrition works, right?
Apple Pumpkin: Finely dice half an apple (peeled) and fold it into the batter. It adds little bursts of sweetness and a slightly different texture. This is great for fall when apples are in season.
Savory-ish Version: Skip the maple syrup and chocolate chips. Add 1/2 cup shredded cheddar cheese and 2 tablespoons chopped fresh sage. Bake as directed. These are weirdly good—like a savory breakfast muffin. My husband loves them with a fried egg on top.
I once tried a version with peanut butter swirled in. It was good, but the peanut butter overpowered the pumpkin flavor. If you want to try it, use just 2 tablespoons and swirl it gently into the batter before baking. Less is more here.
Serving & Storage Suggestions
These pumpkin baked oatmeal cups are incredibly versatile when it comes to serving. Here’s how I handle them in my house.
Serving Temperature: They’re delicious warm, room temperature, or even cold from the fridge. On busy mornings, I pop one in the microwave for 15 seconds and serve it with a side of Greek yogurt or apple slices. On weekends, I warm them up and drizzle a little extra maple syrup on top.
Presentation Ideas: For a brunch spread, arrange them on a wooden board with fresh fruit, a bowl of yogurt, and a pitcher of warm milk. They look beautiful next to a stack of pancakes or a frittata. For kids’ parties, I cut them in half and serve them on a platter—they’re less messy that way.
What to Serve With Them: A glass of cold milk is the classic pairing. But they also go well with a hot cup of coffee (for the adults) or a warm mug of apple cider. For a more filling breakfast, serve them alongside scrambled eggs or a smoothie.
Storage Instructions: Store leftover oatmeal cups in an airtight container in the refrigerator for up to 5 days. I put a piece of paper towel at the bottom of the container to absorb any excess moisture, and another on top. It helps keep them from getting soggy.
Freezer Instructions: These freeze beautifully. Let the cups cool completely, then place them in a single layer on a baking sheet and freeze for 1 hour. Transfer them to a freezer-safe bag or container. They’ll keep for up to 3 months. To reheat, microwave one for 20-30 seconds, or pop it in a 350°F oven for 5-7 minutes.
How Flavors Develop: Honestly, these taste even better on day two. The spices have time to meld together, and the texture becomes more tender. If you can resist eating them all on day one, you’re in for a treat the next morning.
Nutritional Information & Benefits
Let’s talk about what’s actually in these little cups. I’m not a nutritionist, but I’ve done my research, and I feel good about feeding these to my kids.
Estimated Nutritional Values (per cup, without mix-ins):
| Nutrient | Amount |
|---|---|
| Calories | 145 |
| Protein | 5g |
| Carbohydrates | 22g |
| Fiber | 3g |
| Sugar | 8g |
| Fat | 5g |
| Vitamin A | 80% DV |
| Iron | 6% DV |
Health Benefits: Pumpkin is packed with vitamin A, which is great for eye health and immune function. Oats provide soluble fiber, which helps keep everyone full and satisfied until lunch. The eggs add protein, and the maple syrup is a more natural sweetener than refined sugar. Plus, you’re getting a serving of vegetables before 8 AM—that’s a win in my book.
Dietary Considerations: This recipe is naturally vegetarian and can easily be made gluten-free, dairy-free, or egg-free with the substitutions I mentioned earlier. It’s also nut-free if you skip the pecans or walnuts.
Potential Allergens: Contains eggs and (if using) milk and nuts. Check your oat flour label if you’re avoiding gluten.
Look, I’m not saying these are a health food. But compared to a store-bought granola bar or a sugary cereal? These are a significant upgrade. And the fact that my kids actually want to eat them? That’s the kind of win I’ll take any day.
Conclusion
So there you have it—pumpkin baked oatmeal cups that actually taste good and don’t require a battle at the breakfast table. I started making these because I needed something my kids would eat without complaint, and I kept making them because they’re genuinely delicious. The pumpkin keeps them moist, the spices make them cozy, and the fact that they’re portable means I can grab one on my way out the door when I’m running late (which is most mornings, if I’m being honest).
I’d love for you to try these and see how they work for your family. Maybe your kids will love them right away, or maybe, like mine, they’ll take a little convincing. Either way, I think you’ll find yourself coming back to this recipe again and again. It’s become a staple in my kitchen, and I have a feeling it will become one in yours too.
If you make these, let me know how they turn out! Leave a comment below or tag me in your photos—I genuinely love seeing your creations. And if you have a picky eater who surprised you by loving something, I want to hear that story too. Happy baking, friends!
Frequently Asked Questions
Can I use quick oats instead of rolled oats?
You can, but the texture will be different. Quick oats are more finely processed, so they absorb liquid faster and create a softer, almost mushy texture. Rolled oats give the cups more structure and a pleasant chew. If you only have quick oats, reduce the milk by 2 tablespoons to compensate.
Can I make these without a muffin tin?
Yes! You can bake the batter in a greased 8×8 inch baking dish for about 25-30 minutes. Cut it into squares or bars once cooled. The baking time will be longer since it’s a single pan, so start checking at 25 minutes. You can also use a mini muffin tin for bite-sized versions—bake for 10-12 minutes.
Why did my oatmeal cups turn out dry?
This usually happens for one of two reasons: overbaking or too many dry ingredients. Make sure you’re measuring your oats and flour correctly (spoon them into the measuring cup and level off, don’t scoop directly). And check your oven temperature—some ovens run hot. Try reducing the bake time by 2-3 minutes next time.
Can I use fresh pumpkin instead of canned?
Absolutely. If you’re using fresh pumpkin puree, make sure it’s well-drained. Fresh pumpkin tends to be more watery than canned, which can make the batter too loose. After pureeing your cooked pumpkin, let it sit in a fine-mesh strainer for 15-20 minutes to release excess liquid. Then proceed with the recipe as written.
How do I make these more filling for older kids or adults?
Add a scoop of vanilla or unflavored protein powder to the dry ingredients. Start with 2 tablespoons and increase to 1/4 cup if you like. You might need to add an extra tablespoon of milk to balance the moisture. You can also stir in 2 tablespoons of chia seeds or hemp hearts for extra protein and healthy fats.
Pin This Recipe!
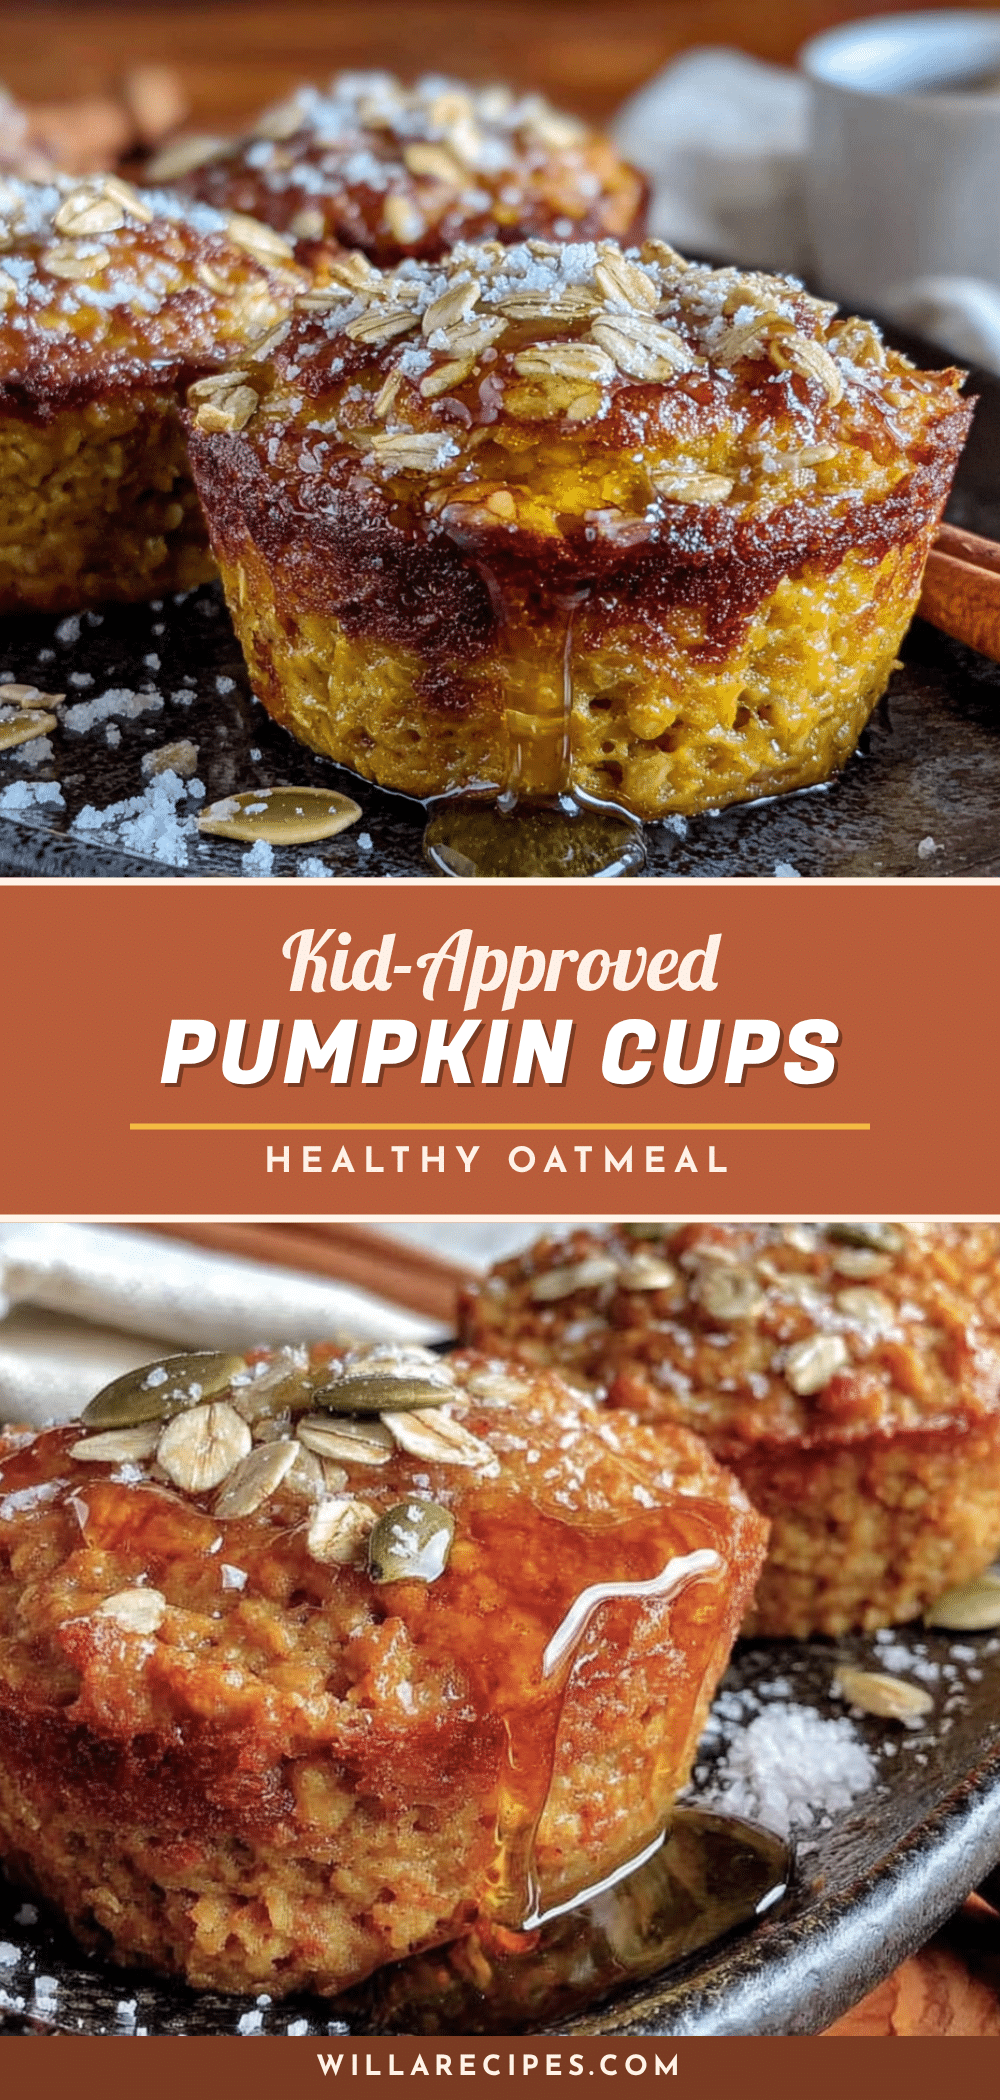
Best Healthy Pumpkin Baked Oatmeal Cups Recipe for Kids
These pumpkin baked oatmeal cups are soft, slightly sweet, and perfect for busy mornings. Made with wholesome ingredients like rolled oats, pumpkin puree, and maple syrup, they’re a kid-friendly breakfast that freezes beautifully.
- Prep Time: 10 minutes
- Cook Time: 20 minutes
- Total Time: 30 minutes
- Yield: 12 servings 1x
- Category: Breakfast
- Cuisine: American
Ingredients
- 2 cups rolled oats (use certified gluten-free if needed)
- 1/2 cup oat flour (or make your own by pulsing rolled oats in a blender)
- 1 cup pumpkin puree (not pumpkin pie filling)
- 2 large eggs, room temperature
- 1/2 cup milk (any kind)
- 1/3 cup maple syrup
- 2 tablespoons coconut oil, melted (or any neutral oil)
- 1 teaspoon vanilla extract
- 1 1/2 teaspoons pumpkin pie spice
- 1 teaspoon cinnamon
- 1 teaspoon baking powder
- 1/4 teaspoon salt
- 1/4 cup mini chocolate chips (optional)
- 1/4 cup chopped pecans or walnuts (optional)
- 1/4 cup dried cranberries (optional)
Instructions
- Preheat your oven to 350°F (175°C). Line a 12-cup muffin tin with paper liners or lightly grease each cup with coconut oil. Spray the liners with non-stick cooking spray for easier removal.
- If making your own oat flour, measure out 1/2 cup of rolled oats and pulse them in a blender or food processor until they turn into a fine powder (about 20-30 seconds).
- In a large bowl, whisk together the rolled oats, oat flour, pumpkin pie spice, cinnamon, baking powder, and salt. Break up any clumps with a fork.
- In a separate bowl, whisk together the pumpkin puree, eggs, milk, maple syrup, melted coconut oil, and vanilla extract until smooth and well combined.
- Pour the wet ingredients into the dry ingredients. Use a rubber spatula to fold together gently until just combined—do not overmix. The batter will be thick and scoopable.
- If using mix-ins (chocolate chips, nuts, or dried fruit), fold them in now. Reserve a few chocolate chips to press into the tops of the cups before baking.
- Divide the batter evenly among the 12 muffin cups, filling each about 3/4 full. Use a cookie scoop for even portions.
- Bake for 18-22 minutes, until the tops are set and golden brown, and a toothpick inserted into the center comes out clean or with a few moist crumbs.
- Cool in the pan for 5 minutes, then transfer to a wire rack to cool completely.
- Enjoy warm or at room temperature. Store leftovers in an airtight container in the refrigerator for up to 5 days, or freeze for up to 3 months.
Notes
Don’t overmix the batter to avoid dense cups. Use room temperature ingredients to prevent coconut oil from solidifying. Check that you’re using 100% pure pumpkin puree, not pumpkin pie filling. Let cups cool completely before storing to prevent sogginess. For a nutty flavor, toast the rolled oats for 5-7 minutes at 350°F before using. If batter is too thick, add a splash more milk; if too thin, add a tablespoon of oats.
Nutrition
- Serving Size: 1 cup
- Calories: 145
- Sugar: 8
- Sodium: 120
- Fat: 5
- Saturated Fat: 2
- Carbohydrates: 22
- Fiber: 3
- Protein: 5
Keywords: pumpkin baked oatmeal cups, healthy breakfast for kids, easy oatmeal cups, pumpkin oatmeal muffins, kid-friendly breakfast


