There used to be a tiny bakery tucked behind a flower shop on Elm Street that made the most incredible cinnamon apple pie I had ever tasted. When they closed suddenly three summers ago, I stood outside their shuttered door like an absolute fool, holding a crumpled paper bag from their last day of business. After twelve tries — including one where I forgot the sugar entirely and served my family what can only be described as “sour apple soup in a crust” — I finally got it. This is that pie, the one that brings back the smell of that little bakery and the feeling of biting into something so perfect you just close your eyes for a second.
Honestly, I didn’t think I’d ever get there. The first few attempts were disasters, let me tell you. The filling was too runny, the crust was tough, and the lattice top looked like a toddler had arranged it during a tantrum. But I kept at it, taking notes after every failed batch like some kind of pie detective. I mean, there’s something about a really good cinnamon apple pie that makes you willing to fail repeatedly. Maybe you’ve been there — that one recipe you just refuse to give up on because you know how good it can be. That was me and this pie.
The secret, I discovered, is in the balance. The cinnamon has to be bold enough to taste but not so strong that it overpowers the apples. The crust needs to be flaky but sturdy enough to hold that gorgeous lattice pattern. And the apples themselves need to hold their shape through baking — nobody wants apple mush in a pie crust, am I right? After all those attempts, I can finally say this recipe is the one. The one that tastes like that bakery on Elm Street. The one I keep making year after year because it just works.
Why You’ll Love This Recipe
Let me tell you why this homemade cinnamon apple pie with lattice crust is going to become your new favorite dessert. I’ve tested this recipe more times than I care to admit, and every single detail has been refined for the best possible results. This isn’t just another apple pie recipe — it’s the one you’ll reach for every time.
- Perfectly Spiced: The cinnamon isn’t just an afterthought here. It’s balanced with nutmeg and a touch of cardamom for warmth that feels like a hug in dessert form.
- Foolproof Lattice: I’ll walk you through a simple technique that makes weaving that beautiful lattice top surprisingly easy, even if you’ve never done it before.
- Never Soggy: No more soupy pie bottoms! A clever trick with pre-cooking the filling ensures every slice holds together beautifully.
- Make-Ahead Friendly: You can prep the dough and filling a day ahead, making Thanksgiving or holiday baking so much less stressful.
- Crowd-Pleasing Classic: This is the pie that disappears at parties. Kids love it, adults fight over the last slice, and everyone asks for the recipe.
What makes this recipe different from all the others? It’s the little things — the way I macerate the apples first to concentrate their flavor, the touch of lemon zest that brightens everything up, and the egg wash technique that gives you that gorgeous golden-brown crust. I’ve learned from every mistake I made in those twelve attempts, and this recipe reflects all of that hard-earned wisdom. This isn’t just good — it’s the kind of pie that makes people close their eyes after the first bite and just… sigh. It’s comfort food at its finest, made with real ingredients and a whole lot of love.
What Ingredients You Will Need
This recipe uses simple, wholesome ingredients to create something truly spectacular. Most of these are pantry staples, which means you’re probably already halfway there. Let me walk you through each one so you know exactly what to look for.
For the Pie Crust
- 2 ½ cups all-purpose flour (I prefer King Arthur for consistent results, but any good brand works)
- 1 teaspoon salt (fine sea salt is best — it dissolves more evenly into the flour)
- 1 tablespoon granulated sugar (just a touch to help with browning)
- 1 cup unsalted butter, very cold and cut into small cubes (this is non-negotiable — the butter must be ice cold for flaky layers)
- 6-8 tablespoons ice water (have extra on hand, you might need it depending on humidity)
For the Cinnamon Apple Filling
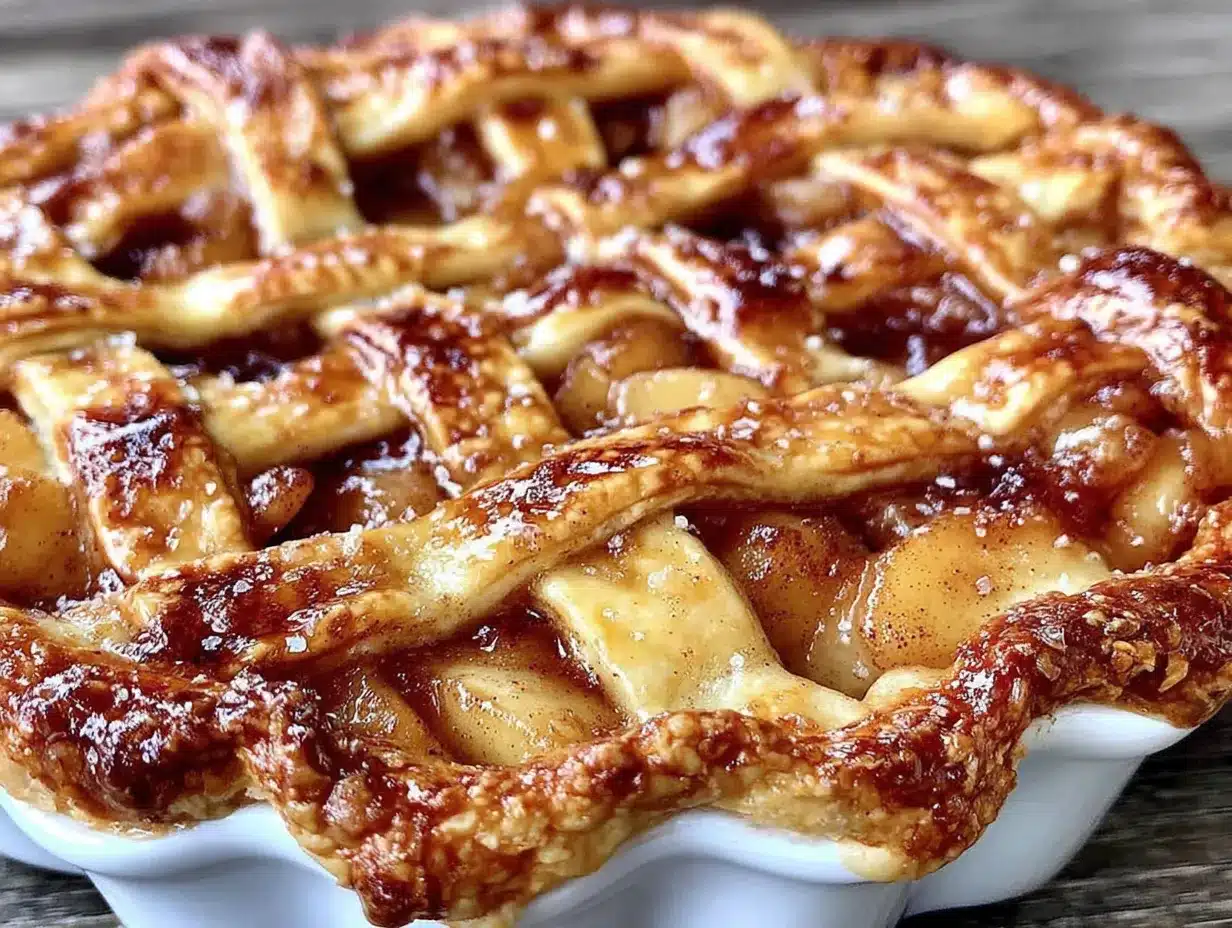
- 6-7 medium apples, peeled, cored, and sliced ¼-inch thick (I use a mix of Granny Smith and Honeycrisp — the tartness and sweetness balance perfectly)
- ¾ cup granulated sugar (adjust based on how sweet your apples are)
- ¼ cup packed brown sugar (adds depth and a hint of molasses flavor)
- 2 teaspoons ground cinnamon (I really like McCormick or Penzeys for strong, fresh flavor)
- ¼ teaspoon ground nutmeg (freshly grated if you have it — it makes a difference)
- ⅛ teaspoon ground cardamom (trust me on this one — it’s subtle but magical)
- 2 tablespoons all-purpose flour (helps thicken the filling)
- 1 tablespoon cornstarch (for that perfect, glossy texture)
- 1 tablespoon lemon juice (brightens the flavors and prevents browning)
- 1 teaspoon lemon zest (adds a fresh note that cuts through the sweetness)
- 2 tablespoons unsalted butter, cut into small pieces (dotting over the filling before baking)
For Assembly and Topping
- 1 large egg, beaten with 1 tablespoon water (for the egg wash)
- 1 tablespoon coarse sugar (like turbinado or demerara) (for that sparkly, crunchy top)
A quick note on apples: Granny Smith apples hold their shape beautifully during baking and provide that necessary tartness. Honeycrisp apples add natural sweetness and a lovely texture. If you can only find one variety, go with Granny Smith — they’re the most reliable for pie. And please, for the love of all things baked, don’t use Red Delicious. They turn into mush. I learned that the hard way during attempt number four.
Equipment Needed
You don’t need a fancy kitchen to make this pie, but having the right tools makes everything easier. Here’s what you’ll need:
- 9-inch pie dish (glass or ceramic works best — metal can sometimes lead to uneven browning)
- Rolling pin (I use a simple wooden one, and it works perfectly)
- Large mixing bowls (one for the dough, one for the filling)
- Pastry cutter or two forks (for cutting butter into flour — or you can use your hands if they run cold)
- Sharp knife or apple slicer (for uniform apple slices)
- Measuring cups and spoons (precision matters in baking)
- Pastry brush (for the egg wash — a silicone one is easy to clean)
- Parchment paper (for rolling out dough and catching spills)
- Plastic wrap (for chilling the dough)
- Baking sheet (place it under the pie in the oven to catch any drips)
If you don’t have a pastry cutter, two forks work just fine — it just takes a little longer. And if you’re really in a pinch, you can even use a food processor for the dough. Just be careful not to over-process it, or your crust will be tough instead of flaky. I’ve made this pie with a $5 rolling pin from the grocery store and it turned out great. Don’t let fancy equipment stop you.
Preparation Method
Alright, let’s get to the fun part. I’ve broken this down into clear steps so you can follow along without any confusion. Take your time with each stage — good pie is worth the effort.
Step 1: Make the Pie Dough
In a large bowl, whisk together the flour, salt, and sugar. Add the cold butter cubes and toss them in the flour to coat. Using a pastry cutter or two forks, cut the butter into the flour until the mixture looks like coarse meal with some pea-sized butter pieces remaining. These little butter chunks are what create those beautiful flaky layers, so don’t overwork it.
Drizzle 6 tablespoons of ice water over the mixture and stir with a fork until the dough starts to come together. If it seems dry, add more water one tablespoon at a time. The dough should hold together when you squeeze a handful of it. Turn it out onto a lightly floured surface, divide it in half, and shape each half into a disc. Wrap each disc in plastic wrap and refrigerate for at least 1 hour — or up to 2 days if you’re planning ahead.
Step 2: Prepare the Apple Filling
While the dough chills, make the filling. In a large bowl, combine the sliced apples with both sugars, cinnamon, nutmeg, cardamom, flour, cornstarch, lemon juice, and lemon zest. Toss everything together until the apples are evenly coated. Let this mixture sit for about 15-20 minutes. During this time, the apples will release some of their juices. This is called macerating, and it’s the secret to a filling that’s perfectly thickened, not watery.
After 20 minutes, pour the apple mixture into a large skillet or saucepan over medium heat. Cook for 5-7 minutes, stirring occasionally, until the juices have thickened slightly and the apples are just starting to soften. Remove from heat and let it cool completely. I usually spread it out on a baking sheet to speed up the cooling process. Trust me, this pre-cooking step is a game-changer — no more runny pie!
Step 3: Roll Out the Dough
Preheat your oven to 400°F (200°C). Take one disc of dough out of the fridge and let it sit at room temperature for about 5 minutes — this makes it easier to roll without cracking. On a lightly floured surface, roll the dough into a 12-inch circle, about ⅛-inch thick. Carefully transfer it to your pie dish, gently pressing it into the bottom and up the sides. Don’t stretch the dough, or it will shrink during baking. Trim the excess, leaving about a ½-inch overhang. Pop it in the fridge while you work on the lattice.
Step 4: Create the Lattice Top
Roll out the second disc of dough into another 12-inch circle. Using a sharp knife or a pizza cutter, cut the dough into 10-12 strips, each about ¾-inch wide. Now for the lattice — it’s easier than it looks! Place 5-6 strips vertically across the pie, spacing them about an inch apart. Fold back every other strip halfway, then lay a horizontal strip across the unfolded strips. Unfold the folded strips back over the horizontal strip. Now fold back the strips that were left down, lay another horizontal strip, and repeat until the entire pie is covered. Trim the lattice strips to match the overhang of the bottom crust. Fold the overhang up and over the edges of the lattice, then crimp the edges with your fingers or a fork.
Step 5: Bake the Pie
Place the pie on a baking sheet (this catches any drips and makes cleanup easier). Brush the entire top crust with the egg wash, making sure to get into all the nooks and crannies. Sprinkle generously with coarse sugar. Cut 4-5 small slits in the top to allow steam to escape. Bake at 400°F for 20 minutes, then reduce the temperature to 375°F (190°C) and bake for another 35-40 minutes. The pie is done when the crust is golden brown and the filling is bubbling through the slits. If the edges start browning too quickly, cover them with foil or a pie shield halfway through.
Let the pie cool on a wire rack for at least 3 hours before slicing. I know, I know — the waiting is the hardest part. But if you cut into it while it’s still hot, the filling will run everywhere. Patience pays off here.
Cooking Tips & Techniques
After all those attempts, I’ve learned a few things the hard way. Let me share what really makes a difference so you don’t have to make the same mistakes I did.
Keep everything cold. This is the number one rule of pie crust. Cold butter, cold water, and even a cold bowl if you can manage it. When the cold butter hits the hot oven, it creates steam that lifts the dough into flaky layers. If your butter softens before baking, you’ll end up with a tough, dense crust. I actually pop my flour in the freezer for 10 minutes before I start — it sounds extra, but it works.
Don’t overwork the dough. I ruined my first three attempts by kneading the dough like it was bread. Pie dough should be handled as little as possible. Mix just until it comes together, and if you see streaks of butter, that’s a good thing. Those streaks are what create the flakes.
Use a mix of apple varieties. This was the breakthrough in attempt number seven. One type of apple gives you one-dimensional flavor and texture. A mix of tart and sweet apples creates complexity. Granny Smith for structure and tartness, Honeycrisp for sweetness and juice — that’s my winning combo.
Pre-cook the filling. I cannot stress this enough. Raw apples release a lot of liquid during baking, which leads to a soggy bottom crust. By pre-cooking the filling, you’re evaporating some of that liquid and giving the thickeners a head start. Your crust will thank you.
Let it cool completely. I know it’s tempting to dig in while it’s still warm, but a properly cooled pie holds its shape. The filling sets as it cools, so you get clean slices instead of apple soup on a plate. Three hours on a wire rack is the minimum — overnight is even better.
Variations & Adaptations
One of the best things about this recipe is how adaptable it is. Here are some of my favorite variations:
Gluten-Free Version: Substitute the all-purpose flour with a good gluten-free flour blend that contains xanthan gum. I’ve had great results with Bob’s Red Mill 1-to-1 Baking Flour. The dough will be a bit more delicate, so handle it gently. Everything else stays the same.
Vegan Option: Use cold coconut oil or vegan butter in place of regular butter. For the egg wash, brush the top with a mixture of 1 tablespoon maple syrup and 1 tablespoon non-dairy milk. The crust won’t be quite as flaky, but it’ll still be delicious.
Spice It Up: Add ¼ teaspoon of ground ginger and a pinch of cloves for a more complex spice profile. This is my go-to for fall baking — it makes the whole house smell like a holiday candle.
Caramel Apple Pie: Drizzle ¼ cup of homemade or store-bought caramel sauce over the apples before adding the lattice top. It adds a rich, buttery sweetness that takes this pie over the top. Just be careful not to add too much, or the filling will be too runny.
Mini Hand Pies: Use a round cookie cutter to cut the dough into circles, fill with a spoonful of the apple mixture, fold over, and crimp the edges. Bake at 375°F for 20-25 minutes. These are perfect for lunchboxes or parties.
Serving & Storage Suggestions
This pie is wonderful served slightly warm or at room temperature. If you want to warm it up, pop individual slices in a 300°F oven for about 10 minutes — the microwave will make the crust soggy. A scoop of vanilla ice cream is the classic pairing, but a dollop of freshly whipped cream or a drizzle of caramel sauce works beautifully too.
For drinks, a cup of hot coffee or a glass of cold milk is perfect. If you’re serving this for a holiday dinner, a crisp apple cider or a warm mug of mulled wine complements the flavors wonderfully.
Storage: Cover the pie loosely with foil or plastic wrap and store at room temperature for up to 2 days. After that, transfer it to the refrigerator for up to 4 more days. The crust will soften slightly in the fridge, but the flavor will still be fantastic.
Freezing: You can freeze the unbaked pie for up to 3 months. Assemble the pie completely but don’t brush with egg wash or sprinkle with sugar. Wrap it tightly in plastic wrap, then foil. When you’re ready to bake, brush with egg wash, sprinkle with sugar, and bake directly from frozen — just add 15-20 minutes to the baking time. You can also freeze baked pie slices individually for quick desserts.
Reheating: To bring back that fresh-baked texture, reheat slices in a 350°F oven for 10-12 minutes. The crust will crisp back up and the filling will get warm and gooey again. It’s almost as good as the day you baked it.
Nutritional Information & Benefits
Let’s be real — this is a treat, not a health food. But it’s made with real ingredients, and that counts for something. Each slice (based on 8 servings) contains approximately:
- Calories: 420
- Fat: 18g
- Carbohydrates: 62g
- Fiber: 4g
- Sugar: 38g
- Protein: 4g
Apples are a good source of fiber and vitamin C, and cinnamon has been studied for its anti-inflammatory properties. The butter and sugar are there for flavor and texture, and honestly, a slice of homemade pie made with love and real ingredients is better for your soul than anything processed from a box. I believe in balance — enjoy your pie, savor every bite, and don’t feel guilty about it. That’s what real food is all about.
FAQs
Why did my pie crust shrink during baking?
This usually happens when the dough is stretched too much when you’re fitting it into the pie dish. Instead of stretching, gently lift the dough and let it settle into the dish. Also, make sure your dough is well-chilled before baking — warm dough shrinks more.
Can I use pre-made pie crust for this recipe?
You absolutely can! Store-bought crust works in a pinch, especially if you’re short on time. Just know that homemade crust has a flakier texture and richer flavor. If you go with pre-made, look for the refrigerated kind in the dairy section — it’s usually better than the frozen ones.
How do I prevent the bottom crust from getting soggy?
Pre-cooking the filling is the best way to prevent a soggy bottom. You can also sprinkle a thin layer of breadcrumbs or ground almonds on the bottom crust before adding the filling — they absorb excess liquid and add a nice texture.
Can I make this pie ahead of time?
Yes! You can make the dough up to 2 days ahead and keep it in the fridge. The filling can also be prepared a day in advance and stored in the refrigerator. You can even assemble the entire pie (without the egg wash) and refrigerate it for up to 24 hours before baking.
What’s the best way to get clean slices?
Let the pie cool completely — at least 3 hours, preferably longer. Use a sharp chef’s knife and wipe it clean between slices. For the first slice, cut all the way through and use a pie server to lift it out gently. Patience is the secret here!
Conclusion
This homemade cinnamon apple pie with lattice crust is more than just a dessert — it’s a labor of love that pays off in every single bite. After all those failed attempts and messy kitchens, I can honestly say this recipe is worth every minute of effort. The flaky crust, the perfectly spiced filling, the gorgeous lattice top — it all comes together to create something truly special.
I hope you give this recipe a try, whether it’s for a holiday gathering, a cozy weekend baking project, or just because you deserve a really good slice of pie. Don’t be afraid to make it your own — swap in your favorite apples, adjust the spices, or experiment with the lattice pattern. That’s the beauty of homemade baking.
When you make this pie, I’d love to hear how it turns out! Leave a comment below and let me know if you tried any variations or if this recipe brought back any memories for you. And if you snap a photo, tag me on social media — I love seeing your creations. Happy baking, friend. You’ve got this!
Pin This Recipe!
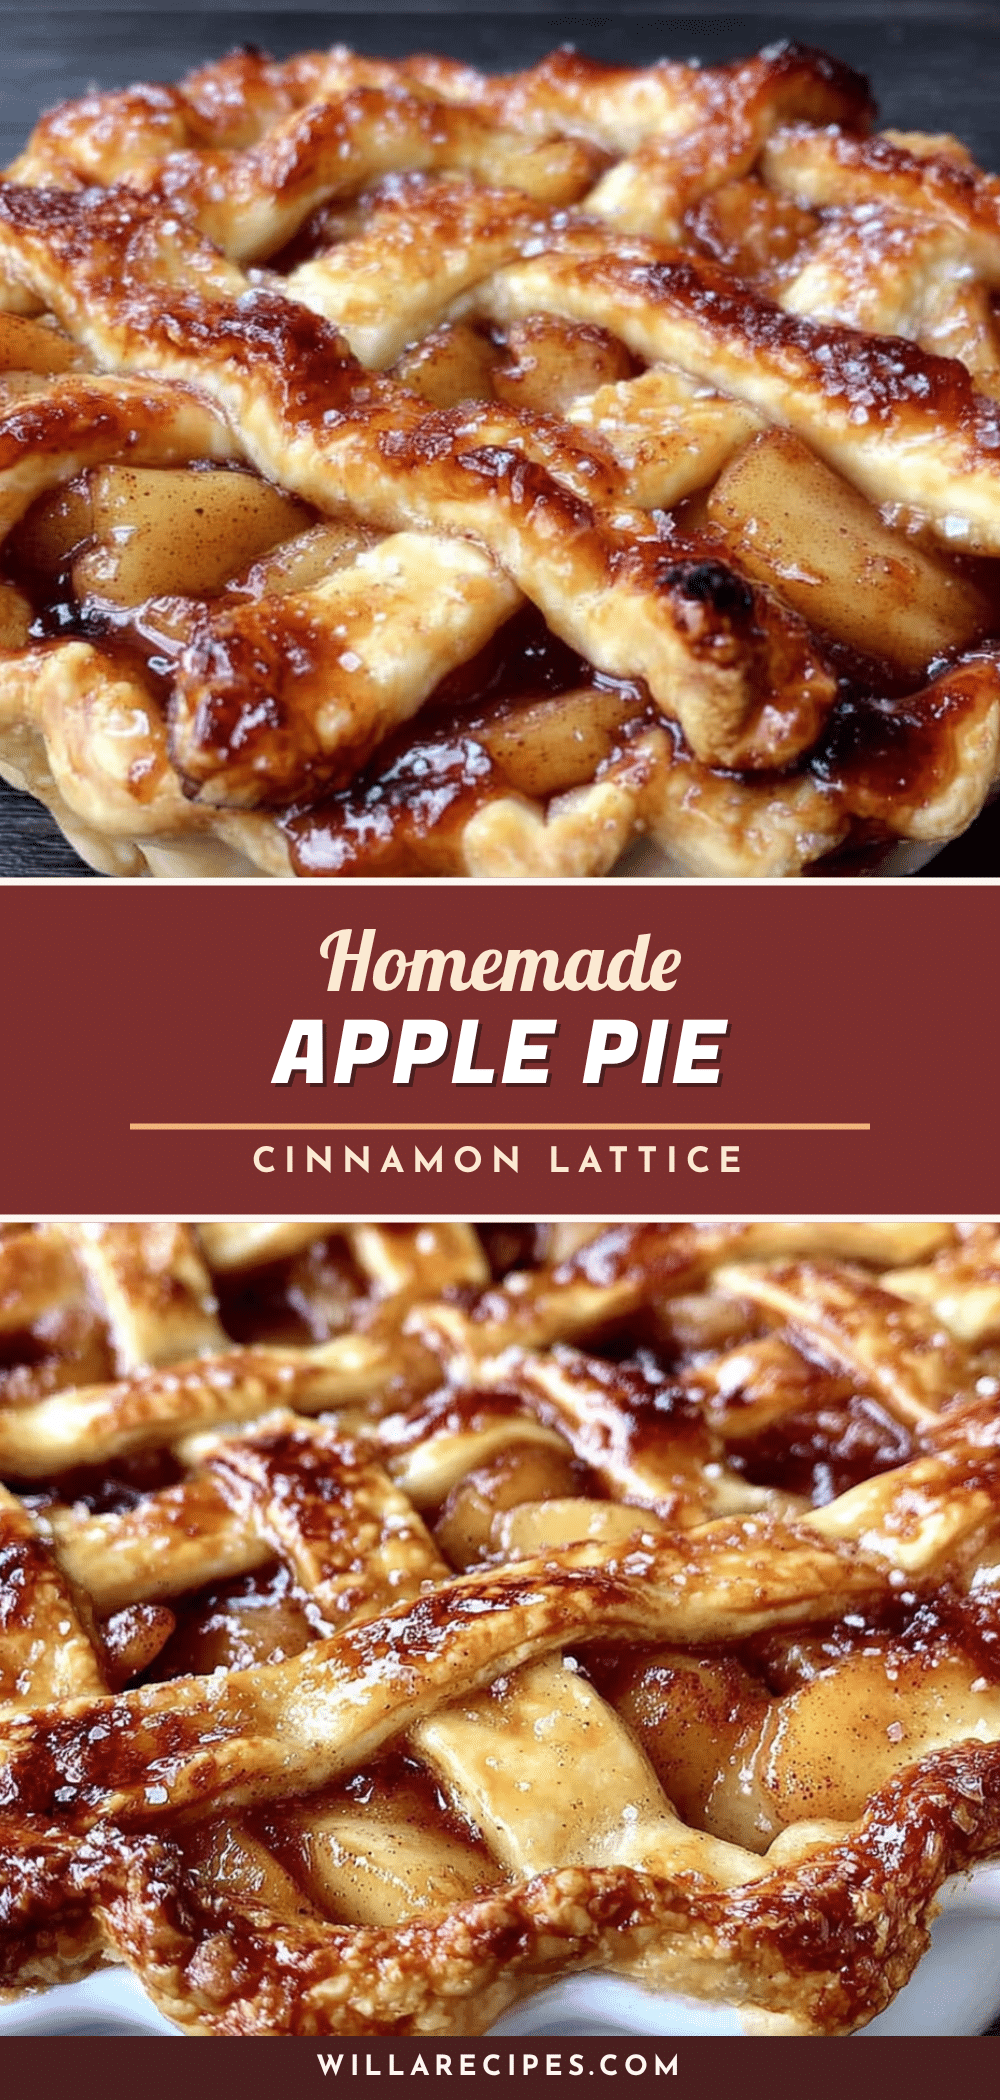
Best Homemade Cinnamon Apple Pie with Easy Lattice Crust
This homemade cinnamon apple pie features a perfectly spiced filling and a beautiful lattice crust. After twelve attempts, this recipe delivers a flaky, never-soggy pie that tastes just like the one from a beloved bakery.
- Prep Time: 30 minutes
- Cook Time: 55 minutes
- Total Time: 1 hour 25 minutes (plus chilling and cooling time)
- Yield: 8 servings 1x
- Category: Dessert
- Cuisine: American
Ingredients
- 2 ½ cups all-purpose flour
- 1 teaspoon fine sea salt
- 1 tablespoon granulated sugar
- 1 cup unsalted butter, very cold and cut into small cubes
- 6–8 tablespoons ice water
- 6–7 medium apples (mix of Granny Smith and Honeycrisp), peeled, cored, and sliced ¼-inch thick
- ¾ cup granulated sugar
- ¼ cup packed brown sugar
- 2 teaspoons ground cinnamon
- ¼ teaspoon ground nutmeg
- ⅛ teaspoon ground cardamom
- 2 tablespoons all-purpose flour
- 1 tablespoon cornstarch
- 1 tablespoon lemon juice
- 1 teaspoon lemon zest
- 2 tablespoons unsalted butter, cut into small pieces
- 1 large egg, beaten with 1 tablespoon water
- 1 tablespoon coarse sugar (turbinado or demerara)
Instructions
- Make the pie dough: In a large bowl, whisk together flour, salt, and sugar. Add cold butter cubes and toss to coat. Using a pastry cutter or two forks, cut butter into flour until mixture resembles coarse meal with some pea-sized butter pieces. Drizzle 6 tablespoons ice water over mixture and stir with a fork until dough starts to come together. Add more water if needed. Turn dough onto a floured surface, divide in half, shape into discs, wrap in plastic wrap, and refrigerate for at least 1 hour…
- Prepare the apple filling: In a large bowl, combine sliced apples with both sugars, cinnamon, nutmeg, cardamom, flour, cornstarch, lemon juice, and lemon zest. Toss to coat. Let sit for 15-20 minutes to macerate. Pour mixture into a large skillet or saucepan over medium heat. Cook for 5-7 minutes, stirring occasionally, until juices thicken and apples start to soften. Remove from heat and let cool completely.
- Roll out the dough: Preheat oven to 400°F (200°C). Take one disc of dough and let sit at room temperature for 5 minutes. On a floured surface, roll into a 12-inch circle, about ⅛-inch thick. Transfer to a 9-inch pie dish, pressing gently into bottom and up sides. Trim excess, leaving ½-inch overhang. Refrigerate while preparing lattice.
- Create the lattice top: Roll out second disc into a 12-inch circle. Cut into 10-12 strips, each about ¾-inch wide. Place 5-6 strips vertically across the pie, spacing about 1 inch apart. Fold back every other strip halfway, lay a horizontal strip across the unfolded strips, then unfold the folded strips back over. Repeat with remaining strips until pie is covered. Trim lattice strips to match overhang. Fold overhang up and over edges of lattice, then crimp edges.
- Bake the pie: Place pie on a baking sheet. Brush top crust with egg wash, getting into all nooks. Sprinkle generously with coarse sugar. Cut 4-5 small slits in top for steam to escape. Bake at 400°F for 20 minutes, then reduce temperature to 375°F (190°C) and bake for another 35-40 minutes, until crust is golden brown and filling is bubbling. If edges brown too quickly, cover with foil. Let cool on a wire rack for at least 3 hours before slicing.
Notes
Keep all ingredients cold for flaky crust. Do not overwork the dough. Pre-cooking the filling prevents a soggy bottom. Let pie cool completely before slicing for clean slices. Can be made ahead: dough can be refrigerated for up to 2 days, filling can be prepared a day ahead, and assembled pie can be refrigerated for up to 24 hours before baking.
Nutrition
- Serving Size: 1 slice
- Calories: 420
- Sugar: 38
- Sodium: 320
- Fat: 18
- Saturated Fat: 11
- Carbohydrates: 62
- Fiber: 4
- Protein: 4
Keywords: apple pie, cinnamon apple pie, lattice crust, homemade pie, fall dessert, Thanksgiving pie


