The Halloween block party was in three hours and I’d completely forgotten. Everyone else would be bringing elaborate themed desserts—I’d seen the neighbor’s Pinterest board, and let me tell you, it was intimidating. I had a block of cheddar, some butter, and half a bag of flour in my pantry. Honestly, I almost just grabbed a bag of chips on the way out. But then I remembered these cheese straws I’d made once for a random Tuesday snack, and a terrible, wonderful idea hit me. I mean, what looks more like a severed finger than a cheesy breadstick? The panic was real, but so was the desperate laughter as I started shaping dough into knobby little fingers. I won the block party’s “Most Creative Dish” award, and I’m pretty sure it was because people couldn’t stop laughing—and eating. This recipe is the one that turned my Halloween panic into a yearly tradition, and it might just save your next spooky gathering too.
Why You’ll Love This Recipe
Let’s face it—Halloween food can be a mixed bag. You’ve got the creepy-looking stuff that tastes like cardboard, and then you’ve got the delicious stuff that looks nothing like the holiday. These Spooky Severed Finger Cheese Straws nail both. They’re genuinely delicious, and they look grotesque enough to make your guests do a double-take.
- Quick & Easy: From fridge to table in under 30 minutes. Perfect for last-minute Halloween panic—trust me, I’ve been there.
- Simple Ingredients: You probably have everything already. Butter, flour, cheese, and a few pantry staples. No weird gelatin molds or specialty food coloring required.
- Perfect for Halloween Parties: These are the star of any spooky spread. Kids love the gross factor, adults love the cheesy goodness.
- Crowd-Pleaser: I’ve made these for three Halloweens running, and they disappear faster than the candy bowl.
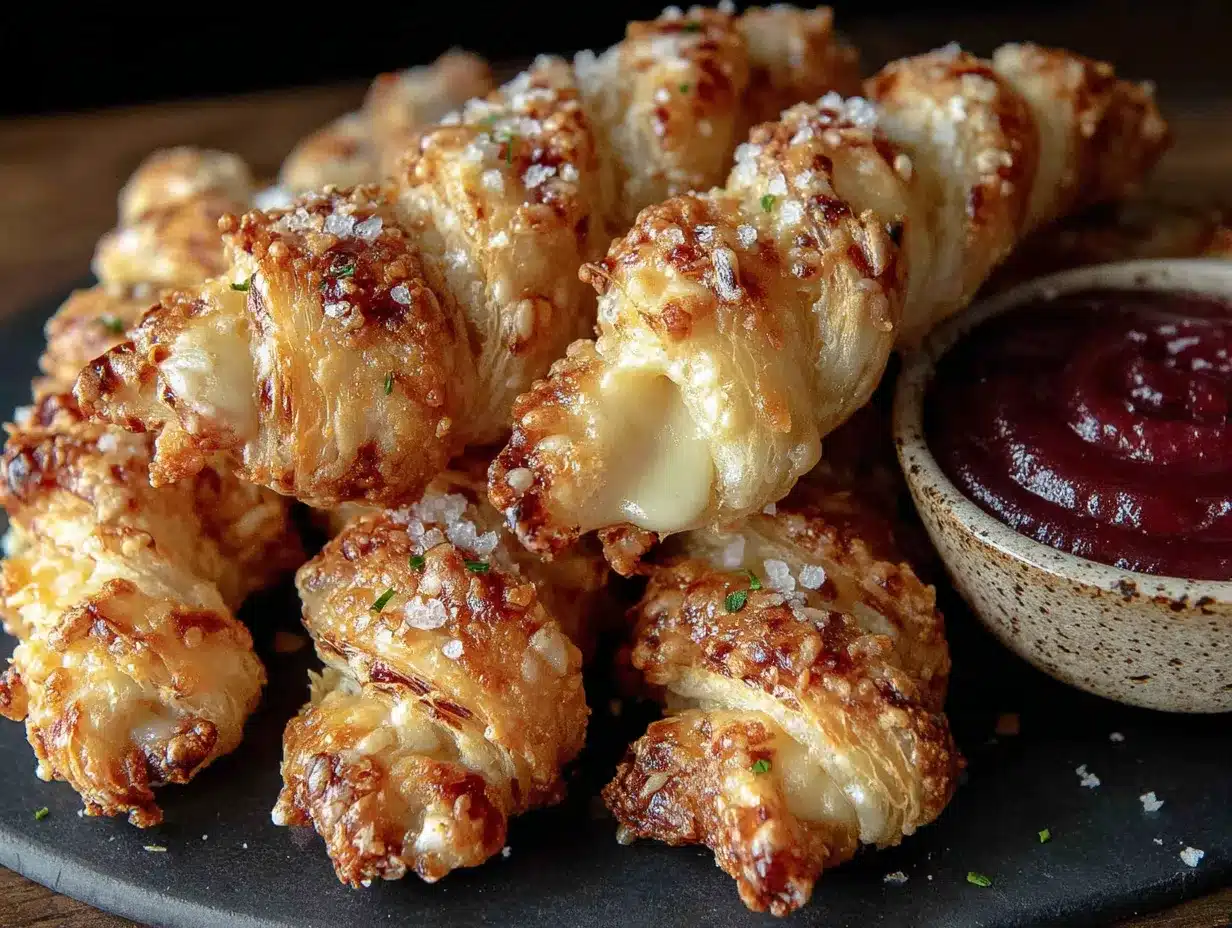
- Unbelievably Delicious: The texture is perfectly flaky, the cheese is sharp and savory, and that little almond “fingernail” adds a satisfying crunch.
What makes these different from other Halloween recipes? It’s the technique. I’ve tested this dough at least a dozen times to get that perfect balance of flaky and sturdy—you need a cheese straw that won’t crumble when someone’s pretending to scream over it. Plus, the almond “fingernail” trick? Pure genius. It’s the detail that sells the illusion.
This recipe isn’t just good—it’s the kind that makes you close your eyes after the first bite. It’s Halloween fun reimagined: spooky, savory, and so satisfying you’ll make them even when it’s not October.
What Ingredients You Will Need
This recipe uses simple, wholesome ingredients to deliver bold flavor and satisfying texture without the fuss. Most of these are pantry staples, which makes this the perfect last-minute Halloween trick.
For the Cheese Straw Dough
- 1 ½ cups all-purpose flour (spooned and leveled—don’t scoop straight from the bag or you’ll get too much)
- ½ teaspoon salt (fine sea salt works best)
- ¼ teaspoon cayenne pepper (optional, but gives a nice little kick—adds to the “spooky” heat)
- ½ teaspoon garlic powder (trust me on this one, it makes the flavor deeper)
- ½ cup unsalted butter, cold and cut into small cubes (I use Kerrygold for the best flavor)
- 1 ½ cups sharp cheddar cheese, finely shredded (buy a block and shred it yourself—pre-shredded has anti-caking agents that mess with the texture)
- 3-4 tablespoons ice-cold water (you might not need all of it)
For the “Severed Finger” Decoration
- 24 whole almonds (blanched or natural, either works—these become the fingernails)
- 1 egg, beaten with 1 tablespoon water (for egg wash, gives that golden, slightly creepy sheen)
- Paprika or smoked paprika (for dusting—makes them look like they’ve been “dirty” from the grave)
- Red food coloring or beet powder (optional—for a drop of “blood” at the cuticle, if you’re feeling extra twisted)
A quick note on the cheese: I’ve tried this with mild cheddar, and it just doesn’t have the same punch. Sharp cheddar gives that savory depth that makes these irresistible. If you want to get fancy, mix in a little Parmesan or Gruyère for an even nuttier flavor. For a dairy-free version, use a good-quality vegan butter and a sharp vegan cheddar—I’ve tested it with Miyoko’s and it works, though the texture is slightly less flaky.
For the almonds, make sure they’re whole. Slivered almonds just don’t look like fingernails, you know? I learned that the hard way.
Equipment Needed
- Large mixing bowl (or a food processor if you’re in a rush)
- Pastry cutter or two forks (for cutting butter into flour)
- Rolling pin (a wine bottle works in a pinch—I’ve done it)
- Sharp knife or pizza cutter (for cutting the dough into finger shapes)
- Baking sheet, lined with parchment paper (non-negotiable—these are buttery and will stick)
- Pastry brush (for egg wash)
- Small bowl (for the egg wash)
- Cooling rack (optional but helpful)
If you don’t have a pastry cutter, honestly, two forks work just fine. My grandmother used her hands—she said the warmth helped the butter incorporate. I prefer the food processor method when I’m in a hurry, but be careful not to over-process or you’ll get tough dough instead of flaky straws.
Preparation Method
Preheat your oven to 375°F (190°C). Line a baking sheet with parchment paper. This is not the time to skip the parchment—trust me, I’ve scraped melted cheese off a bare pan and it’s not fun.
- Make the dough. In a large bowl, whisk together the flour, salt, cayenne (if using), and garlic powder. Add the cold butter cubes. Using a pastry cutter or two forks, cut the butter into the flour until the mixture looks like coarse crumbs with some pea-sized butter pieces remaining. You want visible butter—that’s what creates flaky layers.
- Add the cheese. Toss in the shredded cheddar and mix gently with a fork until the cheese is evenly distributed. Don’t overmix—you want little pockets of cheese throughout.
- Add the water. Sprinkle 3 tablespoons of ice-cold water over the mixture and stir with a fork until the dough starts to come together. If it seems dry, add the remaining tablespoon, one teaspoon at a time. The dough should hold together when squeezed but not be sticky.
- Chill the dough. Form the dough into a disc, wrap it in plastic wrap, and refrigerate for at least 20 minutes. This is crucial—warm dough is impossible to shape into fingers. I once skipped this step and ended up with blobs that looked more like zombie toes than severed fingers.
- Shape the fingers. On a lightly floured surface, roll the dough out to about ¼-inch thickness. Use a sharp knife or pizza cutter to cut rectangles about 3-4 inches long and ¾-inch wide. These are your “fingers.” Round the top slightly and make a small indent near the top to look like a knuckle. Use the back of a knife to score 2-3 small lines for knuckle creases.
- Add the fingernails. Press one whole almond firmly into the rounded end of each finger-shaped dough piece. The pointed end of the almond should face outward. Press it in until it’s secure—it’ll stay put during baking.
- Apply egg wash. Brush each finger with the beaten egg mixture. This gives them that golden, slightly glossy look that’s both appetizing and slightly unsettling.
- Dust with paprika. Lightly sprinkle paprika over the fingers. This gives them a “dirty” look, like they’ve just crawled out of a grave. For extra effect, dab a tiny bit of red food coloring at the base of the “fingernail” to look like blood.
- Bake. Place the fingers on the prepared baking sheet, spacing them about 1 inch apart. Bake for 12-15 minutes, or until golden brown and puffed. The cheese will be bubbly and the edges will be crisp.
- Cool. Let them cool on the baking sheet for 5 minutes, then transfer to a cooling rack. They’ll crisp up more as they cool. Don’t try to move them immediately—they’re fragile when hot.
Your kitchen will smell incredible at this point. Like a buttery, cheesy, slightly spooky bakery.
Cooking Tips & Techniques
Here’s the thing about these cheese straws—they look simple, but there are a few tricks I’ve learned the hard way.
Keep everything cold. This is the number one rule for flaky pastry. If your butter starts to soften, pop the dough back in the fridge for 10 minutes. I once made these on a hot September afternoon without air conditioning, and the dough turned into a greasy mess. Never again.
Don’t overwork the dough. The more you handle it, the tougher it gets. You want to see little specks of butter in the dough—that’s what creates those flaky layers when the butter melts in the oven. If the dough looks smooth and uniform, you’ve gone too far.
Use a sharp knife. A dull knife will drag the dough and ruin your finger shapes. I use a pizza cutter for straight lines—it’s faster and cleaner.
Make the knuckles convincing. Use the back of a butter knife to gently score 2-3 lines near the middle of each finger. Don’t cut all the way through—just enough to create the illusion of knuckles. And make the lines slightly uneven. Real fingers aren’t perfectly symmetrical, you know?
The almond trick. Press the almond in firmly, but not so hard that it disappears into the dough. It should look like a fingernail growing out of the “finger.” If the almond falls off during baking, don’t panic—just press it back on while the straw is still warm.
I’ll be honest—my first batch looked more like deformed sausages than severed fingers. The knuckles were wrong, the almonds were crooked, and one of them actually looked like a thumb. But you know what? Everyone still loved them. Imperfection adds to the creepy factor.
Variations & Adaptations
One of the best things about this recipe is how easy it is to customize. Here are a few variations I’ve tried over the years:
Gluten-Free Version
Substitute the all-purpose flour with a 1:1 gluten-free baking flour blend. I’ve tested this with King Arthur’s Measure for Measure blend and it works beautifully. The texture is slightly more crumbly, but the creepy factor is still there.
Vegan Option
Use vegan butter (I recommend Miyoko’s) and a sharp vegan cheddar. For the egg wash, brush with a mixture of plant-based milk and a pinch of turmeric for color. The texture won’t be as flaky, but the flavor is surprisingly close.
Spicy Bloody Fingers
Add ½ teaspoon of smoked paprika and ¼ teaspoon of chipotle powder to the dough. After baking, drizzle with a little Sriracha or hot honey at the “cuticle” for a bloody, spicy effect. These are dangerously addictive.
Herb-Infused Zombie Fingers
Mix in 1 tablespoon of finely chopped fresh rosemary or thyme with the cheese. The herbs give the fingers a slightly “earthy” look, like they’ve been dug up from a grave. It’s a subtle touch, but it adds to the theme.
Air Fryer Method
Cook at 350°F (175°C) for 8-10 minutes, flipping halfway through. They’ll be slightly less golden but still perfectly flaky. Just don’t overcrowd the basket.
My personal favorite variation? The Spicy Bloody Fingers. I made them for a Halloween party last year and someone actually asked if the “blood” was real. I just smiled and said, “Wouldn’t you like to know?”
Serving & Storage Suggestions
These are best served warm, right out of the oven, when the cheese is still gooey and the butter is doing its thing. Arrange them on a platter in a way that looks like a severed hand—fan them out from a central point, with the “fingernails” facing outward. For maximum creep factor, serve them on a black or dark red plate.
They pair beautifully with a creamy dip. Try a simple ranch dressing with a drop of green food coloring for a “moldy” effect, or a spicy marinara that looks like blood. For drinks, a dark stout or a smoky mezcal cocktail complements the savory cheese perfectly.
Storage: Store leftover cheese straws in an airtight container at room temperature for up to 3 days. Don’t refrigerate them—the fridge will make them soggy. If they lose their crispness, reheat them in a 350°F (175°C) oven for 3-5 minutes. The microwave will turn them into sad, rubbery messes, so avoid it at all costs.
Freezing: You can freeze the unbaked fingers on a baking sheet until solid, then transfer to a freezer bag. Bake directly from frozen, adding 2-3 minutes to the baking time. I do this every October—make a triple batch, freeze them, and bake as needed for parties.
Honestly, these taste even better the next day. The flavors meld together, and the texture stays perfectly crisp. Just don’t expect them to last that long—they have a way of disappearing.
Nutritional Information & Benefits
Per serving (2 cheese straws): Approximately 180 calories, 12g fat, 14g carbohydrates, 6g protein, 1g fiber. These numbers will vary based on the type of cheese and butter you use.
While these are definitely an indulgence, they do offer some nutritional perks. Cheese is a good source of calcium and protein, and almonds provide healthy fats and vitamin E. The cayenne pepper, if you choose to include it, can boost metabolism and add anti-inflammatory benefits.
For dietary considerations: This recipe contains gluten, dairy, and eggs. For a gluten-free version, use a 1:1 gluten-free flour blend. For a dairy-free version, use vegan butter and cheese. The almond “fingernails” are tree nuts, so skip them for a nut-free version—use a small piece of dried apricot or a cashew instead.
I’m not going to pretend these are health food—they’re Halloween treats, after all. But using high-quality ingredients and real cheese means you’re getting more nutritional value than you would from a bag of artificially colored candy. Everything in moderation, right?
Conclusion
These Spooky Severed Finger Cheese Straws are proof that Halloween food can be both terrifying and delicious. They’re quick enough for last-minute panic, simple enough for beginner bakers, and creepy enough to impress even the most jaded party guests. Whether you’re hosting a haunted house party, bringing a dish to a potluck, or just want to surprise your kids with something fun, these cheese straws deliver every time.
Don’t be afraid to experiment with the variations—make them spicy, make them herby, make them as grotesque as you want. The best part of this recipe is how customizable it is. And honestly, the more imperfect your fingers look, the more authentic they seem. Real severed fingers aren’t perfect, you know?
I’d love to hear how yours turn out. Did you add extra “blood”? Did your kids scream when they saw them? Share your creations in the comments below, and don’t forget to tag me on Pinterest when you post your spooky spread. Happy Halloween, and happy baking!
Frequently Asked Questions
Can I make these cheese straws ahead of time?
Absolutely. You can prepare the dough up to 2 days in advance and keep it wrapped in the fridge. You can also shape the fingers and freeze them unbaked for up to 3 months. Just bake from frozen, adding a few extra minutes to the cooking time.
Why did my cheese straws spread out and lose their finger shape?
This usually happens if the dough was too warm when it went into the oven. Make sure your butter is cold and your dough is well-chilled before baking. If you notice spreading, pop the shaped fingers in the fridge for 15 minutes before baking.
Can I use pre-shredded cheese?
You can, but I don’t recommend it. Pre-shredded cheese contains anti-caking agents like potato starch or cellulose, which can make the dough gummy and affect the texture. Grating your own cheese takes two extra minutes and makes a noticeable difference.
What can I use instead of almonds for the fingernails?
If you have a nut allergy or just don’t have almonds on hand, try using a small piece of dried apricot, a cashew, or even a sliver of bell pepper. For a really creepy effect, use a blanched almond that’s been soaked in red food coloring—it looks like a bloody nail.
How do I make these look even more realistic?
Try adding a drop of red food coloring at the base of the almond “fingernail” after baking. You can also brush them with a little olive oil to give them a slightly sweaty, “undead” sheen. And don’t forget the knuckle lines—they make all the difference.
Pin This Recipe!
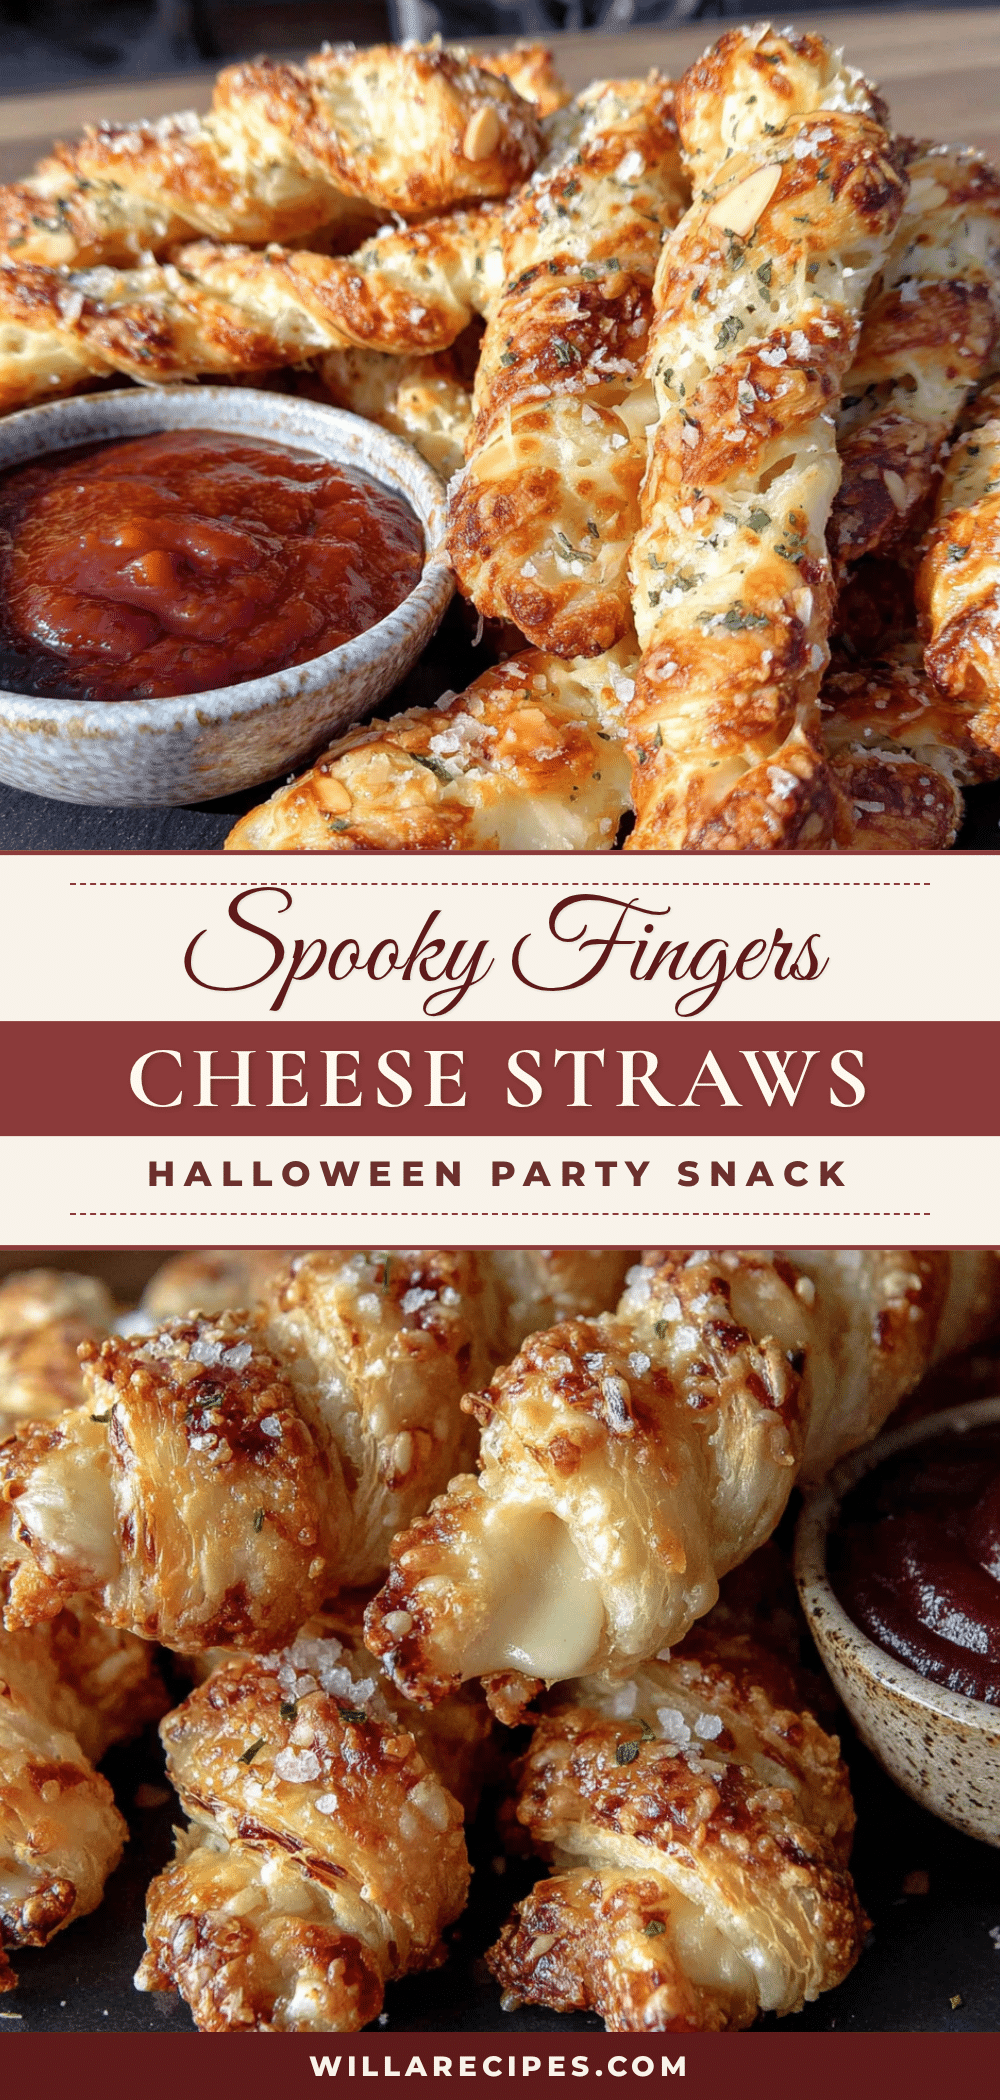
Best Spooky Severed Finger Cheese Straws Recipe for Halloween
These Spooky Severed Finger Cheese Straws are genuinely delicious and grotesque enough to make your guests do a double-take. Quick, easy, and perfect for last-minute Halloween panic, they’re the star of any spooky spread.
- Prep Time: 15 minutes
- Cook Time: 15 minutes
- Total Time: 30 minutes
- Yield: 24 cheese straws (12 servings of 2 straws each) 1x
- Category: Appetizer
- Cuisine: American
Ingredients
- 1 ½ cups all-purpose flour
- ½ teaspoon fine sea salt
- ¼ teaspoon cayenne pepper (optional)
- ½ teaspoon garlic powder
- ½ cup unsalted butter, cold and cut into small cubes
- 1 ½ cups sharp cheddar cheese, finely shredded
- 3–4 tablespoons ice-cold water
- 24 whole almonds (blanched or natural)
- 1 egg, beaten with 1 tablespoon water
- Paprika or smoked paprika for dusting
- Red food coloring or beet powder (optional)
Instructions
- Preheat oven to 375°F (190°C). Line a baking sheet with parchment paper.
- In a large bowl, whisk together flour, salt, cayenne (if using), and garlic powder. Add cold butter cubes. Using a pastry cutter or two forks, cut butter into flour until mixture resembles coarse crumbs with some pea-sized butter pieces remaining.
- Toss in shredded cheddar and mix gently with a fork until evenly distributed. Do not overmix.
- Sprinkle 3 tablespoons of ice-cold water over mixture and stir with a fork until dough starts to come together. If dry, add remaining water one teaspoon at a time. Dough should hold together when squeezed but not be sticky.
- Form dough into a disc, wrap in plastic wrap, and refrigerate for at least 20 minutes.
- On a lightly floured surface, roll dough to about ¼-inch thickness. Cut rectangles about 3-4 inches long and ¾-inch wide. Round the top slightly and make a small indent near the top to look like a knuckle. Use the back of a knife to score 2-3 small lines for knuckle creases.
- Press one whole almond firmly into the rounded end of each finger-shaped dough piece, pointed end outward.
- Brush each finger with beaten egg mixture.
- Lightly sprinkle paprika over the fingers. For extra effect, dab a tiny bit of red food coloring at the base of the ‘fingernail’.
- Place fingers on prepared baking sheet, spacing about 1 inch apart. Bake for 12-15 minutes, until golden brown and puffed.
- Let cool on baking sheet for 5 minutes, then transfer to a cooling rack.
Notes
Keep everything cold for flaky pastry. Do not overwork the dough. Use a sharp knife for clean cuts. For realistic fingers, make knuckle lines slightly uneven. If almond falls off during baking, press back on while warm. Store in airtight container at room temperature for up to 3 days. Reheat in 350°F oven for 3-5 minutes if needed. Freeze unbaked fingers for up to 3 months.
Nutrition
- Serving Size: 2 cheese straws
- Calories: 180
- Sugar: 1
- Sodium: 220
- Fat: 12
- Saturated Fat: 7
- Carbohydrates: 14
- Fiber: 1
- Protein: 6
Keywords: Halloween, cheese straws, severed fingers, spooky, party appetizer, cheddar, almond fingernails


