Our neighborhood potluck was in four hours and I’d completely forgotten. I mean, completely. I was standing in my kitchen at 3 PM on a Saturday, staring at a half-empty carton of apple cider and wondering how everyone else managed to bring those gorgeous, multi-layered desserts that look like they belong on a magazine cover. My neighbor Sarah always brings a from-scratch chocolate layer cake. The guy three doors down makes a bourbon pecan pie that takes him two days. And me? I had some apples, some oats, and a desperate hope that no one would notice I’d spaced out entirely.
Let me tell you, there’s something about time pressure that brings out the creativity. Or maybe it’s just panic. I grabbed that apple cider and started thinking—could I reduce it down into something caramel-like? Honestly, I wasn’t sure it would work. But I’d been playing around with cider reductions for a while, and I figured, why not? If it flopped, at least I’d have a funny story about the time I brought a sad bowl of oatmeal to the potluck.
The timer was ticking, and I was moving fast. The apples got chopped in a kind of frenzy, the topping came together in a single bowl, and I slid it into the oven with about fifteen minutes to spare before I had to leave. I didn’t even have time to clean up the mess—there was flour on the counter, apple peels in the sink, and a sticky puddle of cider syrup on the stove. It was not my finest moment in terms of kitchen organization.
But here’s the thing: when I pulled that crisp out of the oven, bubbling and golden and smelling like autumn in a baking dish, I knew I had something. The cider caramel had turned into this deep, rich, almost buttery sauce that was pooling around the tender apples. The oat topping was perfectly crisp. And when I brought it to the potluck, still warm, and set it next to Sarah’s perfect cake? Well, let’s just say my dish was empty before the cake was even sliced. Maybe you’ve been there—the surprise victory when you least expect it. That’s this recipe. It’s the underdog that wins every time.
Why You’ll Love This Recipe
This cozy apple cider caramel crisp isn’t just another fall dessert—it’s the one that’ll make you close your eyes after the first bite. I’ve tested this recipe about seven times now (yes, really), and each time I’m amazed at how something so simple can taste so special. Here’s why it works:
- Quick & Easy: Comes together in under 45 minutes from start to finish. Perfect for those last-minute cravings or surprise dinner guests.
- Simple Ingredients: No fancy grocery trips needed. You probably have most of these in your kitchen right now—apples, oats, butter, and that half-gallon of apple cider in your fridge.
- Perfect for Two: This is a small-batch recipe designed for cozy nights in. No leftovers to tempt you, no waste—just the right amount for sharing (or not, I won’t judge).
- Crowd-Pleaser: I’ve brought this to potlucks, family dinners, and even a book club meeting. It gets rave reviews every single time.
- Unbelievably Delicious: The secret is the reduced cider caramel. It’s not complicated, but it tastes like you spent hours in the kitchen.
What makes this recipe different from all the other apple crisps out there? It’s the cider caramel. Most recipes just toss some apple slices with sugar and cinnamon and call it a day. But reducing apple cider down to a syrupy, almost-taffy consistency? That’s where the magic happens. The caramel coats every apple slice in a layer of concentrated apple flavor that’s sweet, tangy, and deeply comforting. Plus, the oat topping has just the right amount of brown sugar and butter to create that perfect crumble—not too dense, not too sandy.
This isn’t just good—it’s the kind of dessert that makes you forget about the stressful day you had. It’s comfort food reimagined: quicker than a pie, more satisfying than plain baked apples, and somehow both rustic and elegant at the same time. Perfect for impressing someone special without all the stress, or for turning a quiet Tuesday night into something memorable.
What Ingredients You Will Need
This recipe uses simple, wholesome ingredients to deliver big flavor without the fuss. Most of these are pantry staples, and the apple cider does double duty as both the caramel base and the liquid that keeps the apples tender.
For the Apple Cider Caramel Sauce
- 1 cup apple cider (fresh or store-bought, both work—just avoid anything with added spices or flavors)
- 2 tablespoons unsalted butter (adds richness and helps the caramel thicken)
- 2 tablespoons brown sugar (light or dark, dark gives a deeper molasses flavor)
- 1/4 teaspoon cinnamon (optional, but I love the extra warmth)
- Pinch of salt (don’t skip this—it balances the sweetness)
For the Apple Filling

- 2 medium apples (I recommend Honeycrisp or Granny Smith—one sweet, one tart for balance)
- 1 tablespoon all-purpose flour (helps thicken the juices as it bakes)
- 1/2 teaspoon cinnamon (the classic fall spice)
- 1/4 teaspoon nutmeg (freshly grated if you have it, pre-ground works fine)
- 1 tablespoon lemon juice (keeps the apples from browning and adds brightness)
For the Crisp Topping
- 1/2 cup old-fashioned rolled oats (not quick oats—they’ll turn mushy)
- 1/4 cup all-purpose flour
- 1/4 cup brown sugar (packed)
- 1/4 teaspoon cinnamon
- Pinch of salt
- 3 tablespoons unsalted butter (cold, cut into small cubes)
I personally recommend using Honeycrisp apples from your local farmer’s market if you can find them—they hold their shape beautifully during baking and have that perfect sweet-tart balance. For the cider, I’ve had great results with Martinelli’s brand, but any unfiltered apple cider works. If you’re feeling adventurous, try using a spiced cider during the holidays for an extra layer of flavor.
Substitution Guidance: For a gluten-free version, swap the all-purpose flour with a 1:1 gluten-free baking blend. Use certified gluten-free oats as well. For a dairy-free option, substitute the butter with a high-quality vegan butter like Miyoko’s—just make sure it’s cold for the topping. If you don’t have apple cider on hand, you can use apple juice, but the caramel won’t be as rich. Add an extra tablespoon of brown sugar to compensate.
Equipment Needed
You don’t need a fancy kitchen to make this recipe. Here’s what you’ll need:
- Two 8-ounce ramekins or one small baking dish (I use a 6-inch cast iron skillet for a rustic look)
- Small saucepan (for reducing the cider caramel)
- Mixing bowls (one medium, one small)
- Sharp knife and cutting board
- Measuring cups and spoons
- Pastry cutter or fork (for cutting butter into the topping)
- Baking sheet (to catch any drips—trust me on this)
If you don’t have ramekins, you can use any oven-safe dish. I’ve made this in a small loaf pan and even in a mug (for a single serving). The baking time might vary slightly, so keep an eye on it. A pastry cutter is nice to have, but two forks or even your fingertips work just as well for the topping—just work quickly so the butter doesn’t warm up too much.
Preparation Method
Alright, let’s get cooking. This comes together faster than you think, so read through the steps first and have everything prepped before you start.
- Preheat your oven to 375°F (190°C). Place a baking sheet on the middle rack—this will catch any bubbly caramel that escapes during baking and save you from a messy oven.
- Make the cider caramel. In a small saucepan, combine 1 cup apple cider, 2 tablespoons butter, 2 tablespoons brown sugar, 1/4 teaspoon cinnamon, and a pinch of salt. Bring to a boil over medium-high heat, stirring occasionally. Once it’s boiling, reduce the heat to medium-low and let it simmer for about 10-12 minutes. You’re looking for it to reduce by about half—it should be syrupy and slightly thickened, like a thin maple syrup. Don’t walk away from it; cider can bubble over quickly. When it’s done, remove from heat and set aside. It will continue to thicken as it cools.
- Prep the apples. While the caramel is simmering, peel and core your 2 apples. Cut them into 1/2-inch chunks—not too thin, or they’ll turn to mush. You want them to hold their shape. Toss the apple chunks with 1 tablespoon flour, 1/2 teaspoon cinnamon, 1/4 teaspoon nutmeg, and 1 tablespoon lemon juice in a medium bowl. Make sure every piece is coated.
- Make the crisp topping. In a separate small bowl, combine 1/2 cup rolled oats, 1/4 cup flour, 1/4 cup brown sugar, 1/4 teaspoon cinnamon, and a pinch of salt. Add the 3 tablespoons of cold cubed butter. Use a pastry cutter, two forks, or your fingertips to work the butter into the dry ingredients until the mixture looks like coarse crumbs with some pea-sized butter pieces remaining. Don’t overwork it—those little butter chunks create the crispy bits.
- Assemble the crisps. Divide the apple mixture evenly between your two ramekins (or your small baking dish). Pour the cider caramel over the apples—about 2-3 tablespoons per ramekin. Don’t use all of it; you want some left for drizzling later. Sprinkle the oat topping evenly over the apples, pressing down gently. Place the ramekins on the baking sheet.
- Bake. Bake for 20-25 minutes, or until the topping is golden brown and the filling is bubbly around the edges. The apples should be tender when pierced with a fork. If the topping is browning too quickly, tent loosely with foil for the last 5 minutes.
- Rest and serve. Let the crisps cool on a wire rack for at least 10 minutes. This is important—the filling needs time to set, and you don’t want to burn your mouth. Drizzle with the reserved cider caramel just before serving.
Pro tip: If you’re making this for a special occasion, sprinkle a little flaky sea salt on top right before serving. It sounds fancy, but it’s really just about balancing the sweetness.
Cooking Tips & Techniques
I’ve made this recipe enough times to know where things can go wrong. Here’s what I’ve learned the hard way:
Don’t rush the caramel reduction. The first time I made this, I got impatient and pulled the caramel off the heat too early. It was watery and didn’t coat the apples properly. You want it to be thick enough that it coats the back of a spoon—think the consistency of warm honey. If you’re unsure, let it go another minute or two. It’s better to reduce it a bit too much (you can always thin it with a splash of cider) than not enough.
Cold butter is your friend. For the crisp topping, the butter needs to be straight from the fridge. If it’s too warm, it’ll melt into the oats and you’ll end up with a dense, pasty topping instead of a crumbly one. I’ve made that mistake on a hot summer day, and it was not pretty. If your kitchen is warm, pop the butter in the freezer for 10 minutes before cutting it in.
Watch your oven like a hawk. Every oven runs a little differently. I’ve burned the topping on a batch because I got distracted folding laundry. Set a timer for 15 minutes and check it—if the topping looks dark golden, it’s done. If not, give it another 5 minutes and check again.
Let it rest. I know it’s tempting to dig in right away, but that 10-minute rest is crucial. The filling needs time to set, and the caramel will thicken slightly as it cools. Plus, you won’t burn your tongue. Trust me on this one—I’ve learned the hard way more than once.
Variations & Adaptations
This recipe is incredibly flexible. Here are some of my favorite ways to switch it up:
- Spiced Apple Version: Add 1/4 teaspoon cardamom and a pinch of cloves to the apple filling. It gives the crisp a chai-like warmth that’s perfect for cold winter nights.
- Pear and Apple Combo: Swap one apple for a ripe but firm Bosc pear. The pear adds a delicate sweetness and a slightly different texture that I absolutely love.
- Nutty Topping: Add 2 tablespoons of chopped pecans or walnuts to the oat topping. Toast them first for extra flavor—just toss them in a dry pan over medium heat for 2-3 minutes.
- Dairy-Free Version: Use coconut oil or vegan butter in both the caramel and the topping. I’ve tested this with Miyoko’s vegan butter, and it works beautifully.
- Gluten-Free Version: As mentioned earlier, use a 1:1 gluten-free flour blend and certified gluten-free oats. The texture is slightly more delicate, but it’s still delicious.
- Single Serving: Halve the recipe and bake in a single mug or small ramekin. Reduce the baking time to about 15-18 minutes.
My personal favorite variation? The pear and apple combo with a splash of bourbon added to the caramel. I tried it one night when I had a lonely pear in the fruit bowl and a bottle of bourbon calling my name. It was a happy accident—the bourbon adds a warm, oaky note that pairs beautifully with the caramel.
Serving & Storage Suggestions
This crisp is best served warm, straight from the oven. The contrast between the hot, tender apples and the crispy topping is what makes it so special. But if you have leftovers (unlikely, but possible), here’s what to do:
Serving: Spoon into bowls and top with a scoop of vanilla ice cream or a dollop of whipped cream. The cold creaminess against the warm, spiced apples is pure heaven. For a non-dairy option, coconut whipped cream works beautifully. If you’re feeling extra indulgent, drizzle with a little extra caramel sauce and sprinkle with flaky sea salt.
Storage: Cover leftover crisps tightly with plastic wrap or foil and store in the refrigerator for up to 3 days. The topping will lose some of its crunch, but the flavors will meld together even more. To reheat, pop it in a 350°F oven for about 10 minutes, or microwave for 30-45 seconds. The microwave is faster, but the oven will help restore some of the topping’s crispiness.
Make-Ahead Tip: You can prep the apple filling and the oat topping separately up to a day in advance. Store them in the fridge, then assemble and bake when you’re ready. The caramel should be made fresh for the best texture, but you can make it a few hours ahead and reheat it gently.
Interestingly, the flavors actually deepen overnight. I’ve eaten this cold straight from the fridge the next morning (no judgment, please), and it was still amazing—like a deconstructed apple pie filling. The caramel soaks into the apples and gets almost jammy. It’s a different experience, but a good one.
Nutritional Information & Benefits
Here’s the honest truth: this is a dessert, and it’s meant to be enjoyed. But it does have some redeeming qualities. Apples are packed with fiber and vitamin C, and oats are a great source of complex carbohydrates and soluble fiber, which can help with heart health. The cinnamon and nutmeg aren’t just for flavor—they’re anti-inflammatory spices that add a little nutritional boost.
Estimated nutrition per serving (one ramekin):
- Calories: 380
- Fat: 18g
- Saturated Fat: 11g
- Carbohydrates: 54g
- Fiber: 5g
- Sugar: 35g
- Protein: 4g
- Sodium: 150mg
Dietary Considerations: This recipe can be made gluten-free and dairy-free with the substitutions mentioned above. It contains wheat (flour and oats) and dairy (butter) in its standard form. If you’re watching your sugar intake, you can reduce the brown sugar in the topping by half, though the caramel needs the full amount for proper texture.
My personal take? This is a treat, and there’s nothing wrong with that. I’d rather enjoy a small, perfectly made dessert than a huge bowl of something “healthy” that leaves me unsatisfied. Balance is everything.
Conclusion
This cozy apple cider caramel crisp for two is more than just a recipe—it’s a little moment of comfort in a dish. It’s the dessert you make when you need a hug, when you want to impress someone without stress, or when you just want to enjoy the simple pleasure of warm apples and caramel on a cool evening.
I’ve made this for potlucks, for date nights, and for solo evenings on the couch with a good book. Every time, it delivers. The combination of tender apples, rich cider caramel, and crunchy oat topping is just… perfect. And the best part? It’s forgiving. You can tweak the spices, swap the fruit, or adjust the sweetness to your liking. Make it your own.
I’d love to hear how yours turns out. Did you try a variation? Add something unexpected? Burn the topping and start over? (Trust me, I’ve been there.) Drop a comment below and let me know—your story might inspire someone else to give it a try. And if you share a photo on social media, tag me so I can see your beautiful creation. Happy baking, friend.
Frequently Asked Questions
Can I use apple juice instead of apple cider?
Yes, but the flavor won’t be as rich. Apple juice is thinner and less concentrated, so you might need to simmer it a little longer to get that syrupy consistency. Add an extra tablespoon of brown sugar to boost the flavor.
Can I make this in a larger dish for a crowd?
Absolutely! Double or triple the recipe and bake it in an 8×8 or 9×9 baking dish. The baking time will increase to about 35-40 minutes. Keep an eye on the topping—if it starts to brown too quickly, tent with foil.
Why did my topping turn out soggy?
This usually happens if the butter was too warm when you mixed it in, or if you overworked the topping. Make sure your butter is cold, and stop mixing as soon as the mixture looks like coarse crumbs. Also, don’t press the topping down too firmly on the apples—it needs some air circulation to crisp up.
Can I freeze this crisp?
Yes, but it’s best before baking. Assemble the crisp in a freezer-safe dish, cover tightly with plastic wrap and foil, and freeze for up to 3 months. Bake from frozen, adding about 10-15 minutes to the baking time. If you’ve already baked it, you can freeze leftovers, but the topping will lose its crunch.
What are the best apples for baking?
I love using a mix of Honeycrisp and Granny Smith. Honeycrisp holds its shape well and has a lovely sweetness, while Granny Smith adds a tart contrast that balances the caramel. Other good options include Braeburn, Fuji, or Pink Lady. Avoid Red Delicious—they turn into mush.
Pin This Recipe!
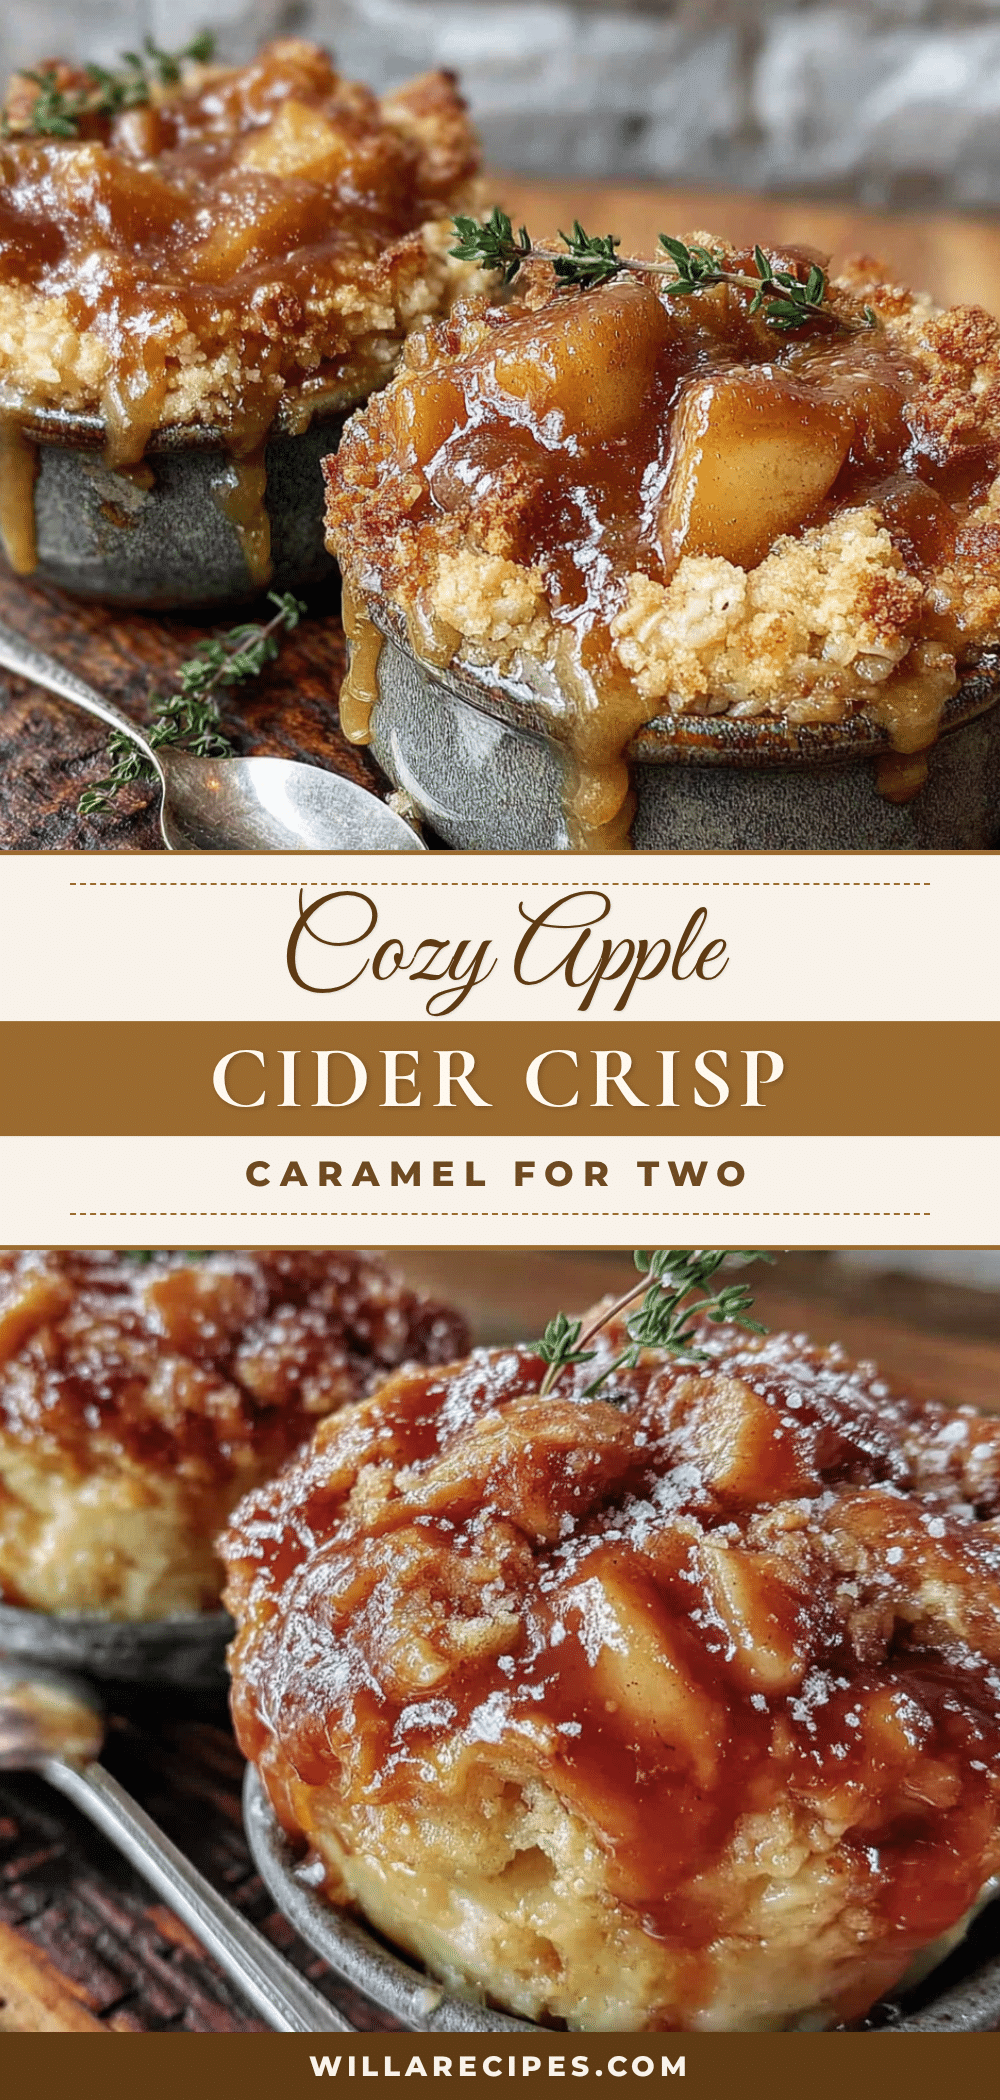
Cozy Apple Cider Caramel Crisp for Two: Easy Fall Dessert

A quick and easy small-batch apple crisp featuring a rich, reduced apple cider caramel sauce. Perfect for cozy nights in or last-minute potlucks, this dessert comes together in under 45 minutes with simple ingredients.
- Prep Time: 15 minutes
- Cook Time: 25 minutes
- Total Time: 40 minutes
- Yield: 2 servings 1x
- Category: Dessert
- Cuisine: American
Ingredients
- 1 cup apple cider
- 2 tablespoons unsalted butter
- 2 tablespoons brown sugar
- 1/4 teaspoon cinnamon
- Pinch of salt
- 2 medium apples (Honeycrisp or Granny Smith)
- 1 tablespoon all-purpose flour
- 1/2 teaspoon cinnamon
- 1/4 teaspoon nutmeg
- 1 tablespoon lemon juice
- 1/2 cup old-fashioned rolled oats
- 1/4 cup all-purpose flour
- 1/4 cup brown sugar (packed)
- 1/4 teaspoon cinnamon
- Pinch of salt
- 3 tablespoons unsalted butter (cold, cubed)
Instructions
- Preheat oven to 375°F (190°C). Place a baking sheet on the middle rack.
- Make the cider caramel: In a small saucepan, combine 1 cup apple cider, 2 tablespoons butter, 2 tablespoons brown sugar, 1/4 teaspoon cinnamon, and a pinch of salt. Bring to a boil over medium-high heat, then reduce heat to medium-low and simmer for 10-12 minutes until reduced by half and syrupy. Remove from heat and set aside.
- Prep the apples: Peel and core apples, cut into 1/2-inch chunks. Toss with 1 tablespoon flour, 1/2 teaspoon cinnamon, 1/4 teaspoon nutmeg, and 1 tablespoon lemon juice in a medium bowl.
- Make the crisp topping: In a small bowl, combine 1/2 cup rolled oats, 1/4 cup flour, 1/4 cup brown sugar, 1/4 teaspoon cinnamon, and a pinch of salt. Cut in 3 tablespoons cold cubed butter until mixture resembles coarse crumbs with pea-sized butter pieces.
- Assemble the crisps: Divide apple mixture between two 8-ounce ramekins. Pour 2-3 tablespoons cider caramel over each. Sprinkle oat topping evenly over apples, pressing down gently. Place ramekins on baking sheet.
- Bake for 20-25 minutes until topping is golden brown and filling is bubbly. If topping browns too quickly, tent with foil for last 5 minutes.
- Let cool on a wire rack for at least 10 minutes. Drizzle with reserved cider caramel before serving.
Notes
For a gluten-free version, use a 1:1 gluten-free baking blend and certified gluten-free oats. For dairy-free, substitute butter with vegan butter like Miyoko’s. Let the crisp rest for 10 minutes before serving to allow the filling to set. Sprinkle with flaky sea salt for an extra touch.
Nutrition
- Serving Size: 1 ramekin
- Calories: 380
- Sugar: 35
- Sodium: 150
- Fat: 18
- Saturated Fat: 11
- Carbohydrates: 54
- Fiber: 5
- Protein: 4
Keywords: apple crisp, apple cider caramel, fall dessert, small batch, easy dessert, apple dessert, caramel apple crisp


