The office pie contest was in two days and I’d completely forgotten. My coworker Sarah had been talking about her triple-layer pecan tart for weeks. Someone else was bringing a chocolate silk pie that apparently took three days to make. I had a bag of apples, some butter, and about an hour of patience left in me after a long week. Honestly, I almost just bought a store-bought pie and called it a day.
But then I remembered the brown butter I’d made last month for a pasta dish, and how that nutty, toasty smell had filled my whole apartment. I had a half-used stick of butter in the fridge, and I thought—why not? I mean, worst case scenario, I’d have a mediocre pie and a funny story. Best case? Well, I didn’t dare hope for best case.
I threw together this brown butter apple crumble pie in a bit of a frenzy, using a crumble topping because I didn’t have time to roll out a second crust. The butter got a little too brown—almost burnt—but I poured it into the apples anyway. Let me tell you, that accident was the best thing that ever happened to my baking. The deep, nutty flavor mixed with the tart apples and the buttery crumble… honestly, it was something else.
Sarah’s pecan tart was beautiful. The chocolate silk pie was rich and perfect. But my slightly frantic, brown-butter-on-a-whim pie won the whole thing. I’m not saying it was better than those elaborate creations. I’m saying that sometimes the recipes you throw together under pressure, with whatever you have, end up being the ones you keep making for years. This is that recipe for me, and I think it could be for you too.
Why You’ll Love This Recipe
This brown butter apple crumble pie isn’t just another apple pie recipe. It is the one you will reach for when you want something special without spending all day in the kitchen. I have tested this recipe at least a dozen times, tweaking the brown butter timing and the crumble ratio until it was just right. Here is why it works so well:
- Quick & Easy: Comes together in about an hour, with most of that time being hands-off baking. Perfect for a busy Tuesday or a last-minute fall gathering.
- Simple Ingredients: You probably have everything you need already—apples, butter, flour, sugar, and oats. No fancy extracts or hard-to-find spices.
- Perfect for Fall Baking: This is the coziest dessert for apple picking season, Thanksgiving, or a crisp weekend afternoon when you just want the house to smell amazing.
- Crowd-Pleaser: I’ve brought this to potlucks, family dinners, and office parties. It gets devoured every single time, by kids and adults alike.
- Unbelievably Delicious: The brown butter adds this deep, almost caramel-like flavor that makes the apples taste richer and more complex. The crumble topping is buttery and crisp, with a little bit of chew from the oats.
What makes this recipe different from the rest? It is the brown butter. That simple step of cooking the butter until it turns golden brown and smells nutty transforms the entire pie. You don’t need to be a pastry chef to make it, and it doesn’t require any special equipment. It is comfort food reimagined—faster, easier, but with the same soul-soothing satisfaction that makes you close your eyes after the first bite.
What Ingredients You Will Need
This recipe uses simple, wholesome ingredients to deliver that cozy fall flavor without any fuss. Most of these are pantry staples, which is exactly what you want when a pie craving hits on a Wednesday night.
For the Brown Butter Apple Filling:
- 6 tablespoons unsalted butter – This is the star of the show. Use good quality butter here, like Kerrygold or Vermont Creamery, for the richest flavor. The browning process is where the magic happens.
- 6 cups peeled and sliced apples – About 4-5 medium apples. I like a mix of Granny Smith for tartness and Honeycrisp for sweetness. You can also use Fuji or Braeburn. (adds balanced flavor)
- 1/2 cup granulated sugar – Just enough to sweeten the apples without masking their natural flavor.
- 1/4 cup light brown sugar, packed – Adds a deeper, molasses-like sweetness that pairs perfectly with the brown butter.
- 2 tablespoons all-purpose flour – Helps thicken the filling so it isn’t runny.
- 1 teaspoon ground cinnamon – Non-negotiable for fall baking. I prefer Saigon cinnamon for its stronger, warmer flavor.
- 1/4 teaspoon ground nutmeg – Freshly grated if you have it, but pre-ground works perfectly fine.
- 1/4 teaspoon salt – Balances the sweetness and brings out the apple flavor.
- 1 teaspoon vanilla extract – Use pure vanilla extract, not imitation, for the best taste.
- 1 tablespoon lemon juice – Keeps the apples from browning and adds a little brightness.
For the Crumble Topping:
- 1/2 cup all-purpose flour – The base of the crumble.
- 1/2 cup old-fashioned rolled oats – Not quick oats! The texture is much better with old-fashioned. (adds a nice chew)
- 1/2 cup light brown sugar, packed – For sweetness and that caramel-like flavor.
- 1 teaspoon ground cinnamon – Because you can never have too much cinnamon in a fall dessert.
- 1/4 teaspoon salt – Essential for balancing the sweetness.
- 6 tablespoons cold unsalted butter, cut into small cubes – The cold butter is what makes the crumble crisp and tender.
For the Pie Crust:
- 1 single 9-inch pie crust – You can use a store-bought crust to save time, or make your own. I often use the refrigerated Pillsbury crusts in a pinch and they work great. If you make your own, a simple all-butter crust is lovely.
Substitution Guidance: If you are gluten-free, use a gluten-free all-purpose flour blend and certified gluten-free oats. For a dairy-free version, substitute the butter with a high-quality vegan butter stick (like Miyoko’s) for both the filling and the topping. You can swap the granulated sugar for coconut sugar, though the color will be a bit darker.
Equipment Needed
You don’t need a fancy kitchen to make this pie. Here is what you will need:
- 9-inch pie dish – A standard glass or ceramic pie dish works perfectly. I use a deep-dish ceramic one I found at a thrift store for three dollars.
- Large skillet or saucepan – For browning the butter. A light-colored pan is best so you can see the butter change color.
- Large mixing bowl – For the apple filling.
- Medium mixing bowl – For the crumble topping.
- Pastry cutter or fork – To cut the butter into the crumble topping. Your fingers work too, but a pastry cutter is faster.
- Sharp knife and cutting board – For peeling and slicing the apples.
- Measuring cups and spoons – Accuracy matters in baking, even a little.
- Rubber spatula – For scraping every last bit of that brown butter into the apples.
- Whisk – For mixing the dry ingredients.
If you don’t have a pastry cutter, just use two forks or your hands. The key is to keep the butter cold, so work quickly. I have definitely used a fork in a pinch and the crumble still came out great. Also, a microplane is nice for grating fresh nutmeg, but again, not necessary.
Preparation Method
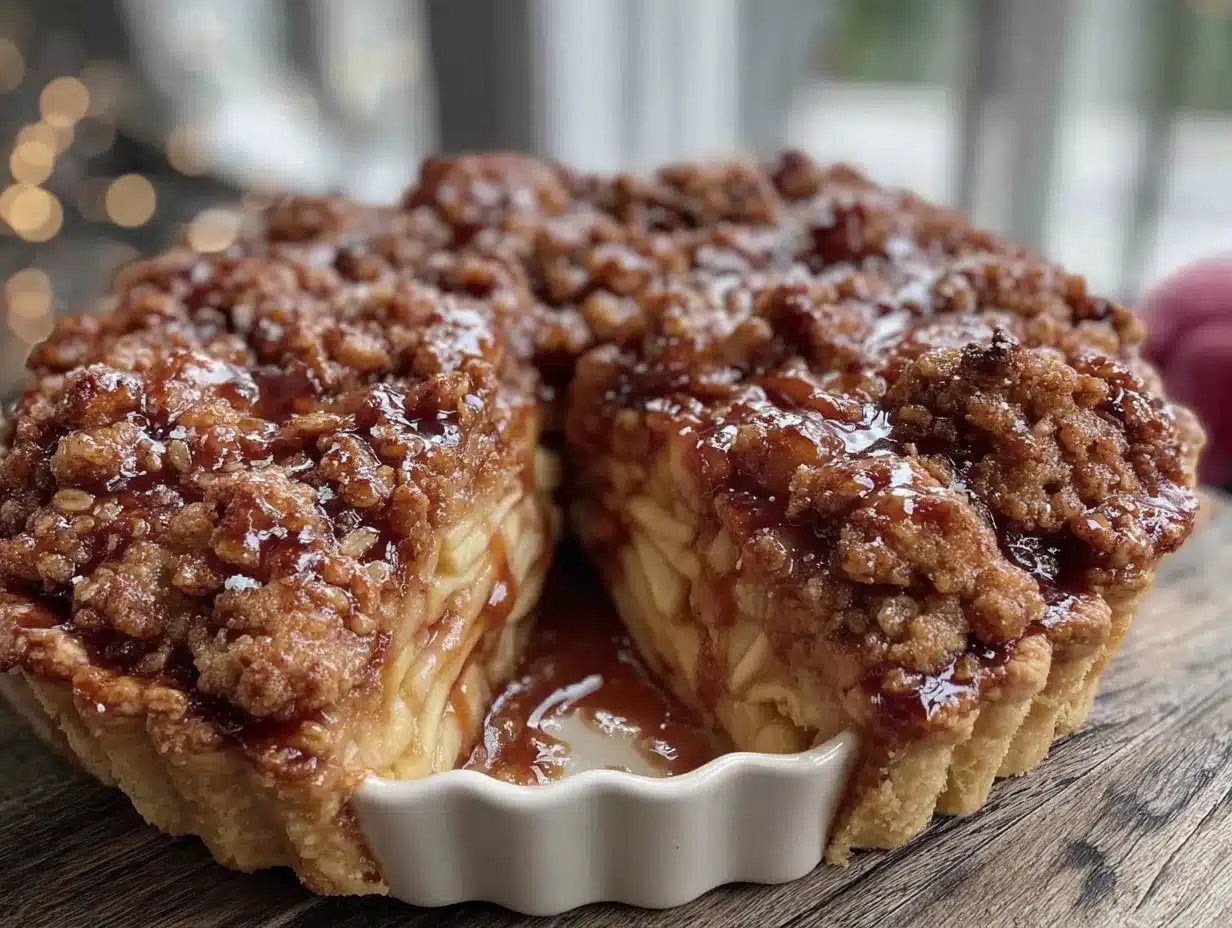
Let’s get to the good part. Here is how to make this brown butter apple crumble pie, step by step. I’ll include all the little details I wish someone had told me the first time.
- Preheat your oven to 375°F (190°C). Place a baking sheet on the lower rack to catch any drips. Trust me on this—apple filling can bubble over and burnt sugar on the oven floor is a nightmare to clean.
- Start the brown butter. Place the 6 tablespoons of unsalted butter in a light-colored skillet or saucepan over medium heat. Let it melt completely, then swirl the pan occasionally. After a few minutes, the butter will start to foam and crackle. Watch it closely. The color will change from yellow to golden to a deep amber. You are looking for a nutty, toasty smell and little brown specks forming at the bottom. This takes about 5-7 minutes. Remove it from the heat immediately and pour it into a heatproof bowl to stop the cooking. Don’t walk away from the pan—brown butter can go from perfect to burnt in seconds.
- Prepare the apple filling. In a large mixing bowl, combine the sliced apples, granulated sugar, brown sugar, flour, cinnamon, nutmeg, salt, vanilla extract, and lemon juice. Pour the warm brown butter over the top and toss everything together until the apples are evenly coated. Let this sit for about 10 minutes while you make the crumble. This resting time lets the apples start releasing their juices, which will create a lovely thick sauce as it bakes.
- Make the crumble topping. In a medium bowl, whisk together the flour, oats, brown sugar, cinnamon, and salt. Add the cold cubed butter. Use a pastry cutter, fork, or your fingers to work the butter into the dry ingredients until the mixture looks like coarse sand with some pea-sized butter lumps. You want some bigger pieces for texture. Pop the bowl in the fridge while you assemble the pie.
- Prepare the pie crust. If using a store-bought crust, let it sit at room temperature for about 15 minutes so it is pliable. Gently press it into your 9-inch pie dish, crimping the edges however you like. I usually just press the tines of a fork around the edge for a simple look. Place the crust in the fridge for 10 minutes to chill—this helps prevent shrinking.
- Assemble the pie. Take the pie crust out of the fridge. Pour the apple filling into the crust, spreading it evenly. Don’t worry if it looks piled high—the apples will soften and settle as they bake. Take the crumble topping out of the fridge and sprinkle it evenly over the apples. Use your fingers to break up any large clumps as you go.
- Bake the pie. Place the pie on the baking sheet you put in the oven earlier. Bake for 45-55 minutes, until the crumble topping is golden brown and the filling is bubbly around the edges. If the crumble is browning too quickly after 30 minutes, loosely tent the pie with aluminum foil. The pie is done when you can insert a knife into the center and the apples are tender.
- Cool completely. This is the hardest part. Let the pie cool on a wire rack for at least 3-4 hours before slicing. The filling needs this time to set up. If you cut into it too soon, you will have a delicious but very soupy pie. I have made this mistake more than once. Be patient.
Cooking Tips & Techniques
After making this pie more times than I can count, I have collected a few tips that make a real difference. Some of these I learned the hard way.
Watch the butter like a hawk. The first time I made brown butter, I got distracted by a phone call and ended up with black butter. It smelled terrible and I had to start over. The process goes from golden to amber to burnt very quickly. Swirl the pan constantly and trust your nose—the nutty aroma is your cue to pull it off the heat.
Use a mix of apple varieties. Granny Smith apples hold their shape well and provide that necessary tartness. Mixing in a sweeter apple like Honeycrisp or Fuji adds depth. If you use only one type, the flavor can be a bit one-note. I have tried it with just Gala apples and the pie was too sweet and a little mushy.
Don’t skip the chilling steps. Chilling the pie crust and the crumble topping before baking is not optional. The cold butter in the crumble creates steam pockets as it bakes, which gives you that crisp, tender texture. A warm crumble will just melt into a flat, dense layer. Same with the crust—a chilled crust holds its shape better.
Let the apples macerate. Giving the apples time to sit with the sugar and brown butter before baking helps draw out their juices. This creates a thicker, more flavorful sauce. I once skipped this step when I was in a hurry, and the filling was noticeably thinner and less cohesive.
Bake on a sheet pan. I cannot stress this enough. Apple pie filling bubbles over. It just does. A sheet pan catches the drips and saves you from scrubbing the bottom of your oven. I use a rimmed baking sheet every single time now.
Cool completely before slicing. I know it is tempting to dig in while it is still warm, but the filling needs time to set. If you slice too early, the juices will run everywhere and the slices will fall apart. Let it cool for at least 3 hours. Overnight is even better. The flavor actually improves as it sits.
Variations & Adaptations
One of the best things about this recipe is how flexible it is. Here are some ways to make it your own:
Gluten-Free Version: Substitute the all-purpose flour in both the filling and the crumble with a 1:1 gluten-free baking flour blend. Use certified gluten-free oats. I have tested this with Bob’s Red Mill 1:1 Baking Flour and it worked beautifully. The crumble was a little more delicate, but still delicious.
Vegan Version: Use a high-quality vegan butter stick for both the brown butter and the crumble. Miyoko’s or Earth Balance work well. The brown butter flavor won’t be as intense, but it will still be nutty and rich. Use a vegan pie crust as well.
Spice It Up: Add 1/4 teaspoon of ground cardamom or ginger to the apple filling for a warmer, more complex spice profile. I did this for a holiday party once and got so many compliments. You can also add a pinch of cloves or allspice, but go easy—they are strong.
Nutty Crumble: Add 1/3 cup of chopped pecans or walnuts to the crumble topping. Toast them lightly first for extra flavor. This adds a lovely crunch and pairs beautifully with the brown butter.
Pear-Apple Combo: Swap half the apples for firm pears like Bosc or Anjou. The pears add a softer, more delicate sweetness. This is a great way to use up a mix of fall fruit from your farmers market haul.
Individual Ramekins: Skip the pie crust entirely and make this as a brown butter apple crisp in individual ramekins. Just layer the apple filling in buttered ramekins, top with the crumble, and bake for about 25-30 minutes. Perfect for a cozy night in when you don’t want to share.
Serving & Storage Suggestions
This pie is beautiful on its own, but a few small touches can make it feel extra special.
Serving: Serve the pie slightly warm or at room temperature. A scoop of vanilla bean ice cream is the classic pairing—the cold creaminess against the warm, buttery crumble is pure magic. A drizzle of salted caramel sauce takes it over the top. For a non-dairy option, try coconut whipped cream or a scoop of oat milk ice cream.
Presentation: Dust the top of the pie with a little powdered sugar just before serving for a pretty, snowy look. You can also add a few fresh apple slices or a sprig of rosemary for a rustic touch. I like to serve it on a wooden cake stand for that cozy farmhouse vibe.
Storage: Cover the pie loosely with foil or plastic wrap and store it at room temperature for up to 2 days. After that, transfer it to the refrigerator for up to 4 more days. The crumble topping will soften over time, but it will still be delicious.
Freezing: You can freeze the baked pie for up to 3 months. Let it cool completely, then wrap it tightly in a layer of plastic wrap and a layer of foil. Thaw it in the refrigerator overnight and reheat individual slices in a 350°F oven for about 10 minutes, or until warmed through.
Reheating: To revive the crispness of the crumble topping, reheat slices in a toaster oven or air fryer at 350°F for 5-7 minutes. The microwave will make the topping soggy, so I avoid it if I can help it. The flavor actually deepens after a day or two, so leftover pie is always a treat.
Nutritional Information & Benefits
This is a dessert, so I am not going to pretend it is health food. But it does have some redeeming qualities. Here is an approximate breakdown per serving (based on 8 servings):
- Calories: 420
- Fat: 18g
- Carbohydrates: 64g
- Fiber: 4g
- Sugar: 38g
- Protein: 4g
Apples are a good source of fiber and vitamin C, especially if you leave the peel on (though I peel mine for texture in this pie). Oats provide soluble fiber, which is great for heart health. The brown butter, while indulgent, adds a rich flavor that means you can use less sugar overall compared to some other apple pie recipes.
If you are watching your sugar intake, you can reduce the granulated sugar to 1/3 cup and the brown sugar in the filling to 3 tablespoons. The pie will be a bit tarter, but still very good. For a lower-fat option, you can reduce the butter in the crumble to 4 tablespoons, but the topping won’t be as crisp.
This recipe is vegetarian and can be made gluten-free and vegan with the substitutions listed above. It contains dairy and gluten in its standard form.
Conclusion
This brown butter apple crumble pie has become my go-to fall dessert for a reason. It is forgiving enough for a beginner baker but impressive enough to win a pie contest (literally). The brown butter adds a depth of flavor that makes it taste like you spent hours in the kitchen, when really it comes together in about an hour of hands-on time.
I love that this recipe feels both special and achievable. It is the kind of dessert you make when you want to treat yourself or impress someone, but you don’t want to stress out. The crumble topping is so much easier than a double crust, and honestly, I think it tastes better. That buttery, oat-y, cinnamon-y layer on top of tender, brown butter-soaked apples… it is pure comfort in a bowl.
I hope you give this recipe a try. Make it for a fall gathering, a quiet Sunday afternoon, or just because the weather turned chilly and you need something warm and sweet. And if you tweak it—add different spices, try a nutty crumble, or swap in pears—please share how it goes in the comments. I love hearing about your kitchen adventures.
Happy baking, friends. May your butter brown perfectly and your crumble stay crisp.
Frequently Asked Questions
Can I use pre-sliced apples from the store?
You can, but they tend to be less fresh and can turn mushy more quickly. I recommend slicing your own apples for the best texture. It only takes a few extra minutes.
My crumble topping turned out soggy. What went wrong?
This usually happens if the butter was too warm when you mixed it into the dry ingredients, or if the pie wasn’t baked long enough. Make sure your butter is very cold, and bake until the crumble is deep golden brown and the filling is bubbly.
Can I make this pie ahead of time?
Absolutely. You can assemble the pie completely (without baking) and refrigerate it for up to 24 hours. Add about 10 minutes to the baking time if starting from cold. You can also bake it a day ahead and reheat slices as needed.
Do I have to peel the apples?
Not necessarily. The peel adds fiber and a bit of color. However, the peel can become tough during baking, and some people don’t like the texture. I peel mine for a smoother, more traditional pie filling, but feel free to leave them on if you prefer.
What is the best way to reheat a slice of this pie?
For the best texture, reheat slices in a toaster oven or air fryer at 350°F for 5-7 minutes. This crisps up the crumble topping again. The microwave works in a pinch but will make the topping soft.
Pin This Recipe!
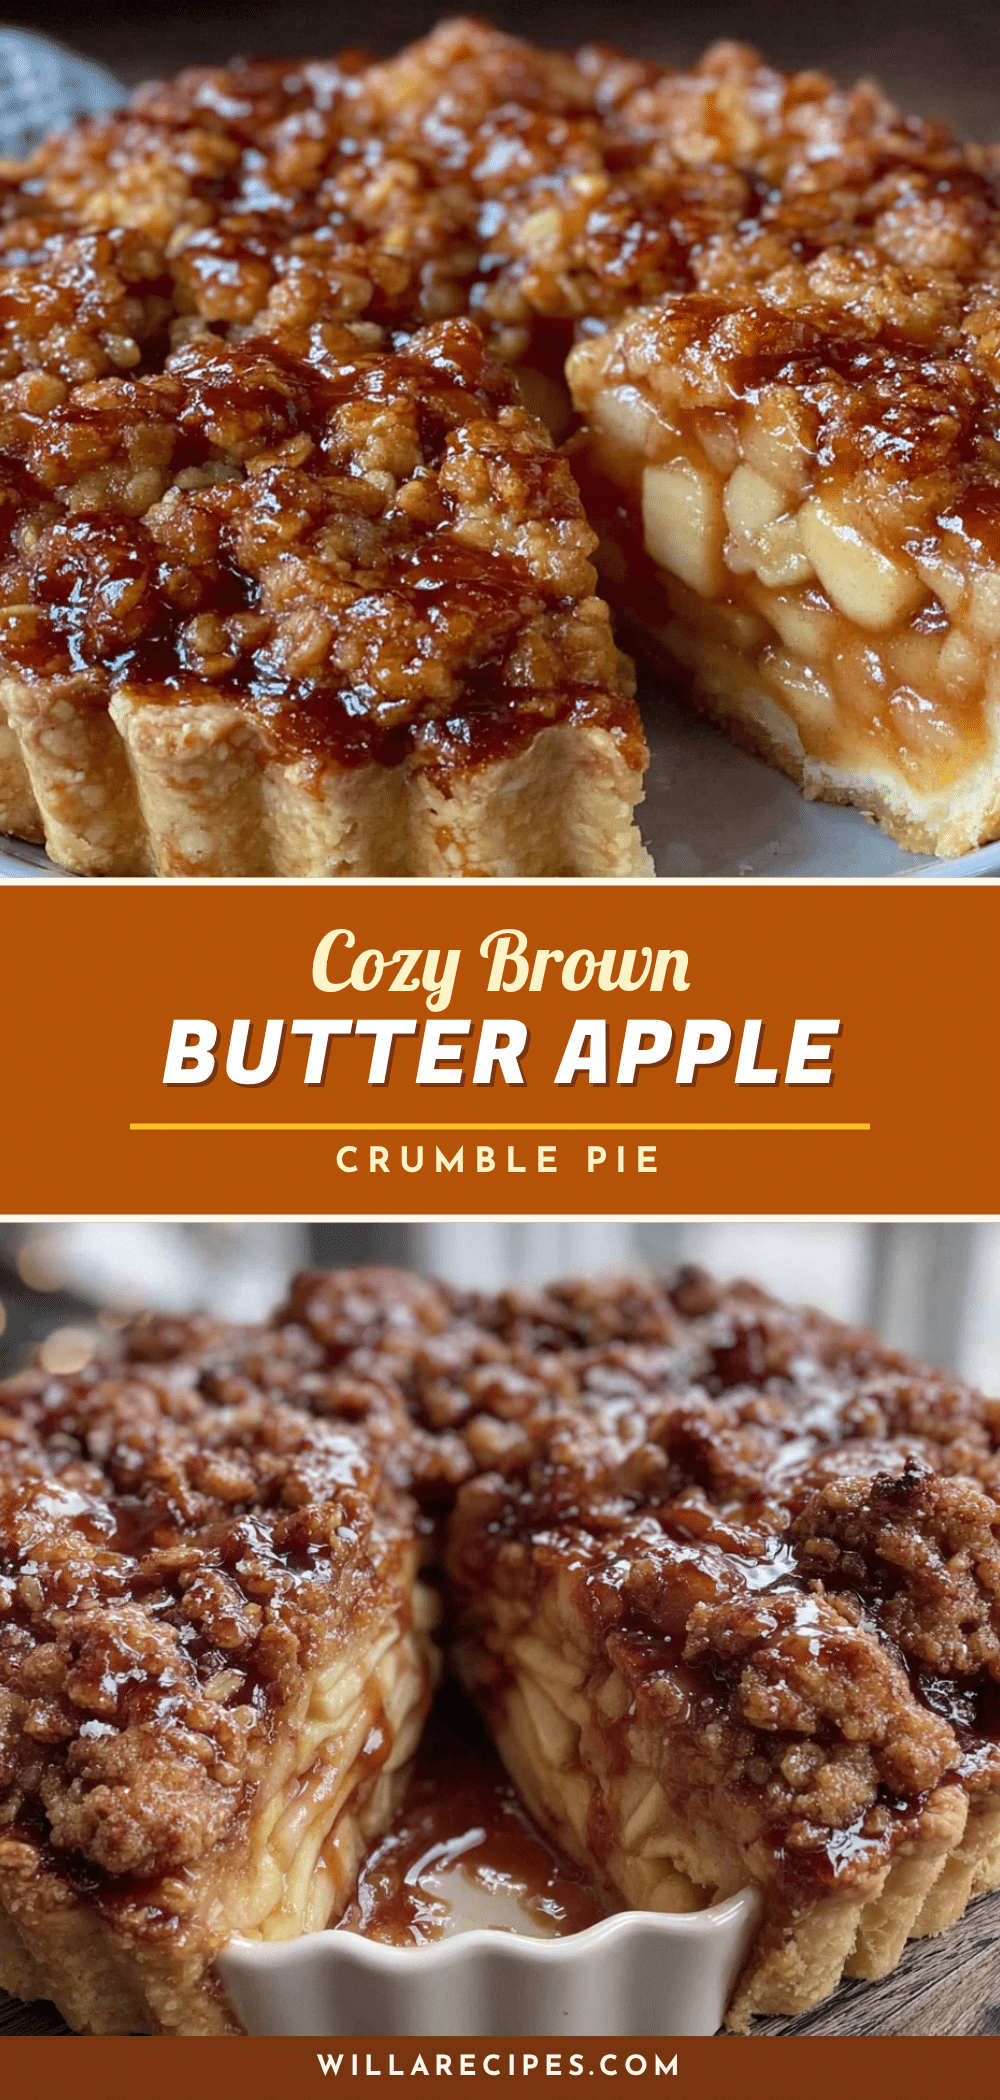
Cozy Brown Butter Apple Crumble Pie – Easy Fall Dessert Recipe
This brown butter apple crumble pie is a quick and easy fall dessert that comes together in about an hour. The nutty brown butter and buttery oat crumble topping make it a crowd-pleaser, perfect for busy weeknights or last-minute gatherings.
- Prep Time: 15 minutes
- Cook Time: 50 minutes
- Total Time: 1 hour 5 minutes
- Yield: 8 servings 1x
- Category: Dessert
- Cuisine: American
Ingredients
- 6 tablespoons unsalted butter
- 6 cups peeled and sliced apples (about 4–5 medium apples, mix of Granny Smith and Honeycrisp)
- 1/2 cup granulated sugar
- 1/4 cup light brown sugar, packed
- 2 tablespoons all-purpose flour
- 1 teaspoon ground cinnamon
- 1/4 teaspoon ground nutmeg
- 1/4 teaspoon salt
- 1 teaspoon vanilla extract
- 1 tablespoon lemon juice
- 1/2 cup all-purpose flour
- 1/2 cup old-fashioned rolled oats
- 1/2 cup light brown sugar, packed
- 1 teaspoon ground cinnamon
- 1/4 teaspoon salt
- 6 tablespoons cold unsalted butter, cut into small cubes
- 1 single 9-inch pie crust (store-bought or homemade)
Instructions
- Preheat your oven to 375°F (190°C). Place a baking sheet on the lower rack to catch any drips.
- Start the brown butter: Place 6 tablespoons unsalted butter in a light-colored skillet or saucepan over medium heat. Let it melt completely, then swirl the pan occasionally. After a few minutes, the butter will foam and crackle. Watch closely until it turns a deep amber color and smells nutty, about 5-7 minutes. Remove from heat immediately and pour into a heatproof bowl to stop cooking.
- Prepare the apple filling: In a large mixing bowl, combine sliced apples, granulated sugar, brown sugar, flour, cinnamon, nutmeg, salt, vanilla extract, and lemon juice. Pour the warm brown butter over the top and toss until apples are evenly coated. Let sit for 10 minutes.
- Make the crumble topping: In a medium bowl, whisk together flour, oats, brown sugar, cinnamon, and salt. Add cold cubed butter. Use a pastry cutter, fork, or fingers to work the butter into the dry ingredients until the mixture looks like coarse sand with some pea-sized butter lumps. Refrigerate while assembling the pie.
- Prepare the pie crust: If using store-bought, let sit at room temperature for 15 minutes. Gently press into a 9-inch pie dish, crimping edges. Place in the fridge for 10 minutes to chill.
- Assemble the pie: Pour the apple filling into the chilled crust, spreading evenly. Sprinkle the crumble topping evenly over the apples.
- Bake the pie: Place on the baking sheet in the oven. Bake for 45-55 minutes, until the crumble is golden brown and the filling is bubbly around the edges. If browning too quickly after 30 minutes, loosely tent with foil. The pie is done when a knife inserted into the center meets tender apples.
- Cool completely: Let the pie cool on a wire rack for at least 3-4 hours before slicing to allow the filling to set.
Notes
Watch the butter closely when browning; it can go from perfect to burnt in seconds. Use a mix of apple varieties for best flavor. Don’t skip chilling the crust and crumble. Let the apples macerate for 10 minutes. Bake on a sheet pan to catch drips. Cool completely before slicing to avoid a soupy pie.
Nutrition
- Serving Size: 1 slice (1/8 of pie)
- Calories: 420
- Sugar: 38
- Sodium: 280
- Fat: 18
- Saturated Fat: 11
- Carbohydrates: 64
- Fiber: 4
- Protein: 4
Keywords: brown butter apple crumble pie, easy fall dessert, apple crumble pie, brown butter pie, quick apple pie, crumble topping pie


