There used to be this little bakery tucked away on a side street in downtown Portland—a place called The Spiced Whisk—that made the most incredible eggnog cheesecake I’ve ever tasted. When they closed their doors back in 2019, I honestly felt a little pang of loss. That cheesecake was my December tradition. I’d grab a slice after work, sit by their tiny window, and just let the creamy, spiced goodness melt away the holiday stress.
After they shut down, I tried everything to recreate it. I mean, I went through maybe six or seven attempts that first year alone. One batch was too dense, like a brick of cream cheese and regret. Another one curdled because I got impatient with the eggs. Let me tell you, there were some real kitchen disasters. But on Christmas Eve last year, after my fourth attempt of the season, I finally cracked it. The texture was silky, the eggnog flavor was spot-on, and that gingerbread crust—oh man, it was the perfect spiced foundation. I nearly cried into the mixing bowl. And the best part? My picky-eater nephew, who swears he hates anything “fancy,” asked for seconds. That’s when I knew I had to share this recipe with you.
Why You’ll Love This Recipe
This cozy eggnog cheesecake with gingerbread crust isn’t just another holiday dessert. It’s the one that’ll have everyone asking for the recipe before the plates are cleared. Here’s why:
- Holiday Magic in Every Bite : The combination of creamy eggnog filling and spiced gingerbread crust tastes like Christmas morning. No artificial flavors here—just real, comforting warmth.
- Surprisingly Simple : I know cheesecake sounds intimidating, but this recipe uses a no-water-bath method that saves you time and hassle. You don’t need to be a pastry chef to nail it.
- Budget-Friendly Ingredients : Everything on the list is affordable and easy to find at your regular grocery store. No hunting down fancy imported spices or expensive cream cheeses.
- Perfect for Picky Eaters : The familiar flavors of eggnog and gingerbread make this a crowd-pleaser even for kids who usually turn their noses up at “adult” desserts.
- Make-Ahead Friendly : This cheesecake actually gets better after a day or two in the fridge. You can prep it Wednesday for your Friday holiday dinner—less stress, more joy.
What sets this recipe apart is the balance. The gingerbread crust isn’t just a pretty base—it’s got real molasses and ginger that cut through the richness of the eggnog filling. I’ve tested this with different spice ratios, and trust me, this version hits that sweet spot where every flavor gets its moment without overpowering the others.
This is the kind of dessert that makes people close their eyes after the first bite. It’s comfort food, holiday tradition, and a little bit of nostalgia all wrapped up in one beautiful slice. Plus, it’s impressive enough for a Christmas Eve dinner but simple enough for a random Tuesday in December when you just need something cozy.
What Ingredients You Will Need
This recipe uses simple, wholesome ingredients that come together to create something truly special. Most of these are probably already in your pantry or fridge, especially if you’ve been doing any holiday baking.
For the Gingerbread Crust
- 2 cups (240g) gingerbread cookie crumbs (about 20-25 cookies, crushed fine)—I prefer using store-bought gingerbread cookies from the holiday section; they’re consistent and save time. If you can find Anna’s Ginger Thins, those work beautifully too.
- 6 tablespoons (85g) unsalted butter, melted—make sure it’s actually melted and cooled slightly, not hot. Hot butter will make your crust greasy instead of firm.
- 2 tablespoons (25g) brown sugar, packed—this adds extra moisture and a deeper molasses flavor to the crust. Dark brown sugar works best here.
- 1/4 teaspoon salt—just a pinch to balance the sweetness. Don’t skip it, even if your cookies are already salted.
For the Eggnog Cheesecake Filling
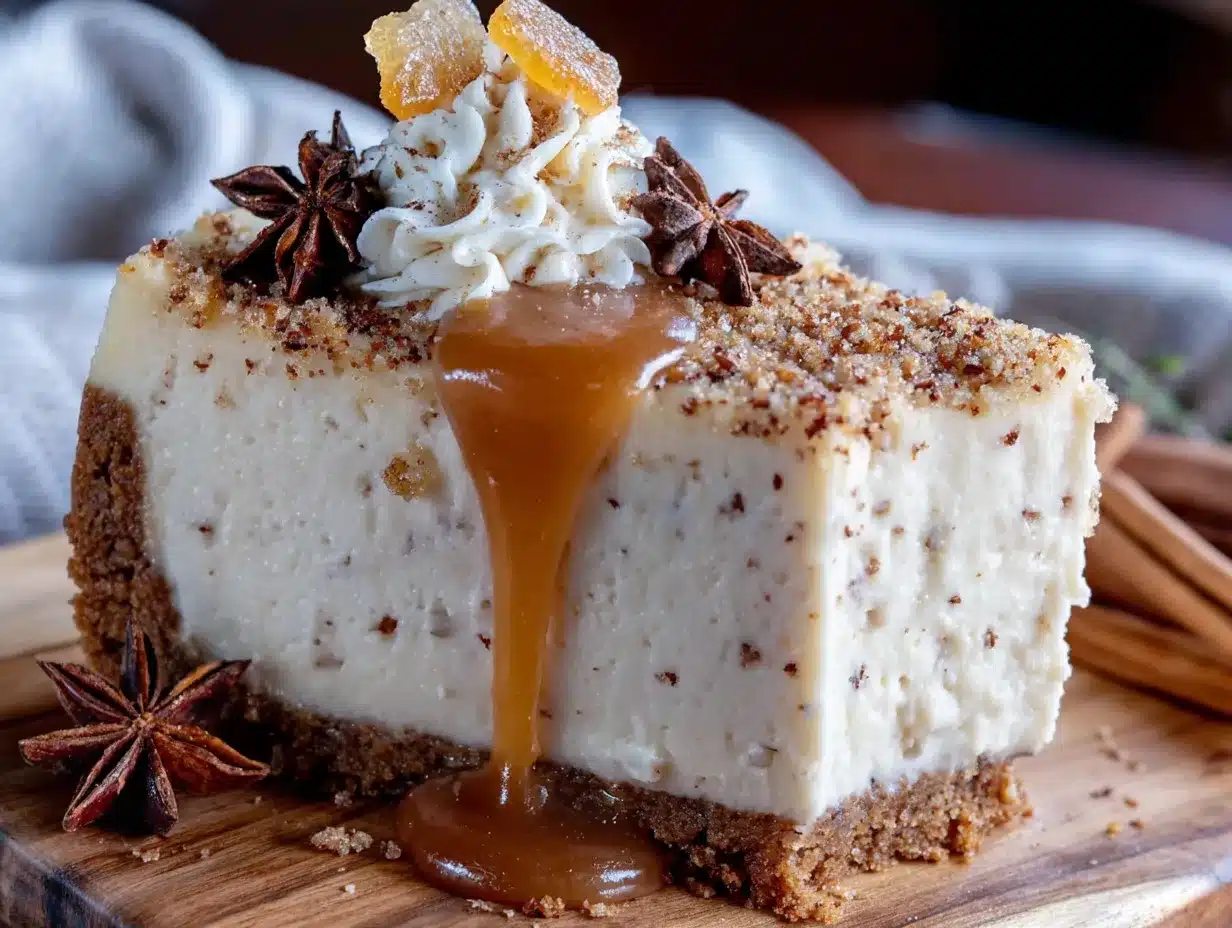
- 32 ounces (910g) cream cheese, softened—this is four standard blocks. Make sure they’re at room temperature, or you’ll end up with lumps. I usually leave mine out on the counter for about two hours before starting.
- 1 cup (200g) granulated sugar—regular white sugar works perfectly here. No need for anything fancy.
- 3 tablespoons (24g) all-purpose flour—this helps stabilize the cheesecake and prevents cracking. You can substitute with cornstarch if you’re gluten-sensitive.
- 4 large eggs, room temperature—cold eggs will seize up the cream cheese mixture. If you forgot to take them out early, place them in a bowl of warm water for 5 minutes.
- 2 large egg yolks, room temperature—the extra yolks add richness and that silky texture we’re after.
- 1 1/2 cups (360ml) high-quality eggnog—this is the star, so use a good one. I recommend Hood or Southern Comfort brand for the best flavor. Avoid the light or low-fat versions—they’re too watery.
- 1 teaspoon vanilla extract—pure vanilla, not imitation. It makes a difference in depth of flavor.
- 1/2 teaspoon ground nutmeg, freshly grated if possible—fresh nutmeg is a game-changer here. It’s warm and aromatic in a way pre-ground stuff just isn’t.
- 1/2 teaspoon ground cinnamon—adds that cozy holiday warmth.
- 1/4 teaspoon ground cloves—just a touch. Cloves are strong, so don’t go overboard.
- Pinch of salt—to balance the sweetness and bring out the spices.
For the Optional Topping
- 1 cup (240ml) heavy whipping cream—cold from the fridge works best for whipping.
- 2 tablespoons (15g) powdered sugar—for sweetness without graininess.
- 1/2 teaspoon vanilla extract—adds a nice flavor to the whipped cream.
- Extra ground nutmeg or cinnamon, for dusting—makes it look bakery-perfect.
Equipment Needed
You don’t need a professional kitchen to make this cheesecake, but having the right tools makes the process smoother. Here’s what you’ll need:
- 9-inch springform pan—this is non-negotiable for cheesecake. The removable sides make it possible to get that perfect slice without destroying your masterpiece. I’ve had good luck with the OXO brand, but any sturdy one will do.
- Electric mixer—either a stand mixer with paddle attachment or a hand mixer works fine. I actually prefer my hand mixer for cheesecake because I have more control and less chance of overmixing.
- Large mixing bowls—you’ll need at least two: one for the crust mixture and one for the filling.
- Measuring cups and spoons—accurate measurements matter in baking, especially with the spices.
- Rubber spatula—for scraping down the bowl and folding ingredients gently.
- Food processor or zip-top bag and rolling pin—for crushing the gingerbread cookies into crumbs. The food processor is faster, but honestly, I’ve used a bag and a heavy skillet before and it worked fine.
- Roasting pan or large baking dish—for the water bath. You’ll need one big enough to hold your springform pan.
- Aluminum foil—heavy-duty kind works best. You’ll be wrapping the bottom of your springform pan to prevent water from seeping in.
- Cooling rack—for letting the cheesecake cool gradually before refrigeration.
If you don’t have a springform pan, you can try using a deep 9-inch pie dish, but removing slices will be trickier. Honestly, springform pans are worth the investment—they’re useful for so many recipes, and a decent one costs about the same as a nice dinner out.
Preparation Method
Let’s walk through this step by step. I’ve included all the little details that make the difference between a good cheesecake and a great one.
Step 1: Prep Your Pan and Preheat
Preheat your oven to 325°F (163°C). While it’s heating up, take your springform pan and wrap the bottom and sides with a double layer of heavy-duty aluminum foil. Make sure the foil comes up at least 2 inches on the sides—you want a good seal to keep water out during the water bath. Set the pan aside.
Step 2: Make the Gingerbread Crust
Place your gingerbread cookies in a food processor and pulse until you have fine crumbs. You need about 2 cups total. If you don’t have a food processor, put the cookies in a zip-top bag, seal it, and crush them with a rolling pin or heavy skillet. It’s a little arm workout, but it works.
In a medium bowl, combine the cookie crumbs, brown sugar, and salt. Pour in the melted butter and stir with a fork until all the crumbs are moistened. The mixture should look like wet sand and hold together when you squeeze it.
Press this mixture firmly into the bottom of your prepared springform pan. I use the bottom of a flat measuring cup to really pack it down tight. Don’t forget to go slightly up the sides—about half an inch—to create a little edge that’ll hold the filling. Bake the crust for 10 minutes, then set it aside to cool while you make the filling. Leave the oven on.
Step 3: Prepare the Filling
In a large mixing bowl, beat the softened cream cheese with an electric mixer on medium speed until it’s smooth and creamy—about 2 minutes. Scrape down the sides and bottom of the bowl with a rubber spatula. You don’t want any lumps hiding in there.
Add the sugar and flour, then beat on medium-low until combined, about 1 minute. Scrape the bowl again.
Add the eggs and egg yolks one at a time, beating on low after each addition just until incorporated. Overmixing at this stage adds too much air, which can cause cracks later. Trust me, I learned this the hard way after a particularly cracked cheesecake that looked like a map of the Grand Canyon.
With the mixer still on low, slowly pour in the eggnog and vanilla extract. Then add the nutmeg, cinnamon, cloves, and salt. Mix just until everything is combined—about 30 seconds. The batter should be smooth, creamy, and pale with a slight tan color from the spices.
Step 4: Assemble and Bake
Pour the filling over the cooled crust. Use your spatula to smooth the top into an even layer. Give the pan a gentle tap on the counter to release any air bubbles that might be hiding.
Place your foil-wrapped springform pan into a large roasting pan. Carefully pour hot water into the roasting pan until it reaches about halfway up the sides of the springform pan. Be gentle—you don’t want to splash water into your cheesecake.
Bake at 325°F (163°C) for 55 to 65 minutes. The edges should look set and slightly puffed, but the center should still jiggle slightly when you gently shake the pan. That jiggle is what gives you that creamy, silky texture. If the center looks completely firm, you’ve overbaked it.
Step 5: Cool and Chill
Turn off the oven, crack the door open, and let the cheesecake sit in the water bath for 1 hour. This gradual cooling helps prevent cracks. After that, remove the pan from the water bath, take off the foil, and let it cool completely on a wire rack—about another hour.
Once it’s at room temperature, cover the pan with plastic wrap and refrigerate for at least 6 hours, but overnight is better. I know it’s hard to wait, but this is where the magic happens. The flavors meld, the texture sets perfectly, and you get that clean slice you’re dreaming of.
Cooking Tips & Techniques
After making this cheesecake more times than I care to count, I’ve picked up a few tricks that’ll save you from my early mistakes.
Room temperature ingredients are not optional. I cannot stress this enough. Cold cream cheese creates lumps that no amount of mixing will fix. Cold eggs can cause the batter to curdle. Plan ahead—take everything out of the fridge about 2 hours before you start baking.
Don’t overmix the filling. I know it’s tempting to keep beating until it’s perfectly smooth, but overmixing incorporates too much air. That air expands during baking and then collapses, leaving you with cracks. Mix just until each ingredient is incorporated, then stop.
The water bath is your friend. Some recipes skip it, but for this eggnog cheesecake, it’s essential. The steam keeps the oven moist and the cheesecake from drying out. Just make sure your foil is wrapped tightly—I double wrap mine to be safe. I once had a leaky foil situation that turned my crust into soggy mush. Not my finest moment.
Watch for the jiggle. The center of the cheesecake should still wobble when you gently shake the pan. It’ll continue to set as it cools. If you wait until the center is completely firm, you’ve gone too far.
Patience with cooling. The gradual cooling process—first in the oven, then on the counter, then in the fridge—is what gives you that smooth, crack-free top. Rushing this step is the number one cause of cracks. I know it’s hard, but trust the process.
Variations & Adaptations
One of the best things about this recipe is how flexible it is. Here are some ways to make it your own:
- Gluten-Free Version : Use gluten-free gingerbread cookies for the crust. I’ve tried several brands, and Pamela’s Gingerbread Cookies work really well. The filling is naturally gluten-free as long as you use a gluten-free flour blend or cornstarch instead of all-purpose flour.
- Lighter Option : Substitute the cream cheese with reduced-fat cream cheese and use low-fat eggnog. The texture will be slightly less rich, but it’s still delicious. I’ve made this for New Year’s resolutions and nobody complained.
- Boozy Twist : Add 2 tablespoons of dark rum or bourbon to the filling along with the vanilla. It deepens the eggnog flavor and adds a grown-up kick. Just reduce the eggnog by 2 tablespoons to keep the consistency right.
- Spice It Up : For a warmer, more intense spice profile, add 1/4 teaspoon of ground cardamom and a pinch of white pepper to the filling. It sounds weird, but white pepper adds a subtle warmth that compliments the nutmeg beautifully.
- No-Bake Version : If you’re short on oven time, you can make this as a no-bake cheesecake. Use the same crust, but for the filling, beat 16 ounces of cream cheese with 1/2 cup sugar, then fold in 2 cups of whipped cream and 1 cup of thickened eggnog (simmer 2 cups eggnog with 3 tablespoons cornstarch until thick, then cool). Chill for 6 hours—it’s lighter but still incredibly good.
Serving & Storage Suggestions
This cheesecake is best served cold, straight from the fridge. I like to take it out about 15 minutes before serving to take the chill off slightly—it makes the flavors more pronounced.
For a beautiful presentation, run a thin knife around the edge of the pan before releasing the springform latch. Slice with a sharp knife dipped in hot water and wiped clean between cuts. You’ll get those gorgeous, clean slices that look like they came from a bakery.
Top each slice with a dollop of whipped cream and a light dusting of nutmeg or cinnamon. If I’m feeling fancy, I add a small gingerbread cookie on the side for extra crunch.
This cheesecake pairs beautifully with a strong cup of coffee or a glass of cold milk. For holiday gatherings, I’ve served it alongside hot apple cider and it was a hit.
Storage: Cover the cheesecake tightly with plastic wrap or store in an airtight container in the refrigerator. It’ll keep for up to 5 days—though in my house, it never lasts that long. The flavors actually deepen and improve after a day or two.
Freezing: This cheesecake freezes beautifully. Wrap individual slices in plastic wrap, then foil, and place in a freezer bag. They’ll keep for up to 3 months. Thaw in the refrigerator overnight before serving. I always keep a few slices in the freezer for those random December evenings when I need a little holiday cheer.
Nutritional Information & Benefits
Let’s be real—this is a decadent dessert, not a health food. But knowing what’s in it helps with mindful indulgence. Per slice (based on 12 servings):
- Calories: Approximately 480-520 calories per slice
- Protein: 8-10 grams
- Fat: 34-38 grams (mostly from cream cheese and eggs)
- Carbohydrates: 38-42 grams
- Sugar: 28-32 grams
- Calcium: A decent amount from the cream cheese and eggnog
On the plus side, you’re getting some protein and calcium from the dairy, and the spices—nutmeg, cinnamon, and cloves—have anti-inflammatory properties. Ginger in the crust is great for digestion. So while this isn’t a health food, it’s not empty calories either. It’s a treat, and treats are part of a balanced life.
If you’re watching your sugar intake, you can reduce the sugar in the filling to 3/4 cup without affecting the texture much. The sweetness will be more subtle, but the spices will still shine through.
Conclusion
This cozy eggnog cheesecake with gingerbread crust is more than just a recipe—it’s a little piece of holiday magic you can create in your own kitchen. It’s the dessert that brings people together, that makes December feel special, that turns an ordinary evening into a celebration.
I’ve made this for Christmas Eve dinners, New Year’s parties, and quiet nights by the fire. Every time, it delivers. The creamy filling, the spiced crust, the warm holiday aroma that fills your kitchen—it’s everything you want from a holiday dessert.
Don’t be afraid to make it your own. Adjust the spices, try different toppings, or experiment with the variations I shared. The best recipes are the ones that become part of your family’s traditions.
I’d love to hear how yours turns out! Leave a comment below and let me know if you added your own twist. And if you share it on social media, tag me—I love seeing your beautiful creations. Happy baking, friends. You’ve got this.
Frequently Asked Questions
Can I use homemade eggnog instead of store-bought?
Absolutely! Homemade eggnog works wonderfully in this recipe. Just make sure it’s fully chilled and has a similar consistency to store-bought. If your homemade version is very thick, you might need to thin it slightly with a splash of milk.
Why did my cheesecake crack on top?
Cracks usually happen from overbaking, overmixing, or cooling too quickly. Make sure you pull the cheesecake out while the center still jiggles, and let it cool gradually in the oven first. If cracks do appear, don’t worry—the whipped cream topping covers them beautifully!
Can I make this cheesecake dairy-free?
You can try using dairy-free cream cheese (like Kite Hill or Tofutti) and a plant-based eggnog. Keep in mind the texture will be slightly different—less creamy and more dense. I’ve tested it with oat-based eggnog and it worked pretty well.
How far in advance can I make this cheesecake?
You can make it up to 3 days ahead of time. In fact, I recommend making it at least a day in advance so the flavors have time to meld. Just keep it covered in the refrigerator until you’re ready to serve.
Can I use a different crust instead of gingerbread?
Sure! A graham cracker crust works perfectly if you don’t have gingerbread cookies. You can also try a shortbread crust for a milder flavor. Just use the same butter-to-crumb ratio—2 cups crumbs to 6 tablespoons melted butter.
Pin This Recipe!
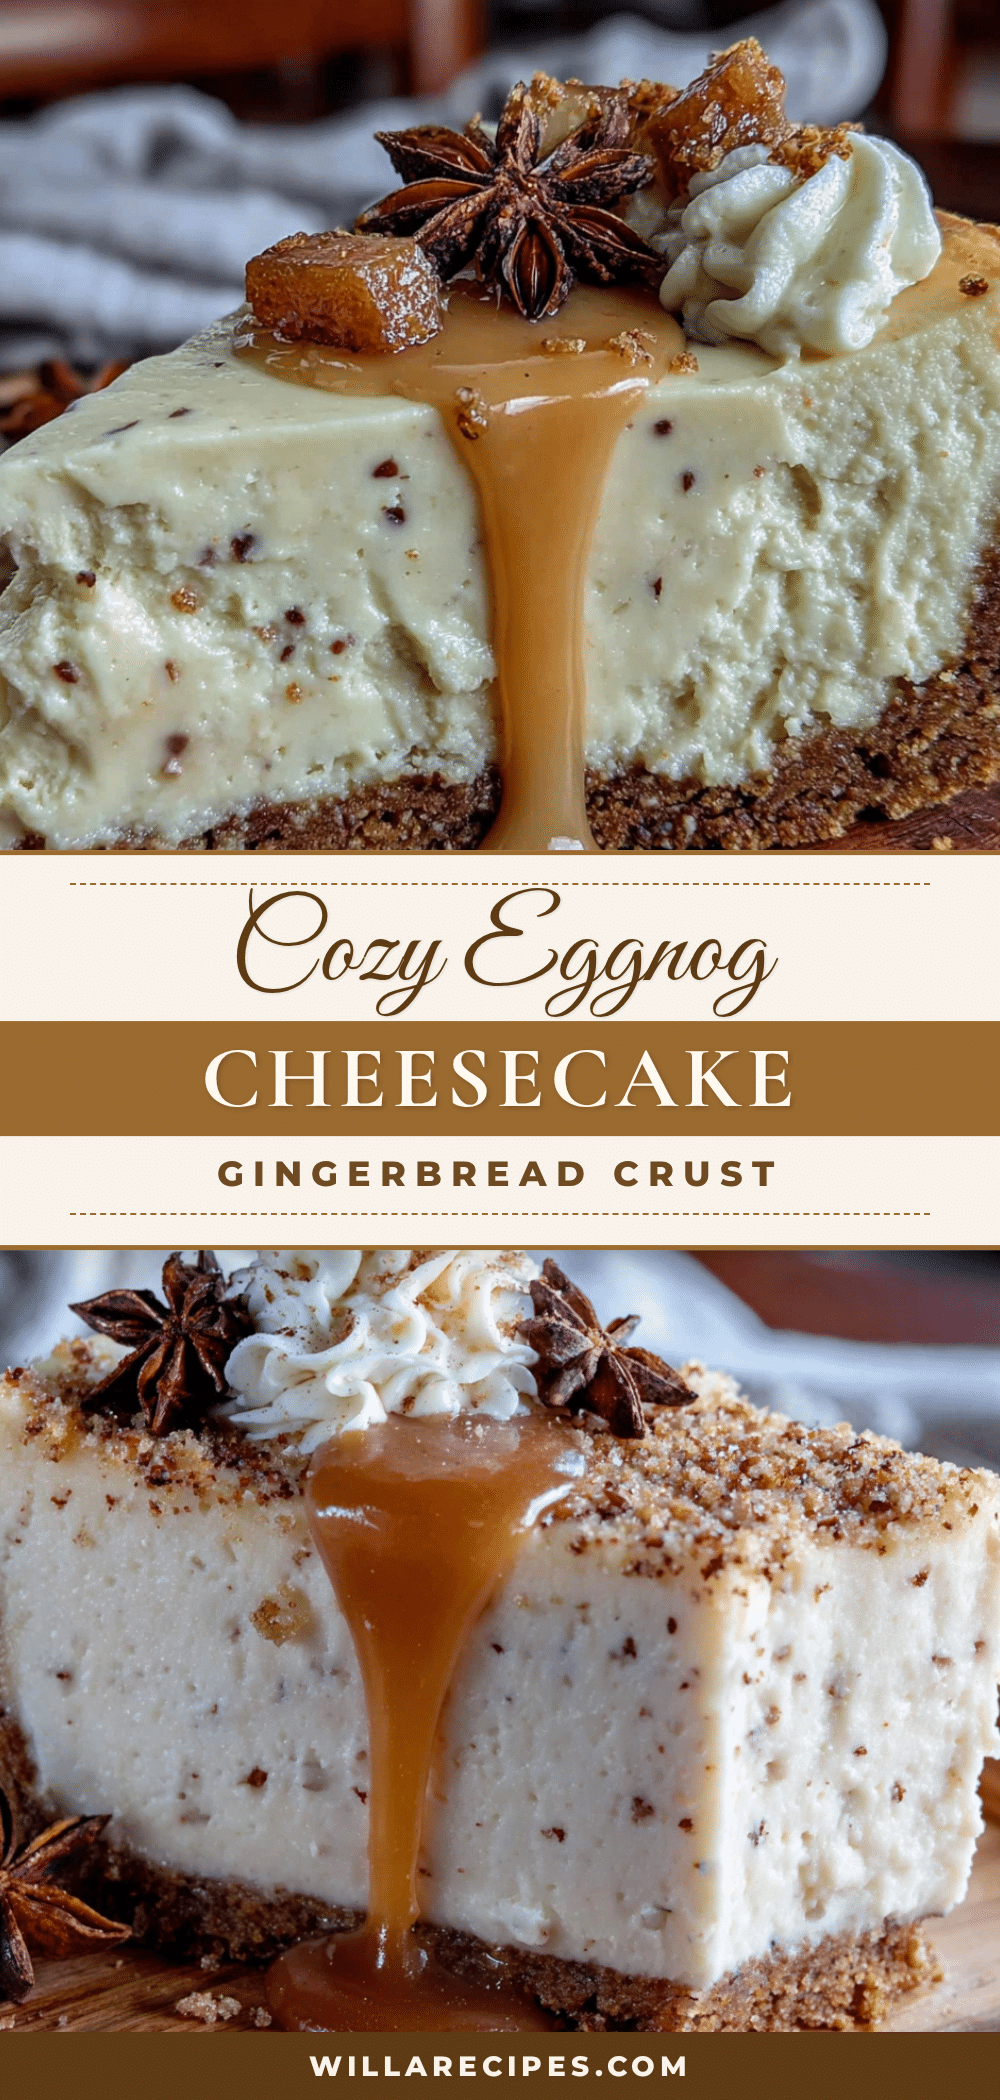
Cozy Eggnog Cheesecake with Gingerbread Crust
A creamy, spiced eggnog cheesecake with a gingerbread crust that tastes like Christmas morning. This easy holiday dessert uses a no-water-bath method and simple ingredients for a silky, crack-free cheesecake that’s perfect for festive gatherings.
- Prep Time: 30 minutes
- Cook Time: 55-65 minutes
- Total Time: 8 hours (including chilling)
- Yield: 12 servings 1x
- Category: Dessert
- Cuisine: American
Ingredients
- 2 cups (240g) gingerbread cookie crumbs (about 20–25 cookies)
- 6 tablespoons (85g) unsalted butter, melted
- 2 tablespoons (25g) brown sugar, packed
- 1/4 teaspoon salt
- 32 ounces (910g) cream cheese, softened
- 1 cup (200g) granulated sugar
- 3 tablespoons (24g) all-purpose flour
- 4 large eggs, room temperature
- 2 large egg yolks, room temperature
- 1 1/2 cups (360ml) high-quality eggnog
- 1 teaspoon vanilla extract
- 1/2 teaspoon ground nutmeg, freshly grated if possible
- 1/2 teaspoon ground cinnamon
- 1/4 teaspoon ground cloves
- Pinch of salt
- 1 cup (240ml) heavy whipping cream (for optional topping)
- 2 tablespoons (15g) powdered sugar (for optional topping)
- 1/2 teaspoon vanilla extract (for optional topping)
- Extra ground nutmeg or cinnamon, for dusting (for optional topping)
Instructions
- Preheat oven to 325°F (163°C). Wrap the bottom and sides of a 9-inch springform pan with a double layer of heavy-duty aluminum foil, making sure the foil comes up at least 2 inches on the sides.
- Make the crust: Pulse gingerbread cookies in a food processor until fine crumbs form (or crush in a zip-top bag with a rolling pin). In a medium bowl, combine cookie crumbs, brown sugar, and salt. Pour in melted butter and stir with a fork until all crumbs are moistened. Press mixture firmly into the bottom of the prepared springform pan, going slightly up the sides (about half an inch). Bake for 10 minutes, then set aside to cool. Leave the oven on.
- Make the filling: In a large mixing bowl, beat softened cream cheese with an electric mixer on medium speed until smooth and creamy (about 2 minutes). Scrape down the sides and bottom of the bowl. Add sugar and flour, beat on medium-low until combined (about 1 minute). Scrape bowl again.
- Add eggs and egg yolks one at a time, beating on low after each addition just until incorporated. With mixer on low, slowly pour in eggnog and vanilla extract. Add nutmeg, cinnamon, cloves, and salt. Mix just until combined (about 30 seconds). Batter should be smooth and creamy.
- Pour filling over cooled crust. Smooth the top with a spatula. Gently tap the pan on the counter to release air bubbles.
- Place foil-wrapped springform pan into a large roasting pan. Carefully pour hot water into the roasting pan until it reaches halfway up the sides of the springform pan.
- Bake at 325°F (163°C) for 55 to 65 minutes. Edges should look set and slightly puffed, but the center should still jiggle slightly when gently shaken.
- Turn off the oven, crack the door open, and let cheesecake sit in the water bath for 1 hour. Remove pan from water bath, take off foil, and let cool completely on a wire rack (about another hour).
- Once at room temperature, cover pan with plastic wrap and refrigerate for at least 6 hours, preferably overnight.
- For optional topping: Beat heavy whipping cream, powdered sugar, and vanilla extract until stiff peaks form. Serve cheesecake slices with a dollop of whipped cream and a dusting of nutmeg or cinnamon.
Notes
Room temperature ingredients are essential for a smooth, crack-free cheesecake. Take cream cheese, eggs, and eggnog out of the fridge about 2 hours before starting. Do not overmix the filling to avoid cracks. The water bath helps prevent cracking and keeps the cheesecake moist. The center should still jiggle when done; it will set as it cools. For best flavor, refrigerate overnight before serving. Cheesecake can be made up to 3 days ahead and freezes well for up to 3 months.
Nutrition
- Serving Size: 1 slice (1/12 of che
- Calories: 500
- Sugar: 30
- Sodium: 350
- Fat: 36
- Saturated Fat: 20
- Carbohydrates: 40
- Fiber: 1
- Protein: 9
Keywords: eggnog cheesecake, gingerbread crust, holiday dessert, Christmas cheesecake, eggnog dessert, gingerbread cheesecake, holiday baking, easy cheesecake recipe


