I had refused to put deviled eggs on the Thanksgiving table for years. A decade, maybe more. They felt too casual, too picnic-y, too much like a summer cookout appetizer trying to crash a formal November gathering. Then last year, my sister-in-law brought a platter of these to our family dinner, and I caught my husband — the same man who once told me deviled eggs were “fine, I guess” — standing by the kitchen island eating his fourth one in a row. He had a smear of filling on his cheek and absolutely zero shame about it.
The thing is, I had to admit they worked. The creamy, tangy filling with that salty crunch of bacon on top somehow fit right in next to the turkey and mashed potatoes. Honestly, I felt a little annoyed at how good they were. I mean, I had spent years perfecting my Thanksgiving appetizer game, and here was a deviled egg stealing the show. But when I finally asked for the recipe and made them myself, I understood. The secret is in the balance — the richness of the yolks, the brightness of the mustard, the smoky bacon that makes every bite feel like a tiny celebration.
Maybe you’ve been there too, clinging to a food opinion that turns out to be completely wrong. Or maybe you’ve always loved deviled eggs and just needed an excuse to put them on the holiday menu. Either way, these Thanksgiving Deviled Eggs with Crispy Bacon have officially earned a permanent spot on my table. They’re the first thing to disappear, and honestly? I’m okay with that now.
Why You’ll Love This Recipe
Let me tell you why these eggs are different from every other deviled egg recipe you’ve seen. I tested this version at least six times before I got it right — the first batch had filling that was too runny, the second was too dry, and the third just tasted like plain egg salad. But when I finally nailed the texture and flavor, I knew this was the one to share.
- Perfect for Thanksgiving Appetizers : These eggs set the tone for the meal without filling anyone up. They’re light enough to enjoy while you’re waiting for the turkey but satisfying enough to curb those pre-dinner hunger pangs.
- Simple Ingredients : You probably already have most of what you need in your fridge and pantry. No special trips to the store for obscure ingredients.
- Crowd-Pleaser : I’ve served these at three different holiday gatherings now, and every single time, someone asks for the recipe. Kids love them, adults love them, even the picky eaters go back for seconds.
- Make-Ahead Friendly : You can prep these the day before and just add the bacon right before serving. It takes so much stress off your Thanksgiving morning.
- Unbelievably Delicious : The combination of creamy yolk filling, tangy mustard, and crispy bacon creates this flavor that just works. It’s familiar but somehow better than you remember.
What makes this recipe different from the rest? It’s the little details — using room temperature eggs for easier peeling, letting the filling sit for ten minutes before piping so the flavors blend together, and crumbling the bacon into pieces that are big enough to taste but small enough to stay on top. I also add a tiny pinch of smoked paprika to the yolk mixture, which gives it this warmth that regular paprika just can’t match. It’s not a huge change, but trust me, you’ll notice the difference.
What Ingredients You Will Need
This recipe uses simple, wholesome ingredients to deliver that cozy Thanksgiving flavor without any fuss. Most of these are pantry staples, which makes this recipe perfect for when you’re already juggling a dozen other dishes.
- 12 large eggs – Use eggs that are at least a week old for easier peeling. Fresh eggs are harder to peel, so plan ahead if you can. Bring them to room temperature before boiling for the best texture.
- 1/3 cup mayonnaise – I prefer Duke’s or Hellmann’s for the creamiest texture. The richness of good mayo makes a huge difference here.
- 1 tablespoon yellow mustard – This adds that classic tangy flavor. You can use Dijon if you want something a little sharper, but yellow mustard is my go-to for this recipe.
- 1 teaspoon white vinegar – A tiny splash brightens up the filling and cuts through the richness. Don’t skip this — it balances everything perfectly.
- 1/4 teaspoon salt – Regular table salt works fine. Add more to taste if needed.
- 1/8 teaspoon black pepper – Freshly ground is best, but pre-ground works too.
- 1/4 teaspoon smoked paprika – This is my secret ingredient. Smoked paprika adds a warm, slightly smoky flavor that regular paprika just can’t replicate. I buy mine from a local spice shop, but any brand works.
- 6 slices bacon – Thick-cut bacon gives you the best crunch. I’ve tried turkey bacon and it works okay, but the texture isn’t quite as satisfying. For the best results, use regular pork bacon.
- Fresh chives for garnish – A few snips of fresh chives on top add color and a mild onion flavor that complements the filling beautifully.
For the bacon, I recommend cooking it until it’s extra crispy — almost to the point where it’s about to burn. That sounds intense, but trust me, the crunchier the bacon, the better the contrast with the creamy filling. I’ve made the mistake of undercooking the bacon before, and it just gets chewy and sad on top of the eggs. Not the vibe for Thanksgiving.
Equipment Needed
You don’t need anything fancy for this recipe, which is part of why I love it. Here’s what you’ll need:
- Large pot – For boiling the eggs. Make sure it’s big enough that the eggs have room to move around a little without bumping into each other too much.
- Mixing bowls – A medium bowl for the filling and a small bowl for the bacon crumbs.
- Piping bag or zip-top bag – I use a piping bag with a star tip for that classic deviled egg look, but a zip-top bag with the corner snipped off works just as well. Honestly, I’ve used a spoon in a pinch, and it still tastes the same.
- Sharp knife – For cleanly slicing the eggs in half. A dull knife will tear the whites and make a mess.
- Skillet – For cooking the bacon. A cast iron skillet works great, but any non-stick pan will do.
- Paper towels – For draining the bacon grease and patting the eggs dry after boiling.
If you don’t have a piping bag, don’t stress. I’ve been there — standing in my kitchen at 10 PM the night before Thanksgiving with no piping bag in sight. A zip-top bag with the corner cut off works perfectly. Just be careful not to cut too big of a hole, or the filling will come out too fast.
Preparation Method
- Boil the eggs – Place the eggs in a large pot and cover them with cold water by about an inch. Bring the water to a rolling boil over high heat. Once it’s boiling, cover the pot, turn off the heat, and let the eggs sit for exactly 12 minutes. This gives you perfectly hard-boiled yolks without that weird green ring around the outside. While the eggs are sitting, fill a large bowl with ice water.
- Ice bath – After 12 minutes, transfer the eggs to the ice water bath using a slotted spoon. Let them sit for at least 10 minutes. This stops the cooking process and makes the eggs much easier to peel. I’ve skipped this step before out of impatience, and I regretted it — the shells stuck to the whites like they were glued on.
- Peel the eggs – Gently tap each egg on the counter to crack the shell all over, then roll it between your palms to loosen the shell. Start peeling from the wider end where the air pocket is. Rinse the peeled eggs under cold water to remove any tiny shell fragments. Pat them dry with paper towels.
- Slice the eggs – Using a sharp knife, slice each egg in half lengthwise. Carefully pop the yolks out into a medium mixing bowl. Arrange the egg white halves on a serving platter, cut side up.
- Cook the bacon – While the eggs are cooling, cook the bacon in a skillet over medium heat until it’s very crispy, about 6-8 minutes. Flip the bacon halfway through so both sides get evenly browned. Transfer the cooked bacon to a paper towel-lined plate to drain and cool. Once cool enough to handle, crumble it into small pieces. I like to leave some pieces a little bigger for texture.
- Make the filling – Mash the egg yolks with a fork until they’re completely broken up with no large lumps. Add the mayonnaise, yellow mustard, white vinegar, salt, black pepper, and smoked paprika. Stir everything together until the mixture is smooth and creamy. Taste it and adjust the seasoning if needed — I sometimes add an extra pinch of salt or a little more mustard depending on my mood.
- Let the filling rest – Here’s a tip I learned through trial and error: let the filling sit for about 10 minutes before piping. This gives the flavors time to meld together, and the texture becomes even creamier. I usually use this time to clean up my workspace or snip the chives.
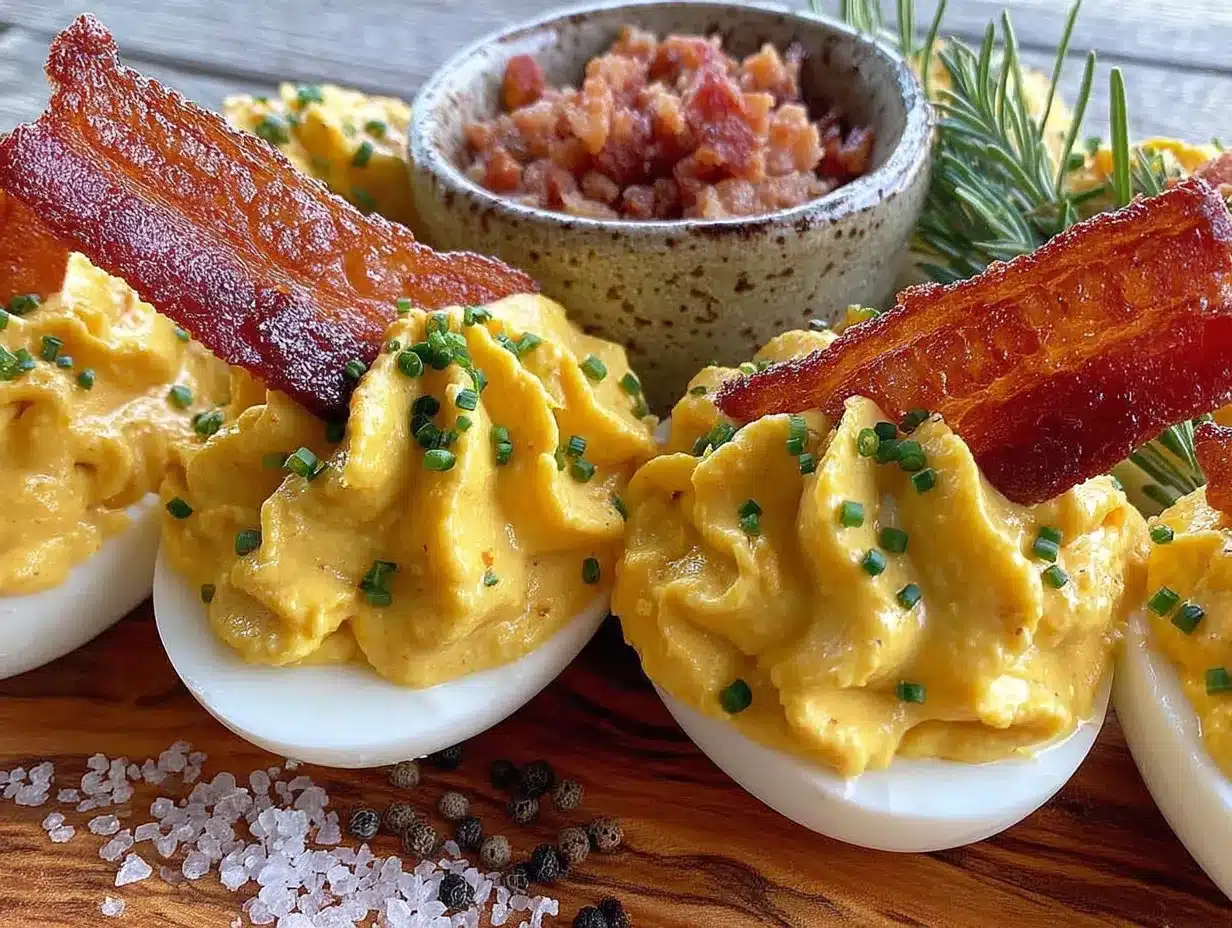
- Fill the eggs – Spoon the filling into a piping bag fitted with a star tip, or into a zip-top bag with the corner snipped off. Pipe the filling into each egg white half, dividing it evenly. You should have enough filling to make each egg look generously stuffed — don’t be shy here.
- Top with bacon and chives – Sprinkle the crumbled bacon evenly over the filled eggs. Snip fresh chives over the top for a pop of color. If you’re serving these right away, go ahead and add the toppings. If you’re making them ahead, hold off on the bacon and chives until just before serving so everything stays fresh and crunchy.
One thing I learned the hard way: don’t overmix the filling. If you stir it too much, it can become thin and runny. You want it to be thick enough to hold its shape when piped. If your filling seems too thin, pop it in the fridge for 15 minutes to firm up before piping.
Cooking Tips & Techniques
Let me share some things I wish someone had told me when I first started making deviled eggs. The first time I made these for Thanksgiving, I ended up with eggs that were impossible to peel and a filling that tasted flat. It was a disaster, honestly. But I learned from every mistake.
The biggest trick for perfectly boiled eggs is the ice bath. I know it feels like an extra step, but it genuinely makes peeling so much easier. I once skipped it because I was in a hurry, and I spent twenty minutes picking shell fragments out of egg whites. Never again.
For the bacon, cook it low and slow. Medium heat is perfect — high heat will burn the outside before the fat renders, leaving you with chewy, uneven bacon. I like to press the bacon down with a spatula while it cooks to keep it flat and ensure even crisping. If you want to save time, you can cook the bacon in the oven at 400°F for about 15 minutes. It comes out perfectly crispy and you don’t have to stand over the stove.
Here’s another tip: if your filling seems too thick, add a tiny splash of pickle juice. I know it sounds weird, but the acidity brightens everything up and adds this subtle tang that pairs beautifully with the bacon. I discovered this by accident when I ran out of vinegar and grabbed the pickle jar instead. Now I do it on purpose.
Don’t overfill the eggs. I know it’s tempting to pile the filling high, but if you add too much, it squishes out when you try to pick them up. Aim for a nice, rounded mound that stays contained within the egg white. You want these to be easy to eat, not messy.
Variations & Adaptations
One of the best things about this recipe is how easy it is to customize. I’ve tried several variations over the years, and each one brings something different to the table.
Spicy Southwest Version – Add a finely chopped jalapeño to the yolk mixture and top with crumbled chorizo instead of bacon. This version is perfect if you want a little heat with your Thanksgiving appetizers. I made this for a Friendsgiving once, and it was the first thing to disappear.
Herb Garden Twist – Swap the chives for fresh dill or tarragon. Dill gives the eggs a bright, slightly tangy flavor that’s wonderful with the bacon. I also add a teaspoon of fresh lemon juice to the filling when I go this route. It feels lighter and more spring-like, which is nice if you’re serving these alongside heavier dishes.
Smoked Salmon Upgrade – Replace the bacon with smoked salmon and add a dollop of crème fraîche on top. This version feels fancy and elegant, perfect for a brunch or a more formal gathering. I served these at a holiday party last year, and people couldn’t stop talking about them.
Dairy-Free Option – Use vegan mayonnaise and skip the bacon (or use coconut bacon for a plant-based alternative). I’ve tested this version for a friend who’s dairy-free, and it works surprisingly well. The key is finding a vegan mayo that’s creamy enough — I like Follow Your Heart brand.
Extra Tangy Version – Add a teaspoon of pickle relish to the yolk mixture and use Dijon mustard instead of yellow. This gives the filling a punchier, more complex flavor that stands up well to the richness of the bacon. My husband actually prefers this version over the original.
Serving & Storage Suggestions
These deviled eggs are best served at room temperature, which makes them perfect for Thanksgiving. You can set them out on the appetizer table while you’re finishing up the turkey, and they’ll be just right by the time guests start grazing.
For presentation, I like to arrange the eggs on a white platter in concentric circles. It looks elegant and makes it easy for people to grab one without disrupting the whole display. A sprinkle of extra smoked paprika on top adds a beautiful red color that’s very festive for the holidays.
If you’re making these ahead of time, here’s what I recommend: prepare the eggs and filling the day before, but keep them separate. Store the egg whites in an airtight container in the fridge, and put the filling in a piping bag or zip-top bag. When you’re ready to serve, just pipe the filling into the whites and add the toppings. The bacon should be cooked fresh — or at least reheated in the oven for a few minutes to bring back its crunch.
Leftover deviled eggs will keep in the fridge for up to two days, but the texture does change a little. The whites can get slightly rubbery, and the bacon loses its crunch. If you have leftovers, I recommend eating them within 24 hours for the best experience. And honestly, at my house, they never last that long anyway.
Nutritional Information & Benefits
Each deviled egg half (with bacon) contains approximately 80 calories, 6 grams of fat, 1 gram of carbohydrates, and 5 grams of protein. These numbers will vary slightly depending on the specific brands you use and how much bacon you add.
Eggs are a great source of high-quality protein and contain important nutrients like vitamin B12, vitamin D, and choline, which supports brain health. The yolks are where most of the nutrients are, so don’t skip them — they’re the best part anyway.
Bacon adds some protein and fat, which makes these eggs more satisfying as an appetizer. If you’re watching your sodium intake, you can use low-sodium bacon or reduce the added salt in the filling.
This recipe is naturally low-carb and gluten-free, which makes it a great option for guests with dietary restrictions. Just make sure to check the labels on your mayonnaise and mustard to confirm they’re gluten-free — most are, but it’s always good to double-check.
From a wellness perspective, I love that these deviled eggs feel indulgent without being heavy. They’re rich enough to satisfy those comfort food cravings but light enough that you can enjoy a couple without feeling stuffed before the main meal.
Conclusion
These Thanksgiving Deviled Eggs with Crispy Bacon have become a staple in my holiday rotation, and I honestly can’t imagine the table without them now. They’re the perfect balance of creamy and crunchy, tangy and smoky, familiar and surprising. Every time I make them, I think about that first Thanksgiving when my sister-in-law brought them over and proved me wrong about deviled eggs. Sometimes the best recipes are the ones that change your mind.
I’d love to hear how these turn out for you. Did you try any of the variations? Did your family fight over the last one like mine does? Drop a comment below and let me know. And if you’re looking for more cozy Thanksgiving recipes, check out our classic Thanksgiving turkey or our creamy mashed potatoes for the perfect holiday meal.
Happy cooking, and here’s to a Thanksgiving filled with good food and even better company!
Frequently Asked Questions
Can I make these deviled eggs a day ahead of time?
Yes! Prepare the egg whites and filling separately, then store them in the fridge. Assemble and add the bacon and chives just before serving for the best texture and freshness.
How do I keep the bacon crispy on top?
Cook the bacon until it’s very crispy, then let it cool completely before crumbling. Only add it to the eggs right before serving. If the bacon softens, you can reheat it in a 350°F oven for 3-4 minutes to bring back the crunch.
Can I use a different type of mustard?
Absolutely. Dijon mustard gives a sharper, more complex flavor, while honey mustard adds a touch of sweetness. Feel free to experiment with what you have on hand.
Why are my hard-boiled eggs hard to peel?
This usually happens with very fresh eggs. For easier peeling, use eggs that are at least a week old. Also, make sure to transfer them to an ice bath immediately after boiling — the temperature shock helps separate the shell from the egg white.
Can I freeze deviled eggs?
I don’t recommend freezing deviled eggs. The texture of both the egg whites and the filling changes significantly after freezing and thawing. These are best enjoyed fresh or within a day or two of preparation.
Pin This Recipe!
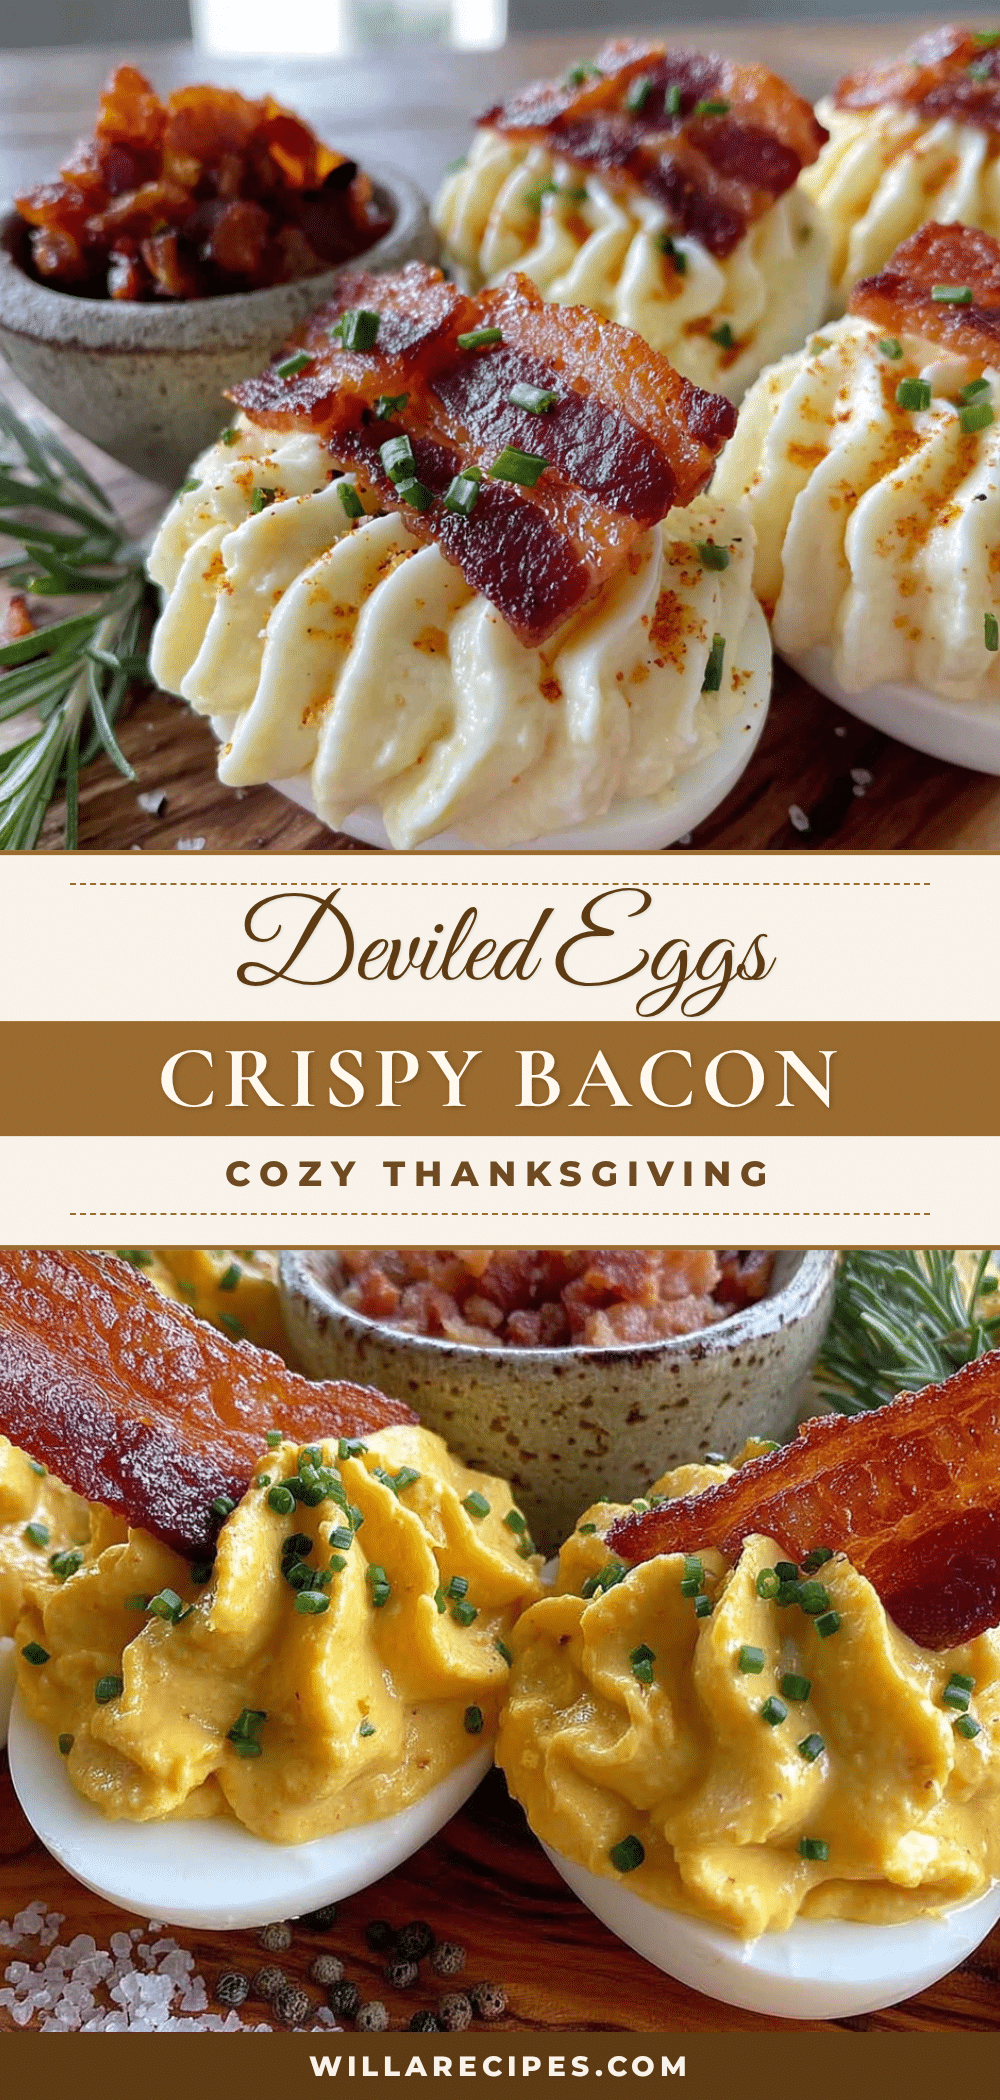
Cozy Thanksgiving Deviled Eggs with Crispy Bacon
Creamy, tangy deviled eggs topped with crispy bacon and fresh chives, perfect for Thanksgiving appetizers. This crowd-pleasing recipe is make-ahead friendly and uses simple ingredients for a cozy holiday starter.
- Prep Time: 15 minutes
- Cook Time: 20 minutes
- Total Time: 35 minutes
- Yield: 24 deviled egg halves (12 servings of 2 halves each) 1x
- Category: Appetizer
- Cuisine: American
Ingredients
- 12 large eggs
- 1/3 cup mayonnaise
- 1 tablespoon yellow mustard
- 1 teaspoon white vinegar
- 1/4 teaspoon salt
- 1/8 teaspoon black pepper
- 1/4 teaspoon smoked paprika
- 6 slices bacon
- Fresh chives for garnish
Instructions
- Place the eggs in a large pot and cover with cold water by about an inch. Bring to a rolling boil over high heat. Cover, turn off heat, and let sit for exactly 12 minutes. Meanwhile, fill a large bowl with ice water.
- After 12 minutes, transfer eggs to the ice water bath using a slotted spoon. Let sit for at least 10 minutes to stop cooking and make peeling easier.
- Gently tap each egg on the counter to crack the shell all over, then roll between palms to loosen. Start peeling from the wider end. Rinse peeled eggs under cold water and pat dry with paper towels.
- Using a sharp knife, slice each egg in half lengthwise. Pop yolks into a medium mixing bowl. Arrange egg white halves on a serving platter, cut side up.
- Cook bacon in a skillet over medium heat until very crispy, about 6-8 minutes, flipping halfway. Transfer to a paper towel-lined plate to drain and cool. Crumble into small pieces.
- Mash egg yolks with a fork until no large lumps remain. Add mayonnaise, yellow mustard, white vinegar, salt, black pepper, and smoked paprika. Stir until smooth and creamy. Adjust seasoning to taste.
- Let the filling rest for about 10 minutes to allow flavors to meld.
- Spoon filling into a piping bag fitted with a star tip, or into a zip-top bag with the corner snipped off. Pipe filling into each egg white half, dividing evenly.
- Sprinkle crumbled bacon evenly over filled eggs. Snip fresh chives on top. If making ahead, hold off on bacon and chives until just before serving.
Notes
Use eggs that are at least a week old for easier peeling. Bring eggs to room temperature before boiling. For the bacon, cook until extra crispy for best texture contrast. If filling seems too thin, refrigerate for 15 minutes before piping. To make ahead, prepare egg whites and filling separately, store in fridge, and assemble with bacon and chives just before serving. Leftovers keep up to 2 days but are best within 24 hours.
Nutrition
- Serving Size: 2 deviled egg halves
- Calories: 160
- Sugar: 1
- Sodium: 350
- Fat: 12
- Saturated Fat: 3.5
- Carbohydrates: 2
- Protein: 10
Keywords: deviled eggs, Thanksgiving appetizer, bacon deviled eggs, holiday appetizer, easy appetizer, make-ahead appetizer


