I wasn’t expecting cooking advice from the quiet man who fixed my washing machine, but there I was, standing in my kitchen doorway with a wrench in one hand and a plate of deviled eggs in the other. He’d noticed the half-dozen hard-boiled eggs sitting on my counter and just started talking—about his grandmother’s farm in Iowa, about the summer he learned to peel eggs underwater, and about this crazy combination he swore by: bacon and chives in the filling. Honestly, I almost laughed. Deviled eggs are supposed to be classic, right? Paprika, maybe a little pickle relish. But he was so earnest, so sure of himself, that I scribbled his instructions on the back of an old receipt. That was three summers ago, and I haven’t made deviled eggs any other way since. The first time I tried his recipe, I burned the bacon (let’s be real, we’ve all been there), and the chives I’d bought were looking a little sad. But even with those fumbles, the filling was something else—smoky, creamy, with this fresh little bite from the chives that cut through all that richness. It was the kind of recipe you just keep coming back to, you know? Maybe you’ve been there, standing over a platter of appetizers, thinking, “I could eat six of these and not feel bad about it.” That’s exactly the energy this recipe brings.
Why You’ll Love This Recipe
These Creamy Bacon Chive Deviled Eggs aren’t your grandma’s deviled eggs—well, okay, they kind of are, but with a serious upgrade. I’ve tested this recipe more times than I can count, tweaking the ratio of mayo to mustard, figuring out the perfect bacon fat-to-filling situation, and honestly, it’s the version I’m most proud of. Here’s why you’ll feel the same way:
- Quick & Easy: From start to finish, you’re looking at about 30 minutes, and most of that is hands-off boiling time. Perfect for last-minute party prep or a random Tuesday craving.
- Simple Ingredients: Eggs, bacon, chives, mayo, mustard, salt, pepper—that’s it. No weird specialty items or trips to three different stores.
- Perfect for Gatherings: These disappear fast at potlucks, barbecues, Easter brunch, or even just a quiet night in when you want something special.
- Crowd-Pleaser: I’ve served these to kids who swear they hate eggs and adults who claim they’re “not really appetizer people.” Empty plate every single time.
- Unbelievably Delicious: The smoky bacon, the fresh chives, the ultra-creamy yolk filling—it’s comfort food that feels a little fancy without trying too hard.
What sets this recipe apart is the technique. I blend the yolks with a touch of the reserved bacon fat (trust me on this one), which adds this deep, savory richness you just can’t get any other way. It’s not just another deviled egg recipe—it’s the one that’ll have people asking for the recipe before they’ve even finished chewing. And honestly, that’s the best kind of compliment, isn’t it?
What Ingredients You Will Need
This recipe uses simple, everyday ingredients to create something truly special. Most of these are probably in your kitchen right now, which is part of the beauty of it.
- 6 large eggs – The foundation of it all. Use eggs that are at least a week old for easier peeling. Fresh eggs are great for scrambling, but for hard-boiling, older is better.
- 4 slices of bacon – I prefer thick-cut bacon for a meatier bite, but regular works too. You’ll use both the crispy bacon and about a teaspoon of the rendered fat in the filling.
- 2 tablespoons fresh chives, finely chopped – Fresh is non-negotiable here. Dried chives just don’t have the same bright, oniony pop. Plus, they look gorgeous on top.
- 3 tablespoons mayonnaise – Full-fat mayo gives the creamiest result. I like Duke’s or Hellmann’s, but use your favorite. Avoid miracle whip here—it’s too tangy and sweet for this filling.
- 1 teaspoon yellow mustard – Adds a subtle tang and that classic deviled egg color. You can swap in Dijon for a sharper flavor if you’re feeling adventurous.
- 1 teaspoon reserved bacon fat – This is the secret weapon. It adds an incredible smoky depth that makes people say, “What is that flavor?”
- Salt and freshly ground black pepper to taste – Go easy on the salt since the bacon and bacon fat are already salty. Fresh pepper makes a difference here.
- Optional garnish: paprika, extra chive pieces, or a small piece of crispy bacon – For that final flourish that makes them look like you spent way more effort than you actually did.
Equipment Needed
You don’t need a fancy kitchen to make these deviled eggs, which is honestly my favorite thing about them. Here’s what you’ll need:
- Medium saucepan – For boiling the eggs. Any size works, just make sure the eggs fit in a single layer.
- Large bowl with ice water – For shocking the eggs after boiling. This stops the cooking process and makes peeling easier.
- Small skillet – For cooking the bacon. Cast iron is my go-to, but non-stick works just fine.
- Sharp knife and cutting board – For halving the eggs and chopping chives. A dull knife will squish the yolks, so keep it sharp.
- Small mixing bowl – For the filling. I use a cereal bowl, honestly. No need for anything fancy.
- Fork or potato masher – For mashing the yolks. A fork works perfectly, but if you have a pastry blender, it makes short work of it.
- Piping bag or zip-top bag – For piping the filling into the egg whites. A zip-top bag with the corner snipped off works like a charm and costs nothing.
- Serving platter – Something flat to arrange the finished eggs on. A white platter makes the colors pop beautifully.
Preparation Method
Let’s get cooking. This method is foolproof, I promise.
- Boil the eggs. Place the eggs in a single layer in your saucepan and cover them with cold water by about an inch. Bring the water to a rolling boil over high heat. Once boiling, cover the pot, remove it from the heat, and let it sit for exactly 12 minutes. Set a timer—don’t guess. This gives you perfectly hard-boiled yolks without that weird green ring around the outside.
- Shock the eggs. While the eggs are resting, fill a large bowl with ice and cold water. Once the 12 minutes are up, use a slotted spoon to transfer the eggs to the ice bath. Let them sit for at least 5 minutes. This stops the cooking immediately and makes peeling a million times easier. I’ve skipped this step before in a hurry, and let me tell you, I regretted every second of peeling those stubborn shells.
- Cook the bacon. While the eggs are cooling, cook the bacon in your skillet over medium heat until crispy, about 6-8 minutes. Flip halfway through for even cooking. Transfer the bacon to a paper towel-lined plate to drain. Reserve 1 teaspoon of the rendered bacon fat in a small bowl—this is where the magic happens. Crumble or chop the cooled bacon into small pieces.
- Peel the eggs. Gently tap each egg on the counter to crack the shell all over, then roll it between your palms to loosen it. Start peeling from the wider end where the air pocket is—it’s usually easier. Rinse the peeled eggs under cool water to remove any tiny shell fragments. Pat them dry with a paper towel.
- Halve the eggs. Using a sharp knife, slice each egg in half lengthwise. Gently pop out the yolks into your small mixing bowl. Arrange the egg white halves on your serving platter, cut-side up.
- Make the filling. Mash the yolks with a fork until they’re crumbly with no large chunks. Add the mayonnaise, yellow mustard, reserved bacon fat, and about half of the chopped chives. Mix until smooth and creamy. Season with salt and pepper to taste. Remember, the bacon adds saltiness, so start with just a pinch and adjust from there.
- Pipe the filling. Spoon the yolk mixture into a piping bag or a zip-top bag. If using a zip-top bag, snip off about ½ inch from one corner. Pipe the filling into each egg white half, dividing it evenly. Don’t overfill—you want them to look elegant, not exploding. A little swirl on top looks beautiful.
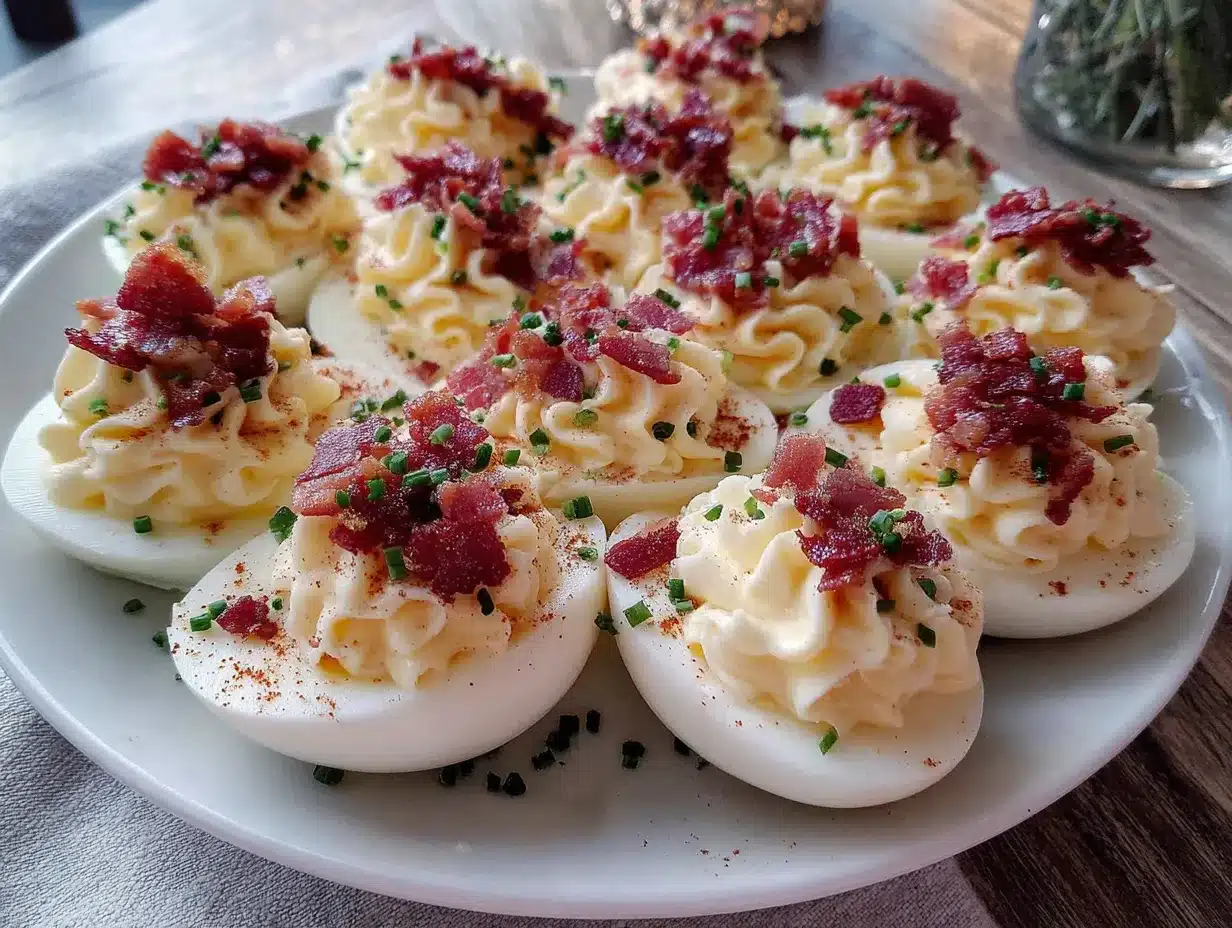
- Garnish and serve. Top each deviled egg with a sprinkle of the remaining chives and a piece of crispy bacon. If you’re feeling fancy, add a tiny dusting of paprika. Serve immediately or refrigerate until ready.
Cooking Tips & Techniques
I’ve made these Creamy Bacon Chive Deviled Eggs more times than I can count, and I’ve definitely learned a few things the hard way. Here are my best tips so you don’t have to repeat my mistakes.
Perfect hard-boiled eggs every time. The 12-minute rest method is non-negotiable. I once tried to speed things up by leaving the eggs on the burner the whole time, and the yolks turned that unappetizing gray-green color. Not cute. Also, older eggs peel easier. If your eggs are super fresh, steam them instead of boiling—it somehow makes peeling less of a battle.
Don’t skip the bacon fat. I know it sounds a little extra, but that teaspoon of bacon fat is what takes these from “good” to “what did you put in these?” If you’re vegetarian, you can skip it, but you’ll be missing that deep, smoky note. Just use an extra teaspoon of mayo instead.
Make the filling smooth. A fork works, but if you want that silky, pipeable texture, use a potato masher or even a food processor for a few seconds. Just don’t over-process or it’ll get gummy. You want it creamy, not gluey.
Pipe, don’t spoon. I know it’s tempting to just scoop the filling in with a spoon, but piping gives you that gorgeous, professional look that makes people think you spent hours. Plus, it’s actually easier—no messy fingers. A zip-top bag works perfectly and costs nothing.
Chill before serving. These are best served cold. Pop them in the fridge for at least 30 minutes after piping to let the filling firm up. It makes them easier to handle and the flavors meld together beautifully.
Variations & Adaptations
One of the best things about deviled eggs is how customizable they are. Here are some of my favorite twists on this recipe.
Spicy Bacon Chive Deviled Eggs: Add ½ teaspoon of smoked paprika and a dash of cayenne pepper to the filling. Top with a thin slice of jalapeño for extra heat. I tried this for a game day party, and they were gone before the first quarter ended.
Herb & Bacon Deviled Eggs: Swap the chives for a mix of fresh dill and parsley. Dill adds this bright, almost citrusy note that pairs beautifully with the smoky bacon. My friend Sarah begged me for this version after I brought them to a picnic last summer.
Keto-Friendly Deviled Eggs: These are already low-carb, but to make them even keto-friendly, use avocado oil mayo and add an extra tablespoon of bacon fat for healthy fats. You can also top them with everything bagel seasoning for crunch without carbs.
Smoked Salmon & Chive Deviled Eggs: Replace the bacon with finely chopped smoked salmon and a squeeze of lemon juice in the filling. It’s a completely different vibe—elegant, brunch-worthy, and absolutely delicious.
Bacon Cheddar Deviled Eggs: Add 2 tablespoons of finely shredded sharp cheddar cheese to the filling. The cheese melts slightly into the creamy yolk mixture, and it’s just… chef’s kiss. I made this version once when I was out of chives, and it was a happy accident.
Serving & Storage Suggestions
These Creamy Bacon Chive Deviled Eggs are best served chilled, straight from the fridge. Arrange them on a white platter for maximum visual impact—the yellow filling, green chives, and brown bacon pop beautifully against a light background. I like to sprinkle a little extra paprika on top just before serving for that final touch of color.
They’re perfect for so many occasions: Easter brunch, summer barbecues, game day snacks, or even just a fancy afternoon treat. Pair them with other appetizers like a charcuterie board, fresh veggies with dip, or a light salad. For drinks, they go wonderfully with a crisp white wine, a cold beer, or even a bloody mary for brunch.
Storage: Store any leftover deviled eggs in an airtight container in the refrigerator for up to 2 days. The filling might soften slightly, but they’ll still taste great. I don’t recommend freezing them—the texture of the egg whites gets weird and watery when thawed.
Reheating: These are served cold, so no reheating needed! Just pull them out of the fridge about 10 minutes before serving to take the chill off if you prefer.
Make-ahead tip: You can boil the eggs and cook the bacon up to 2 days in advance. Store the peeled eggs in a container in the fridge and the cooked bacon in a zip-top bag. Assemble the deviled eggs the day you plan to serve them for the freshest result.
Nutritional Information & Benefits
Per serving (based on 12 deviled egg halves, using 6 eggs, 4 slices bacon, and full-fat mayo):
- Calories: ~120 per 2 halves
- Protein: 8g
- Fat: 9g
- Carbohydrates: 1g
- Fiber: 0g
- Sugar: 0g
These deviled eggs are naturally low-carb and keto-friendly, making them a great option for those watching their carbohydrate intake. Eggs are an excellent source of high-quality protein, choline (great for brain health), and several B vitamins. Chives add a small amount of vitamin K and antioxidants, while bacon—in moderation—provides a satisfying dose of savory flavor that makes these feel indulgent without being over-the-top.
If you’re looking for a lighter option, you can use light mayonnaise or swap half the mayo for plain Greek yogurt. It changes the flavor slightly but still delivers that creamy texture. Just keep in mind that the texture won’t be quite as rich.
Conclusion
These Creamy Bacon Chive Deviled Eggs are the kind of recipe that proves simple ingredients, treated with a little love and a few smart tricks, can create something truly memorable. They’re perfect for any occasion—from holiday gatherings to lazy Sunday afternoons when you just want something good.
I love how versatile they are. You can keep them classic or play around with the variations I shared. Honestly, the best version is the one that makes you happy. Maybe that means extra bacon (always a good call) or a little more chive for that fresh kick. Don’t be afraid to make them your own.
If you give these a try, I’d love to hear how they turned out. Drop a comment below, tag me in your photos, or share your own twist on the recipe. And if you’re looking for more crowd-pleasing appetizers, don’t miss my classic holiday appetizer collection—they pair perfectly with these deviled eggs.
Until next time, happy cooking, and remember: the best recipes are the ones you share with the people you love.
Frequently Asked Questions
Can I make these deviled eggs ahead of time?
Absolutely! You can prepare the filling and boil the eggs up to 2 days in advance. Store the peeled eggs and filling separately in the fridge, then assemble them the day you plan to serve. This keeps the egg whites firm and the filling fresh.
How do I get perfectly peeled eggs every time?
Use eggs that are at least a week old, and shock them in ice water immediately after boiling. Starting to peel from the wider end (where the air pocket is) also helps. If you’re still struggling, try steaming the eggs instead of boiling—it’s a game-changer.
Can I use turkey bacon instead of regular bacon?
Yes, you can. Turkey bacon will work, but it won’t render as much fat for the filling. You’ll need to add an extra tablespoon of mayonnaise to compensate for the missing bacon fat. The flavor will be a little milder, but still delicious.
How long do deviled eggs last in the fridge?
Deviled eggs are best within 2 days of being made. Store them in an airtight container in the refrigerator. After that, the egg whites can get watery and the filling may soften. I don’t recommend eating them past 3 days for food safety reasons.
Can I freeze deviled eggs?
I don’t recommend freezing deviled eggs. The egg whites become watery and rubbery when thawed, and the filling can separate. If you need to prep ahead, just boil the eggs and cook the bacon, then assemble fresh when you’re ready to serve.
Pin This Recipe!

Creamy Bacon Chive Deviled Eggs

These Creamy Bacon Chive Deviled Eggs are a smoky, creamy twist on the classic appetizer. With crispy bacon, fresh chives, and a secret touch of bacon fat in the filling, they’re perfect for any gathering and disappear fast.
- Prep Time: 15 minutes
- Cook Time: 20 minutes
- Total Time: 35 minutes
- Yield: 12 deviled egg halves (6 servings of 2 halves each) 1x
- Category: Appetizer
- Cuisine: American
Ingredients
- 6 large eggs
- 4 slices bacon
- 2 tablespoons fresh chives, finely chopped
- 3 tablespoons mayonnaise
- 1 teaspoon yellow mustard
- 1 teaspoon reserved bacon fat
- Salt and freshly ground black pepper to taste
- Optional garnish: paprika, extra chive pieces, or a small piece of crispy bacon
Instructions
- Boil the eggs. Place the eggs in a single layer in your saucepan and cover them with cold water by about an inch. Bring the water to a rolling boil over high heat. Once boiling, cover the pot, remove it from the heat, and let it sit for exactly 12 minutes.
- Shock the eggs. While the eggs are resting, fill a large bowl with ice and cold water. Once the 12 minutes are up, use a slotted spoon to transfer the eggs to the ice bath. Let them sit for at least 5 minutes.
- Cook the bacon. While the eggs are cooling, cook the bacon in your skillet over medium heat until crispy, about 6-8 minutes. Flip halfway through for even cooking. Transfer the bacon to a paper towel-lined plate to drain. Reserve 1 teaspoon of the rendered bacon fat in a small bowl. Crumble or chop the cooled bacon into small pieces.
- Peel the eggs. Gently tap each egg on the counter to crack the shell all over, then roll it between your palms to loosen it. Start peeling from the wider end where the air pocket is. Rinse the peeled eggs under cool water to remove any tiny shell fragments. Pat them dry with a paper towel.
- Halve the eggs. Using a sharp knife, slice each egg in half lengthwise. Gently pop out the yolks into your small mixing bowl. Arrange the egg white halves on your serving platter, cut-side up.
- Make the filling. Mash the yolks with a fork until they’re crumbly with no large chunks. Add the mayonnaise, yellow mustard, reserved bacon fat, and about half of the chopped chives. Mix until smooth and creamy. Season with salt and pepper to taste.
- Pipe the filling. Spoon the yolk mixture into a piping bag or a zip-top bag. If using a zip-top bag, snip off about ½ inch from one corner. Pipe the filling into each egg white half, dividing it evenly.
- Garnish and serve. Top each deviled egg with a sprinkle of the remaining chives and a piece of crispy bacon. If you’re feeling fancy, add a tiny dusting of paprika. Serve immediately or refrigerate until ready.
Notes
Use eggs that are at least a week old for easier peeling. Don’t skip the bacon fat—it adds incredible smoky depth. Pipe the filling for a professional look. Chill before serving for best texture and flavor. Store leftovers in an airtight container in the refrigerator for up to 2 days.
Nutrition
- Serving Size: 2 deviled egg halves
- Calories: 120
- Sodium: 250
- Fat: 9
- Saturated Fat: 3
- Carbohydrates: 1
- Protein: 8
Keywords: deviled eggs, bacon, chives, appetizer, party food, easy, low-carb, keto-friendly


