I was standing in the middle of the party supply aisle last October, staring at a bag of plastic spider rings, when the smell hit me. It wasn’t the fake cinnamon scent of a candle or the dusty cardboard of the decorations—it was the faint, sweet aroma of chocolate pudding and crushed Oreos. And suddenly I was seven years old again, sitting cross-legged on Mrs. Kowalski’s linoleum kitchen floor, my fingers sticky with gummy worms and my heart full of pure, uncomplicated joy.
Mrs. Kowalski was our next-door neighbor, a retired schoolteacher with silver hair and a laugh that sounded like wind chimes. Every Halloween, she’d invite the whole block over for a pre-trick-or-treating party, and the centerpiece of her snack table was always her famous dirt cups. She’d line them up on a weathered wooden tray—little plastic cups filled with dark, crumbly “soil” and gummy worms wriggling out of the top. I remember the way she’d wink at me as she handed one over, her knobby fingers brushing mine. “Made these just for you, kiddo,” she’d say, and I believed her.
She moved away when I was twelve, and I never got her recipe. For years, I tried to recreate them from memory, but something was always off—the pudding was too runny, the worms too stiff, the magic just… missing. Honestly, I’d given up until that moment in the party supply aisle. Maybe you’ve been there—that sudden, sharp ache for a taste of something you can’t quite name. I grabbed a bag of gummy worms, a box of chocolate pudding mix, and a pack of clear plastic cups, and I went home determined to get it right this time.
It took three tries. The first batch was a soupy disaster (too much milk). The second was better but the “dirt” was clumpy. The third? I closed my eyes after the first bite, and there I was—seven years old, on Mrs. Kowalski’s floor, the gummy worm dangling from my lips. This is that recipe. It’s not fancy, and it doesn’t need to be. It’s the one that makes people smile before they even take a bite, the one that turns a regular Halloween into a memory. And honestly? That’s exactly why I keep making it.
Why You’ll Love This Recipe
Let’s be real for a second—Halloween desserts can be a hassle. Between carving pumpkins, wrangling costumes, and answering the doorbell every five minutes, the last thing you need is a complicated recipe with a mile-long ingredient list. That’s where these crowd-pleasing Halloween dirt cups with gummy worms come in. They’re the kind of dessert that looks like you spent hours on it, when really, you pulled it together in about twenty minutes flat.
Here’s why this recipe has become my go-to for every Halloween gathering:
- Quick & Easy: Comes together in under 30 minutes, with just 10 minutes of active prep. Perfect for busy Halloween weeknights or last-minute party planning.
- Simple Ingredients: No fancy grocery trips needed. You probably already have most of these in your pantry—pudding mix, milk, Oreos, and cream cheese.
- Perfect for Halloween Parties: These little cups are the star of any spooky spread. They’re portable, mess-free, and kids absolutely go wild for them.
- Crowd-Pleaser: I’ve served these at three different Halloween parties now, and every single time, they’re the first thing to disappear. Adults sneak them just as much as kids do.
- Unbelievably Delicious: The combination of creamy chocolate pudding, tangy cream cheese, crunchy Oreo “dirt,” and chewy gummy worms is next-level comfort food. It’s like a deconstructed chocolate cheesecake meets a childhood dream.
What makes these dirt cups different from the rest? It’s the cream cheese in the pudding layer. Most recipes just use instant pudding and milk, which gives you a thin, watery base. Adding softened cream cheese transforms it into something rich, thick, and almost mousse-like. It’s a small tweak, but it makes a world of difference—trust me on this one.
This recipe isn’t just good—it’s the kind that makes you close your eyes after the first bite. It’s Halloween nostalgia in a cup, reimagined for grown-up taste buds but still simple enough for little hands to help make. Perfect for impressing guests without stress, or turning a simple October evening into something memorable.
What Ingredients You Will Need
This recipe uses simple, everyday ingredients to deliver that rich, creamy, slightly decadent flavor that makes these dirt cups so addictive. Most of these are pantry staples or easy to find at any grocery store.
For the Pudding Base
- 1 (3.9 oz) box instant chocolate pudding mix – I prefer Jell-O brand for the smoothest texture, but store brands work fine too. Do not use cook-and-serve pudding; it won’t set properly.
- 2 cups (480 ml) cold whole milk – Whole milk gives the richest result, but 2% works in a pinch. Avoid skim milk; the pudding won’t be as creamy.
- 4 oz (113 g) cream cheese, softened to room temperature – This is the secret ingredient that takes these dirt cups from good to unforgettable. Make sure it’s fully softened so it blends smoothly without lumps.
- 1/4 cup (50 g) granulated sugar – Just a touch to balance the tang of the cream cheese and the bitterness of the cocoa.
- 1 tsp vanilla extract – Pure vanilla extract adds warmth and depth. Imitation vanilla works in a pinch, but pure is better.
For the “Dirt” Layer
- 1 (14.3 oz) package Oreo cookies (about 36 cookies) – Regular Oreos work best. Double Stuf is fine too, but you’ll get slightly sweeter “dirt.” Do NOT remove the cream filling; it helps the crumbs stick together.
- 2 tbsp (28 g) unsalted butter, melted – This helps the Oreo crumbs clump slightly, giving a more realistic “dirt” texture. Optional but recommended.
For the Garnish
- 1 cup gummy worms – The classic choice! I like Trolli brand for their bright colors and chewy texture. You can also use gummy spiders, bugs, or even candy eyeballs for variety.
- Optional: 1/2 cup crushed chocolate cookies or chocolate shavings – For extra texture on top.
- Optional: Green or orange food coloring – A few drops in the pudding gives it a spooky green or pumpkin orange tint. I’ve done both, and kids love the green version.
Ingredient Selection Tips
For the best results, use full-fat cream cheese and whole milk. I’ve tested this with low-fat options, and the texture just isn’t the same—it’s thinner and less satisfying. If you’re dairy-free, you can substitute with dairy-free cream cheese and oat milk, but the pudding will be slightly less firm. I recommend letting it chill for an extra 30 minutes if you go that route.
When it comes to Oreos, don’t be tempted to buy the generic version. I tried that once, and the “dirt” was bland and overly sweet. Stick with the real deal—it makes a noticeable difference. And for the gummy worms, grab the bright, colorful ones. The contrast against the dark “dirt” is what makes these cups so visually striking.
Equipment Needed
- 6-8 clear plastic or glass cups (7-8 oz each) – Clear cups are key for showing off the layers. I use 7 oz plastic cups from the party supply store, but small mason jars or glass tumblers work beautifully too.
- Electric hand mixer or stand mixer – For beating the cream cheese until smooth. A whisk works in a pinch, but you’ll need some serious arm strength.
- Large mixing bowl – For the pudding mixture.
- Medium mixing bowl – For crushing the Oreos.
- Food processor or zip-top bag and rolling pin – For crushing the Oreos into fine crumbs. The food processor is faster and gives a more consistent texture, but the bag-and-rolling-pin method works great and is oddly satisfying.
- Measuring cups and spoons – Precision matters here, especially for the milk and cream cheese.
- Spatula – For scraping every last bit of pudding into the cups.
- Small offset spatula or spoon – For smoothing the layers.
If you don’t have a food processor, don’t stress. I’ve made these dirt cups more times than I can count using a zip-top bag and a heavy-bottomed skillet. Just seal the Oreos in the bag, remove as much air as possible, and go to town. It’s a great way to release some pre-Halloween stress, honestly.
Preparation Method
Alright, let’s get to the fun part. Here’s how to make these crowd-pleasing Halloween dirt cups with gummy worms, step by step.
- Crush the Oreos. Place the entire package of Oreos (cream filling included) in a food processor. Pulse until you get fine, sand-like crumbs. If using the bag method, seal the Oreos in a large zip-top bag and crush with a rolling pin until no large chunks remain. Transfer to a medium bowl, stir in the melted butter, and set aside. The butter helps the crumbs clump slightly, mimicking real dirt. You should have about 2 cups of crumbs.
- Soften the cream cheese. Take the cream cheese out of the fridge about 30 minutes before you start. It needs to be at room temperature for a smooth, lump-free mixture. If you’re short on time, cut it into small cubes and let it sit for 10-15 minutes.
- Make the pudding base. In a large mixing bowl, beat the softened cream cheese with an electric hand mixer on medium speed until smooth and creamy, about 1-2 minutes. Add the granulated sugar and vanilla extract, and beat for another 30 seconds until well combined. Scrape down the sides of the bowl with a spatula.
- Add the pudding mix. Sprinkle the instant chocolate pudding mix over the cream cheese mixture. Beat on low speed until the powder is fully incorporated and no dry streaks remain, about 30 seconds. The mixture will be thick and paste-like at this point—don’t worry, that’s normal.
- Add the milk. Slowly pour in the cold milk while beating on low speed. Once all the milk is added, increase the speed to medium and beat for 2 minutes until the pudding is smooth, thick, and glossy. It should be noticeably thicker than regular pudding at this stage. If you’re adding food coloring for a spooky tint, stir it in now.
- Chill the pudding. Cover the bowl with plastic wrap and refrigerate for 10-15 minutes. This allows the pudding to set up slightly, making it easier to layer without everything running together. Don’t skip this step—I learned the hard way when my first batch turned into a muddy mess.
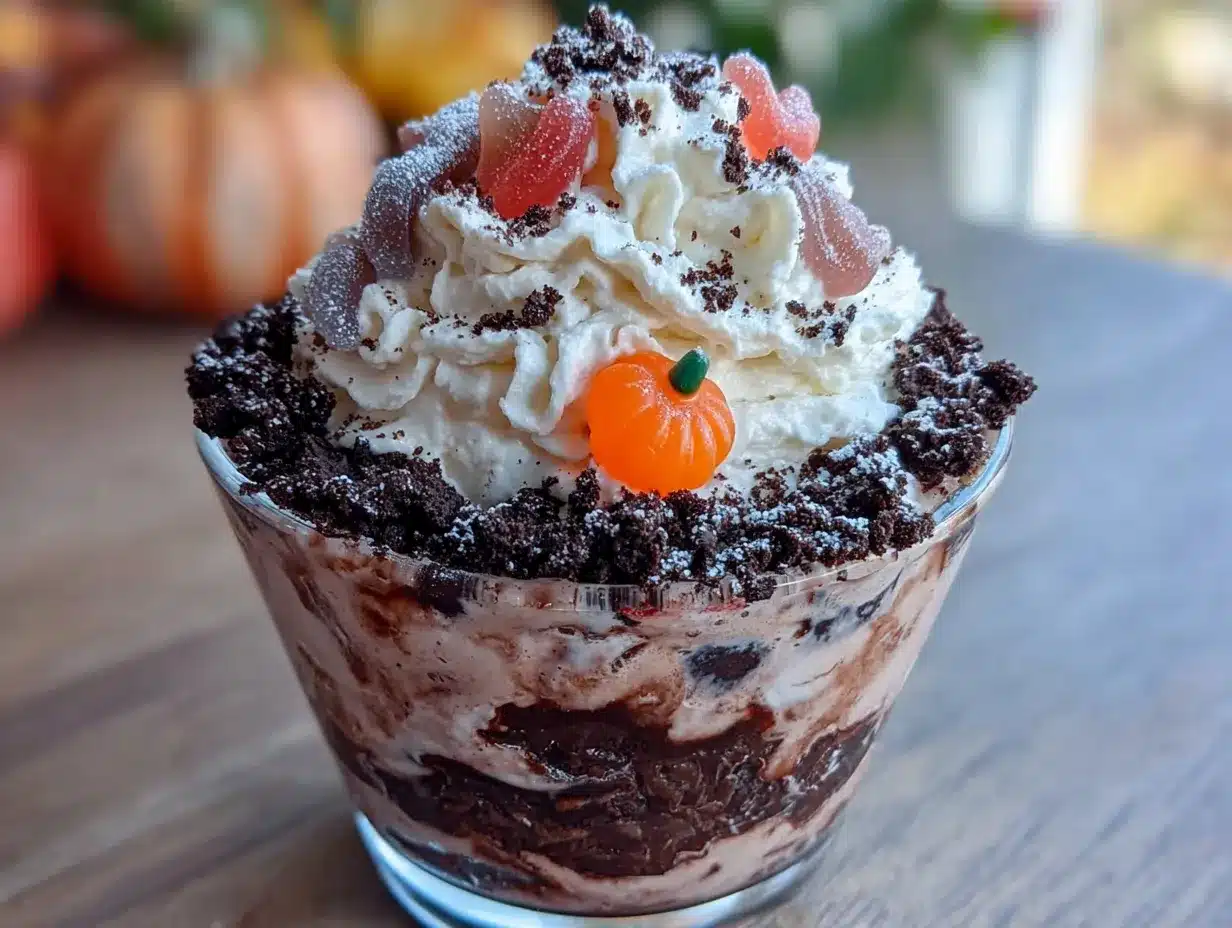
- Assemble the cups. Spoon about 2 tablespoons of the Oreo crumbs into the bottom of each clear cup. Press down gently with the back of a spoon to create a compact base layer. Next, spoon or pipe the pudding mixture over the crumbs, filling each cup about halfway. Use a small offset spatula or the back of a spoon to smooth the top. Add another 2 tablespoons of Oreo crumbs on top, creating a thick “dirt” layer.
- Add the gummy worms. Gently press 2-3 gummy worms into the top layer of “dirt” so they look like they’re crawling out. You can also tuck one or two into the side of the cup so they’re visible through the clear plastic. For extra fun, let a worm dangle over the rim of the cup.
- Chill before serving. Refrigerate the assembled cups for at least 2 hours, preferably 4. This allows the pudding to fully set and the flavors to meld together. The cups will keep in the fridge for up to 3 days, though the Oreo crumbs will soften slightly over time.
- Garnish and serve. Just before serving, sprinkle a few extra Oreo crumbs on top and add one final gummy worm for dramatic effect. Serve cold straight from the fridge.
Cooking Tips & Techniques
I’ve made these dirt cups at least a dozen times now, and I’ve picked up a few tricks along the way. Here’s what I wish someone had told me before my first attempt.
Don’t overmix the pudding. Once you add the milk, beat for exactly 2 minutes and stop. Overmixing can make the pudding thin and runny. I made this mistake on my second batch—I walked away for a minute, came back, and the pudding was practically soup. Two minutes on medium speed is the sweet spot.
Layer while the pudding is still slightly warm. This goes against every instinct, I know, but hear me out. If you chill the pudding completely before layering, it becomes too stiff to spread evenly. A 10-15 minute chill is perfect—it should be cool but still spoonable. Trust me on this one.
Use a piping bag for the pudding layer. If you want those clean, Instagram-worthy layers, transfer the pudding to a piping bag (or a zip-top bag with the corner snipped off) and pipe it into the cups. It’s neater and gives you more control. I didn’t bother the first few times, but once I tried it, I never went back.
Crush the Oreos finely. The finer the crumbs, the more realistic the “dirt” looks. If there are large chunks, they’ll look like, well, cookie chunks. Pulse the food processor until the crumbs are uniform and sandy. For an extra-fine texture, sift the crumbs through a mesh strainer.
Let the cream cheese come to room temperature. This is non-negotiable. Cold cream cheese will leave lumps in your pudding, and no amount of beating will fix it completely. I learned this the hard way when I was in a rush and ended up with grainy pudding. Set it out 30 minutes ahead, and you’ll be golden.
Variations & Adaptations
One of the best things about this recipe is how easy it is to customize. Here are some variations I’ve tried and loved.
Peanut Butter Dirt Cups: Add 1/4 cup of creamy peanut butter to the cream cheese mixture before adding the pudding mix. Beat until smooth. The peanut butter adds a salty-savory note that pairs beautifully with the chocolate. My husband says this version is his favorite, and he’s not even a peanut butter fanatic.
Mint Chocolate Dirt Cups: Swap the vanilla extract for 1/2 teaspoon of peppermint extract. Add a drop of green food coloring to the pudding for a spooky green tint. Top with crushed chocolate mint candies instead of gummy worms. This version is especially popular around Christmas, but it works for Halloween too.
Vegan Dirt Cups: Use dairy-free cream cheese (I like Kite Hill), oat milk, and vegan chocolate pudding mix. Crush vegan chocolate sandwich cookies (like Newman’s Own). The texture is slightly less firm, but the flavor is still fantastic. I’ve served these at parties alongside the regular version, and no one could tell the difference.
Pumpkin Spice Dirt Cups: For a fall twist, add 1/2 cup of pumpkin puree and 1 teaspoon of pumpkin pie spice to the cream cheese mixture. Reduce the milk to 1 3/4 cups to compensate for the extra moisture. Top with crushed ginger snaps instead of Oreos. This is my go-to for Thanksgiving.
Spider Web Dirt Cups: After adding the top layer of “dirt,” drizzle a thin stream of melted white chocolate over the surface in a spiral pattern. Use a toothpick to drag lines from the center outward, creating a spider web effect. Place a plastic spider on top for a dramatic finish. This one takes a bit more effort, but it’s a showstopper.
Serving & Storage Suggestions
These dirt cups are best served cold, straight from the fridge. The contrast between the chilled, creamy pudding and the crunchy Oreo “dirt” is what makes them so satisfying. I like to set them out on a platter about 10 minutes before serving so they’re not ice-cold, but that’s a personal preference.
For presentation, arrange the cups on a black or orange platter—something that screams Halloween. Scatter a few extra gummy worms and plastic spiders around the base for a creepy-crawly effect. If you’re feeling extra festive, add a small pumpkin or a battery-operated tealight next to each cup.
These pair beautifully with other Halloween treats. I like to serve them alongside a plate of Halloween popcorn mix for a sweet-and-salty combo, or with a pitcher of sparkling pumpkin punch for a non-alcoholic option that adults and kids both love. If you’re hosting a party, consider setting up a “dirt cup bar” with toppings like crushed cookies, candy corn, and extra gummy worms so guests can customize their own.
Storage: Cover each cup with plastic wrap or transfer to an airtight container. They’ll keep in the refrigerator for up to 3 days. The Oreo crumbs will soften over time, absorbing moisture from the pudding. If you prefer a crunchy “dirt” layer, add a fresh sprinkle of crumbs just before serving. I don’t recommend freezing these—the pudding becomes watery and the texture is off.
Make-Ahead Tip: You can prepare the pudding and crush the Oreos up to 2 days in advance. Store the pudding in the fridge and the crumbs in an airtight container at room temperature. Assemble the cups no more than 24 hours before serving for the best texture. I’ve pushed it to 48 hours in a pinch, and they were still good, just softer.
Nutritional Information & Benefits
Let’s be honest—these dirt cups are a treat, not a health food. But here’s the estimated nutritional breakdown per serving (based on 8 servings):
- Calories: 385
- Total Fat: 18g
- Saturated Fat: 9g
- Cholesterol: 35mg
- Sodium: 420mg
- Total Carbohydrates: 52g
- Dietary Fiber: 2g
- Sugars: 38g
- Protein: 6g
On the bright side, the cream cheese adds a small amount of protein and calcium. The cocoa in the pudding and Oreos contains antioxidants called flavonoids, which may support heart health in moderation. And hey—there’s something to be said for the mental health benefits of a nostalgic treat shared with loved ones. I firmly believe that food made with joy and shared with people you care about is good for the soul, even if it’s not technically “healthy.”
For those with dietary restrictions, this recipe contains dairy, gluten, and soy. The vegan variation mentioned above addresses dairy concerns. For a gluten-free option, use gluten-free chocolate sandwich cookies and gluten-free pudding mix. Always check labels if you’re serving someone with allergies.
Conclusion
These crowd-pleasing Halloween dirt cups with gummy worms are more than just a dessert—they’re a little time machine back to the best parts of childhood. Every time I make them, I think of Mrs. Kowalski and her wind-chime laugh, and I smile. That’s the kind of recipe worth keeping, you know?
Whether you’re making them for a Halloween party, a classroom celebration, or just a quiet Tuesday night in October, these dirt cups deliver. They’re quick, simple, and guaranteed to make people happy. I’d love to hear how yours turn out—leave a comment below and tell me about your favorite Halloween memory. Did you add a twist? Did the kids go wild? Share your photos on Pinterest and tag me so I can see your spooky creations!
Go ahead, grab a bag of gummy worms and a box of pudding mix. Your inner seven-year-old is waiting.
Frequently Asked Questions
Can I make these dirt cups ahead of time?
Absolutely! You can assemble them up to 24 hours in advance. Just keep them covered in the refrigerator. For the crunchiest “dirt” layer, add a fresh sprinkle of Oreo crumbs right before serving.
Can I use sugar-free pudding mix?
Yes, sugar-free instant chocolate pudding works fine. The texture will be slightly different—a bit less creamy—but it’s a good option if you’re watching your sugar intake. I’ve tested it and it’s still delicious.
How do I keep the gummy worms from getting hard?
Gummy worms naturally firm up in the fridge. To keep them soft and chewy, add them just before serving instead of during assembly. If you want them embedded in the “dirt,” press them in about 30 minutes before serving so they soften slightly.
Can I use a different type of cookie for the “dirt”?
Yes! Chocolate wafer cookies, gluten-free chocolate sandwich cookies, or even crushed chocolate graham crackers all work well. For a fun twist, try crushed chocolate chip cookies or brownies. The flavor will change slightly, but the concept remains the same.
How many servings does this recipe make?
This recipe makes 6-8 servings, depending on the size of your cups. If using 7 oz cups, you’ll get 6 generous servings. For smaller cups (like 4 oz shot glasses), you can get 10-12 mini servings—perfect for parties where guests want to sample multiple treats.
PrintCrowd-Pleasing Halloween Dirt Cups with Gummy Worms

These crowd-pleasing Halloween dirt cups with gummy worms are a quick and easy no-bake dessert that combines creamy chocolate pudding, tangy cream cheese, crunchy Oreo ‘dirt,’ and chewy gummy worms. Perfect for Halloween parties, they come together in under 30 minutes and are guaranteed to be a hit with kids and adults alike.
- Prep Time: 10 minutes
- Cook Time: 0 minutes
- Total Time: 2 hours 10 minutes (includes chilling)
- Yield: 6-8 servings 1x
- Category: Dessert
- Cuisine: American
Ingredients
- 1 (3.9 oz) box instant chocolate pudding mix
- 2 cups (480 ml) cold whole milk
- 4 oz (113 g) cream cheese, softened to room temperature
- 1/4 cup (50 g) granulated sugar
- 1 tsp vanilla extract
- 1 (14.3 oz) package Oreo cookies (about 36 cookies)
- 2 tbsp (28 g) unsalted butter, melted
- 1 cup gummy worms
- Optional: 1/2 cup crushed chocolate cookies or chocolate shavings
- Optional: Green or orange food coloring
Instructions
- Crush the Oreos. Place the entire package of Oreos (cream filling included) in a food processor. Pulse until you get fine, sand-like crumbs. If using the bag method, seal the Oreos in a large zip-top bag and crush with a rolling pin until no large chunks remain. Transfer to a medium bowl, stir in the melted butter, and set aside.
- Soften the cream cheese. Take the cream cheese out of the fridge about 30 minutes before you start. It needs to be at room temperature for a smooth, lump-free mixture.
- Make the pudding base. In a large mixing bowl, beat the softened cream cheese with an electric hand mixer on medium speed until smooth and creamy, about 1-2 minutes. Add the granulated sugar and vanilla extract, and beat for another 30 seconds until well combined. Scrape down the sides of the bowl with a spatula.
- Add the pudding mix. Sprinkle the instant chocolate pudding mix over the cream cheese mixture. Beat on low speed until the powder is fully incorporated and no dry streaks remain, about 30 seconds.
- Add the milk. Slowly pour in the cold milk while beating on low speed. Once all the milk is added, increase the speed to medium and beat for 2 minutes until the pudding is smooth, thick, and glossy. If you’re adding food coloring for a spooky tint, stir it in now.
- Chill the pudding. Cover the bowl with plastic wrap and refrigerate for 10-15 minutes. This allows the pudding to set up slightly, making it easier to layer without everything running together.
- Assemble the cups. Spoon about 2 tablespoons of the Oreo crumbs into the bottom of each clear cup. Press down gently with the back of a spoon to create a compact base layer. Next, spoon or pipe the pudding mixture over the crumbs, filling each cup about halfway. Use a small offset spatula or the back of a spoon to smooth the top. Add another 2 tablespoons of Oreo crumbs on top, creating a thick ‘dirt’ layer.
- Add the gummy worms. Gently press 2-3 gummy worms into the top layer of ‘dirt’ so they look like they’re crawling out. You can also tuck one or two into the side of the cup so they’re visible through the clear plastic. For extra fun, let a worm dangle over the rim of the cup.
- Chill before serving. Refrigerate the assembled cups for at least 2 hours, preferably 4. This allows the pudding to fully set and the flavors to meld together. The cups will keep in the fridge for up to 3 days, though the Oreo crumbs will soften slightly over time.
- Garnish and serve. Just before serving, sprinkle a few extra Oreo crumbs on top and add one final gummy worm for dramatic effect. Serve cold straight from the fridge.
Notes
For best results, use full-fat cream cheese and whole milk. Do not overmix the pudding; beat for exactly 2 minutes after adding milk. Layer while the pudding is still slightly warm (after a 10-15 minute chill). Use a piping bag for clean layers. Crush Oreos finely for realistic ‘dirt.’ Let cream cheese come to room temperature to avoid lumps. For crunchier ‘dirt,’ add fresh Oreo crumbs just before serving. Gummy worms can be added just before serving to keep them soft.
Nutrition
- Serving Size: 1 cup
- Calories: 385
- Sugar: 38
- Sodium: 420
- Fat: 18
- Saturated Fat: 9
- Carbohydrates: 52
- Fiber: 2
- Protein: 6
Keywords: Halloween dirt cups, gummy worms, chocolate pudding, Oreo dirt, no-bake dessert, Halloween dessert, easy Halloween treat, dirt cups recipe


