I was standing in the checkout line at the grocery store last Tuesday, completely zoned out, when a little girl in front of me started giggling at her mom’s phone. The screen showed a photo of a turkey made out of a handprint—you know the one, traced in brown construction paper with colorful feathers fanning out. And just like that, I was six years old again, sitting at my Aunt Rita’s kitchen table in her tiny apartment that always smelled like vanilla and cinnamon. Her fingers, stained with food coloring, were carefully piping little smiles onto sugar cookie turkeys while I sat there, chin barely clearing the table, trying not to sneak raw dough when she wasn’t looking.
Aunt Rita passed away a few years ago, and honestly, I haven’t thought about those afternoons in ages. But standing there in the checkout line, surrounded by strangers and shopping carts, I could feel the exact texture of that cookie dough between my fingers—soft, slightly sticky, dusted with flour. I could hear her humming some oldies station while she worked, pausing every few minutes to ask if I wanted to lick the spoon. She always let me, even when my mom said it was gross. And those turkey cookies? They were the highlight of every Thanksgiving for years. Not the big roasted bird, not the pies—just those silly, adorable little cookies with candy corn feathers and chocolate chip eyes.
So I went home and pulled out my sugar cookie recipe, determined to get that feeling back. The first batch was a disaster, I won’t lie. The cookies spread too much, the candy corn slid off, and I may have yelled at my oven a little. But by the third try, I had it. That perfect little turkey cookie, just like Aunt Rita used to make. Maybe you’ve had that moment where a random smell or sight just grabs you by the heart and won’t let go. That’s what this is. These cookies are my way of holding onto her, one bite at a time.
Why You’ll Love This Recipe
Let me tell you, these aren’t just any sugar cookies. These are the kind that make people stop and say, “Wait, you made those?” They’re adorable, yes, but they’re also genuinely delicious—soft, buttery, with just the right amount of sweetness. Here’s why you’re going to love them:
- Super Simple Ingredients : You probably have most of this stuff in your pantry right now. No weird extracts or hard-to-find decorations. Just butter, sugar, flour, and a few fun toppings.
- Kid-Friendly Fun : This is the perfect recipe to get the little ones involved. They can help press the candy corn “feathers” and draw on the faces. Messy? Yes. Worth it? Absolutely.
- Make-Ahead Magic : The dough can be prepped days in advance, and the baked cookies freeze beautifully. Thanksgiving morning stress? Not on my watch.
- Customizable Cuties : You can make them as simple or as fancy as you want. Candy corn, mini M&Ms, sprinkles—go wild or keep it classic. No wrong answers here.
- Crowd-Pleasing Charm : I’ve brought these to Friendsgiving dinners, school parties, and family gatherings. They disappear fast. Like, suspiciously fast. And everyone always asks for the recipe.
What makes these different from every other turkey cookie out there? It’s the texture, honestly. The cookie base is soft but sturdy enough to hold all those decorations without crumbling. I tested this recipe about four times (I know, rough job) to get that balance just right. Plus, the decorating method is foolproof—no piping bags required, just a little patience and some candy corn. This isn’t just another version of a Thanksgiving cookie. This is the one you’ll come back to year after year.
What Ingredients You Will Need
This recipe uses simple, everyday ingredients to create something special. Most of these are probably already in your kitchen, which makes this a total win for busy holiday prep.
For the Sugar Cookie Dough:
- 2 ¾ cups all-purpose flour (I use Gold Medal, but any brand works fine)
- 1 teaspoon baking soda
- ½ teaspoon baking powder
- 1 cup unsalted butter, softened (salted butter works too, just skip the added salt)
- 1 ½ cups granulated sugar
- 1 large egg, room temperature
- 1 teaspoon vanilla extract
- ½ teaspoon almond extract (optional, but adds a lovely bakery-style flavor)
- ¼ teaspoon salt
For the Royal Icing:
- 2 cups powdered sugar
- 2 tablespoons meringue powder (you can find this at most craft stores or online)
- 3-4 tablespoons warm water
- ½ teaspoon vanilla extract
For Decorating:
- Candy corn (about 1 cup, maybe more if you snack while decorating)
- Mini chocolate chips or candy eyes (for the turkey eyes)
- Orange sprinkles or orange frosting (for the beak)
- Red candy melts or red frosting (for the wattle—that little red dangly bit under the beak)
- Assorted fall-colored sprinkles (optional, for extra flair)
A few notes on ingredients: For the butter, make sure it’s truly softened—not melted, not rock hard. Leave it on the counter for about an hour. If you’re in a rush, cut it into small cubes and let it sit for 15 minutes. The almond extract is totally optional, but I swear it gives the cookies that “bakery” taste that makes people think you spent hours on them. And for the candy corn, buy the good stuff—the store brand tends to be a little too hard and doesn’t stick as well. Brach’s is my go-to.
If you need a gluten-free option, swap the all-purpose flour for a 1:1 gluten-free baking flour. I’ve tested this with Bob’s Red Mill and it worked great, just chill the dough an extra 30 minutes. For a dairy-free version, use vegan butter sticks (not the spreadable kind in a tub).
Equipment Needed
You don’t need a ton of fancy equipment for these cookies, which is part of the appeal. Here’s what you’ll want to have on hand:
- Mixing bowls (at least one large, one medium)
- Electric hand mixer or stand mixer (you can do this by hand, but your arm will get a workout)
- Measuring cups and spoons
- Baking sheets (I prefer light-colored ones for even browning)
- Parchment paper or silicone baking mats
- Rolling pin (a wine bottle works in a pinch—I’ve been there)
- 2.5-inch round cookie cutter (or a drinking glass with a similar diameter)
- Wire cooling rack
- Small piping bags or zip-top bags (for the icing)
- Offset spatula (not required, but makes icing smoother)
If you don’t have a round cookie cutter, don’t stress. I’ve used the rim of a mason jar before and it worked perfectly. Just make sure the edges are smooth. For the piping bags, you can absolutely use a small zip-top bag with the corner snipped off. That’s actually what I do most of the time because I’m too lazy to wash piping bags.
Preparation Method
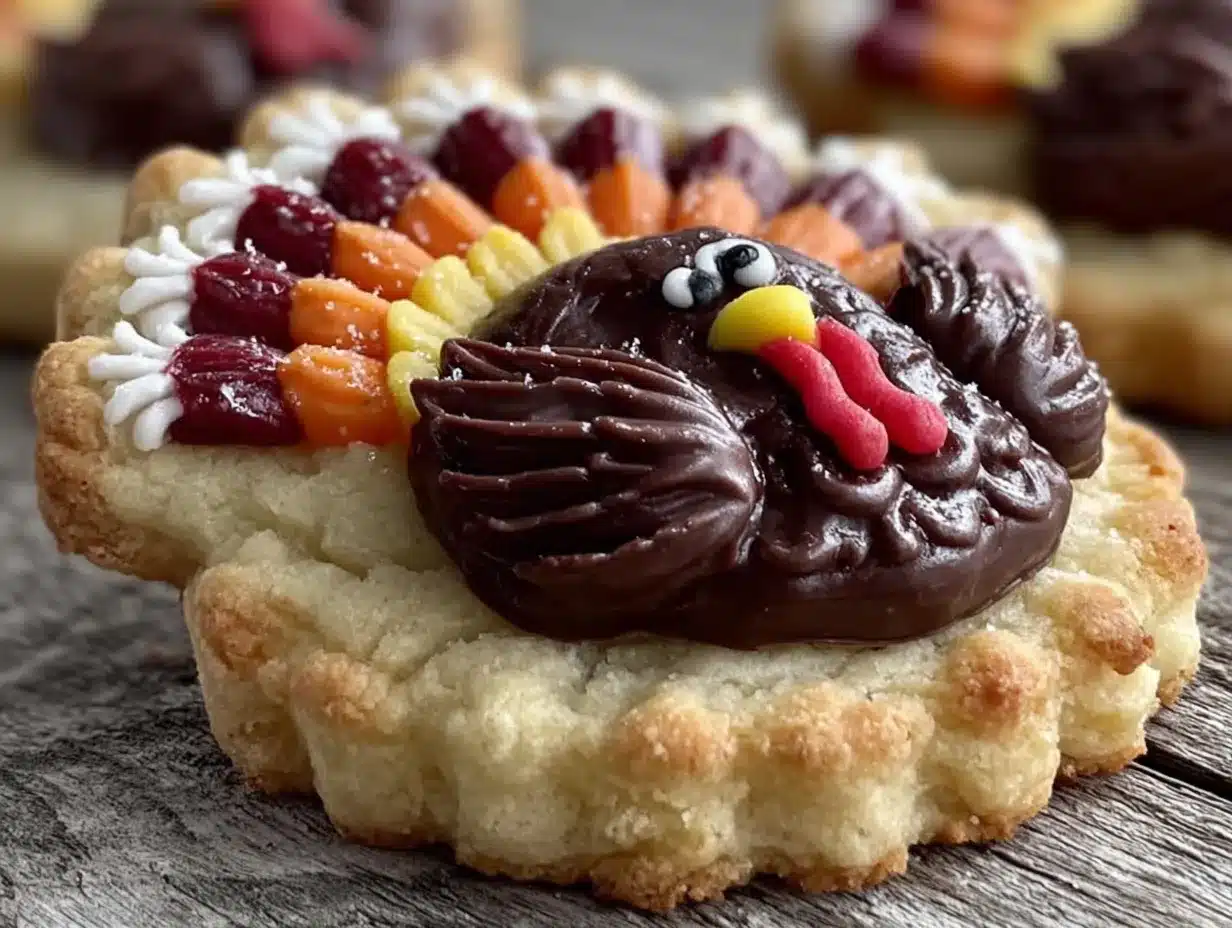
Alright, let’s get to the good part. Here’s how to make these adorable little turkeys step by step.
- Make the cookie dough. In a medium bowl, whisk together the flour, baking soda, baking powder, and salt. Set aside. In a large bowl, beat the softened butter and sugar together until light and fluffy—about 3 minutes with an electric mixer. Scrape down the sides of the bowl. Add the egg, vanilla extract, and almond extract (if using), and beat until combined. Gradually add the dry ingredients to the wet mixture, mixing on low speed until just combined. Don’t overmix, or your cookies will be tough. The dough should be soft but not sticky.
- Chill the dough. Divide the dough into two discs, wrap each in plastic wrap, and refrigerate for at least 1 hour. This step is non-negotiable, honestly. Chilled dough spreads less and is way easier to roll out. I once skipped this step because I was impatient, and my cookies turned into flat, sad blobs. Learn from my mistakes.
- Preheat and prep. When you’re ready to bake, preheat your oven to 350°F (175°C). Line your baking sheets with parchment paper or silicone mats.
- Roll and cut. On a lightly floured surface, roll out one disc of dough to about ¼-inch thickness. Use your 2.5-inch round cutter to cut out circles. Re-roll the scraps and cut more circles until all the dough is used. Place the circles about 2 inches apart on the prepared baking sheets.
- Bake. Bake for 8-10 minutes, or until the edges are just barely golden. The centers should look set but not browned. Let the cookies cool on the baking sheet for 5 minutes, then transfer to a wire rack to cool completely. Do not try to decorate warm cookies—the icing will just slide right off. Trust me, I’ve tried.
- Make the royal icing. While the cookies cool, make your icing. In a medium bowl, whisk together the powdered sugar and meringue powder. Add 3 tablespoons of warm water and the vanilla extract, then whisk until smooth. The consistency should be thick but flowy—like honey. If it’s too thick, add more water a teaspoon at a time. If it’s too thin, add more powdered sugar. Cover the bowl with a damp paper towel so the icing doesn’t dry out.
- Decorate the turkey bodies. Transfer the icing to a piping bag or zip-top bag and snip a tiny corner off. Pipe a thin layer of icing onto each cooled cookie, spreading it gently with an offset spatula if needed. This is your “glue” for the decorations. Work in batches of 4-5 cookies at a time so the icing doesn’t set before you add the features.
- Add the feathers. While the icing is still wet, arrange 5-7 pieces of candy corn in a fan pattern on the top half of each cookie. The pointed ends should face outward, like feathers. Press them gently so they stick.
- Add the face. Place two mini chocolate chips or candy eyes in the center of the cookie, just below the feathers. Add an orange sprinkle or a tiny dot of orange frosting for the beak. Use a toothpick to dab a tiny bit of red icing or a small red candy melt for the wattle. Don’t stress about perfection—turkeys are supposed to look a little goofy.
- Let them set. Allow the decorated cookies to sit at room temperature for at least 2 hours, or until the icing is completely hard. This is the hardest part, I know. But if you try to stack them too soon, you’ll end up with a pile of candy corn and sad cookie faces.
Cooking Tips & Techniques
I’ve made these cookies more times than I care to admit, and I’ve learned a few things along the way. Here are my best tips for success:
- Chill the dough thoroughly. I cannot stress this enough. Warm dough spreads in the oven, and spread cookies are harder to decorate. If your kitchen is warm, pop the cut-out cookies in the fridge for 10 minutes before baking.
- Don’t overbake. Sugar cookies continue to cook on the hot baking sheet even after they come out of the oven. Pull them when the edges are just barely golden. The centers should look slightly underdone—they’ll firm up as they cool.
- Work in small batches. When decorating, only ice a few cookies at a time. Royal icing dries fast, and if you ice too many cookies at once, the candy corn won’t stick. I usually do 4-5 cookies at a time, and it works perfectly.
- Use a toothpick for details. For the beak and wattle, a toothpick is your best friend. Dip it in the icing and dab it on. Way easier than trying to pipe tiny dots.
- Let the icing set overnight. If you’re making these for a party, decorate them the day before. The icing gets nice and hard, and the cookies stay fresh for days. Plus, it’s one less thing to do on Thanksgiving morning.
One thing I learned the hard way: don’t use gel food coloring in the royal icing if you want bright white icing. Gel colors can make the icing look streaky. Use powdered food coloring instead, or just leave it plain white—it looks adorable against the colorful candy corn.
Variations & Adaptations
These cookies are super versatile, and I love playing around with different versions. Here are some of my favorites:
- Chocolate Turkey Cookies: Swap out ¼ cup of the flour for unsweetened cocoa powder. The chocolate version is rich and delicious, and the candy corn really pops against the dark cookie.
- Gluten-Free Version: As I mentioned earlier, use a 1:1 gluten-free flour blend. Add an extra tablespoon of butter to help with moisture, and chill the dough for an extra 30 minutes.
- Vegan Turkey Cookies: Use vegan butter sticks and a flax egg (1 tablespoon ground flaxseed mixed with 3 tablespoons water, let sit for 5 minutes). The texture is slightly different—a little more cakey—but still delicious.
- Mini Turkey Cookies: Use a 1.5-inch round cutter to make bite-sized turkeys. These are perfect for kids’ lunchboxes or as little party favors. Just reduce the baking time to 6-7 minutes.
- Pumpkin Spice Twist: Add 1 teaspoon pumpkin pie spice and ½ teaspoon cinnamon to the dry ingredients. It gives the cookies a warm, fall flavor that pairs beautifully with the candy corn.
I tried the pumpkin spice version last year for a Friendsgiving, and honestly, it might be my new favorite. The spices make the cookies smell incredible while they’re baking—like autumn in a kitchen.
Serving & Storage Suggestions
These cookies are best served at room temperature, and they’re perfect on a dessert table alongside pies and other treats. I like to arrange them on a platter in a circle, with the turkey faces pointing outward—it makes a cute centerpiece. You can also package them in little cellophane bags tied with twine for a thoughtful homemade gift.
For storage, place the fully set cookies in an airtight container at room temperature. They’ll stay fresh for up to 5 days. If you need to stack them, place a sheet of parchment paper between layers to protect the decorations. Do not refrigerate them—the moisture in the fridge can make the icing sticky and the cookies soft.
These cookies freeze beautifully, too. Freeze the undecorated baked cookies in an airtight container for up to 3 months. When you’re ready to decorate, thaw them at room temperature for about an hour, then ice and decorate as directed. The candy corn might not stick as well to frozen cookies, so make sure they’re fully thawed.
One thing I love about these cookies is that the flavors actually get better after a day or two. The cookies soften slightly, and the candy corn melds with the icing. So if you can resist eating them all right away, they’ll be even better the next day.
Nutritional Information & Benefits
Let’s be real—these are cookies, so they’re not health food. But here’s the estimated nutritional info per cookie (based on a 2.5-inch cookie with icing and candy corn):
| Nutrient | Amount per Cookie |
|---|---|
| Calories | 185 |
| Total Fat | 8g |
| Saturated Fat | 5g |
| Carbohydrates | 27g |
| Sugar | 18g |
| Protein | 2g |
| Sodium | 95mg |
That said, there are a few tiny benefits. The butter provides a small amount of vitamin A, and if you use almond extract, you get a hint of vitamin E. Mostly, though, these are about joy and tradition, not nutrition. And honestly, that’s okay. Thanksgiving is about indulgence and gratitude, and these cookies fit right in.
If you’re watching your sugar intake, you can reduce the sugar in the cookie dough to 1 cup—the cookies will be less sweet, but the candy corn and icing will still give you plenty of sweetness. For a lower-fat option, swap half the butter for unsweetened applesauce, but note that the texture will be more cake-like.
Conclusion
These adorable Thanksgiving turkey sugar cookies are more than just a dessert—they’re a little piece of nostalgia you can hold in your hand. Every time I make them, I think of Aunt Rita and her messy kitchen and the way she’d laugh when I accidentally stuck candy corn to my forehead. They’re simple enough for a beginner baker but cute enough to impress even the pickiest Thanksgiving guests.
I hope you give these a try, and I hope they bring a little warmth to your holiday table. Maybe you’ll even start your own tradition—whether it’s making them with your kids, bringing them to a Friendsgiving, or just sneaking one (or three) while nobody’s looking. And if you come up with a fun variation, I’d love to hear about it. Drop a comment below and tell me how your turkeys turned out. Did you use M&Ms instead of candy corn? Did you add a little hat? I want to know.
Happy baking, and happy Thanksgiving. May your cookies be cute, your icing be smooth, and your heart be full.
Frequently Asked Questions
Can I use store-bought sugar cookie dough?
Absolutely! If you’re short on time, grab a tube of refrigerated sugar cookie dough from the store. Just roll it out, cut it into circles, and bake according to the package directions. The texture will be slightly different, but the decorating part works the same way.
How far in advance can I make these cookies?
You can make the dough up to 3 days ahead and keep it in the fridge. Bake the cookies up to 2 days ahead and store them undecorated in an airtight container. Decorate them the day before you plan to serve them so the icing has plenty of time to set.
My candy corn keeps falling off. What am I doing wrong?
This usually happens when the icing is too thin or has started to set before you add the candy corn. Make sure your icing is thick enough to hold the candy corn (it should be like honey), and work in small batches so the icing stays wet. Press the candy corn gently but firmly into the icing.
Can I freeze the decorated cookies?
I don’t recommend freezing decorated cookies because the royal icing can become sticky when thawed. However, you can freeze the undecorated baked cookies for up to 3 months. Thaw them at room temperature, then decorate as usual.
My cookies spread too much in the oven. How do I fix this?
This is almost always a dough temperature issue. Make sure your dough is thoroughly chilled—at least 1 hour in the fridge. If your kitchen is warm, pop the cut-out cookies in the fridge for 10-15 minutes before baking. Also, make sure your butter isn’t too soft when you start. It should be softened but still cool to the touch.
Pin This Recipe!
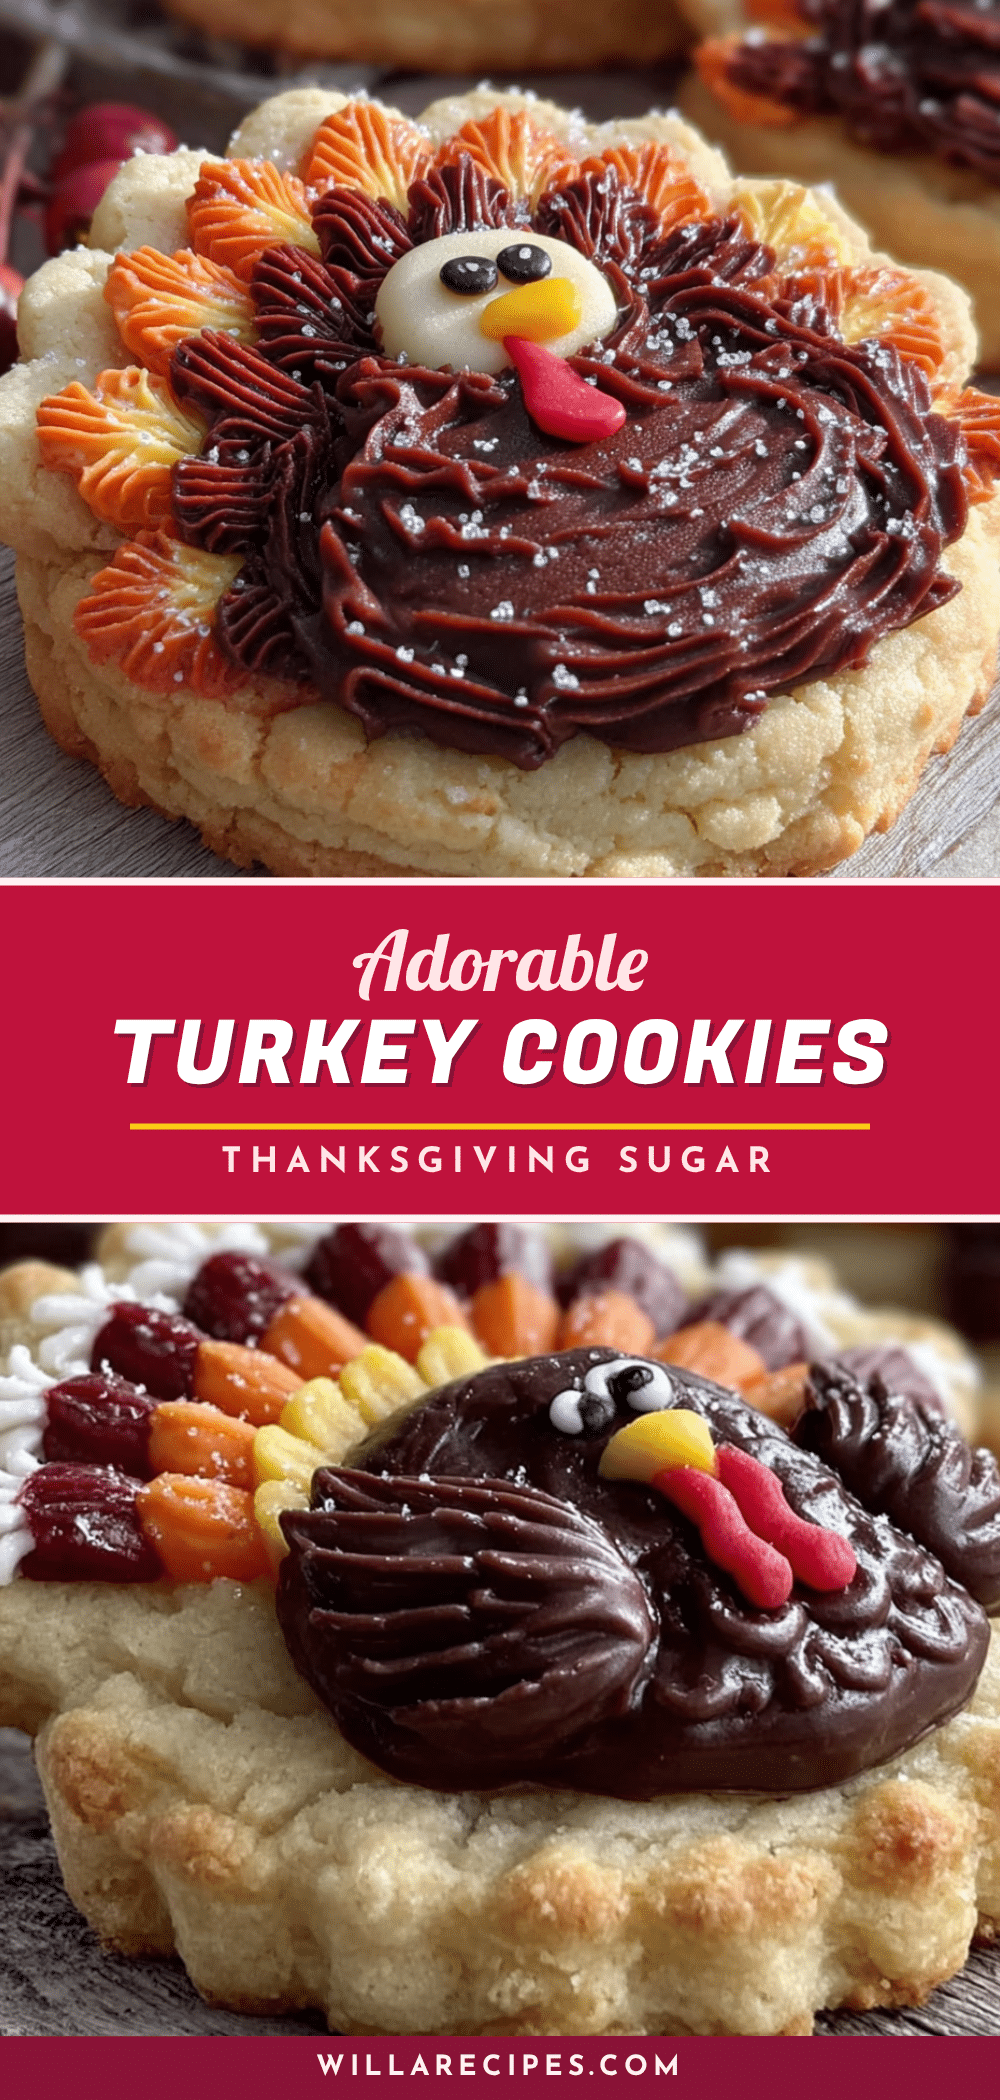
Easy Adorable Thanksgiving Turkey Sugar Cookies

These adorable turkey sugar cookies are soft, buttery, and decorated with candy corn feathers and chocolate chip eyes. A nostalgic Thanksgiving treat that’s perfect for making with kids and sharing at holiday gatherings.
- Prep Time: 1 hour 30 minutes
- Cook Time: 10 minutes
- Total Time: 3 hours 40 minutes
- Yield: 24 servings 1x
- Category: Dessert
- Cuisine: American
Ingredients
- 2 ¾ cups all-purpose flour
- 1 teaspoon baking soda
- ½ teaspoon baking powder
- 1 cup unsalted butter, softened
- 1 ½ cups granulated sugar
- 1 large egg, room temperature
- 1 teaspoon vanilla extract
- ½ teaspoon almond extract (optional)
- ¼ teaspoon salt
- 2 cups powdered sugar
- 2 tablespoons meringue powder
- 3–4 tablespoons warm water
- ½ teaspoon vanilla extract
- 1 cup candy corn
- Mini chocolate chips or candy eyes
- Orange sprinkles or orange frosting
- Red candy melts or red frosting
- Assorted fall-colored sprinkles (optional)
Instructions
- Make the cookie dough: In a medium bowl, whisk together flour, baking soda, baking powder, and salt. Set aside. In a large bowl, beat softened butter and sugar together until light and fluffy, about 3 minutes. Add egg, vanilla extract, and almond extract (if using), and beat until combined. Gradually add dry ingredients, mixing on low until just combined. Do not overmix.
- Chill the dough: Divide dough into two discs, wrap in plastic wrap, and refrigerate for at least 1 hour.
- Preheat and prep: Preheat oven to 350°F (175°C). Line baking sheets with parchment paper or silicone mats.
- Roll and cut: On a lightly floured surface, roll out one disc of dough to ¼-inch thickness. Cut out circles using a 2.5-inch round cutter. Re-roll scraps and repeat. Place circles 2 inches apart on prepared baking sheets.
- Bake: Bake for 8-10 minutes, until edges are just barely golden. Let cool on baking sheet for 5 minutes, then transfer to a wire rack to cool completely.
- Make the royal icing: In a medium bowl, whisk together powdered sugar and meringue powder. Add 3 tablespoons warm water and vanilla extract, whisk until smooth. Consistency should be thick but flowy like honey. Adjust with more water or powdered sugar as needed. Cover with a damp paper towel.
- Decorate the turkey bodies: Transfer icing to a piping bag or zip-top bag and snip a tiny corner. Pipe a thin layer of icing onto each cooled cookie, spreading gently. Work in batches of 4-5 cookies.
- Add the feathers: While icing is still wet, arrange 5-7 pieces of candy corn in a fan pattern on the top half of each cookie, pointed ends outward. Press gently.
- Add the face: Place two mini chocolate chips or candy eyes in the center below the feathers. Add an orange sprinkle or dot of orange frosting for the beak. Use a toothpick to dab red icing or a small red candy melt for the wattle.
- Let them set: Allow decorated cookies to sit at room temperature for at least 2 hours, or until icing is completely hard.
Notes
Chill dough thoroughly to prevent spreading. Work in small batches when decorating to keep icing wet. Let icing set overnight for best results. For gluten-free, use 1:1 gluten-free flour blend and chill dough an extra 30 minutes. For dairy-free, use vegan butter sticks.
Nutrition
- Serving Size: 1 cookie
- Calories: 185
- Sugar: 18
- Sodium: 95
- Fat: 8
- Saturated Fat: 5
- Carbohydrates: 27
- Protein: 2
Keywords: Thanksgiving cookies, turkey cookies, sugar cookies, holiday baking, easy cookies, kid-friendly, candy corn cookies


