I used to think charcuterie boards were for people who had their lives together. You know the type—the ones who fold napkins into swans and remember to buy fresh thyme on a Tuesday. For years, I avoided making them entirely, convinced they required some secret skill I just didn’t have. Then my friend Jenna showed up to our weekly hangout with a cutting board piled high with cheese, crackers, and what she called “a little something pretty,” and I found myself eating a slice of pear dipped in honey while sitting cross-legged on her floor. That was the moment I realized I had been overthinking this whole thing.
The truth is, a Friendsgiving charcuterie board isn’t about perfection—it’s about making people feel welcome. And honestly, this Easy Friendsgiving Charcuterie Board with Fall Fruit and Honey is the most forgiving recipe I know. You can’t mess it up. You just arrange things on a board, drizzle some honey, and suddenly everyone thinks you’re a culinary genius. I mean, I literally forgot the cheese knife once, and nobody even noticed because they were too busy fighting over the last slice of apple.
Maybe you’ve been there—staring at a grocery list for a holiday gathering and feeling your energy drain. This board is the answer. It comes together in under 15 minutes, uses ingredients you can grab at any store, and somehow looks like you spent hours on it. The trick is letting the fall fruit do the heavy lifting. Apples, pears, figs—they bring color and sweetness that makes everything feel special without any actual cooking. And the honey? That’s your secret weapon. It ties everything together with this warm, golden finish that makes people close their eyes when they take a bite. This recipe stayed with me because it proved I didn’t need to be a fancy host to host well. I just needed a board, some good cheese, and the willingness to let honey drip where it may.
Why You’ll Love This Easy Friendsgiving Charcuterie Board
After testing this board at three different Friendsgiving gatherings (and one very impromptu Tuesday night dinner), I can tell you exactly why this version works when others fall flat. It’s not just about throwing ingredients on a board—it’s about creating a spread that feels abundant without exhausting you. Here’s what makes this one special:
- Quick & Easy: This board comes together in under 15 minutes. No cooking, no complicated steps—just arranging and drizzling. Perfect for when you’re hosting and running behind (which, let’s be honest, is always).
- Simple Ingredients: You don’t need a specialty grocery store. Apples, pears, a few cheeses, crackers, and honey—that’s it. I’ve made this with ingredients from my corner bodega and it still looked stunning.
- Perfect for Friendsgiving: This board is designed for sharing. It’s casual enough for a potluck but impressive enough to be the centerpiece. Plus, everyone can pick at it while the main dishes finish cooking.
- Crowd-Pleaser: I’ve watched self-proclaimed “picky eaters” devour this board. The combination of sweet fruit, salty cheese, and crunchy nuts hits every craving. Kids love it, adults love it, and everyone goes back for seconds.
- Unbelievably Delicious: The magic is in the contrast—warm honey over cold cheese, crisp apple slices next to creamy brie, salty prosciutto wrapped around sweet pear. It’s the kind of flavor combination that makes you wonder why you don’t eat like this every day.
What makes this board different from the rest is the technique of drizzling honey at the very end. Most recipes tell you to drizzle honey over everything before serving, but I learned the hard way that makes the crackers soggy. Instead, I drizzle the honey right before guests start eating, or even better, I let them drizzle their own. This keeps the textures perfect and lets everyone control how much sweetness they want. It’s a small tweak, but it makes a huge difference.
This recipe isn’t just good—it’s the kind that makes you feel like a capable host even when you’re tired. It’s comfort food reimagined for sharing, with the same soul-soothing satisfaction of a home-cooked meal but none of the stress. Perfect for impressing your friends without spending your whole day in the kitchen.
What Ingredients You Will Need
This Easy Friendsgiving Charcuterie Board uses simple, seasonal ingredients to create a spread that feels both rustic and elegant. The key is choosing ingredients that complement each other—sweet with salty, creamy with crunchy, mild with bold. Here’s everything you need, broken down by category so you can shop and prep with confidence.
For the Cheeses
- Brie cheese (8 oz wheel) — Go for a double or triple cream brie for that ultra-creamy texture. I prefer President brand for consistent quality, but any soft-ripened cheese works.
- Aged cheddar (6 oz) — Choose a sharp white cheddar for bold flavor contrast. Cabot makes a reliable extra-sharp version that stands up to sweet fruit.
- Goat cheese log (4 oz) — Look for a plain, soft chèvre. The tanginess cuts through the honey beautifully. Vermont Creamery is my go-to for consistent creaminess.
For the Fall Fruits
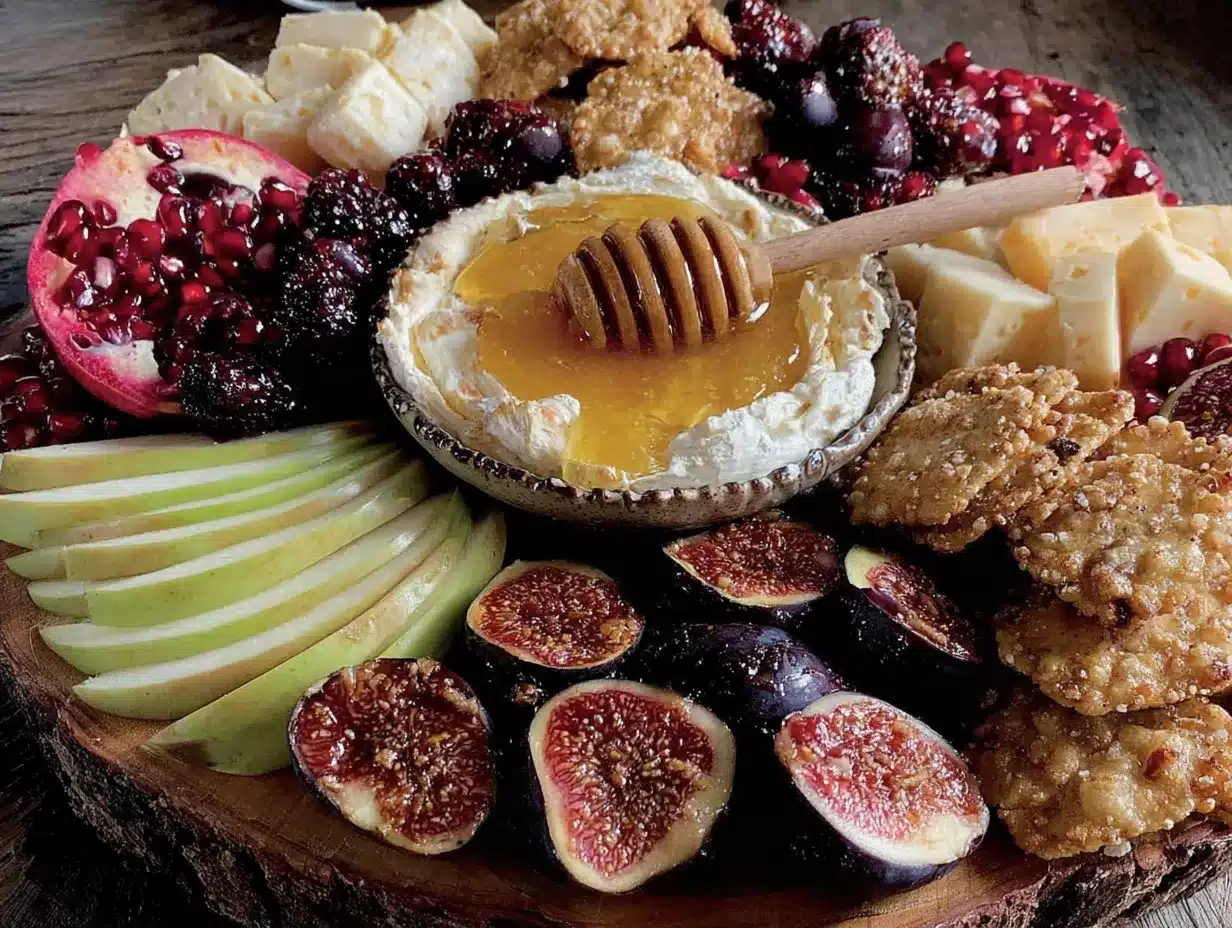
- Honeycrisp apples (2 medium) — These hold their shape and don’t brown as quickly as other varieties. Slice them just before serving for best color.
- Bartlett pears (2 medium) — Choose pears that are ripe but still firm. They should yield slightly when pressed near the stem but not feel mushy.
- Fresh figs (6-8, halved) — Look for figs that are plump and slightly soft. Black Mission or Brown Turkey varieties work beautifully. If figs aren’t in season, substitute with halved grapes.
- Dried apricots (1/2 cup) — These add chewy sweetness and a pop of orange color. Bella Viva dried apricots are my favorite for their natural sweetness without added sugar.
For the Meats
- Prosciutto (4 oz, thinly sliced) — Look for prosciutto di Parma for the best flavor. Ask the deli counter to slice it paper-thin for easy draping.
- Sopressata (4 oz) — This dry Italian salami adds a spicy, savory note. Slice it into thin rounds or quarter-moons for easy grabbing.
For the Crunchy Elements
- Water crackers (about 30) — Plain water crackers let the cheese and fruit shine. Carr’s or Ritz original work well.
- Baguette slices (1 small baguette, sliced into 20-24 rounds) — Toast them lightly for extra crunch, or leave them soft for a breadier option.
- Toasted walnuts (1/2 cup) — Toast them in a dry pan over medium heat for 3-4 minutes until fragrant. This brings out their nutty flavor.
- Pumpkin seeds (1/4 cup) — Add these for a seasonal crunch. Raw or roasted both work; just make sure they’re unsalted so they don’t overpower the board.
For the Sweet Finishes
- Local honey (1/4 cup) — Use a mild, runny honey. Nature Nate’s is widely available and has a clean sweetness that doesn’t compete with the fruit.
- Fresh rosemary sprigs (2-3) — These are for garnish, but they also add a subtle herbal note that pairs surprisingly well with honey and cheese.
Ingredient Substitution Tips
If you’re feeding someone with dietary restrictions, this board is easy to adapt. Swap the brie for a vegan cashew cheese, and use gluten-free crackers instead of water crackers. For a dairy-free option, skip the cheeses and double up on fruits, nuts, and a good-quality olive oil for dipping. I’ve also made this board with sliced mango and kiwi in the summer, and it works beautifully—just adjust the fruit to whatever’s in season near you.
Equipment Needed
You don’t need fancy tools to build this board, but having the right equipment makes the process smoother and the presentation prettier. Here’s what I use every time:
- Large wooden cutting board or serving platter (at least 12×16 inches) — A big board gives you room to spread everything out. If you don’t have a wooden board, a large baking sheet lined with parchment paper works perfectly. I’ve used a clean cutting board from IKEA for years and it does the job.
- Small bowls or ramekins (3-4) — You’ll need these for the honey, walnuts, and pumpkin seeds. They keep the wet and dry ingredients separate and make the board look intentional. I use mismatched ramekins from thrift stores—they add charm.
- Cheese knives (2-3) — One for soft cheese (like brie) and one for hard cheese (like cheddar). If you don’t have cheese knives, a butter knife for soft cheese and a paring knife for hard cheese work fine.
- Small tongs — These are optional but helpful for guests who don’t want to touch everything. I usually skip them for casual gatherings, but they’re nice for more formal Friendsgiving dinners.
- Paring knife and cutting board for fruit — Use a sharp knife to slice apples and pears just before serving. A dull knife will bruise the fruit and make it look messy.
Budget-friendly tip: You don’t need to buy a fancy cheese board. A large dinner plate, a wooden pizza peel, or even a clean cutting board from your kitchen drawer will work. The presentation is more about arrangement than the board itself.
Preparation Method
Building this Easy Friendsgiving Charcuterie Board is more about assembly than cooking. But there’s an art to arranging it so it looks abundant and inviting. Here’s my step-by-step method, with all the timing and sensory cues you need to get it right.
- Prep your fruit (5 minutes before serving) — Wash and dry the apples and pears. Slice the apples into thin wedges (about 8 wedges per apple) and the pears into similar-sized slices. Cut each fig in half lengthwise. Place the sliced fruit in a bowl of cold water with a squeeze of lemon juice to prevent browning while you assemble the rest. Tip: Don’t slice the fruit more than 15 minutes before serving, or it will start to oxidize and lose its fresh look.
- Toast the nuts (3 minutes) — Heat a small dry skillet over medium heat. Add the walnuts and stir constantly for 2-3 minutes until they become fragrant and slightly darker. You’ll know they’re done when you smell that warm, nutty aroma. Transfer them immediately to a plate to cool. Warning: Nuts burn fast—don’t walk away from the stove.
- Arrange the cheeses (2 minutes) — Place the brie wheel whole on the board, slightly off-center. Slice the aged cheddar into thin triangles or cubes and arrange them in a small cluster near the brie. Place the goat cheese log on the opposite side of the board. Leave space between each cheese so guests can easily access them.
- Add the meats (2 minutes) — Drape the prosciutto slices in loose folds near one of the cheeses. Fold each slice into a ribbon-like shape rather than laying it flat—this creates texture and makes it easier to grab. Arrange the sopressata slices in a small pile nearby. Sensory cue: The prosciutto should look silky and slightly translucent; if it’s sticking together, it’s too warm—pop it in the fridge for 5 minutes.
- Place the bowls (1 minute) — Set your small bowls on the board. Fill one with honey, one with toasted walnuts, and one with pumpkin seeds. Position them evenly across the board so guests don’t have to reach too far for any element.
- Add the crackers and bread (2 minutes) — Arrange the water crackers in a single layer along one side of the board. Place the baguette slices in a small stack or fan pattern near the brie. Don’t overcrowd—leave room for the fruit.
- Scatter the fruit (2 minutes) — Drain the sliced apples and pears, pat them dry with a paper towel, and arrange them in small clusters around the board. Tuck the fig halves between the cheeses and meats. Scatter the dried apricots in any empty spaces. Visual cue: The board should look colorful and full, with no large empty spaces. If you see a gap, add a few more crackers or a handful of nuts.
- Garnish and drizzle (1 minute) — Tuck fresh rosemary sprigs between the cheese and fruit for a pop of green. Right before serving, drizzle the honey in a thin, zigzag pattern over the brie, goat cheese, and some of the fruit. Don’t drown everything—just a light drizzle. Pro tip: Warm the honey slightly (10 seconds in the microwave) for easier drizzling.
- Final check and serve (30 seconds) — Step back and look at your board. Make sure every element is visible and accessible. Add a few extra crackers to any empty spots. Serve immediately, with extra honey on the side for guests who want more.
Cooking Tips & Techniques
After building this board more times than I can count, I’ve picked up a few tricks that make the process smoother and the results more impressive. Here are the lessons I learned the hard way so you don’t have to.
Don’t overthink the arrangement. I used to stress about making everything look perfect, but the truth is, the board looks best when it feels organic. Start with the largest items (cheeses and bowls) and fill in around them. Think of it like a puzzle—you’re just fitting pieces together until it looks full. If you’re stuck, Pinterest is your friend, but don’t let it make you feel inadequate. Your board will look beautiful because you made it.
Keep the honey for last. I learned this one the messy way. If you drizzle honey over everything before guests arrive, the crackers get soggy, the fruit gets sticky, and the whole board turns into a sweet mess. Drizzle right before serving, or better yet, put the honey in a small pitcher and let guests drizzle their own. This keeps everything fresh and lets people control their sweetness level.
Room temperature cheese is better cheese. Take your cheeses out of the fridge 30 minutes before assembling the board. Cold cheese doesn’t have the same creamy texture or full flavor. I’ve made the mistake of serving ice-cold brie, and it was like eating butter straight from the fridge—not great. Give it time to soften, and you’ll taste the difference.
Use the “three of everything” rule. For a board that looks abundant, include at least three types of cheese, three types of fruit, three crunchy elements, and three savory items. This creates visual variety and ensures there’s something for everyone. If you’re short on one category, just double up on another—more nuts or an extra fruit variety works fine.
Prep everything before you start arranging. I used to slice fruit while trying to arrange cheese, and it always ended with me forgetting something. Now I prep all ingredients first—slice fruit, toast nuts, arrange cheeses on a separate plate—then assemble the board in one go. It takes the same amount of time but feels much less chaotic.
Variations & Adaptations
This Easy Friendsgiving Charcuterie Board is endlessly adaptable. Here are some of my favorite variations, all tested and approved by friends who have strong opinions about food.
Vegetarian Version — Skip the prosciutto and sopressata, and add more cheese variety instead. Smoked gouda, manchego, or a creamy blue cheese like gorgonzola work beautifully. You can also add roasted vegetables like balsamic-glazed Brussels sprouts or honey-roasted carrots for a savory-sweet balance. I tried this for a vegetarian friend, and she said it was the best board she’d ever had.
Gluten-Free Adaptation — Replace water crackers and baguette slices with gluten-free crackers or rice cakes. I like Simple Mills almond flour crackers for their nutty flavor that pairs well with cheese. You can also add extra fruits and nuts to fill the space. Just make sure all your meats and cheeses are gluten-free (most are, but check labels on processed items).
Spicy Honey Version — For a kick, infuse your honey with red pepper flakes. Heat 1/4 cup honey with 1 teaspoon red pepper flakes in a small saucepan over low heat for 3 minutes. Let it cool, then strain out the flakes. Drizzle this spicy honey over the brie and goat cheese for a sweet-heat combination that’s addictive. I made this for a Friendsgiving where everyone kept asking, “What’s in this honey?”
Seasonal Swap — In the fall, use apples, pears, and figs. In the summer, swap in sliced peaches, nectarines, and fresh berries. In winter, use pomegranate seeds, persimmons, and dried cranberries. The honey and cheese stay the same, but the fruit changes the whole vibe of the board. I’ve made this for every season, and it always feels right.
Nut-Free Option — Replace walnuts and pumpkin seeds with roasted chickpeas or sunflower seeds. You can also add more crackers or dried fruit to fill the crunch category. For a savory crunch, try roasted edamame or wasabi peas—they add a surprising pop of flavor.
Serving & Storage Suggestions
This board is best served at room temperature, so aim to have it ready about 15 minutes before guests arrive. The cheese should be soft, the fruit should be fresh, and the honey should be runny. If you’re serving this as part of a larger Friendsgiving spread, set it out as guests arrive so they can snack while the main dishes finish cooking.
Presentation tips: Place the board in the center of the table where everyone can reach it. If you’re serving multiple boards, keep them on separate tables to avoid crowding. I like to add a few small plates and napkins nearby so guests can build their own little plates. For a more rustic look, serve the honey in a small mason jar with a wooden dipper.
What to serve alongside: This board pairs beautifully with a crisp white wine like Sauvignon Blanc or a light red like Pinot Noir. For non-alcoholic options, try sparkling apple cider or a warm spiced tea. If you’re serving this as an appetizer before a main meal, keep it light. If it’s the main event (which it absolutely can be), add some crusty bread and a simple green salad on the side.
Storage instructions: This board is best assembled and served fresh. If you have leftovers, store each component separately. Wrap cheeses in wax paper or cheese paper and store in the refrigerator. Store fruits in an airtight container in the fridge. Keep crackers and nuts in a cool, dry place. The honey can stay at room temperature. Note: The fruit will soften and the crackers will lose their crunch after a few hours, so leftovers are best eaten within 24 hours.
Reheating tips: You don’t need to reheat anything, but if you want to refresh the nuts, toast them in a dry pan for 1-2 minutes. If the cheese has been refrigerated, let it sit at room temperature for 20 minutes before serving again. The honey can be gently warmed if it crystallizes.
How flavors develop: The cheese and honey combination actually gets better after a few hours at room temperature. The flavors meld together, and the honey seeps into the cheese slightly, creating a more complex taste. That’s why leftover brie with honey is one of my favorite snacks the next day.
Nutritional Information & Benefits
This Easy Friendsgiving Charcuterie Board is more nutrient-dense than you might expect. While it’s definitely an indulgence, the ingredients offer some surprising health benefits. Here’s a rough estimate per serving (about 1/8 of the board):
| Nutrient | Amount |
|---|---|
| Calories | 380-420 |
| Protein | 14g |
| Fat | 24g |
| Carbohydrates | 32g |
| Fiber | 5g |
| Sugar | 18g |
| Sodium | 680mg |
Health benefits of key ingredients: Apples and pears are rich in fiber and vitamin C, which support digestion and immune health. Walnuts are packed with omega-3 fatty acids that are great for brain health. Honey contains antioxidants and has natural antibacterial properties. Cheese provides calcium and protein, though it’s high in saturated fat, so moderation is key.
Dietary considerations: This board contains dairy (cheese), gluten (crackers and bread), and nuts (walnuts). For a dairy-free version, substitute vegan cheese. For gluten-free, use gluten-free crackers. For nut-free, replace walnuts with seeds. The honey is suitable for most diets, but note that it’s not vegan—use maple syrup or agave as a substitute if needed.
My wellness perspective: I don’t believe in labeling foods as “good” or “bad.” This board is about celebration and sharing, and that has its own nutritional value. If you’re watching your intake, focus on the fruit and nuts, go easy on the cheese and bread, and enjoy the honey in moderation. The joy of sharing food with people you love is good for your soul, and that counts for something.
Conclusion
This Easy Friendsgiving Charcuterie Board with Fall Fruit and Honey is proof that you don’t need to be a professional chef to host a memorable gathering. It’s forgiving, flexible, and somehow always looks like you put in way more effort than you actually did. The combination of sweet fall fruit, creamy cheese, salty meat, and golden honey is the kind of simple magic that makes people feel cared for.
I love this recipe because it reminds me that hosting isn’t about perfection—it’s about connection. When I set this board on the table, I’m not trying to impress anyone. I’m just creating a space where people can gather, graze, and talk. And honestly, that’s the whole point of Friendsgiving, isn’t it?
So go ahead and make this board your own. Swap in your favorite cheeses, use whatever fruit looks good at the market, and don’t stress about the arrangement. The only rule is to drizzle the honey right before serving and enjoy every bite with the people you love. If you make this for your Friendsgiving, I’d love to hear about it. Drop a comment below and let me know what combinations you tried—I’m always looking for new ideas!
Frequently Asked Questions
Can I make this charcuterie board ahead of time?
You can prep the components ahead, but assemble the board no more than 30 minutes before serving. Slice the fruit just before serving to prevent browning, and drizzle the honey right before guests start eating to keep crackers crisp.
How many people does this board serve?
This board serves 6-8 people as an appetizer or 4-6 as a main dish. If you’re serving it as part of a larger Friendsgiving spread, it will comfortably feed 8-10 people as a starter.
What if I can’t find fresh figs?
No problem! Substitute fresh figs with halved grapes, sliced strawberries, or dried figs. The sweetness and texture will be slightly different, but the board will still be delicious. In a pinch, extra apple or pear slices work great too.
Can I use a different type of honey?
Absolutely. Any runny honey works—wildflower, clover, orange blossom, or even a spicy honey like buckwheat. Each variety brings its own flavor profile. Just avoid crystallized or creamed honey, which won’t drizzle well.
How do I keep the fruit from browning?
Dip sliced apples and pears in a bowl of cold water mixed with a squeeze of fresh lemon juice. This slows down oxidation and keeps the fruit looking fresh for up to an hour. Pat the slices dry before arranging them on the board to avoid making the crackers soggy.
Pin This Recipe!
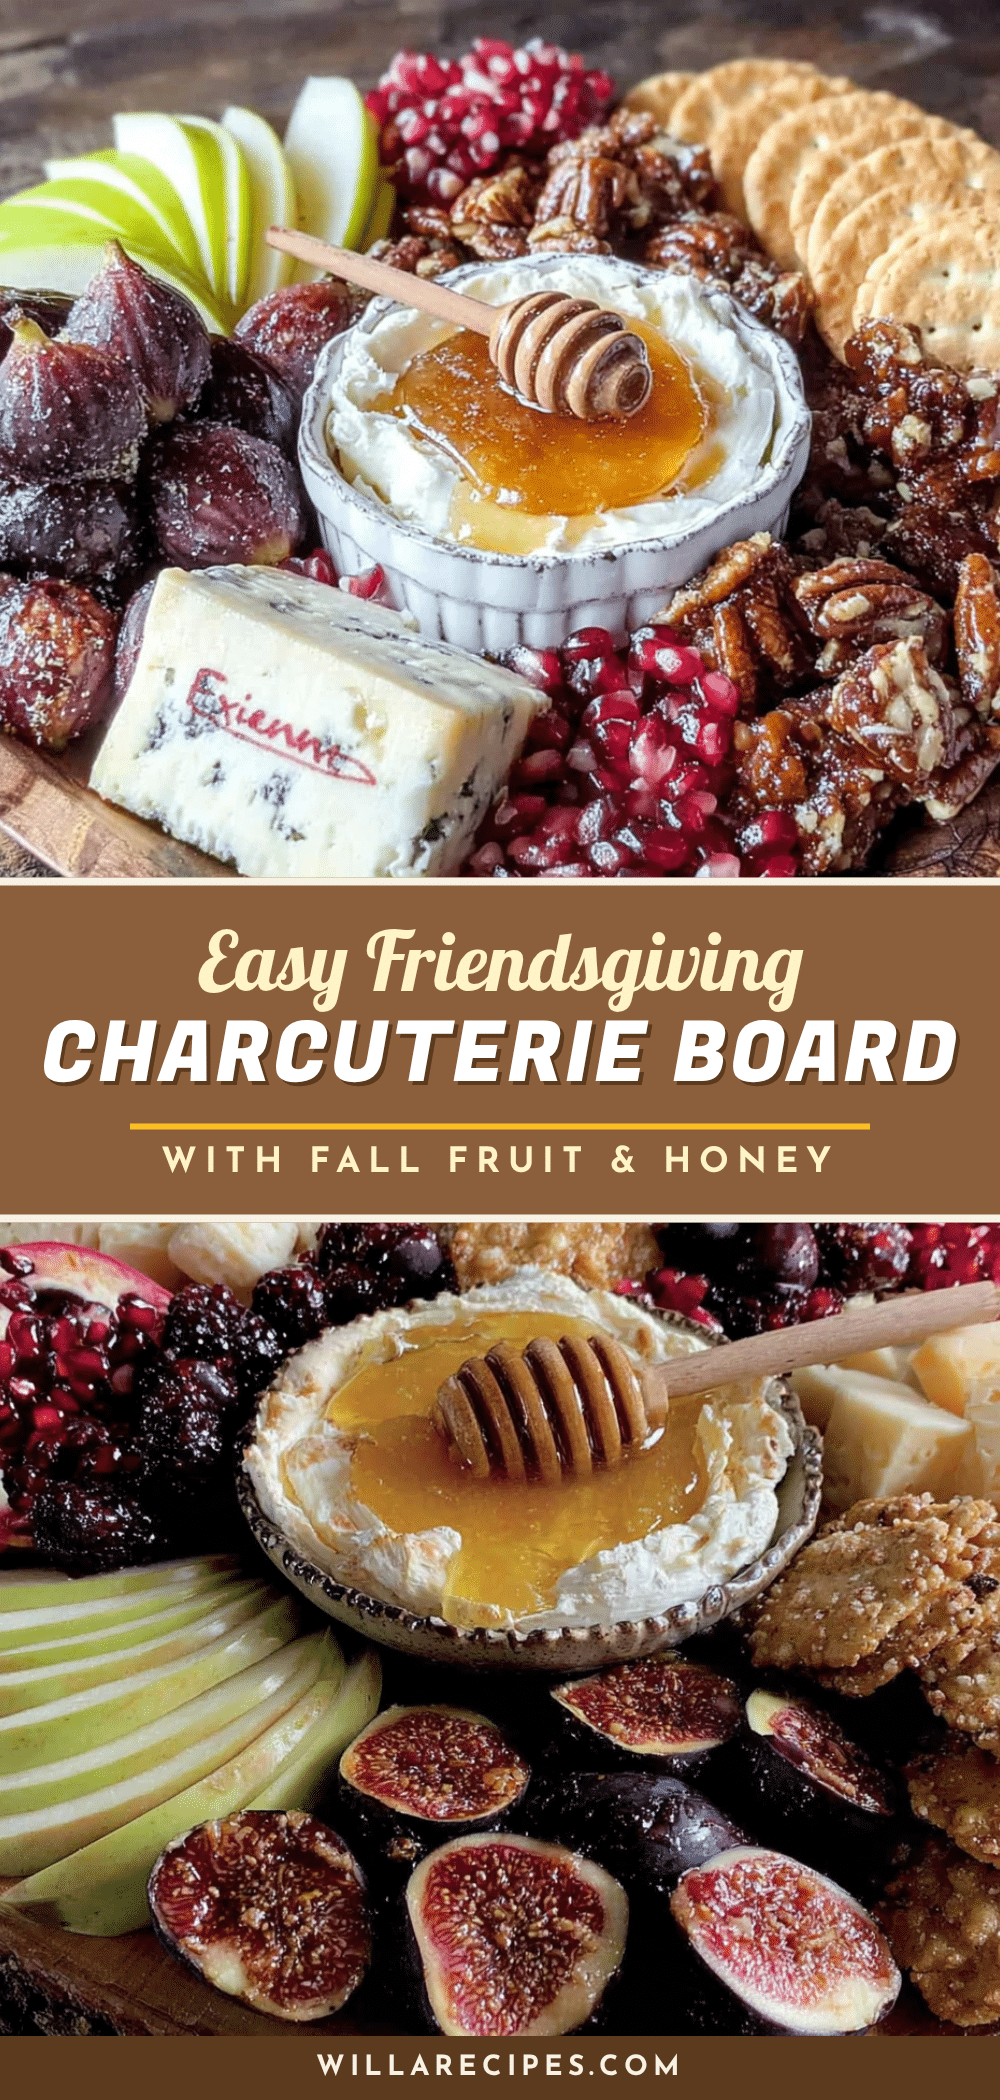
Easy Friendsgiving Charcuterie Board with Fall Fruit and Honey
A simple, no-cook charcuterie board featuring fall fruits, cheeses, meats, and a honey drizzle. Perfect for Friendsgiving gatherings, it comes together in under 15 minutes and looks impressive with minimal effort.
- Prep Time: 15 minutes
- Cook Time: 3 minutes
- Total Time: 18 minutes
- Yield: 6-8 servings 1x
- Category: Appetizer
- Cuisine: American
Ingredients
- 8 oz brie cheese (double or triple cream)
- 6 oz aged white cheddar cheese
- 4 oz goat cheese log (plain chèvre)
- 2 medium Honeycrisp apples
- 2 medium Bartlett pears
- 6–8 fresh figs (halved)
- 1/2 cup dried apricots
- 4 oz prosciutto (thinly sliced)
- 4 oz sopressata (sliced into thin rounds)
- 30 water crackers
- 1 small baguette (sliced into 20–24 rounds)
- 1/2 cup toasted walnuts
- 1/4 cup pumpkin seeds (unsalted)
- 1/4 cup local honey (runny)
- 2–3 fresh rosemary sprigs (for garnish)
Instructions
- Prep your fruit (5 minutes before serving): Wash and dry apples and pears. Slice apples into thin wedges (about 8 per apple) and pears into similar-sized slices. Cut each fig in half lengthwise. Place sliced fruit in a bowl of cold water with a squeeze of lemon juice to prevent browning.
- Toast the nuts (3 minutes): Heat a small dry skillet over medium heat. Add walnuts and stir constantly for 2-3 minutes until fragrant and slightly darker. Transfer immediately to a plate to cool.
- Arrange the cheeses (2 minutes): Place the brie wheel whole on the board, slightly off-center. Slice aged cheddar into thin triangles or cubes and arrange in a small cluster near the brie. Place goat cheese log on the opposite side.
- Add the meats (2 minutes): Drape prosciutto slices in loose folds near one cheese. Fold each slice into a ribbon-like shape. Arrange sopressata slices in a small pile nearby.
- Place the bowls (1 minute): Set small bowls on the board. Fill one with honey, one with toasted walnuts, and one with pumpkin seeds. Position them evenly across the board.
- Add the crackers and bread (2 minutes): Arrange water crackers in a single layer along one side. Place baguette slices in a small stack or fan pattern near the brie.
- Scatter the fruit (2 minutes): Drain sliced apples and pears, pat dry, and arrange in small clusters around the board. Tuck fig halves between cheeses and meats. Scatter dried apricots in empty spaces.
- Garnish and drizzle (1 minute): Tuck fresh rosemary sprigs between cheese and fruit. Right before serving, drizzle honey in a thin zigzag pattern over brie, goat cheese, and some fruit.
- Final check and serve (30 seconds): Ensure every element is visible and accessible. Add extra crackers to empty spots. Serve immediately with extra honey on the side.
Notes
Drizzle honey right before serving to keep crackers crisp. Let cheeses come to room temperature for 30 minutes before assembling. Use the ‘three of everything’ rule for visual variety. Prep all ingredients before arranging to reduce chaos.
Nutrition
- Serving Size: 1/8 of board
- Calories: 380420
- Sugar: 18
- Sodium: 680
- Fat: 24
- Saturated Fat: 12
- Carbohydrates: 32
- Fiber: 5
- Protein: 14
Keywords: charcuterie board, Friendsgiving, fall fruit, honey, easy appetizer, cheese board, holiday appetizer


