It was 10:47 PM on a Tuesday, and I had a sudden, ridiculous craving for bread that was chewy and crisp all at once. I didn’t have the energy for a full sourdough bake, but I had a bowl of bubbly discard sitting on the counter and a block of Parmesan staring at me from the fridge. The idea hit me like a tired, desperate lightning bolt—what if I made a focaccia that was so good even my kids would eat it without complaint? I grabbed the rosemary from the windowsill, crossed my fingers, and started mixing. Honestly, I wasn’t expecting much. I mean, focaccia can be finicky, right?
But there I was, at almost 11 PM, watching this dough come together in a way that felt almost magical. The kitchen was quiet except for the hum of the fridge and the occasional thump of my cat jumping off the counter. I forgot to add the salt at first—classic late-night move—and had to sprinkle it in halfway through the kneading. It was a mess, but a beautiful one. When I finally slid that pan into the oven, the smell of rosemary and melted cheese started filling the house. My youngest actually wandered out in his pajamas, half-asleep, and said, “What’s that smell?” That’s when I knew I was onto something.
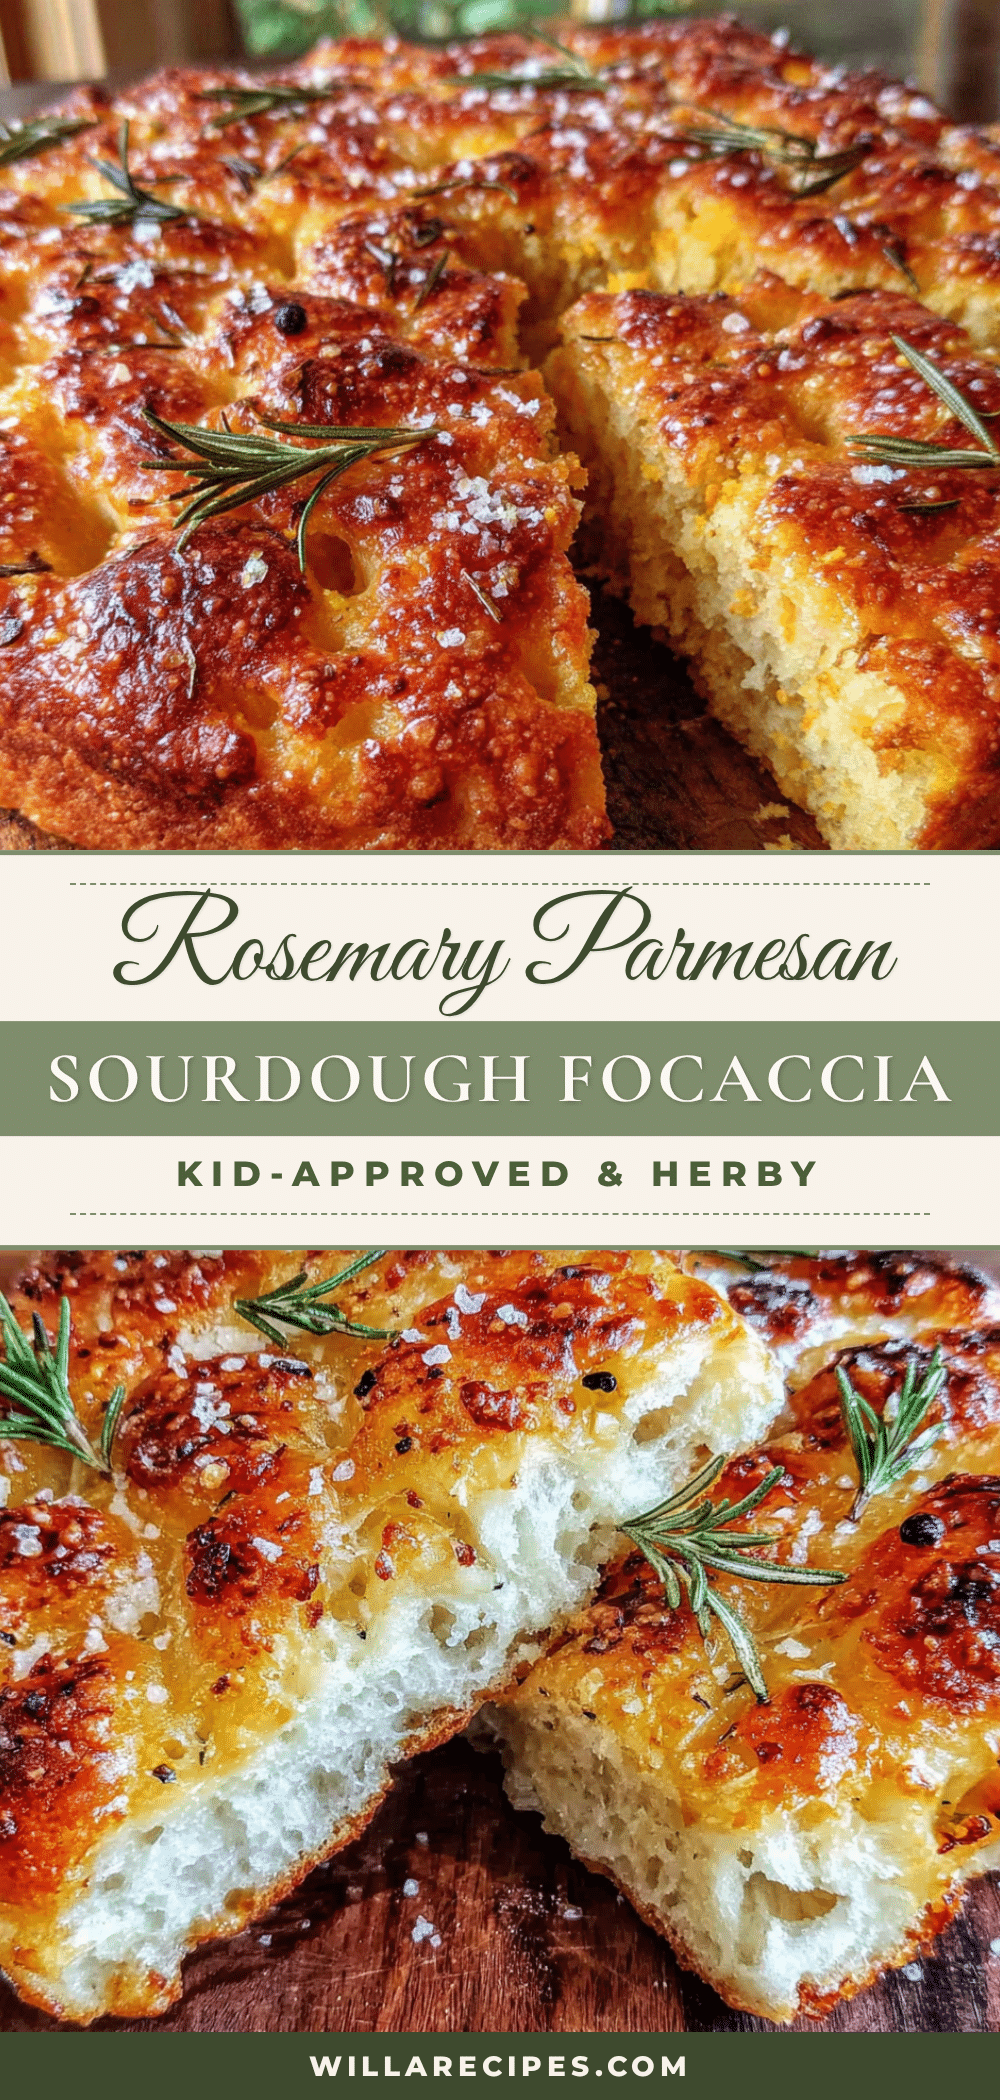
This kid-approved rosemary Parmesan sourdough focaccia became an instant staple in our house. It’s the kind of bread that makes you close your eyes after the first bite—crispy edges, soft, airy center, and that salty, herby kick. Maybe you’ve been there, too, standing in your kitchen late at night, just trying to make something good out of what you’ve got. This recipe is that moment, perfected. It’s not just bread; it’s a little victory, and I keep making it because it never fails to bring everyone to the table.
Why You’ll Love This Recipe
This isn’t just another focaccia recipe. After testing this about six times (yes, my family was very patient), I can honestly say this version hits every note. It’s the one I bring to potlucks, the one my kids request for school lunches, and the one that makes my neighbor ask for the recipe every single time.
- Quick & Easy: With a sourdough discard base, there’s no waiting for a starter to peak. It comes together in under 2 hours from start to finish, perfect for a weeknight bread craving.
- Simple Ingredients: You likely have everything in your kitchen right now. No fancy grocery trips needed—just flour, water, discard, Parmesan, and rosemary.
- Perfect for Family Meals: This focaccia is great alongside soups, salads, pasta, or just slathered with butter. It turns a simple dinner into something special without any extra stress.
- Crowd-Pleaser: My kids used to push bread aside, but this one? They fight over the corner pieces. The crispy, cheesy edges are pure gold.
- Unbelievably Delicious: The tang from the sourdough, the saltiness of the Parmesan, and the woodsy rosemary create a flavor combo that’s next-level comfort food.
What makes this recipe different from the rest? It’s the technique. Using sourdough discard not only reduces waste but also gives the focaccia a subtle tang that balances the rich cheese perfectly. Plus, the high hydration dough creates those signature air pockets without needing a stand mixer. This isn’t just another version—it’s my best version, tested by picky eaters and bread snobs alike.
This recipe is the kind that makes you close your eyes after the first bite. It’s comfort food reimagined—faster, simpler, but with the same soul-soothing satisfaction. Perfect for impressing guests without stress, or turning a simple Tuesday dinner into something memorable.
What Ingredients You Will Need
This recipe uses simple, wholesome ingredients to deliver bold flavor and satisfying texture without the fuss. Most of these are pantry staples, which makes this focaccia perfect for last-minute baking sessions.
For the Dough
- All-purpose flour, 3 cups (360g) – I prefer Gold Medal or King Arthur for consistent results. Bread flour works too, but AP gives a softer crumb.
- Sourdough discard, 1 cup (240g) – Unfed discard works perfectly here. If you don’t have discard, use an equal amount of active starter and reduce the yeast slightly.
- Warm water, 1 cup (240ml) – About 100°F. Too hot will kill the yeast; too cold and it won’t rise properly.
- Instant yeast, 1 teaspoon – This gives the discard a little boost for a faster rise. You can skip it for a longer, cold-ferment version.
- Olive oil, ¼ cup (60ml) – Plus extra for the pan and topping. Use a good quality extra virgin for the best flavor.
- Salt, 1½ teaspoons – Fine sea salt works best. I accidentally used kosher once and had to adjust—fine salt dissolves more evenly.
- Honey or sugar, 1 teaspoon – Just a touch to help the yeast along and add a hint of sweetness. (adds depth)
For the Topping

- Fresh rosemary, 2 tablespoons, finely chopped – Dried works in a pinch, but fresh gives that aromatic punch. I grab mine from the garden even in winter.
- Parmesan cheese, ½ cup (50g), finely grated – Use the real stuff, not the green can. Parmigiano-Reggiano melts and crisps up beautifully. (adds richness)
- Flaky sea salt, 1 teaspoon – Maldon is my go-to. It adds those little bursts of saltiness that make the focaccia addictive.
- Optional: Garlic powder, ½ teaspoon – My kids love this addition. It adds a savory note without being overpowering.
Ingredient Selection Tips: For the best texture, use a discard that’s been fed within the last week. If it’s been sitting longer, the flavor will be more sour, which some people love. For the Parmesan, buy a block and grate it yourself—it melts so much better than pre-shredded. In summer, I sometimes swap the rosemary for fresh thyme or oregano from the garden. It’s a fun way to change things up.
Equipment Needed
You don’t need a fancy kitchen to make this focaccia. Here’s what you’ll need:
- 9×13-inch baking pan – A metal pan gives the crispiest edges. Glass or ceramic works too, but you’ll need to add 5-10 minutes to the bake time.
- Large mixing bowl – Any bowl works, but a wide one makes mixing easier.
- Wooden spoon or dough scraper – A rubber spatula works too. I’ve used a clean hand in a pinch.
- Plastic wrap or a damp kitchen towel – For covering the dough while it rises.
- Measuring cups and spoons – A kitchen scale is more accurate, but cups work fine.
- Pastry brush – For spreading the olive oil. You can use your fingers if you don’t mind getting messy.
- Cooling rack – Essential for keeping the bottom crust crisp.
Budget-friendly options: If you don’t have a baking pan, a cast-iron skillet works beautifully. I’ve also used a disposable aluminum pan for camping trips—works like a charm. For the dough scraper, a plastic spatula or even a clean credit card does the job.
Preparation Method
Let’s get baking. This method is broken down into simple steps that even a beginner can follow. Take your time—good bread is worth the effort.
- Mix the dough (10 minutes): In a large bowl, combine the warm water, sourdough discard, and honey. Stir until the discard dissolves into the water. Add the instant yeast and let it sit for 5 minutes until it gets foamy. This step tells you the yeast is alive and working. If it doesn’t foam, your water might have been too hot or your yeast is old.
- Add dry ingredients (5 minutes): Add the flour and salt to the bowl. Mix with a wooden spoon until a shaggy dough forms. It will be sticky—that’s normal. Don’t be tempted to add more flour. The high hydration is what gives focaccia its airy texture. Cover the bowl with plastic wrap and let it rest for 15 minutes. This autolyse step lets the flour absorb the water, making the dough easier to handle.
- Stretch and fold (20 minutes): After the rest, wet your hands slightly to prevent sticking. Grab one side of the dough, stretch it up, and fold it over the center. Rotate the bowl and repeat 4 times total. Cover and rest 10 minutes. Repeat this stretch-and-fold process 3 times total. You’ll feel the dough become smoother and more elastic with each fold. This builds strength without kneading.
- First rise (45-60 minutes): After the last fold, cover the bowl and let the dough rise in a warm spot until it doubles in size. I usually put it in my oven with the light on. It should look puffy and jiggly when you tap the bowl. If your kitchen is cold, it might take longer—up to 90 minutes. Patience pays off here.
- Prepare the pan (5 minutes): Pour 2 tablespoons of olive oil into your 9×13 pan. Use your fingers to spread it all over the bottom and sides. This prevents sticking and creates that crispy, golden crust. Don’t skimp on the oil—it’s what makes focaccia special.
- Transfer and stretch (10 minutes): Gently scrape the dough into the oiled pan. Don’t punch it down—you want to keep those air bubbles. Let the dough rest for 10 minutes, then use your fingertips to gently stretch it toward the edges of the pan. If it springs back, let it rest another 5 minutes and try again. The dough should fill the pan evenly.
- Second rise (30-40 minutes): Cover the pan with plastic wrap and let the dough rise again until it’s puffy and fills the pan completely. It should look like a soft pillow. While it rises, preheat your oven to 425°F (220°C).
- Dimple and top (5 minutes): This is the fun part. Dip your fingertips in olive oil and press deep dimples all over the dough, all the way to the bottom of the pan. Don’t be shy—those dimples hold the oil and toppings. Drizzle the remaining 2 tablespoons of olive oil over the top. Sprinkle the chopped rosemary, grated Parmesan, and flaky sea salt evenly. If using garlic powder, sprinkle it now.
- Bake (20-25 minutes): Place the pan on the middle rack of your preheated oven. Bake until the top is deep golden brown and the edges look crispy and caramelized. The cheese should be bubbling and slightly browned in spots. If the top is browning too fast but the bottom isn’t done, tent loosely with foil for the last 5 minutes.
- Cool and serve (15 minutes): Remove the pan from the oven and let it cool in the pan for 5 minutes. Then transfer the focaccia to a cooling rack. This step is crucial—if you leave it in the pan, the bottom will get soggy. Let it cool for at least 10 minutes before slicing. The wait is hard, but it’s worth it for that perfect texture.
Sensory cues: The dough should feel like a soft, squishy pillow after the second rise. When you dimple it, you’ll hear a slight popping sound from the air bubbles—that’s a good sign. The finished focaccia should sound hollow when you tap the bottom. The crust should crackle slightly when you squeeze it.
Cooking Tips & Techniques
I’ve made this focaccia at least a dozen times, and I’ve learned a few things the hard way. Here’s what I wish someone had told me.
Don’t skip the autolyse. That 15-minute rest after mixing the flour and water is non-negotiable. It gives the gluten time to develop naturally, which means less work for you and a better texture. I once skipped it because I was in a hurry, and the dough was a sticky, unmanageable mess.
Watch your water temperature. If your water is too hot, it will kill the yeast and your dough won’t rise. Too cold, and the rise will take forever. I use a kitchen thermometer, but if you don’t have one, the water should feel like warm bath water—not hot, not cold.
Use cold discard for a tangier flavor. If you want that classic sourdough tang, use discard straight from the fridge. The cold temperature slows down the fermentation slightly, allowing more flavor to develop. Room temperature discard gives a milder flavor that my kids prefer.
Don’t over-flour your hands. When handling the sticky dough, wet your hands with water or oil instead of flouring them. Adding extra flour changes the hydration ratio and can make the focaccia dense. I learned this after making a brick-like loaf my first time.
Let it cool completely for the best texture. I know it’s tempting to tear into it while it’s hot, but the interior needs time to set. If you cut too early, the crumb will be gummy. I usually make this in the afternoon so it’s ready for dinner.
Variations & Adaptations
This recipe is incredibly versatile. Here are some ways to change it up based on what you have or who you’re feeding.
- Cheese Swap: Replace Parmesan with crumbled feta, shredded mozzarella, or sharp cheddar. My kids love a cheddar version with a sprinkle of paprika on top. It gives a lovely orange color and a mildly smoky flavor.
- Herb Variations: No rosemary? Use fresh thyme, oregano, or even dried Italian seasoning. In the fall, I add a tablespoon of chopped sage for a cozy, earthy flavor that pairs perfectly with roasted vegetables.
- Gluten-Free Option: Substitute a 1:1 gluten-free flour blend. The texture will be slightly more dense, but still delicious. Add an extra tablespoon of olive oil for moisture. I’ve tested this with Bob’s Red Mill 1:1 and it worked surprisingly well.
- Add-Ins: Sprinkle halved cherry tomatoes, sliced olives, or caramelized onions on top before baking. My family loves a version with sun-dried tomatoes and a pinch of red pepper flakes for a little heat.
- Dairy-Free: Omit the Parmesan and use a dairy-free alternative or nutritional yeast for a cheesy flavor. The focaccia will still be delicious—just a little less rich.
Personal variation: I once made a batch with leftover pesto swirled into the dough before the second rise. It turned the focaccia a beautiful green and added so much flavor. My kids called it “dinosaur bread” and ate it all in one sitting.
Serving & Storage Suggestions
This focaccia is best served warm, but it’s still fantastic at room temperature. Here’s how to make the most of it.
Serving temperature: Serve warm from the oven for the crispiest edges and softest interior. If it’s cooled down, pop it in a 350°F oven for 5 minutes to revive the crunch. Avoid the microwave—it makes the crust chewy and sad.
Presentation: Cut into squares or rectangles and arrange on a wooden board. I like to serve it with a small bowl of olive oil and balsamic vinegar for dipping. For a meal, pair it with a big Italian salad, a bowl of tomato soup, or a simple pasta dish.
Storage: Store leftovers in an airtight container at room temperature for up to 2 days. Do not refrigerate—the cold air will dry it out and make it stale. If you need to keep it longer, freeze it.
Freezing instructions: Wrap the cooled focaccia tightly in plastic wrap, then foil. Freeze for up to 3 months. To reheat, thaw at room temperature, then warm in a 350°F oven for 10 minutes. I often make a double batch and freeze one for busy weeks.
Flavor development: The flavors actually deepen after a day. The rosemary and Parmesan meld together overnight, making the focaccia even more delicious the next day. It’s perfect for making ahead for a party.
Nutritional Information & Benefits
While this is a treat, it does have some redeeming qualities. Here’s a rough estimate per serving (1 square, assuming 12 servings):
- Calories: 220
- Fat: 9g (2g saturated)
- Carbohydrates: 28g
- Protein: 6g
- Fiber: 1g
- Sodium: 380mg
Health benefits: Sourdough fermentation breaks down some of the gluten and phytic acid, making the nutrients more bioavailable. This means your body can absorb more of the iron, zinc, and magnesium from the flour. Plus, the fermentation creates beneficial bacteria that support gut health. Parmesan is a good source of calcium and protein, while olive oil provides healthy monounsaturated fats. Rosemary contains antioxidants that help reduce inflammation.
Dietary considerations: This recipe is vegetarian. For a lower-sodium version, reduce the flaky sea salt on top. It’s not gluten-free as written, but the gluten-free variation works well. The dairy-free version is also suitable for those avoiding lactose.
Personal wellness perspective: I love that this bread feels indulgent but isn’t loaded with processed ingredients. It’s real food made from scratch, and that makes me feel good about serving it to my family.
Conclusion
This kid-approved rosemary Parmesan sourdough focaccia has become a staple in our home for good reason. It’s forgiving enough for beginners, impressive enough for guests, and so delicious that even picky eaters ask for seconds. The combination of tangy sourdough, salty Parmesan, and aromatic rosemary is simply unbeatable.
I encourage you to make this recipe your own. Add your favorite herbs, swap the cheese, or throw on some veggies. The beauty of focaccia is that it welcomes creativity. Don’t be afraid to experiment—that’s how the best recipes are born.
Personally, I love this recipe because it reminds me that great food doesn’t have to be complicated. It’s about using what you have, putting in a little love, and sharing the results with the people you care about. That late-night experiment turned into something my family looks forward to every week.
I’d love to hear how yours turns out! Leave a comment below with your favorite variation, share a photo of your bake, or tag me on social media. Happy baking, friends—you’ve got this!
Frequently Asked Questions
Can I use active sourdough starter instead of discard?
Absolutely! If you use active starter, reduce the instant yeast to ½ teaspoon or omit it entirely. The rise time will be similar since the starter is already active. The flavor will be slightly milder than using discard.
Why is my focaccia dense and not airy?
This usually happens for a few reasons: the dough wasn’t hydrated enough (add a tablespoon more water next time), the yeast was dead (check the expiration date), or the dough didn’t rise long enough. Make sure your kitchen is warm enough—around 75°F is ideal. A cold kitchen can slow the rise significantly.
Can I make this ahead of time?
Yes! You can prepare the dough through step 6, then cover and refrigerate overnight. The next day, let it come to room temperature for about an hour before continuing with the second rise and baking. The cold fermentation actually develops more flavor.
How do I get those big air bubbles in the crumb?
High hydration is key—don’t be afraid of a sticky dough. Also, handle the dough gently during the stretch and fold process. Don’t punch it down when transferring to the pan. The less you handle it, the more bubbles you’ll keep. Using a metal pan also helps create a better rise.
Can I freeze the unbaked dough?
I don’t recommend freezing the unbaked dough, as the yeast activity will be unpredictable. However, you can freeze the baked focaccia with excellent results. Just wrap it well and reheat in the oven for the best texture. It’s a great way to have fresh bread on hand for busy nights.
Pin This Recipe!
Easy Kid-Approved Rosemary Parmesan Sourdough Focaccia
This kid-approved rosemary Parmesan sourdough focaccia is a quick and easy bread with crispy edges, a soft airy center, and a salty, herby kick. Made with sourdough discard, it comes together in under 2 hours and is perfect for family meals or impressing guests.
- Prep Time: 15 minutes
- Cook Time: 25 minutes
- Total Time: 1 hour 50 minutes
- Yield: 12 servings 1x
- Category: Bread
- Cuisine: Italian
Ingredients
- 3 cups (360g) all-purpose flour
- 1 cup (240g) sourdough discard
- 1 cup (240ml) warm water (about 100°F)
- 1 teaspoon instant yeast
- ¼ cup (60ml) olive oil, plus extra for pan and topping
- 1½ teaspoons fine sea salt
- 1 teaspoon honey or sugar
- 2 tablespoons fresh rosemary, finely chopped
- ½ cup (50g) Parmesan cheese, finely grated
- 1 teaspoon flaky sea salt (e.g., Maldon)
- ½ teaspoon garlic powder (optional)
Instructions
- Mix the dough: In a large bowl, combine warm water, sourdough discard, and honey. Stir until the discard dissolves. Add instant yeast and let sit for 5 minutes until foamy.
- Add dry ingredients: Add flour and salt to the bowl. Mix with a wooden spoon until a shaggy, sticky dough forms. Cover with plastic wrap and let rest for 15 minutes (autolyse).
- Stretch and fold: Wet your hands slightly. Stretch one side of the dough up and fold it over the center. Rotate the bowl and repeat 4 times total. Cover and rest 10 minutes. Repeat this stretch-and-fold process 3 times total.
- First rise: Cover the bowl and let the dough rise in a warm spot until doubled in size, about 45-60 minutes.
- Prepare the pan: Pour 2 tablespoons of olive oil into a 9×13-inch baking pan and spread it all over the bottom and sides.
- Transfer and stretch: Gently scrape the dough into the oiled pan. Let rest for 10 minutes, then use your fingertips to gently stretch it toward the edges of the pan. If it springs back, rest another 5 minutes and try again.
- Second rise: Cover the pan with plastic wrap and let the dough rise until puffy and fills the pan, about 30-40 minutes. Meanwhile, preheat oven to 425°F (220°C).
- Dimple and top: Dip your fingertips in olive oil and press deep dimples all over the dough. Drizzle remaining 2 tablespoons olive oil over the top. Sprinkle evenly with chopped rosemary, grated Parmesan, flaky sea salt, and garlic powder (if using).
- Bake: Place pan on middle rack and bake until deep golden brown and edges are crispy, 20-25 minutes. If top browns too fast, tent loosely with foil for last 5 minutes.
- Cool and serve: Let cool in pan for 5 minutes, then transfer to a cooling rack. Cool for at least 10 minutes before slicing.
Notes
For a tangier flavor, use cold sourdough discard straight from the fridge. For a milder flavor, use room temperature discard. Do not refrigerate leftovers; store in an airtight container at room temperature for up to 2 days. Freeze baked focaccia for up to 3 months. Reheat in a 350°F oven for 5-10 minutes to restore crispness.
Nutrition
- Serving Size: 1 square
- Calories: 220
- Sugar: 1
- Sodium: 380
- Fat: 9
- Saturated Fat: 2
- Carbohydrates: 28
- Fiber: 1
- Protein: 6
Keywords: sourdough focaccia, rosemary parmesan bread, kid-friendly bread, easy focaccia recipe, sourdough discard recipe, quick bread, homemade focaccia


