It was 11:47 PM on a random Thursday, and I had a very specific, almost aggressive, craving for something sweet. You know that feeling? The one where a bowl of ice cream just won’t cut it, and you need something with texture, with crunch, with that particular kind of sweetness that feels like a hug. I wanted a white chocolate macadamia nut cookie, but I was not about to preheat an oven at midnight. I didn’t have the patience, or the butter that had softened, or honestly, the will to wash a single mixing bowl.
But I did have a bag of white chocolate chips, a can of nuts I’d forgotten about, and a box of crispy rice cereal that was mostly just taking up space. I stared at the pantry for a solid minute, and a weird, almost desperate idea arrived. What if I just… melted the chocolate, threw everything in, and let the fridge do the work? I mean, it’s basically a cookie, right? Just without the whole “baking” part. I grabbed a pot, made a mess, and honestly, I was half expecting to be scraping a sad, sticky blob out of a pan an hour later.
But I wasn’t. What came out of the fridge was this perfect, chunky, crunchy, creamy avalanche of flavor. It was a total accident, a midnight kitchen miracle born from pure laziness and a sugar craving. I took a bite, standing there in the dark kitchen, and let me tell you, I felt like a genius. It was better than the cookie I’d been dreaming of. And now, every time I make these Easy No-Bake White Chocolate Avalanche Cookies, I remember that quiet Thursday night. It’s the kind of recipe that proves you don’t need a lot of fuss to get something amazing.
Why You’ll Love This Recipe
Let’s be honest. You’re busy. You’re tired. And you want a dessert that doesn’t require a culinary degree or a sink full of dishes. These cookies are your new best friend.
- Quick & Easy: From start to finish, you’re looking at about 15 minutes of active work. The fridge does the rest. Perfect for a weeknight treat or a last-minute potluck contribution.
- Simple Ingredients: You likely have most of these in your pantry right now. No fancy grocery runs, no obscure extracts. Just real, honest ingredients.
- No-Bake Magic: This is the star of the show. No oven preheating, no checking for doneness, no hot kitchen. Just melt, mix, and chill.
- Crowd-Pleaser: I’ve brought these to parties, family dinners, and work events. They disappear. Kids love them, adults love them. They’re universally adored.
- Unbelievably Delicious: The combination of creamy white chocolate, crunchy nuts, and crispy cereal is pure textural bliss. It’s sweet, it’s salty, it’s everything you want in a bite-sized treat.
What makes this recipe different from the rest? It’s the ratio. I’ve tested this a dozen times to get the perfect balance of white chocolate to mix-ins. You get a generous coating on every piece without it being overwhelmingly sweet. Plus, using a high-quality white chocolate (like Ghirardelli or Guittard) makes a world of difference. This isn’t just another no-bake cookie; it’s the best version. It’s the one that makes you close your eyes after the first bite and just go, “Mmm.”
What Ingredients You Will Need
This recipe uses a handful of simple ingredients to create something truly special. Each one plays a key role in the final texture and flavor.
- White Chocolate Chips (12 oz or 340g): This is the backbone of the cookie. Don’t skimp here. Use a high-quality brand like Ghirardelli or Guittard for the best melt and creamiest flavor. The cheaper chips often contain more stabilizers and won’t melt as smoothly.
- Rice Krispies Cereal (3 cups or 85g): This provides that classic, satisfying crunch. Make sure you’re using the original, unsweetened kind. You can also use a generic brand of crispy rice cereal, just check the ingredient list.
- Salted Dry-Roasted Macadamia Nuts (1 cup or 140g): The buttery, rich flavor of macadamia nuts is a perfect partner for white chocolate. The salt is crucial—it cuts the sweetness and adds a savory depth. If you only have unsalted nuts, add a good pinch of flaky sea salt to the mix.
- Coconut Oil (1 tablespoon or 15ml): This is a secret weapon. It helps thin the white chocolate just enough to coat all the ingredients evenly. It also gives the finished cookies a beautiful, subtle sheen. Don’t skip it!
- Vanilla Extract (1 teaspoon): A little pure vanilla extract enhances the sweetness of the white chocolate and rounds out the flavor profile. Imitation vanilla will work, but pure is better.
For ingredient selection tips, look for macadamia nuts that are fairly uniform in size. For the cereal, a slightly stale box will work fine, but fresh cereal gives the best crunch. If you’re feeling adventurous, you can substitute the macadamia nuts with chopped pecans or even toasted almonds for a different flavor profile.
Equipment Needed
You don’t need a fancy kitchen to make these, which is part of the beauty. Here’s the short list of what you’ll need.
- Medium Microwave-Safe Bowl: For melting the white chocolate. A glass or ceramic bowl works best.
- Large Mixing Bowl: For combining all the ingredients. Make sure it’s big enough to give you room to stir without making a mess.
- Rubber Spatula: Essential for scraping every last bit of melted chocolate and for gently folding the ingredients together.
- Baking Sheet: To hold the cookies while they chill. A standard half-sheet pan is perfect.
- Parchment Paper or Silicone Baking Mat: This is non-negotiable. It prevents the cookies from sticking and makes cleanup a breeze.
- Cookie Scoop or Two Spoons: For portioning the mixture into even cookies. A 1.5-tablespoon scoop is a great size.
If you don’t have a microwave, you can melt the white chocolate in a heatproof bowl set over a pot of simmering water (a double boiler). Just be careful not to let the bowl touch the water. I’ve used a cheap baking sheet from the grocery store for years, and it works fine. You don’t need expensive equipment for these cookies to turn out perfectly.
Preparation Method
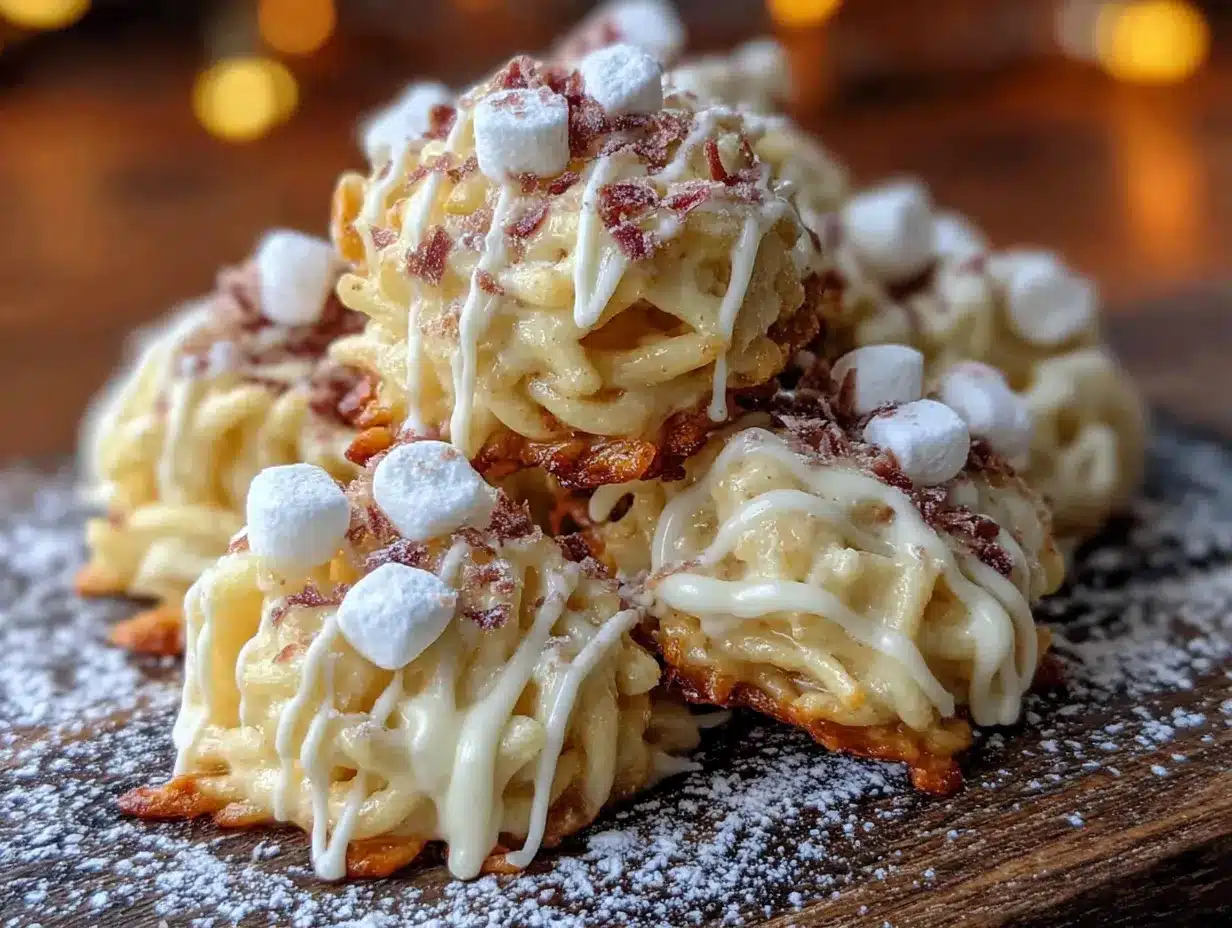
This is where the magic happens. Follow these steps, and you’ll have a batch of incredible cookies in no time.
- Prep Your Pan: Line a large baking sheet with parchment paper or a silicone baking mat. Set it aside. This step is crucial for easy removal later.
- Melt the White Chocolate: Place the 12 oz of white chocolate chips and 1 tablespoon of coconut oil in a medium microwave-safe bowl. Microwave in 30-second intervals, stirring well with a rubber spatula after each interval. It usually takes about 1.5 to 2 minutes total. The residual heat will finish melting the chips, so stop when most of the chips are shiny and just a few lumps remain. Stir until completely smooth. Be careful not to overheat, or the chocolate will seize and become grainy.
- Combine the Dry Ingredients: In a large mixing bowl, gently combine the 3 cups of Rice Krispies cereal and 1 cup of salted macadamia nuts. Give them a quick stir to distribute the nuts evenly.
- Mix Everything Together: Pour the melted white chocolate mixture over the dry ingredients. Add the 1 teaspoon of vanilla extract. Using your rubber spatula, gently fold everything together until every piece of cereal and every nut is evenly coated in white chocolate. It will look like a glorious, sticky, chunky mess. This is exactly what you want.
- Portion the Cookies: Working quickly before the chocolate sets, use a cookie scoop or two spoons to drop heaping tablespoons of the mixture onto the prepared baking sheet. Leave about an inch of space between each cookie. They don’t spread, so you can pack them fairly close together.
- Shape the Cookies (Optional but Recommended): If you want perfectly round cookies, lightly wet your hands with a little cold water. Gently press each mound of mixture into a neat, round disc shape. The water prevents the chocolate from sticking to your fingers.
- Chill to Set: Place the baking sheet in the refrigerator for at least 30 minutes. This allows the white chocolate to fully harden and the cookies to set. They will be firm to the touch.
- Serve and Enjoy: Once set, remove the cookies from the fridge. They are ready to eat immediately. Store any leftovers in an airtight container in the fridge.
Sensory Cue: When you stir the melted chocolate into the cereal, listen for the satisfying crackle. That’s the sound of the crispy rice staying crisp! If it goes quiet, you’ve over-mixed it.
Cooking Tips & Techniques
I’ve made my fair share of mistakes with these cookies, and I’m here to help you avoid them. Here are my best tips for no-bake success.
- Don’t Overheat the Chocolate: This is the #1 mistake. White chocolate is delicate. If it gets too hot, it will seize into a thick, grainy paste. Always use low power in the microwave and stir frequently. The residual heat is your friend.
- Work Quickly: Once the chocolate is melted and mixed, you have a limited window before it starts to set. Have your pan lined and your cookie scoop ready. If the mixture becomes too stiff, you can pop the bowl back in the microwave for 10 seconds to loosen it up.
- Use a Light Hand: When folding the cereal and nuts into the chocolate, be gentle. Over-mixing can crush the cereal, leading to a denser, less crunchy cookie. You want to coat everything without breaking it down.
- Chill for the Full Time: Don’t rush the chilling process. Thirty minutes is the minimum. If you try to eat them too soon, they will be soft and messy. Patience is key for that perfect, firm bite.
- For a Saltier Kick: If you love the sweet-salty combo, sprinkle a tiny pinch of flaky sea salt (like Maldon) on top of each cookie right after you shape them. It’s a game-changer.
I once tried to double the recipe and used a bowl that was way too small. I ended up with white chocolate and cereal all over my counter. It was a mess, and the cookies didn’t mix well. Learn from my disaster—always use a big enough bowl!
Variations & Adaptations
One of the best things about this recipe is how easy it is to change up. Here are a few of my favorite twists.
- Chocolate Lover’s Version: Swap the white chocolate chips for semi-sweet or dark chocolate chips. The rich, bittersweet flavor is incredible with the macadamia nuts. You can also drizzle melted dark chocolate over the finished white chocolate cookies for a beautiful marbled effect.
- Holiday Avalanche Cookies: For Christmas, swap the macadamia nuts for toasted pecans and add 1/2 cup of dried cranberries. The red and green (if you use a little green food coloring in the white chocolate, or just leave it white) is so festive. For Easter, use pastel-colored M&Ms instead of the nuts.
- Dietary Adaptations: To make these gluten-free, simply ensure you’re using certified gluten-free crispy rice cereal. Most standard Rice Krispies are not gluten-free, but many store brands are. For a dairy-free version, use a high-quality dairy-free white chocolate (like Enjoy Life brand) and a little more coconut oil to help it melt.
- Trail Mix Cookies: Use a 1/2 cup each of macadamia nuts, dried cherries, and mini pretzel twists (crushed). The salty pretzel is a fantastic addition. This is my personal go-to variation when I want something a little more interesting.
I once made a batch with pistachios and dried apricots, and it was surprisingly amazing. Don’t be afraid to experiment with whatever you have in your pantry!
Serving & Storage Suggestions
These cookies are best served cold, straight from the fridge. The texture is perfect—firm, crunchy, and creamy all at once. They soften quickly at room temperature, so I recommend keeping them chilled until you’re ready to serve.
For a beautiful presentation, arrange them on a white platter or a wooden board. They look lovely next to a cup of coffee or a glass of cold milk. For a party, you can even press the mixture into a lined 8×8 inch pan instead of making individual cookies. Once set, cut them into bars or squares. It’s a super easy way to make a lot of servings at once.
Storage Instructions: Store the cookies in an airtight container in the refrigerator. They will stay fresh and crunchy for up to 1 week. I like to layer them between sheets of parchment paper to prevent them from sticking together.
Freezer Instructions: These cookies freeze beautifully. Place them in a single layer on a baking sheet and freeze for 1 hour. Then, transfer the frozen cookies to a freezer-safe bag or container. They will keep for up to 3 months. You can eat them directly from the freezer—they’re like little frozen bites of candy! To thaw, just let them sit at room temperature for 5-10 minutes.
I’ve noticed that the flavors actually meld together and get even better after a day or two in the fridge. So don’t worry if you make them ahead of time—they’ll be delicious.
Nutritional Information & Benefits
While these are definitely a treat, they do offer a few surprising benefits. Here’s a quick look at the estimated nutritional values per cookie (based on a batch of 24 cookies).
| Nutrient | Per Cookie |
|---|---|
| Calories | ~180 |
| Fat | 12g |
| Carbohydrates | 17g |
| Sugar | 14g |
| Protein | 2g |
Macadamia nuts are a great source of healthy monounsaturated fats, which are good for heart health. They also provide a bit of fiber and essential minerals like manganese and thiamine. The white chocolate, in moderation, can be a source of calcium.
Dietary Considerations: This recipe is naturally vegetarian and can be easily made gluten-free and dairy-free with the right substitutions. The main allergens to be aware of are dairy (from the white chocolate) and tree nuts (from the macadamia nuts).
My personal perspective? Life is about balance. These cookies are a delicious, easy way to satisfy a sweet tooth without spending hours in the kitchen. They’re a joy to make and share, and that’s a form of wellness in itself.
Conclusion
So there you have it. My accidental midnight creation that turned into a staple in my kitchen. These Easy No-Bake White Chocolate Avalanche Cookies are proof that you don’t need a fancy recipe or a lot of time to make something truly special. They’re quick, they’re simple, and they’re absolutely, unbelievably delicious.
I really hope you give them a try. Don’t be afraid to make them your own—swap in your favorite nuts, add some dried fruit, or go full chocolate mode. The beauty of this recipe is how forgiving and adaptable it is. I’d love to hear how yours turn out! What variations did you try? Did you have a late-night kitchen adventure of your own? Drop a comment below and let me know. Happy no-baking, friends!
Frequently Asked Questions (FAQs)
1. Can I use white chocolate melting wafers instead of chips?
Yes, you can! Melting wafers (like Wilton’s) are designed to melt smoothly and set firmly. They often don’t need the extra coconut oil, but you can still add a teaspoon for a smoother texture. Just follow the same melting instructions.
2. My white chocolate seized and became grainy. What happened?
This usually happens when the chocolate gets too hot or if a tiny bit of water gets into the bowl. Always melt it slowly in 30-second intervals. If it does seize, it’s unfortunately hard to fix. The best thing to do is start over with a fresh batch of chips.
3. Can I make these without macadamia nuts?
Absolutely! If you have a nut allergy or just don’t like macadamia nuts, you can substitute them with an equal amount of chopped pecans, walnuts, or even roasted almonds. For a nut-free version, try using sunflower seeds or crushed pretzels.
4. How do I get perfectly round cookies?
The key is to work quickly before the chocolate sets. Use a cookie scoop for even portions. Then, lightly wet your fingers with cold water and gently press each mound into a round disc. The water prevents the chocolate from sticking to your hands. You can also press them into a mini muffin tin for a perfectly uniform shape.
5. Can I leave these cookies out on the counter?
They will soften at room temperature, especially in a warm kitchen. For the best texture—firm and crunchy—I highly recommend storing them in the refrigerator. They are perfectly safe to eat at room temperature, but they just won’t have that same satisfying bite.
Pin This Recipe!

Easy No-Bake White Chocolate Avalanche Cookies

These no-bake white chocolate avalanche cookies are a quick and easy treat made with white chocolate, crispy rice cereal, and macadamia nuts. Perfect for a last-minute dessert or a late-night craving, they require just 15 minutes of active prep and no oven.
- Prep Time: 15 minutes
- Cook Time: 0 minutes
- Total Time: 45 minutes
- Yield: 24 cookies 1x
- Category: Dessert
- Cuisine: American
Ingredients
- 12 oz (340g) white chocolate chips
- 3 cups (85g) Rice Krispies cereal
- 1 cup (140g) salted dry-roasted macadamia nuts
- 1 tablespoon (15ml) coconut oil
- 1 teaspoon vanilla extract
Instructions
- Line a large baking sheet with parchment paper or a silicone baking mat.
- Place the white chocolate chips and coconut oil in a medium microwave-safe bowl. Microwave in 30-second intervals, stirring well after each, until smooth (about 1.5 to 2 minutes total).
- In a large mixing bowl, gently combine the Rice Krispies cereal and macadamia nuts.
- Pour the melted white chocolate mixture over the dry ingredients. Add the vanilla extract. Gently fold until everything is evenly coated.
- Working quickly, use a cookie scoop or two spoons to drop heaping tablespoons of the mixture onto the prepared baking sheet, leaving about an inch of space between each.
- Optionally, lightly wet your hands with cold water and gently press each mound into a round disc shape.
- Refrigerate for at least 30 minutes until firm.
- Serve cold. Store leftovers in an airtight container in the refrigerator.
Notes
Use high-quality white chocolate for best results. Do not overheat the chocolate. Work quickly as the mixture sets fast. For a saltier kick, sprinkle flaky sea salt on top after shaping. Store in the refrigerator for up to 1 week or freeze for up to 3 months.
Nutrition
- Serving Size: 1 cookie
- Calories: 180
- Sugar: 14
- Sodium: 80
- Fat: 12
- Saturated Fat: 6
- Carbohydrates: 17
- Fiber: 1
- Protein: 2
Keywords: no-bake cookies, white chocolate cookies, avalanche cookies, easy dessert, no-bake dessert, white chocolate macadamia nut cookies


