This was supposed to be a Moroccan-style chicken tagine. I had the preserved lemons ready, the saffron threads soaking in warm water, and a brand-new clay tagine dish I’d bought on a whim from a specialty shop downtown. The plan was ambitious—too ambitious for a Tuesday night, honestly. I got distracted by my phone ringing, grabbed a heavy-bottomed skillet instead of the tagine, and tossed in a handful of ingredients I’d normally never combine. The rice went in dry. The chicken thighs were overcrowded. I forgot the saffron entirely. And let me tell you, I was already panicking because guests were coming in forty-five minutes. What came out of that skillet was nothing like the plan—and better. It was golden, fragrant, and so absurdly good that my neighbor Dave, who never compliments anything, asked for the recipe before he finished his first helping. That happy kitchen disaster turned into this one-pan chicken and rice dinner, and I’ve been making it ever since.
Maybe you’ve been there—standing over a stove, convinced you’ve ruined dinner, only to pull off something that tastes like you meant to do it all along. That’s the energy of this dish. It’s not fancy. It doesn’t require a special trip to the store or a culinary degree. But it delivers that deep, savory, comfort-food magic that makes people close their eyes after the first bite. I mean, honestly, the crispy edges of the rice alone are worth the price of admission. This recipe stayed with me because it taught me something: sometimes the best meals come from letting go of the plan and trusting your instincts. And that’s a lesson I’m happy to share with you.
Why You’ll Love This Recipe
Let me tell you why this one-pan chicken and rice skillet dinner has become my go-to for every gathering, from casual weeknight dinners to holiday potlucks. I’ve tested it at least a dozen times, tweaked the liquid ratio, adjusted the heat, and even swapped the protein once (don’t tell anyone, but turkey thighs work in a pinch). It’s been family-approved, neighbor-tested, and stress-validated. Here’s what makes it stand out:
- Quick & Easy: Comes together in under an hour, with only about 15 minutes of active prep. Perfect for those nights when you’re juggling a million things and still want to impress.
- Simple Ingredients: No fancy grocery trips needed. You likely already have chicken thighs, rice, onions, garlic, and a few pantry spices in your kitchen right now.
- Perfect for Hosting: This dish was born from a hosting panic, and it’s built to handle a crowd. It scales beautifully, looks impressive on the table, and lets you actually sit down with your guests instead of slaving over the stove.
- Crowd-Pleaser: I’ve served this to picky eaters, spice lovers, and even a vegetarian friend who couldn’t resist the rice. It always gets rave reviews.
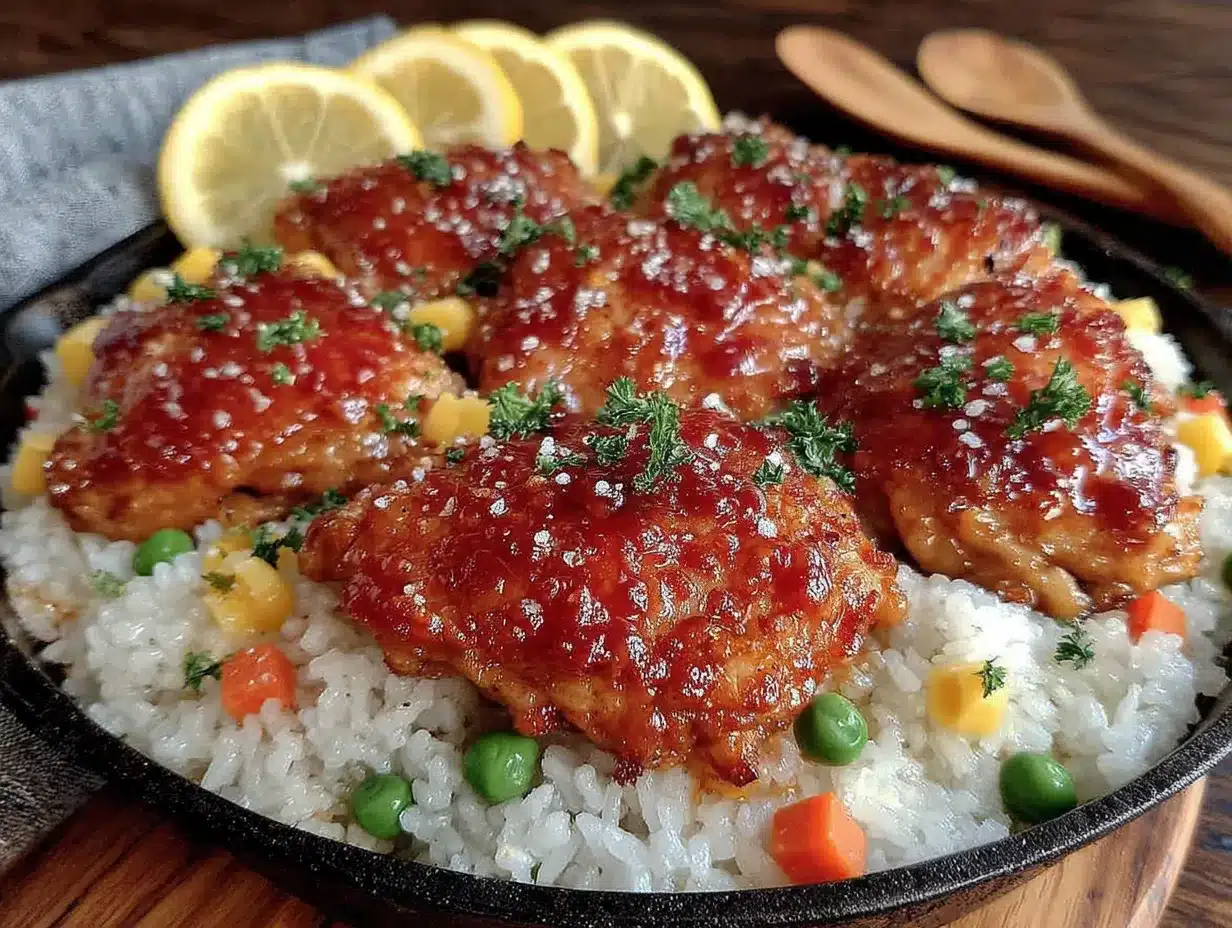
- Unbelievably Delicious: The texture is next-level—crispy, golden chicken skin on top, tender meat underneath, and rice that soaks up all the savory juices until it’s perfectly fluffy and slightly caramelized on the bottom.
What makes this recipe different from the rest? It’s the technique of searing the chicken first to build a deep, browned flavor base, then letting the rice cook in that same pan, absorbing every bit of goodness. No separate pots, no complicated steps, just one skillet and a whole lot of flavor. It’s comfort food reimagined—simpler, faster, but with the same soul-soothing satisfaction. Perfect for impressing guests without stress, or turning a simple meal into something memorable.
What Ingredients You Will Need
This recipe uses simple, wholesome ingredients to deliver bold flavor and satisfying texture without the fuss. Most of these are pantry staples, so you can whip this up on a whim. Here’s what you’ll need:
For the Chicken
- 4 bone-in, skin-on chicken thighs (about 1.5 pounds total) – The skin gets beautifully crispy, and the bone keeps the meat moist. You can use boneless thighs, but reduce cooking time by about 10 minutes.
- 1 teaspoon salt – I prefer kosher salt for even seasoning.
- ½ teaspoon black pepper – Freshly ground is best for that subtle heat.
- 1 teaspoon paprika – Adds a warm, smoky depth. Smoked paprika works beautifully here.
- ½ teaspoon garlic powder – Not the same as fresh garlic, but it helps the seasoning stick to the skin.
For the Rice and Vegetables
- 1 tablespoon olive oil – For searing the chicken. Avocado oil works too, if that’s what you have.
- 1 medium yellow onion, diced (about 1 cup) – Adds sweetness and aroma as it softens.
- 3 cloves garlic, minced – Fresh garlic is non-negotiable here; it makes the rice sing.
- 1 cup long-grain white rice – Basmati or jasmine work great. Avoid short-grain rice, which can get gummy.
- 1½ cups chicken broth – Low-sodium is best so you can control the salt. Homemade broth takes it to another level, but store-bought is perfectly fine.
- ½ cup water – Helps the rice cook evenly without drying out.
- 1 teaspoon dried thyme – Earthy and slightly floral, it pairs beautifully with chicken.
- ½ teaspoon turmeric – Gives the rice that gorgeous golden color and a mild, earthy flavor.
- ¼ teaspoon red pepper flakes – Optional, but I love the tiny kick. Adjust to your heat tolerance.
- 1 cup frozen peas and carrots – Thawed. They add color, sweetness, and a pop of texture. You can also use fresh vegetables if you have them.
- 2 tablespoons fresh parsley, chopped – For garnish. It brightens the dish and adds a fresh finish.
Substitution Notes
If you’re gluten-free, this recipe is naturally safe—just double-check your chicken broth label. For a dairy-free version, you’re already good to go since there’s no dairy in the base recipe. Want to swap the protein? Turkey thighs or even bone-in pork chops work beautifully. Just adjust the cooking time as needed. And if you’re out of turmeric, a pinch of curry powder can step in—though the flavor profile will shift a bit.
Equipment Needed
You don’t need a professional kitchen to pull this off. Here’s what you’ll need:
- A large, heavy-bottomed skillet or Dutch oven (12-inch with a tight-fitting lid) – Cast iron is my favorite for even heat distribution and that perfect crispy rice bottom. A stainless steel skillet works too, but make sure it’s oven-safe if you plan to finish the dish in the oven.
- Tongs – For flipping the chicken without tearing the skin. A spatula works in a pinch, but tongs give you better control.
- A sharp knife and cutting board – For dicing the onion and mincing the garlic. A dull knife makes everything harder, trust me.
- Measuring cups and spoons – Accuracy matters for the liquid-to-rice ratio. Eyeballing it can lead to mushy or undercooked rice.
- A wooden spoon or silicone spatula – For stirring the rice and scraping up the browned bits from the pan. Those bits are pure flavor gold.
If you don’t have a lid for your skillet, a sheet of aluminum foil tightly crimped around the edges works as a temporary cover. I’ve done it more times than I’d like to admit, and it works perfectly.
Preparation Method
Let’s get cooking. This method is designed to be stress-free, even if you’re juggling a conversation or a glass of wine while you work. Here’s the step-by-step:
- Season the chicken. Pat the chicken thighs dry with paper towels—this is crucial for crispy skin. In a small bowl, mix the salt, pepper, paprika, and garlic powder. Rub the seasoning all over the chicken, including under the skin if you can. Let it sit at room temperature for 10 minutes while you prep the other ingredients. (Don’t skip this rest—it helps the seasoning penetrate.)
- Sear the chicken. Heat the olive oil in your skillet over medium-high heat until it shimmers. Place the chicken thighs skin-side down in the pan. Don’t crowd them—if your skillet is smaller, work in batches. Cook without moving for 5-6 minutes, until the skin is deep golden brown and crispy. Flip and cook the other side for 3 minutes. Transfer the chicken to a plate. It won’t be cooked through yet, and that’s okay.
- Sauté the aromatics. Reduce the heat to medium. In the same skillet, add the diced onion. Cook for 3-4 minutes, stirring occasionally, until softened and translucent. Scrape up any browned bits from the bottom of the pan—that’s flavor you don’t want to lose. Add the minced garlic and cook for 30 seconds until fragrant. (Garlic burns fast, so keep it moving.)
- Toast the rice. Add the rice to the skillet. Stir it around for 1-2 minutes until the grains are coated in the onion-garlic mixture and start to smell nutty. This step is often skipped, but it makes a huge difference in texture and flavor.
- Add the liquids and spices. Pour in the chicken broth and water. Add the dried thyme, turmeric, and red pepper flakes. Stir everything together, scraping the bottom of the pan one last time. Bring the liquid to a gentle boil.
- Nestle the chicken back in. Place the seared chicken thighs on top of the rice, skin-side up. They should be partially submerged. Don’t push them down—let them sit on top. This keeps the skin crispy while the rice cooks below.
- Simmer and cover. Reduce the heat to low, cover the skillet with a tight-fitting lid, and let it simmer for 20 minutes. Resist the urge to peek! Every time you lift that lid, steam escapes, and your rice might end up unevenly cooked.
- Add the vegetables. After 20 minutes, remove the lid. Sprinkle the thawed peas and carrots over the rice around the chicken. Don’t stir them in—just let them sit on top. Re-cover and cook for another 5-7 minutes, until the rice is tender and the liquid is absorbed.
- Rest and serve. Turn off the heat and let the skillet sit, covered, for 5 minutes. This resting time allows the rice to finish steaming and the flavors to meld. Sprinkle with fresh parsley and serve directly from the skillet. (Trust me, the presentation is gorgeous.)
Sensory cues: When the rice is done, it should look fluffy and separate, not clumpy. The chicken skin should be crackling-crisp, and the bottom of the rice should have a thin, golden crust—that’s the prize. If the rice seems too wet, let it sit uncovered for a few minutes. If it’s too dry, add a splash of broth next time.
Cooking Tips & Techniques
I’ve made this dish enough times to know where things can go sideways. Here are my hard-earned lessons:
- Don’t skip the sear. I once tried to save time by skipping the browning step and just throwing everything in the pan. The result was pale, sad chicken and bland rice. That deep golden crust isn’t just for looks—it’s the foundation of the dish’s flavor. Take the extra 10 minutes.
- Use the right rice. Long-grain rice is your friend here. I’ve tried medium-grain and short-grain, and they both turned out too sticky for this preparation. Basmati or jasmine gives you those beautiful, separate grains that soak up the broth without turning mushy.
- Watch the heat. If your simmer is too high, the liquid will evaporate before the rice is cooked. If it’s too low, the rice will take forever and might turn gummy. Medium-low is the sweet spot—you should see gentle bubbles around the edges of the pan.
- Let it rest. I know it’s tempting to dig in immediately, but that 5-minute rest is non-negotiable. It lets the rice absorb any remaining moisture and the chicken juices redistribute. I’ve ruined a few batches by being impatient, and the texture was never the same.
- Scaling for a crowd. Doubling this recipe? Use a larger skillet or a Dutch oven, and increase the cooking time by about 5-7 minutes. Make sure the lid fits tightly—if steam escapes, the rice will be uneven. You can also finish it in a 375°F oven for 25 minutes after the stovetop sear.
Variations & Adaptations
This recipe is incredibly forgiving, and I’ve played with it more times than I can count. Here are some variations you might love:
- Spicy Southwest Version: Swap the thyme and turmeric for 1 teaspoon cumin and ½ teaspoon chili powder. Add a can of drained black beans and a diced jalapeño with the onions. Top with fresh cilantro and a squeeze of lime. It’s a whole different vibe, and it’s become my summer go-to.
- Herb and Lemon Version: Replace the dried thyme with 1 tablespoon fresh rosemary and 1 teaspoon lemon zest stirred into the rice before cooking. Add a few lemon slices on top of the chicken before covering. The brightness cuts through the richness beautifully.
- Vegetarian Adaptation: Skip the chicken entirely. Sear thick slices of portobello mushrooms or firm tofu in the skillet instead. Use vegetable broth and add a can of chickpeas for protein. The cooking time for the rice stays the same.
- Dairy-Free Creamy Version: Stir in ¼ cup full-fat coconut milk with the broth. It adds a subtle sweetness and makes the rice incredibly luscious. I tried this on a whim one rainy evening, and it was surprisingly good.
Serving & Storage Suggestions
This dish is a showstopper right out of the skillet. Serve it hot, directly from the pan, with a sprinkle of fresh parsley. It pairs beautifully with a simple green salad dressed with lemon vinaigrette—the acidity cuts through the richness of the chicken and rice. For drinks, a crisp white wine like Sauvignon Blanc or a light lager works wonders. If you’re hosting, set the skillet on a trivet in the center of the table and let everyone serve themselves. It’s rustic, inviting, and makes for great conversation.
For storage, let the dish cool completely, then transfer to an airtight container. It keeps in the refrigerator for up to 4 days. The flavors actually deepen overnight, so leftovers might be even better the next day. To reheat, add a splash of broth or water to a skillet, cover, and warm over medium-low heat for 5-7 minutes. You can also microwave individual portions, but the rice won’t be as tender. Freezing is possible for up to 3 months, but the rice texture will soften slightly upon thawing. I recommend freezing the chicken and rice separately if you’re planning ahead.
Nutritional Information & Benefits
Here’s an approximate breakdown per serving (based on 4 servings):
- Calories: 480
- Protein: 32g
- Fat: 18g
- Carbohydrates: 45g
- Fiber: 4g
- Sugar: 5g
- Sodium: 680mg
Chicken thighs are a great source of B vitamins, particularly B6 and B12, which support energy metabolism. The rice provides complex carbohydrates for sustained energy, and the peas and carrots add a good dose of vitamin A and fiber. This dish is naturally gluten-free and can be made dairy-free with no adjustments. If you’re watching your sodium, use low-sodium broth and reduce the added salt. Honestly, this is the kind of meal that feels indulgent but is actually quite balanced—protein, carbs, and vegetables all in one pan. It’s comfort food you can feel good about serving to your family.
Conclusion
This one-pan chicken and rice skillet dinner is proof that the best recipes often come from happy accidents. It’s forgiving, flexible, and always delivers—whether you’re feeding your family on a Tuesday or hosting a dinner party. I love it because it reminds me that perfection isn’t the goal; connection is. When you serve this dish, you’re not just feeding people—you’re giving them a moment of warmth and comfort. I encourage you to make it your own. Swap the spices, try a different protein, or add your favorite vegetables. And when you do, I’d love to hear about it. Drop a comment below, share your tweaks, or tag me in your photos. Let’s keep the conversation going. Happy cooking!
Frequently Asked Questions
Can I use boneless, skinless chicken thighs?
Yes, you can. The cooking time will be shorter—about 15 minutes total after adding the chicken back to the pan. The skinless version won’t get crispy, but you can still get some browning by searing the thighs well. Just keep an eye on the internal temperature; it should reach 165°F.
Why is my rice mushy?
Mushy rice usually means too much liquid or too high heat. Stick to the 1½ cups broth and ½ cup water ratio for 1 cup of rice. Make sure your simmer is gentle, not a rolling boil. And don’t stir the rice after you add the liquid—stirring releases starch and makes it gummy.
Can I make this in a slow cooker or Instant Pot?
For a slow cooker, sear the chicken first, then add all ingredients except the rice. Cook on low for 4-6 hours, then stir in cooked rice before serving. For an Instant Pot, use the sauté function to sear the chicken and aromatics, then add the rice and liquid. Pressure cook on high for 6 minutes, then natural release for 5 minutes. The texture will be slightly different, but still delicious.
How do I get crispy rice on the bottom?
That crispy bottom layer, known as “tahdig” in Persian cooking, is a treat. To achieve it, let the rice cook undisturbed for the last 5 minutes of simmering. Don’t stir it. If you want extra crispiness, drizzle a tablespoon of olive oil around the edges of the pan before covering. When you serve, flip the rice out onto a platter to show off that golden crust.
Can I add other vegetables?
Absolutely. Diced bell peppers, chopped zucchini, or sliced mushrooms work great. Add them with the onions so they soften and release their moisture. For leafy greens like spinach or kale, stir them in during the last 5 minutes of cooking. Just keep the total vegetable volume similar to avoid throwing off the liquid ratio.
Pin This Recipe!
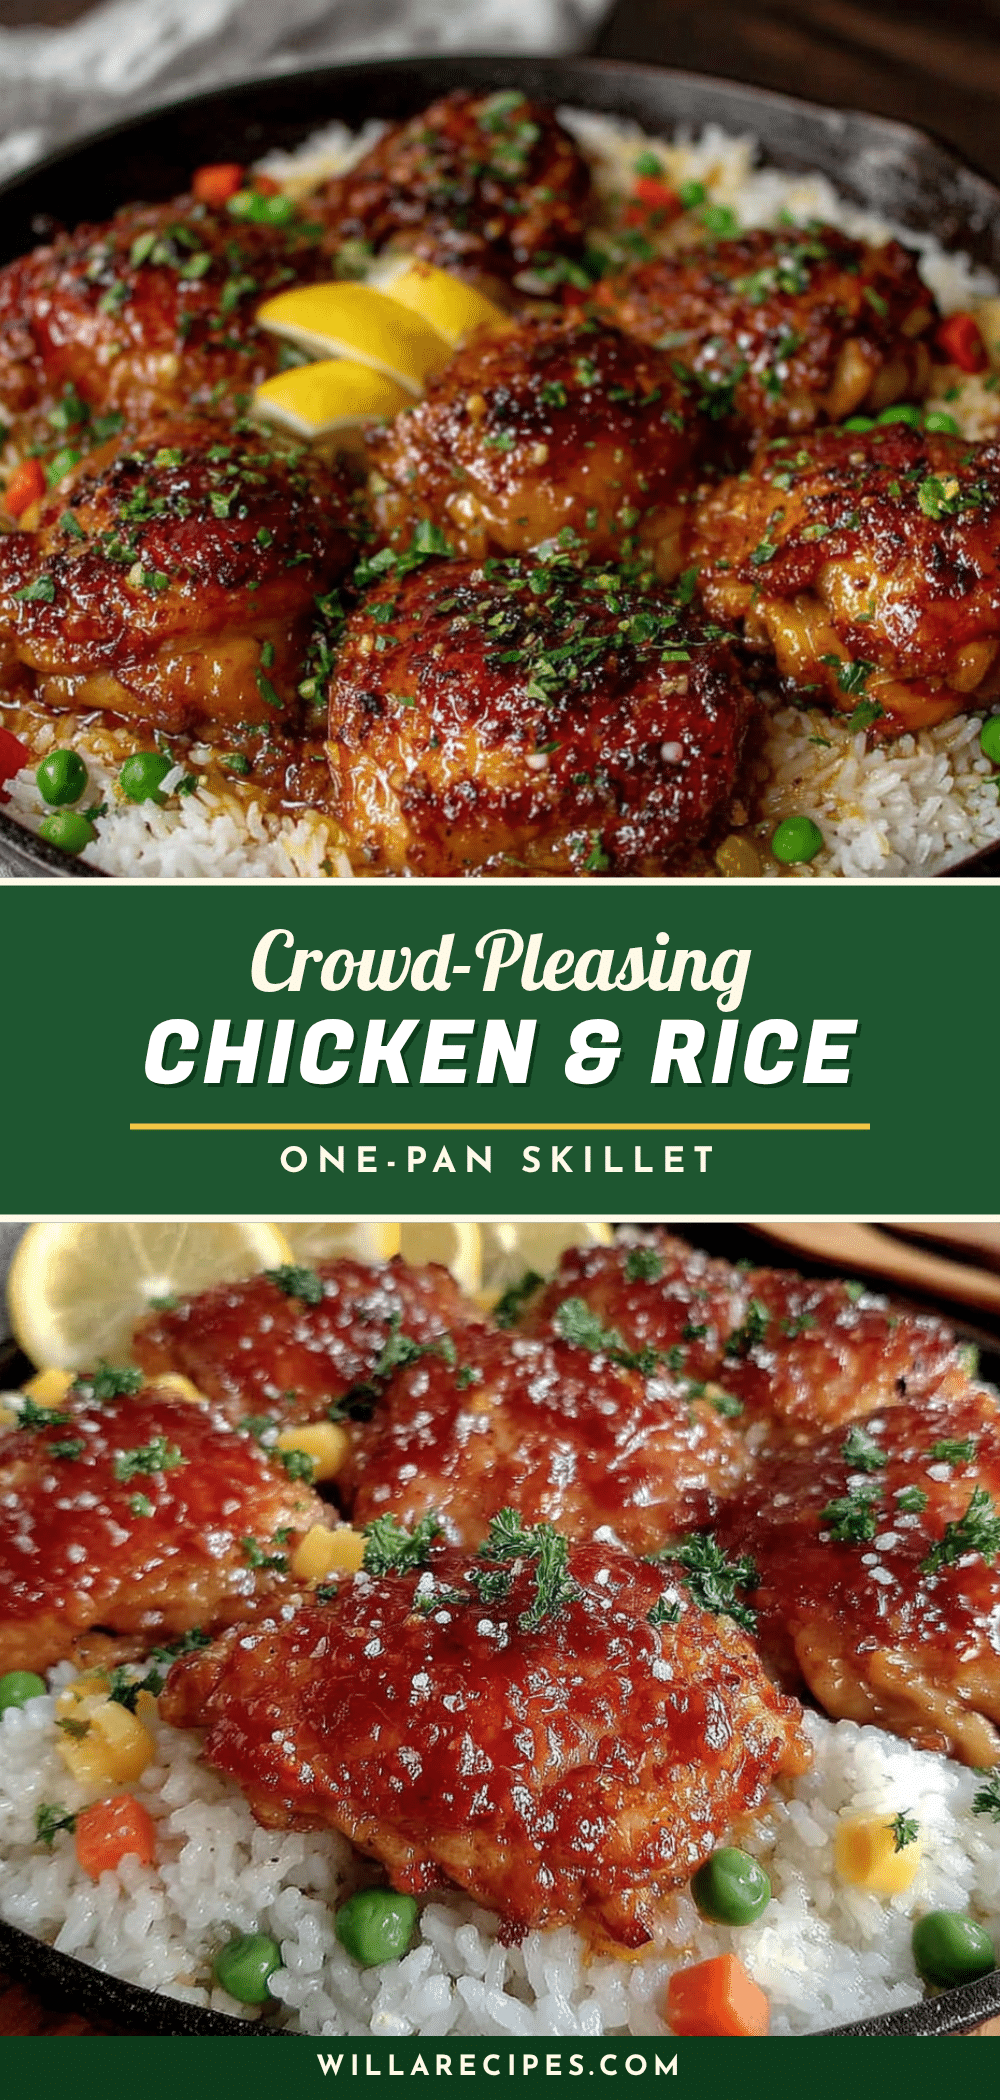
Easy One-Pan Chicken & Rice Skillet Dinner

A golden, fragrant one-pan chicken and rice dinner born from a happy kitchen accident. This forgiving recipe delivers deep, savory comfort-food magic with crispy chicken skin and perfectly fluffy rice, all cooked in a single skillet.
- Prep Time: 15 minutes
- Cook Time: 35 minutes
- Total Time: 50 minutes
- Yield: 4 servings 1x
- Category: Main Course
- Cuisine: American
Ingredients
- 4 bone-in, skin-on chicken thighs (about 1.5 pounds total)
- 1 teaspoon salt
- ½ teaspoon black pepper
- 1 teaspoon paprika
- ½ teaspoon garlic powder
- 1 tablespoon olive oil
- 1 medium yellow onion, diced (about 1 cup)
- 3 cloves garlic, minced
- 1 cup long-grain white rice (basmati or jasmine)
- 1½ cups chicken broth, low-sodium
- ½ cup water
- 1 teaspoon dried thyme
- ½ teaspoon turmeric
- ¼ teaspoon red pepper flakes (optional)
- 1 cup frozen peas and carrots, thawed
- 2 tablespoons fresh parsley, chopped
Instructions
- Season the chicken: Pat chicken thighs dry with paper towels. In a small bowl, mix salt, pepper, paprika, and garlic powder. Rub seasoning all over chicken, including under skin if possible. Let sit at room temperature for 10 minutes.
- Sear the chicken: Heat olive oil in a large heavy-bottomed skillet over medium-high heat until shimmering. Place chicken skin-side down, cook without moving for 5-6 minutes until deep golden brown and crispy. Flip and cook other side for 3 minutes. Transfer to a plate (chicken will not be fully cooked).
- Sauté aromatics: Reduce heat to medium. Add diced onion to the same skillet, cook 3-4 minutes until softened, scraping up browned bits. Add minced garlic and cook 30 seconds until fragrant.
- Toast the rice: Add rice to skillet, stir for 1-2 minutes until coated and nutty-smelling.
- Add liquids and spices: Pour in chicken broth and water. Add dried thyme, turmeric, and red pepper flakes. Stir, scraping bottom of pan. Bring to a gentle boil.
- Nestle chicken back in: Place seared chicken thighs on top of rice, skin-side up, partially submerged.
- Simmer and cover: Reduce heat to low, cover tightly, and simmer for 20 minutes. Do not lift the lid.
- Add vegetables: After 20 minutes, remove lid. Sprinkle thawed peas and carrots over rice around chicken. Re-cover and cook 5-7 minutes until rice is tender and liquid absorbed.
- Rest and serve: Turn off heat, let skillet sit covered for 5 minutes. Sprinkle with fresh parsley and serve directly from skillet.
Notes
For crispy rice bottom (tahdig), let rice cook undisturbed for last 5 minutes of simmering. Drizzle 1 tablespoon olive oil around edges before covering for extra crispiness. If doubling recipe, use larger skillet or Dutch oven and increase cooking time by 5-7 minutes. Can finish in 375°F oven for 25 minutes after stovetop sear.
Nutrition
- Serving Size: 1 serving
- Calories: 480
- Sugar: 5
- Sodium: 680
- Fat: 18
- Saturated Fat: 5
- Carbohydrates: 45
- Fiber: 4
- Protein: 32
Keywords: one-pan chicken and rice, skillet dinner, easy chicken recipe, weeknight dinner, comfort food, one pot meal


