My brother swore he hated chicken thighs for a solid twenty-seven years. Dark meat, he’d insist, was greasy, gristly, and just plain unappealing. He was a boneless, skinless chicken breast guy through and through, and nothing was going to change his mind. Then I moved into a new apartment with a ridiculously small oven and a desperate need for a quick, no-fuss dinner on a Tuesday night. I threw some chicken thighs on a sheet pan, slathered them in a garlic butter situation I’d just made up on the spot, and roasted them until the skin crackled. I wasn’t even trying to prove a point. I was just hungry.
I plated one for myself and set the rest on the counter. A few minutes later, I walked back into the kitchen to find my brother, who had stopped by to borrow a tool, standing at the counter with a chicken thigh in his hand. He was mid-bite, with this look on his face like he’d just been caught doing something wrong. “That’s not chicken,” he said, pointing the bone at me. “That’s something else.” I just handed him a napkin and let him finish his dinner standing up. He never said he liked them, but he asked for the recipe three times the next week. Honestly, that felt better than any compliment.
Maybe you’ve got someone in your life who’s stubborn about dinner, or maybe you’re just the one who needs dinner on the table in under thirty minutes without a sink full of dishes. That’s where this easy sheet pan garlic butter chicken thighs recipe comes in. It’s the kind of meal that changes minds without even trying. I keep making it because it works every single time—crispy skin, juicy meat, and a pan sauce that is basically liquid gold. And honestly? It proved me wrong about what a weeknight dinner could be.
Why You’ll Love This Recipe
Let me tell you, I have tested a lot of chicken thigh recipes in my time. Some were too fussy, some took forever, and some just didn’t deliver on flavor. This one? It’s the one I keep coming back to, and here’s why I think you’ll love it too.
- Quick & Easy : This whole meal comes together in about 30 minutes. From prep to plate, you’re looking at a hands-off dinner that doesn’t keep you chained to the stove. Perfect for those nights when you walk in the door at 6 PM and need to eat by 6:30.
- Simple Ingredients : You probably have most of this stuff in your kitchen right now. Garlic, butter, chicken thighs, a few spices. No fancy grocery trips required. I mean it—I’ve made this with whatever butter I had in the fridge and it still turned out great.
- Perfect for Busy Weeknights : This is the definition of a weeknight hero. One pan, minimal prep, and the oven does all the work. You can even prep the garlic butter mixture the night before and just spread it on when you’re ready to cook.
- Crowd-Pleaser : I’ve served this to picky kids, skeptical in-laws, and hungry neighbors. Everyone goes back for seconds. The crispy skin and the garlicky butter sauce just hit different—it’s comfort food that feels a little bit fancy but takes almost no effort.
- Unbelievably Delicious : The texture and flavor combo here is next-level. The chicken thighs get perfectly crispy on the outside while staying juicy and tender on the inside. And that garlic butter sauce that pools in the bottom of the pan? You’re going to want to spoon it over everything on your plate.
What makes this recipe different from all the other sheet pan chicken recipes out there is the technique. Instead of just tossing everything together, you create a compound butter with garlic and herbs that you spread under the skin of the chicken thighs. This does two things: it keeps the meat incredibly moist, and it infuses every single bite with that garlic butter flavor. It’s not just another chicken recipe—it’s the best version of a weeknight chicken dinner.
This recipe isn’t just good—it is the kind that makes you close your eyes after the first bite. It’s comfort food reimagined—faster, simpler, but with the same soul-soothing satisfaction. Perfect for impressing your family without stress, or turning a simple Tuesday dinner into something memorable.
What Ingredients You Will Need
This recipe uses simple, wholesome ingredients to deliver bold flavor and satisfying texture without the fuss. Most of these are pantry staples, which is exactly what you want on a busy weeknight.
- Chicken thighs : Use bone-in, skin-on chicken thighs for the best flavor and texture. You’ll need about 6 to 8 thighs, depending on how many people you’re feeding. The skin gets beautifully crispy, and the bone keeps the meat juicy. I prefer buying a pack from Costco or my local butcher—they’re always fresh and reasonably priced.
- Unsalted butter : Half a cup, softened to room temperature. Using unsalted butter lets you control the salt level yourself. If you only have salted butter on hand, just reduce the added salt by about a quarter teaspoon. I use Kerrygold when I can find it—the European-style butter has a higher fat content which makes the sauce richer.
- Garlic : Six to eight cloves, minced fresh. Please don’t use the pre-minced stuff in a jar for this one. Fresh garlic makes a huge difference in the flavor of the butter. I mince mine by hand with a chef’s knife, but a garlic press works fine too if you’re in a hurry.
- Fresh parsley : Two tablespoons, finely chopped. This adds a fresh, bright note to the garlic butter. Flat-leaf parsley is my preference, but curly parsley works just as well. If you don’t have fresh parsley, you can substitute one teaspoon of dried parsley—just know the flavor won’t be quite as vibrant.
- Lemon juice : One tablespoon, freshly squeezed. The acidity cuts through the richness of the butter and chicken beautifully. A squeeze of lemon at the end brightens up the whole dish. I usually use half a lemon for this.
- Olive oil : One tablespoon, for drizzling over the vegetables if you’re adding them. This helps everything roast up nicely without sticking to the pan.
- Salt : One and a half teaspoons of kosher salt, divided. I use Diamond Crystal kosher salt—it’s less salty by volume than table salt, so adjust accordingly if you’re using something different.
- Black pepper : Half a teaspoon, freshly ground. Freshly ground pepper has so much more flavor than the pre-ground stuff. It’s worth the extra few seconds.
- Paprika : One teaspoon. This adds a lovely color and a subtle smokiness to the chicken skin. Smoked paprika is my favorite here, but sweet paprika works too.
- Optional vegetables : If you want to make it a complete one-pan meal, add about two cups of baby potatoes (halved), one cup of green beans (trimmed), or two cups of broccoli florets. Toss them in a little olive oil, salt, and pepper before adding them to the sheet pan.
For the herbs, I’ve also tried this with fresh thyme and rosemary when I had them on hand. Both work beautifully—just add about one teaspoon of fresh thyme leaves or one teaspoon of chopped rosemary to the butter mixture. In summer, I sometimes add a handful of cherry tomatoes to the pan during the last ten minutes of cooking. They burst and create this amazing little sauce that mixes with the garlic butter.
Equipment Needed
You don’t need much for this recipe, which is part of its beauty. Here’s what you’ll need:
- Sheet pan : A half-sheet pan (about 18 by 13 inches) is perfect. I’ve used the same Nordic Ware aluminum sheet pan for years—it’s sturdy, doesn’t warp, and cleans up easily. If you don’t have a half-sheet pan, a 9 by 13 baking dish works too, though the chicken won’t get quite as crispy since the sides are higher.
- Mixing bowl : A small bowl for making the compound butter. Any small bowl will do.
- Chef’s knife : For mincing garlic and chopping parsley. A sharp knife makes this job so much easier. I learned the hard way that a dull knife just crushes garlic instead of cutting it cleanly.
- Cutting board : Any sturdy cutting board works. I prefer a wooden one for garlic since it doesn’t dull my knife as quickly.
- Measuring spoons : For measuring out the salt, pepper, paprika, and lemon juice. Eyeballing it works too once you’ve made this a few times.
- Kitchen tongs : For flipping the chicken and arranging vegetables on the pan. Tongs are way easier than trying to use a spatula for this.
- Instant-read thermometer (optional but recommended) : This takes the guesswork out of knowing when your chicken is done. Chicken thighs are done at 175 to 185 degrees Fahrenheit—the higher temperature helps break down the connective tissue and keeps the meat juicy.
If you don’t have a sheet pan, you can use a cast iron skillet or a baking dish. Just keep in mind that the chicken won’t crisp up as much in a dish with high sides. I’ve even made this in a disposable aluminum pan when I was camping—it turned out great, though I had to watch it more carefully since the pan was thinner.
Preparation Method
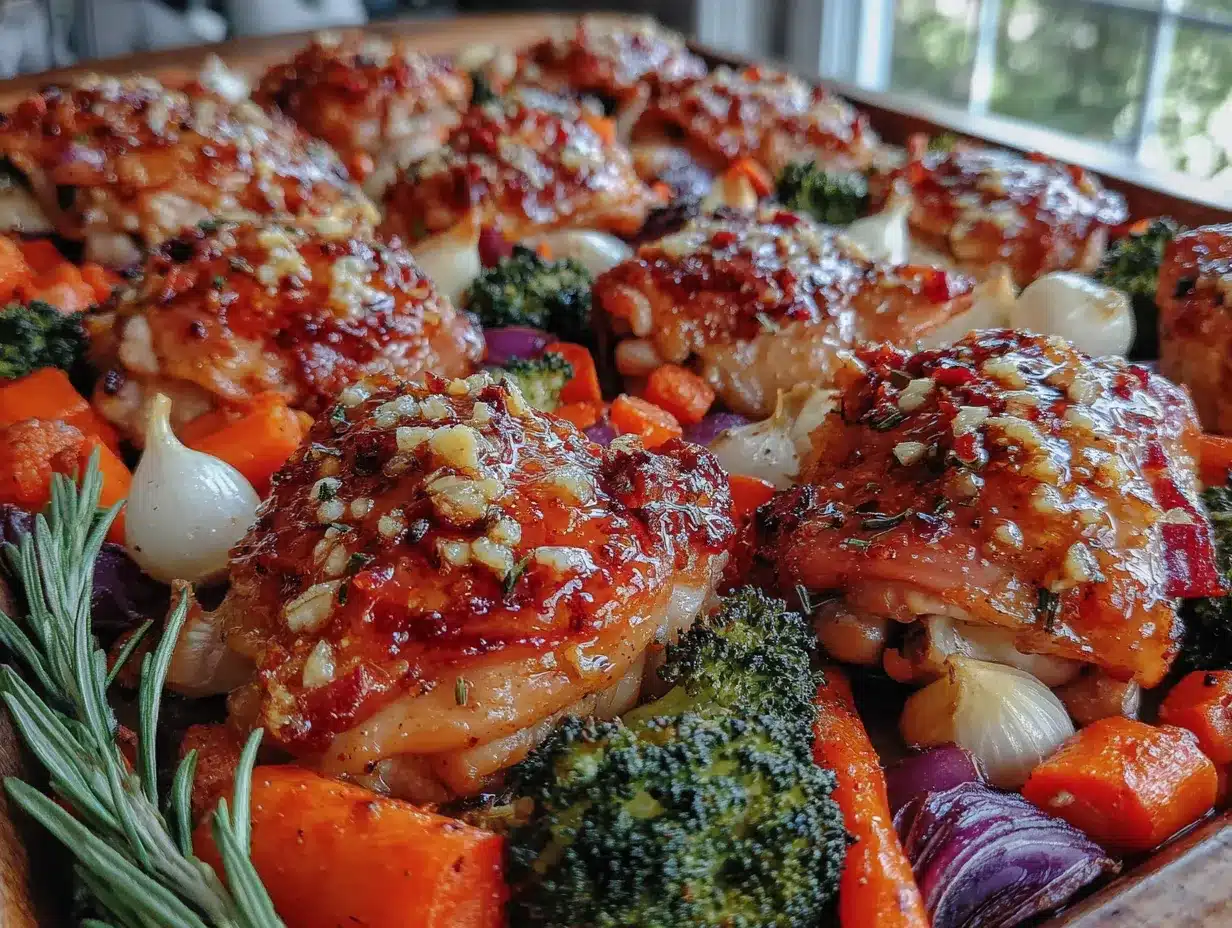
Preheat your oven to 425 degrees Fahrenheit (220 degrees Celsius). This high heat is key for getting that crispy skin without drying out the meat. While the oven heats up, let’s get everything ready.
Step 1: Make the garlic butter. In a small mixing bowl, combine the softened butter, minced garlic, chopped parsley, lemon juice, half a teaspoon of salt, and a quarter teaspoon of black pepper. Mix everything together with a fork until it’s well combined and smooth. The butter should be soft enough to spread easily—if it’s too firm, let it sit at room temperature for another five minutes. Taste a tiny bit of the butter on your finger and adjust the seasoning if needed. You want it to be nicely seasoned but not too salty, since you’ll be adding more salt to the chicken skin.
Step 2: Prep the chicken thighs. Pat the chicken thighs dry with paper towels. This is a crucial step—wet skin won’t crisp up properly, and we want that golden, crackly skin. Place the chicken thighs on a clean cutting board or plate. Using your fingers, gently loosen the skin from the meat, creating a little pocket. Be careful not to tear the skin—go slowly and use your fingertips to separate it from the meat. It takes a little practice, but you’ll get the hang of it after the first couple of thighs.
Step 3: Stuff the butter under the skin. Take about a tablespoon of the garlic butter mixture and spread it evenly under the skin of each chicken thigh. Push it around to cover as much of the meat as possible. This is where the magic happens—the butter melts as the chicken cooks, basting the meat from the inside and keeping it incredibly moist. Don’t worry if some butter oozes out—it’ll mix with the pan juices and create that amazing sauce. Reserve about two tablespoons of the butter mixture to brush on top of the skin later.
Step 4: Season the chicken. Place the stuffed chicken thighs on the sheet pan, skin side up, leaving a little space between each one. In a small bowl, mix together the remaining one teaspoon of salt, the paprika, and the remaining quarter teaspoon of black pepper. Sprinkle this seasoning mixture evenly over the skin of each chicken thigh. The paprika gives the skin a beautiful color and a subtle smoky flavor that pairs perfectly with the garlic butter.
Step 5: Add vegetables (if using). If you’re adding vegetables, toss them in a bowl with the olive oil and a pinch of salt and pepper. Arrange them around the chicken thighs on the sheet pan. Try not to overcrowd the pan—if everything is too crowded, the vegetables will steam instead of roast. If you’re using potatoes, cut them into uniform sizes so they cook evenly.
Step 6: Roast the chicken. Place the sheet pan in the preheated oven and roast for 25 to 30 minutes. After about 15 minutes, brush the remaining garlic butter mixture over the skin of the chicken thighs. This gives the skin an extra boost of flavor and helps it get extra crispy. The chicken is done when the skin is golden brown and crispy, and the internal temperature reaches 175 to 185 degrees Fahrenheit when measured at the thickest part of the thigh (without touching the bone). The juices should run clear when you pierce the meat with a knife.
Step 7: Rest and serve. Remove the sheet pan from the oven and let the chicken rest for about 5 minutes. This resting period allows the juices to redistribute throughout the meat, making every bite tender and flavorful. Spoon some of the pan juices over the chicken before serving. The garlic butter sauce that’s pooled in the bottom of the pan is liquid gold—don’t waste a drop of it.
A quick note on timing: if your chicken thighs are on the smaller side, start checking them at 22 minutes. Larger thighs might need up to 32 minutes. The instant-read thermometer is your best friend here—it takes all the guesswork out of the equation.
Cooking Tips & Techniques
I’ve made this recipe more times than I can count, and I’ve definitely learned a few things along the way. Here are my best tips for getting it right every time.
Don’t skip drying the chicken skin. I know it seems like a small step, but it makes a huge difference. Wet skin steams instead of crisping up, and you’ll end up with sad, rubbery skin instead of that beautiful golden crackle. Use paper towels and really pat those thighs dry. I’ve made this mistake before when I was in a hurry, and I regretted it every time.
Let the butter come to room temperature. Cold butter is a nightmare to spread under chicken skin. It just breaks apart and doesn’t distribute evenly. Take the butter out of the fridge about 30 minutes before you start cooking. If you forget, you can microwave it for about 10 seconds—just don’t melt it completely. You want it soft but still solid.
Use a meat thermometer. This is non-negotiable for me now. Chicken thighs are more forgiving than breasts, but you still want to hit that sweet spot of 175 to 185 degrees Fahrenheit. Below that, the meat is tough and chewy. Above that, it starts to dry out. I use a Thermapen instant-read thermometer and it’s worth every penny.
Don’t overcrowd the pan. If you cram too many chicken thighs onto one sheet pan, they’ll steam instead of roast. Give them a little breathing room—about an inch between each thigh. If you’re cooking for a crowd, use two sheet pans or cook in batches. I learned this lesson the hard way when I tried to fit ten thighs on one pan for a family dinner. The skin was a sad, soggy mess.
Brush the skin halfway through. That extra application of garlic butter at the 15-minute mark is what takes this from good to incredible. It gives the skin a second hit of flavor and helps it crisp up even more. Set a timer so you don’t forget—I’ve definitely gotten distracted and missed this step before.
Let the chicken rest. I know you’re hungry, but those five minutes of resting time make a real difference. If you cut into the chicken right away, all those delicious juices run out onto the cutting board instead of staying in the meat. Patience pays off here.
Variations & Adaptations
One of the best things about this recipe is how customizable it is. Here are some of my favorite variations.
Spicy garlic butter chicken : Add half a teaspoon of red pepper flakes or a teaspoon of sriracha to the butter mixture. The heat cuts through the richness of the butter beautifully. I made this version for a Super Bowl party and it disappeared in minutes. You can also add a pinch of cayenne pepper if you want more of a slow burn.
Herb garden version : Swap the parsley for a mix of fresh herbs. I love using thyme, rosemary, and a little sage in the fall. Just chop them finely and mix them into the butter. The rosemary adds this amazing woodsy flavor that pairs perfectly with the garlic. In the summer, I use basil and oregano for a more Mediterranean vibe.
Lemon garlic version : Double the lemon juice and add some lemon zest to the butter mixture. Slice another lemon and arrange the slices around the chicken on the sheet pan. The lemon slices caramelize as they roast and add a bright, tangy flavor to the pan sauce. This is my go-to when I want something a little lighter.
Cheesy garlic butter chicken : During the last five minutes of cooking, sprinkle some grated Parmesan cheese over the chicken thighs. The cheese melts and gets crispy, creating this amazing crust on top of the skin. I’ve also tried it with Pecorino Romano, which adds a saltier, more assertive flavor.
Dairy-free adaptation : Use vegan butter or a high-quality olive oil instead of regular butter. The texture will be slightly different, but the flavor is still amazing. I’ve made this for dairy-free friends using Miyoko’s vegan butter and it worked beautifully. Just make sure to check the salt content of your vegan butter and adjust accordingly.
Air fryer method : If you have an air fryer, this recipe adapts perfectly. Cook the chicken at 375 degrees Fahrenheit for about 18 to 20 minutes, flipping halfway through. The skin gets incredibly crispy in the air fryer—almost like it’s been fried. Just make sure not to overcrowd the basket.
Serving & Storage Suggestions
This easy sheet pan garlic butter chicken thighs recipe is versatile enough for any occasion. Here’s how I like to serve it and store it.
Serving suggestions : Serve the chicken hot, right off the sheet pan, with plenty of the pan juices spooned over the top. I love pairing it with a simple side salad dressed with lemon vinaigrette to cut through the richness. Mashed potatoes are another favorite—the garlic butter sauce is incredible spooned over creamy potatoes. For a low-carb option, serve it with roasted asparagus or a cauliflower mash. The pan juices work as a sauce for whatever you’re serving alongside.
Presentation tip : Transfer the chicken to a serving platter and spoon the pan juices over the top. Garnish with a sprinkle of fresh parsley and some lemon wedges on the side. It looks impressive with almost no extra effort.
Storage instructions : Leftover chicken can be stored in an airtight container in the refrigerator for up to 4 days. The flavors actually get better as they meld together overnight. I’ve been known to make a double batch just for the leftovers.
Reheating methods : The best way to reheat this chicken is in the oven at 350 degrees Fahrenheit for about 10 to 15 minutes. This helps the skin crisp back up. You can also reheat it in an air fryer at 375 degrees for about 5 minutes. Avoid microwaving if you can—it makes the skin soggy and the meat rubbery. If you’re in a pinch, the microwave works, but it’s not ideal.
Freezer instructions : This chicken freezes beautifully. Let it cool completely, then wrap each thigh individually in plastic wrap and place them in a freezer bag. They’ll keep for up to 3 months. To reheat, thaw in the refrigerator overnight and then reheat in the oven as directed above.
How flavors develop : The garlic butter flavor intensifies as the chicken sits in the refrigerator. I actually think the leftovers are even better than the fresh version. The garlic mellows and melds with the chicken in a way that’s just incredible.
Nutritional Information & Benefits
Here’s a rough estimate of the nutritional information for one serving (based on one chicken thigh with about a tablespoon of the garlic butter sauce).
| Nutrient | Amount per serving |
|---|---|
| Calories | 320-350 |
| Protein | 25-28g |
| Fat | 24-27g |
| Saturated Fat | 10-12g |
| Carbohydrates | 2-3g |
| Fiber | 0g |
| Sugar | 0g |
| Sodium | 550-600mg |
Chicken thighs are a fantastic source of protein, iron, and B vitamins. The skin provides healthy fats that help your body absorb fat-soluble vitamins from any vegetables you serve alongside. Garlic is known for its anti-inflammatory properties and immune-boosting benefits. This recipe is naturally gluten-free and low-carb, making it suitable for a variety of dietary needs.
If you’re watching your saturated fat intake, you can reduce the butter to about three tablespoons and use olive oil for the rest. The flavor will be slightly different, but it’s still delicious. For a lower sodium version, use unsalted butter and reduce the added salt to one teaspoon total.
Conclusion
This easy sheet pan garlic butter chicken thighs recipe is the kind of meal that makes weeknight cooking feel effortless. It’s quick, it’s simple, and it delivers incredible flavor with minimal cleanup. The crispy skin, the juicy meat, and that irresistible garlic butter sauce—it’s a combination that never gets old.
I love this recipe because it proves that you don’t need complicated techniques or fancy ingredients to make something truly delicious. It’s the kind of meal that brings people to the table and keeps them coming back for seconds. And honestly? It changed my brother’s mind about chicken thighs, which I thought was impossible.
I’d love to hear how this recipe turns out for you. Did you add any vegetables? Did you try one of the variations? Leave a comment below and let me know. And if you loved it as much as we do, share it with a friend who needs an easy weeknight dinner in their life. Happy cooking!
Frequently Asked Questions
Can I use boneless, skinless chicken thighs for this recipe?
Yes, you can, but the cooking time will be shorter—about 18 to 22 minutes. The skin adds a lot of flavor and crispiness, so if you skip it, you’ll miss out on that texture. You can still make the garlic butter and spread it over the chicken before roasting. Just keep an eye on the internal temperature.
How do I know when the chicken is fully cooked?
The safest way is to use an instant-read thermometer. Chicken thighs are done when they reach an internal temperature of 175 to 185 degrees Fahrenheit. The juices should run clear when you pierce the thickest part of the thigh. If you don’t have a thermometer, cut into the thickest part and check that the meat is no longer pink and the juices run clear.
Can I prep this recipe ahead of time?
Absolutely. You can make the garlic butter up to 3 days in advance and keep it in the refrigerator. Let it soften at room temperature before using. You can also stuff the butter under the chicken skin up to 24 hours ahead and keep it covered in the refrigerator. Just add about 5 minutes to the cooking time if the chicken is cold from the fridge.
What vegetables work best on the sheet pan with the chicken?
Any sturdy vegetable that roasts well works here. Baby potatoes, carrots, broccoli, cauliflower, green beans, and Brussels sprouts are all great choices. Just cut them into uniform sizes so they cook evenly. Add them to the pan at the same time as the chicken, or add quick-cooking vegetables like green beans during the last 10 minutes.
Can I make this recipe dairy-free?
Yes. Substitute the butter with a high-quality vegan butter or olive oil. The flavor will be slightly different, but it’s still delicious. If using olive oil, mix the garlic and herbs into the oil and brush it over and under the chicken skin. The cooking time remains the same.
Pin This Recipe!
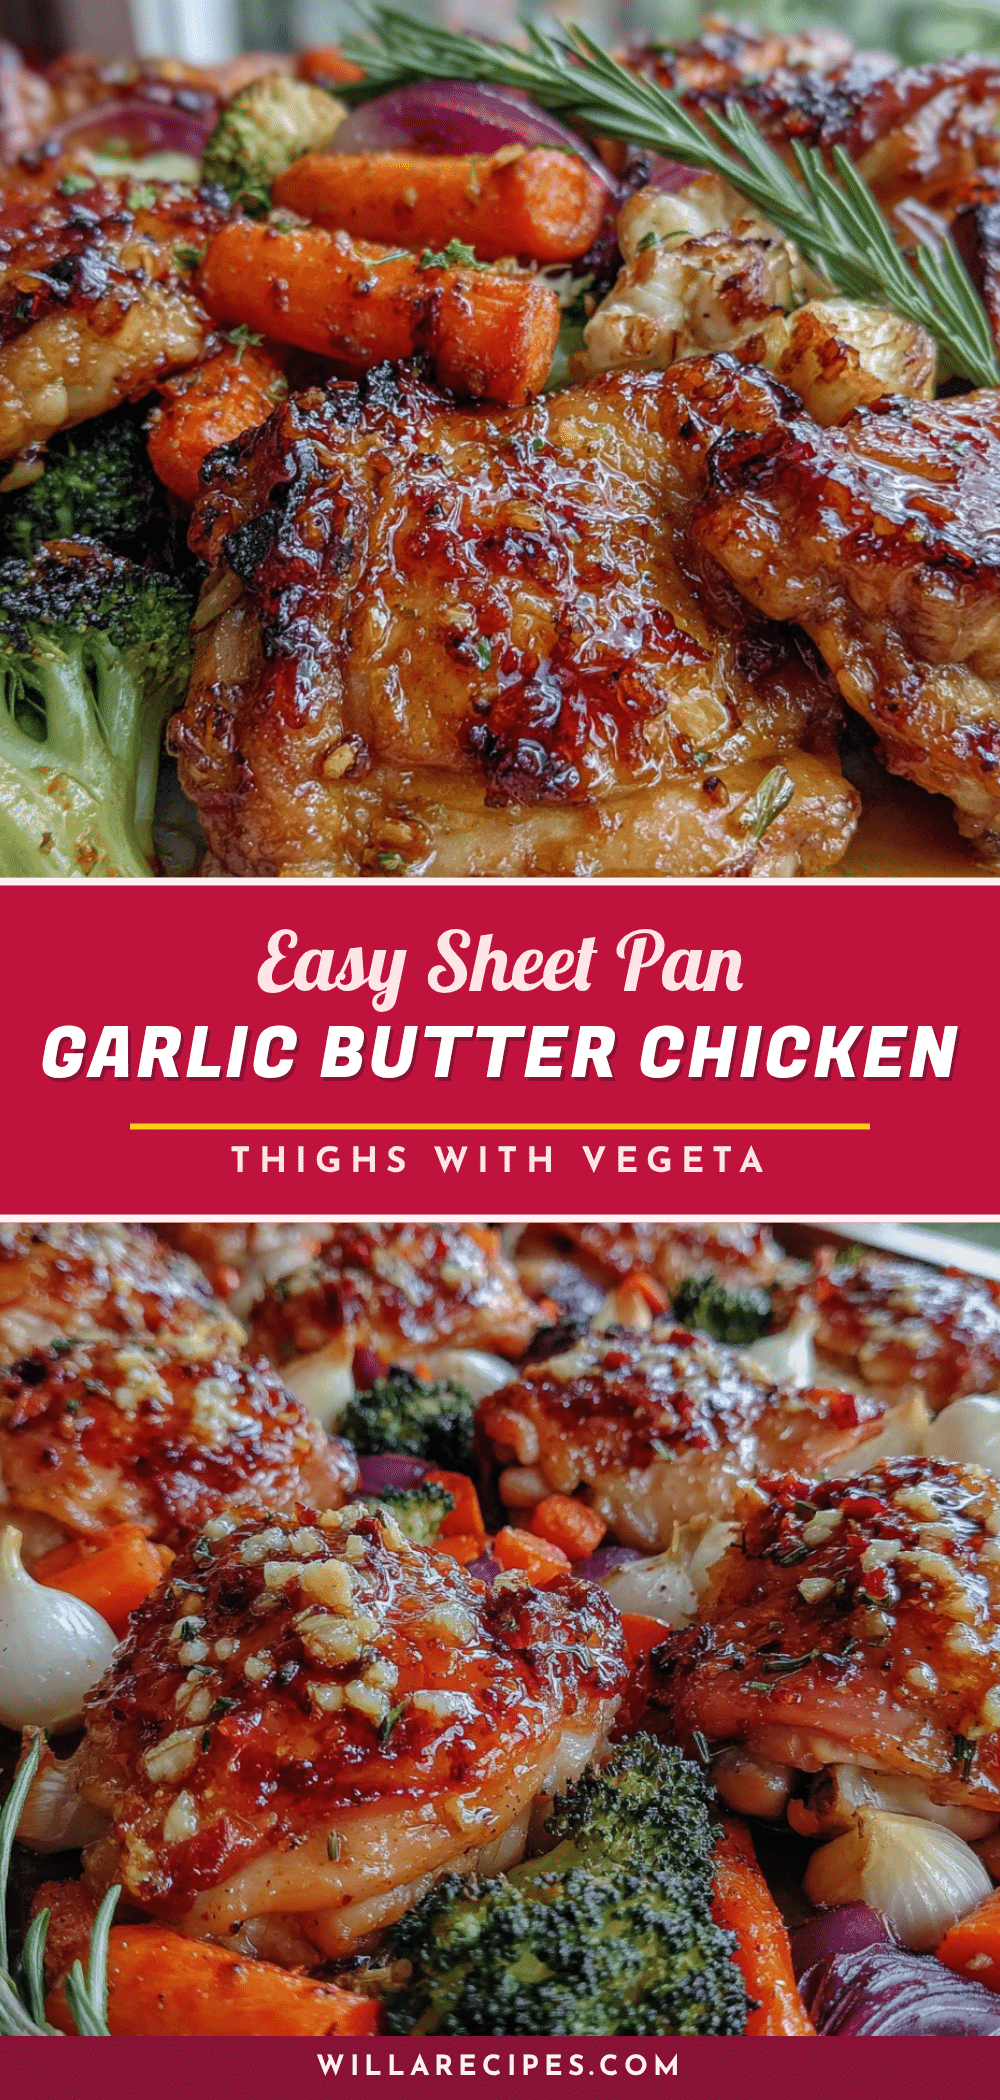
Easy Sheet Pan Garlic Butter Chicken Thighs | Best 30-Minute Dinner

Crispy, juicy chicken thighs with a garlic butter sauce, all made on a single sheet pan in under 30 minutes. Perfect for busy weeknights and guaranteed to change minds about dark meat.
- Prep Time: 10 minutes
- Cook Time: 25-30 minutes
- Total Time: 35-40 minutes
- Yield: 4 servings 1x
- Category: Main Course
- Cuisine: American
Ingredients
- 6–8 bone-in, skin-on chicken thighs
- 1/2 cup unsalted butter, softened
- 6–8 cloves garlic, minced
- 2 tablespoons fresh parsley, finely chopped
- 1 tablespoon lemon juice, freshly squeezed
- 1 tablespoon olive oil (for vegetables, if using)
- 1 1/2 teaspoons kosher salt, divided
- 1/2 teaspoon black pepper, freshly ground
- 1 teaspoon paprika (smoked or sweet)
- Optional: 2 cups baby potatoes, halved
- Optional: 1 cup green beans, trimmed
- Optional: 2 cups broccoli florets
Instructions
- Preheat oven to 425°F (220°C).
- In a small bowl, combine softened butter, minced garlic, parsley, lemon juice, 1/2 teaspoon salt, and 1/4 teaspoon black pepper. Mix until smooth.
- Pat chicken thighs dry with paper towels. Gently loosen the skin from the meat to create a pocket, being careful not to tear the skin.
- Spread about 1 tablespoon of garlic butter under the skin of each thigh. Reserve 2 tablespoons for later.
- Place chicken thighs skin-side up on a sheet pan. Mix remaining 1 teaspoon salt, paprika, and 1/4 teaspoon black pepper; sprinkle evenly over the skin.
- If using vegetables, toss with olive oil, salt, and pepper, then arrange around the chicken on the pan.
- Roast for 25-30 minutes. After 15 minutes, brush reserved garlic butter over the skin. Chicken is done when skin is golden and internal temperature reaches 175-185°F.
- Let rest for 5 minutes. Spoon pan juices over chicken before serving.
Notes
For extra crispy skin, pat chicken very dry. Let butter come to room temperature for easy spreading. Use a meat thermometer for best results. Don’t overcrowd the pan. Brush skin halfway through for extra flavor. Let chicken rest before serving.
Nutrition
- Serving Size: 1 chicken thigh with
- Calories: 320350
- Sodium: 550600
- Fat: 2427
- Saturated Fat: 1012
- Carbohydrates: 23
- Protein: 2528
Keywords: sheet pan chicken, garlic butter chicken, chicken thighs, easy dinner, 30-minute meal, weeknight dinner, one-pan meal


