I was at my car’s oil change place last November, stuck in that plastic chair with the ripped cushion, flipping through a two-year-old magazine. The guy next to me, a retired plumber named Frank with pumpkin-colored stains on his coveralls, leaned over and said, “You know what most people get wrong about pumpkin pie?” I didn’t, obviously. I was just there waiting for an oil change, not expecting a culinary lesson from a man who smelled like motor oil and cinnamon. But Frank had strong opinions. He told me his wife had passed ten years back and he’d spent every Thanksgiving since trying to perfect her recipe. He’d burned the filling twice, once so badly the fire alarm went off and the neighbors called. Honestly, I was half-listening until he described the crust — buttery, flaky, the kind that shatters when you cut into it. I asked him to write it down. He scribbled on a napkin from the coffee machine. I kept that napkin in my glovebox for a year before I actually tried it. And let me tell you, that first bite — I called Frank to thank him, and I think he was happier I made the pie than I was. Maybe you’ve been there, chasing a recipe that feels just out of reach. This homemade pumpkin pie with buttery crust is the one that finally landed for me.
Why You’ll Love This Recipe
I’ve tested this homemade pumpkin pie with buttery crust at three different family gatherings now, and it disappears every single time. Here’s why it works for real families on a budget:
- Budget-Friendly Ingredients : You probably have most of this stuff in your pantry already. Canned pumpkin, eggs, sugar, spices — nothing fancy, nothing expensive.
- Make-Ahead Friendly : This pie actually tastes better the next day. The flavors meld together overnight, and the crust stays perfectly flaky. You can bake it Wednesday for Thursday’s dinner with zero stress.
- Picky Eater Approved : My nephew claims he hates pumpkin pie, but he ate two slices of this one. The secret is the balance of spices — not too heavy on the cloves, just enough cinnamon to feel familiar.
- Foolproof Crust : Frank’s method uses ice water and a specific technique that even a beginner can nail. No fancy equipment needed, just your hands and a little patience.
- Leftovers Reheat Beautifully : Pop a slice in the microwave for 15 seconds, and it tastes almost fresh-baked. Perfect for that 10 PM snack after the dishes are done.
What makes this homemade pumpkin pie with buttery crust different from the hundreds of other recipes out there? It’s the crust, hands down. Most recipes use shortening or all-butter, but Frank’s method combines both with a splash of apple cider vinegar that keeps the dough tender. The filling is silky, not grainy, thanks to a trick I learned from a pastry chef friend — straining the pumpkin puree first. This isn’t just another pie recipe. It’s the one that makes you close your eyes after the first bite, the one that turns a regular Tuesday into something special without breaking the bank.
What Ingredients You Will Need
This homemade pumpkin pie with buttery crust relies on simple, everyday ingredients that work together to create something extraordinary. Most of these are pantry staples, which means you can make this pie on a whim without a special trip to the store.
For the Buttery Crust
- 2 ½ cups all-purpose flour (I use Gold Medal, but any brand works fine — just don’t use self-rising flour)
- 1 teaspoon salt (fine sea salt preferred, but table salt is fine)
- 1 tablespoon granulated sugar (just a touch of sweetness for the crust)
- ½ cup cold unsalted butter, cut into small cubes (Kerrygold is my go-to for flavor, but store-brand works too)
- ½ cup cold vegetable shortening, cut into small pieces (Crisco is the classic choice)
- 6-8 tablespoons ice water (you’ll need more or less depending on humidity)
- 1 teaspoon apple cider vinegar (this is Frank’s secret — it relaxes the gluten and makes the crust tender)
For the Pumpkin Filling
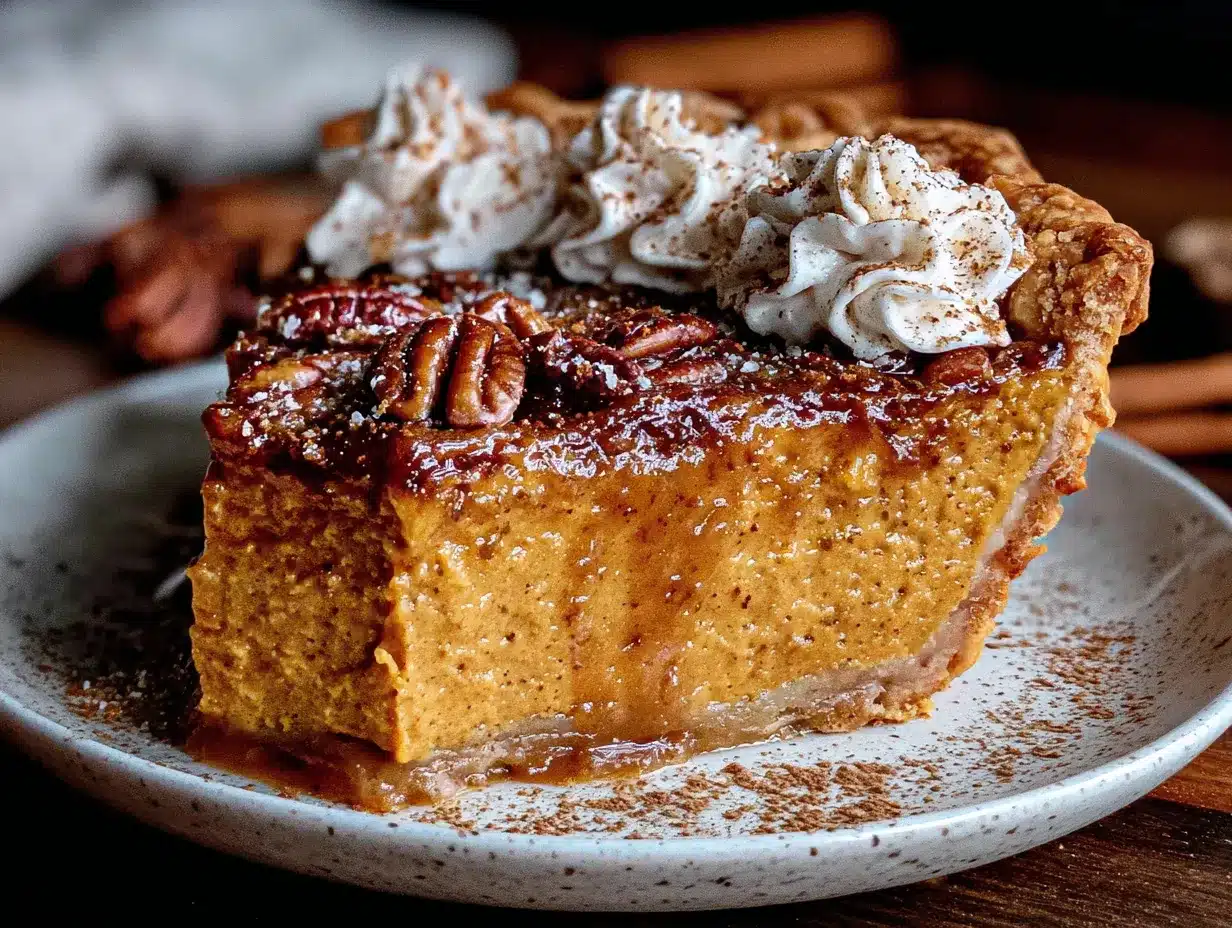
- 1 can (15 oz) pumpkin puree (not pumpkin pie filling — look for 100% pure pumpkin, Libby’s is my favorite)
- 1 can (12 oz) evaporated milk (full-fat gives the creamiest texture, but low-fat works in a pinch)
- ¾ cup packed brown sugar (dark brown gives deeper flavor, but light brown is fine)
- 2 large eggs, room temperature (cold eggs can make the filling lumpy)
- 1 teaspoon vanilla extract (pure vanilla if you have it, imitation works too)
- 2 teaspoons ground cinnamon (I prefer Saigon cinnamon for its warmth)
- 1 teaspoon ground ginger (adds a subtle kick)
- ½ teaspoon ground nutmeg (freshly grated if you’re fancy, pre-ground is totally fine)
- ¼ teaspoon ground cloves (go easy — cloves can overpower quickly)
- ¼ teaspoon salt (enhances all the flavors)
Ingredient Tips from My Kitchen
For the flakiest crust, make sure your butter and shortening are really cold. I pop my cubed butter in the freezer for 10 minutes before starting. If you’re dairy-free, you can substitute the butter with vegan butter sticks — just make sure they’re cold. For the filling, I’ve tested this with homemade pumpkin puree from sugar pumpkins, and it works great, but you’ll need to strain it well to remove excess moisture. Canned pumpkin is actually more consistent, which I prefer for holiday pies when I can’t afford surprises.
Equipment Needed
You don’t need a fancy kitchen to make this homemade pumpkin pie with buttery crust. Here’s what you’ll need:
- 9-inch pie dish (glass or ceramic works best — I use a Pyrex dish that cost me $8)
- Rolling pin (a wine bottle works in a pinch, I’ve done it)
- Large mixing bowl (for the crust)
- Medium mixing bowl (for the filling)
- Pastry cutter or two forks (for cutting butter into flour)
- Plastic wrap (for chilling the dough)
- Parchment paper (for blind baking)
- Pie weights or dried beans (for blind baking — I keep a jar of old beans just for this)
- Whisk (for the filling)
- Measuring cups and spoons
- Aluminum foil (for covering the crust edges)
If you don’t have a pastry cutter, don’t stress. Two forks work just as well, it just takes a little longer. For the pie weights, I’ve used pennies in a pinch — just wrap them in foil first. The most important tool is your hands, honestly. You’ll need to feel the dough to know when it’s ready.
Preparation Method
Step 1: Make the Buttery Crust (20 minutes + 1 hour chilling)
In your large bowl, whisk together the flour, salt, and sugar. Add the cold butter cubes and shortening pieces. Using your pastry cutter or two forks, cut the fats into the flour until the mixture looks like coarse meal with pea-sized butter chunks remaining. You want some visible butter pieces — that’s what creates flaky layers.
Sprinkle the apple cider vinegar over the mixture, then add 6 tablespoons of ice water. Stir with a fork until the dough starts coming together. Squeeze a handful — if it holds together without crumbling, it’s ready. If it’s too dry, add more water one tablespoon at a time. I’ve definitely added too much water before, and the crust came out tough. Trust me, less is more here.
Turn the dough onto a lightly floured surface. Gather it into a ball, then flatten into a disk about 1 inch thick. Wrap tightly in plastic wrap and refrigerate for at least 1 hour. You can make this up to 2 days ahead.
Step 2: Blind Bake the Crust (20 minutes + 15 minutes cooling)
Preheat your oven to 375°F. On a floured surface, roll the chilled dough into a 12-inch circle, about ⅛ inch thick. Carefully transfer it to your pie dish. I fold the dough in half, then in half again, and unfold it in the dish — less chance of tearing. Trim the edges, leaving about ½ inch overhang. Fold the overhang under and crimp the edges with your fingers or a fork.
Line the crust with parchment paper and fill with pie weights or dried beans. Bake for 15 minutes. Remove the parchment and weights, then bake for another 5-7 minutes until the bottom looks dry and lightly golden. Set aside to cool while you make the filling. Don’t skip this step — a soggy bottom crust is the number one complaint I hear about pumpkin pie.
Step 3: Prepare the Filling (10 minutes)
Reduce oven temperature to 350°F. In your medium bowl, whisk together the pumpkin puree and brown sugar until smooth. Add the eggs one at a time, whisking well after each. Stir in the evaporated milk and vanilla extract.
In a small bowl, combine the cinnamon, ginger, nutmeg, cloves, and salt. Whisk the spice mixture into the pumpkin mixture until fully incorporated. The filling should be smooth and slightly thick — if it looks watery, your pumpkin puree might have excess moisture. I’ve had this happen with store brands, so now I always pat the puree with paper towels first.
Step 4: Bake the Pie (50-60 minutes + 2 hours cooling)
Place the blind-baked crust on a baking sheet (this catches any spills). Pour the filling into the warm crust. Cover the crust edges with aluminum foil strips to prevent over-browning.
Bake at 350°F for 50-60 minutes. The pie is done when the edges are set but the center still jiggles slightly when you gently shake the pan. It will continue to set as it cools. If you insert a knife near the center, it should come out mostly clean.
Cool the pie completely on a wire rack, at least 2 hours. Don’t rush this — a warm pie will fall apart when you slice it. I’ve learned this the hard way, serving a beautiful pie that turned into pumpkin soup on the plate.
Cooking Tips & Techniques
After making this homemade pumpkin pie with buttery crust more times than I can count, here are the lessons I’ve learned the hard way:
Don’t Overwork the Dough — The more you handle pie dough, the tougher it gets. Mix just until it comes together. A few dry spots are fine. I once kneaded my dough like bread, and the crust came out like cardboard. We ate the filling with spoons and threw the crust away.
Watch the Filling Temperature — Pouring cold filling into a warm crust can cause thermal shock and crack your crust. Let your eggs and evaporated milk come to room temperature before mixing. If you’re in a rush, place the eggs in warm water for 5 minutes.
Use the Oven Rack Strategically — Bake the pie on the lower third of the oven. This ensures the bottom crust cooks through while the top doesn’t burn. I used to bake everything in the middle, and my bottom crusts were always underdone.
Prevent Cracks — Cracks in the filling happen when the pie is overbaked or cooled too quickly. If you see cracks forming, your pie is done — take it out immediately. Cool it gradually on a wire rack, not in the fridge.
Test for Doneness Correctly — The jiggle test is more reliable than a knife test for pumpkin pie. The center should wobble like Jell-O, not slosh like soup. If it sloshes, give it 10 more minutes.
Variations & Adaptations
This homemade pumpkin pie with buttery crust is flexible enough to adapt to different needs. Here are some variations I’ve tried:
Gluten-Free Version — Substitute the all-purpose flour with a gluten-free flour blend that contains xanthan gum. I’ve used Bob’s Red Mill 1-to-1 with good results. The crust will be slightly more delicate, so handle it gently. Blind baking is essential here.
Dairy-Free Adaptation — Use vegan butter sticks instead of regular butter, and replace the evaporated milk with full-fat coconut milk. The filling will have a subtle coconut flavor that actually pairs beautifully with pumpkin. My dairy-free friend said it was the best pumpkin pie she’d had in years.
Spice Variation — Swap the individual spices for 2 teaspoons of pumpkin pie spice mix if that’s what you have. I’ve also added a pinch of cardamom for a more complex flavor profile. One Thanksgiving, I accidentally used double the ginger, and honestly, it was amazing — gave the pie a nice warmth.
Maple Pumpkin Pie — Replace the brown sugar with ½ cup maple syrup and reduce the evaporated milk to ¾ cup. The maple flavor adds a lovely depth that screams fall. Just watch the baking time — maple syrup can make the filling brown faster.
Mini Pies — Use a muffin tin instead of a pie dish. Roll the dough, cut circles, and press into greased muffin cups. Fill and bake for 20-25 minutes. Perfect for portion control and lunchboxes.
Serving & Storage Suggestions
This homemade pumpkin pie with buttery crust is best served at room temperature or slightly warm. If you’re serving it warm, let it cool for at least 2 hours after baking, then reheat individual slices in the microwave for 10-15 seconds. Top with a dollop of whipped cream — homemade is lovely, but store-bought works perfectly for busy weeknights.
For a complete dessert spread, serve alongside a cup of hot coffee or spiced apple cider. The pie also pairs beautifully with vanilla ice cream — the cold creaminess contrasts with the spiced filling. If you’re feeling fancy, drizzle caramel sauce over each slice.
Storage Instructions: Cover the pie loosely with plastic wrap or foil and refrigerate for up to 4 days. The flavors actually improve after a day or two as the spices meld together. I’ve found that day-old pie tastes even better than fresh-baked.
Freezing: You can freeze the baked pie for up to 3 months. Wrap it tightly in plastic wrap, then foil. Thaw overnight in the refrigerator before serving. To freeze the unbaked pie, assemble it in a disposable aluminum pie pan, wrap well, and freeze. Bake directly from frozen, adding 15-20 minutes to the baking time.
Reheating: For individual slices, microwave for 15-20 seconds. For a whole pie, place in a 300°F oven for 10-15 minutes. Don’t overheat or the filling can become watery.
Nutritional Information & Benefits
Here’s the estimated nutritional breakdown for one slice of this homemade pumpkin pie with buttery crust (based on 8 servings):
- Calories: 385
- Total Fat: 19g
- Saturated Fat: 10g
- Cholesterol: 85mg
- Sodium: 380mg
- Total Carbohydrates: 47g
- Dietary Fiber: 3g
- Sugars: 28g
- Protein: 7g
Pumpkin is packed with vitamin A, which supports eye health and immune function. One slice provides over 100% of your daily vitamin A needs. The fiber from the pumpkin and flour helps with digestion and keeps you feeling full. While this is definitely a treat, it’s not entirely empty calories — you’re getting real nutrients from real ingredients.
Dietary Considerations: This recipe contains gluten, dairy, and eggs. For gluten-free and dairy-free adaptations, see the variations section above. The pie is naturally nut-free and can be made soy-free by using soy-free butter alternatives.
Conclusion
This homemade pumpkin pie with buttery crust has become my go-to for every fall gathering, and I honestly can’t imagine Thanksgiving without it now. It’s the kind of recipe that feels special enough for holidays but simple enough for a random Tuesday when you’re craving something warm and comforting. The buttery crust shatters perfectly, the filling is silky and spiced just right, and the whole thing comes together with ingredients you probably already have.
I hope you give Frank’s recipe a try. Maybe you’ll tweak the spices, maybe you’ll add a different crust, maybe you’ll make it your own — that’s exactly what cooking is supposed to be. I’d love to hear how it turns out for you. Drop a comment below and let me know if your family loved it as much as mine does. And if you have a recipe that came from an unexpected source, share that too — those are always the best stories.
Happy baking, friends. Your kitchen is about to smell incredible.
Frequently Asked Questions
Can I use fresh pumpkin instead of canned?
Yes, you can use fresh pumpkin puree from sugar pumpkins. Just roast the pumpkin, scoop out the flesh, and puree it in a food processor. The key is to strain the puree through cheesecloth or a fine mesh sieve to remove excess moisture. Fresh pumpkin can be more watery than canned, which can make the filling runny if you don’t strain it properly.
Why did my pie crust shrink during baking?
Pie crust shrinkage happens when the gluten in the dough is overworked or when the dough isn’t chilled enough before baking. Make sure you refrigerate your dough for at least an hour before rolling it out. Also, let the crust rest in the pie dish for 15 minutes in the fridge before blind baking. If your dough springs back when you roll it, let it rest for 5 minutes before trying again.
Can I make this pie ahead of time?
Absolutely! This homemade pumpkin pie with buttery crust actually tastes better the next day. You can bake it up to 2 days ahead and store it covered in the refrigerator. The flavors meld together overnight, and the crust stays perfectly flaky. Just bring it to room temperature before serving, or warm individual slices in the microwave for 10-15 seconds.
How do I prevent cracks in my pumpkin pie?
Cracks form when the pie is overbaked or cooled too quickly. Bake the pie until the edges are set but the center still jiggles slightly — it will continue to set as it cools. Cool the pie gradually on a wire rack at room temperature, not in the refrigerator. If you do get cracks, don’t worry — a generous layer of whipped cream covers them beautifully.
Can I freeze leftover pumpkin pie?
Yes, you can freeze baked pumpkin pie for up to 3 months. Wrap it tightly in plastic wrap, then a layer of aluminum foil. Thaw overnight in the refrigerator before serving. For best texture, don’t freeze the pie with whipped cream on top — add that fresh after thawing. You can also freeze the unbaked pie and bake it directly from frozen, adding 15-20 minutes to the baking time.
Pin This Recipe!
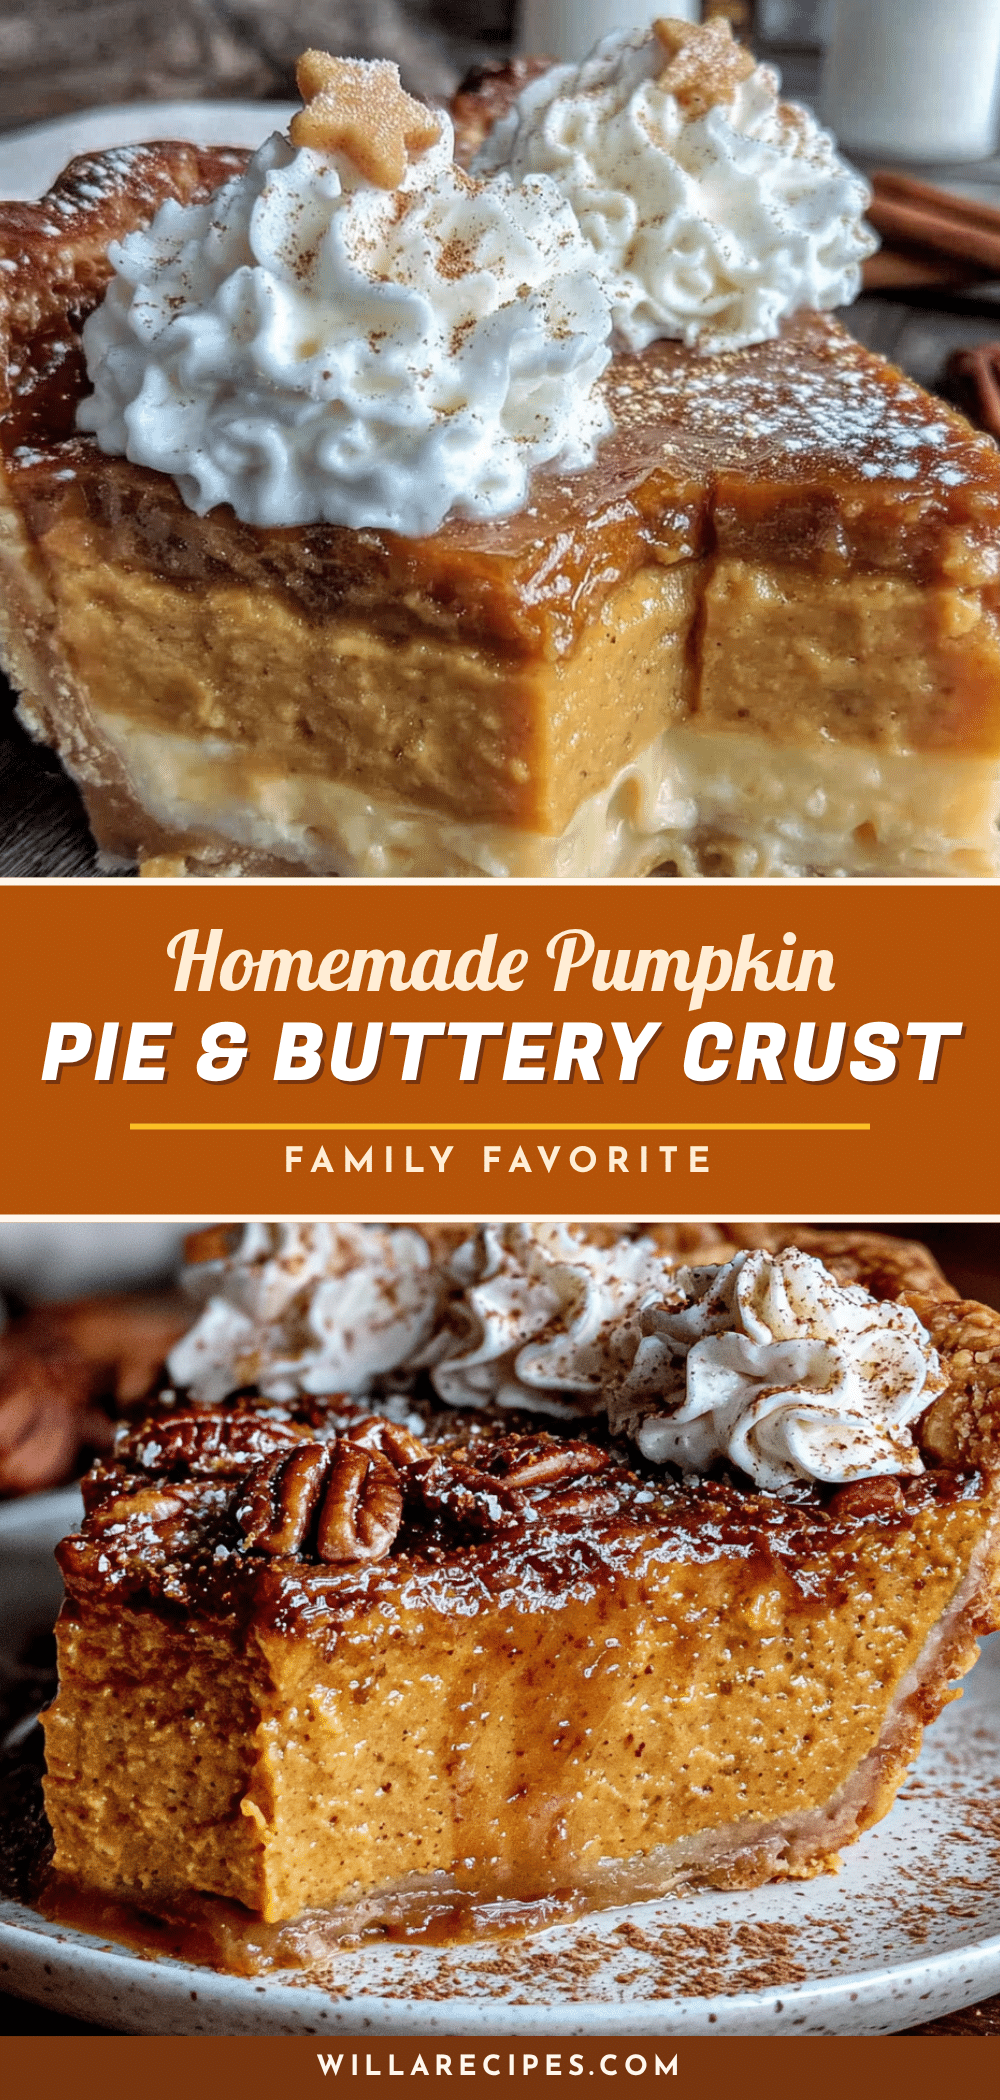
Homemade Pumpkin Pie with Buttery Crust – Best Easy Recipe
This homemade pumpkin pie with buttery crust features a flaky, tender crust and a silky, perfectly spiced filling. It’s budget-friendly, make-ahead friendly, and picky eater approved.
- Prep Time: 20 minutes
- Cook Time: 50-60 minutes
- Total Time: 1 hour 10 minutes (plus 1 hour chilling and 2 hours cooling)
- Yield: 8 servings 1x
- Category: Dessert
- Cuisine: American
Ingredients
- 2 ½ cups all-purpose flour
- 1 teaspoon salt
- 1 tablespoon granulated sugar
- ½ cup cold unsalted butter, cut into small cubes
- ½ cup cold vegetable shortening, cut into small pieces
- 6–8 tablespoons ice water
- 1 teaspoon apple cider vinegar
- 1 can (15 oz) pumpkin puree
- 1 can (12 oz) evaporated milk
- ¾ cup packed brown sugar
- 2 large eggs, room temperature
- 1 teaspoon vanilla extract
- 2 teaspoons ground cinnamon
- 1 teaspoon ground ginger
- ½ teaspoon ground nutmeg
- ¼ teaspoon ground cloves
- ¼ teaspoon salt
Instructions
- Make the Buttery Crust: In a large bowl, whisk together flour, salt, and sugar. Add cold butter cubes and shortening pieces. Using a pastry cutter or two forks, cut the fats into the flour until the mixture looks like coarse meal with pea-sized butter chunks remaining. Sprinkle apple cider vinegar over the mixture, then add 6 tablespoons of ice water. Stir with a fork until the dough starts coming together. Squeeze a handful – if it holds together without crumbling, it’s ready. If too dry, add m…
- Blind Bake the Crust: Preheat oven to 375°F. On a floured surface, roll the chilled dough into a 12-inch circle, about ⅛ inch thick. Transfer to a 9-inch pie dish. Trim edges, leaving ½ inch overhang, fold under, and crimp. Line crust with parchment paper and fill with pie weights or dried beans. Bake for 15 minutes. Remove parchment and weights, then bake for another 5-7 minutes until bottom looks dry and lightly golden. Set aside to cool.
- Prepare the Filling: Reduce oven temperature to 350°F. In a medium bowl, whisk together pumpkin puree and brown sugar until smooth. Add eggs one at a time, whisking well after each. Stir in evaporated milk and vanilla extract. In a small bowl, combine cinnamon, ginger, nutmeg, cloves, and salt. Whisk spice mixture into pumpkin mixture until fully incorporated.
- Bake the Pie: Place blind-baked crust on a baking sheet. Pour filling into warm crust. Cover crust edges with aluminum foil strips. Bake at 350°F for 50-60 minutes until edges are set but center still jiggles slightly. Cool completely on a wire rack for at least 2 hours.
Notes
For the flakiest crust, make sure butter and shortening are really cold. Pop cubed butter in freezer for 10 minutes before starting. Don’t overwork the dough. Pouring cold filling into a warm crust can cause thermal shock and crack the crust. Let eggs and evaporated milk come to room temperature before mixing. Bake pie on lower third of oven to ensure bottom crust cooks through. Cool pie gradually on a wire rack, not in the fridge, to prevent cracks. The jiggle test is more reliable than a knife test for doneness.
Nutrition
- Serving Size: 1 slice
- Calories: 385
- Sugar: 28
- Sodium: 380
- Fat: 19
- Saturated Fat: 10
- Carbohydrates: 47
- Fiber: 3
- Protein: 7
Keywords: pumpkin pie, buttery crust, homemade pumpkin pie, easy pumpkin pie, Thanksgiving dessert, fall dessert


