My ten-year-old nephew looked up from the cookbook he was flipping through and asked, “Auntie, why can’t you just dump a can of creamed corn into the casserole instead of making that fancy sauce?” I started to explain why that wouldn’t work — something about texture and binding agents and the integrity of the dish. Then I stopped. Honestly, I had no good reason. I’d just never seen it done that way. So I shrugged, grabbed the can opener, and said, “Alright, let’s try it your way.”
The power went out halfway through baking that afternoon — a summer thunderstorm knocked the lights out just as the timer hit thirty minutes. We finished the casserole in the dark, using the gas stove’s pilot light to check if the topping was golden. And you know what? That cheesy corn casserole with its buttery cracker topping was the best batch I’d ever made. My nephew didn’t say “I told you so,” but he didn’t have to. I learned more from his simple question than from any recipe book I’d read. Maybe you’ve been there — that moment when a beginner’s instinct cuts through all your carefully learned rules and shows you something simpler. That’s the story behind this recipe. It’s not fancy. It’s not complicated. It’s just really, really good. And honestly? Sometimes that’s all a family dinner needs to be.
Why You’ll Love This Recipe
Let me tell you why this cheesy corn casserole has become a regular in my kitchen. It’s not just because it’s easy — though it absolutely is. It’s because every single time I make it, someone asks for the recipe. That never gets old.
- Quick & Easy: From fridge to table in about 45 minutes, with just 10 minutes of hands-on prep. Perfect for those evenings when you’re staring at the clock wondering what’s for dinner.
- Simple Ingredients: You probably have most of these in your pantry right now. Canned corn, cream of mushroom soup, sour cream, butter, and crackers. No fancy grocery trips required.
- Budget-Friendly: This whole dish costs under $10 to make. That’s comfort food that won’t wreck your grocery budget.
- Crowd-Pleaser: Kids devour it. Adults go back for seconds. I’ve seen picky eaters clean their plates and ask for more. It’s practically magic.
- Leftovers That Reheat Well: This is not one of those casseroles that turns into a sad, soggy mess the next day. It reheats beautifully, making it perfect for meal prep or lunch the next day.
What makes this version different from all the others? It’s the buttery cracker topping. That golden, crunchy crust is what takes this from a simple side dish to the star of the table. And the filling? It’s impossibly creamy, with just the right balance of sweet corn and sharp cheddar. I’ve tested this recipe a dozen times to get the proportions perfect — not too wet, not too dry, just that perfect spoonable consistency that makes everyone go quiet at the table.
This is the kind of recipe that makes you feel like a good cook without actually having to work hard at it. And honestly, isn’t that what we all need sometimes?
What Ingredients You Will Need
This recipe uses simple, honest ingredients that come together to create something genuinely special. Most of these are pantry staples, which is exactly what you want when you’re feeding a family on a budget.
- For the Casserole Base:
- 2 cans (15.25 oz each) whole kernel corn, drained — I prefer Del Monte or Green Giant, but any brand works fine
- 1 can (14.75 oz) creamed corn — this is the secret to that creamy texture without extra work
- 1 can (10.5 oz) condensed cream of mushroom soup — use cream of chicken if you prefer, or a gluten-free version if needed
- 1 cup sour cream (full-fat works best for richness, but light sour cream is fine too)
- 1/2 cup unsalted butter, melted (1 stick)
- 1 large egg, lightly beaten — helps bind everything together
- 2 cups shredded sharp cheddar cheese — shred it yourself for better melting; pre-shredded has anti-caking agents that don’t melt as smoothly
- 1/4 cup finely chopped onion — about half a medium onion; you can leave this out if your kids are onion-averse
- 1/2 teaspoon salt
- 1/4 teaspoon black pepper
- 1/4 teaspoon garlic powder (optional, but I love the extra flavor)
- For the Buttery Cracker Topping:
- 1 sleeve (about 40 crackers) Ritz or similar buttery crackers, crushed — you want coarse crumbs, not dust
- 1/4 cup unsalted butter, melted
- 1/2 cup shredded sharp cheddar cheese — for extra cheesiness on top
Ingredient Tips: For the best texture, make sure your sour cream and egg are at room temperature before mixing. Cold ingredients can make the filling seize up. If you’re using salted butter, reduce the added salt to 1/4 teaspoon. And here’s a trick I learned the hard way — don’t crush the crackers too fine. You want some bigger pieces for that satisfying crunch.
Substitution Guidance: Need to make this gluten-free? Use gluten-free cream of mushroom soup and gluten-free crackers (Schar’s table crackers work well). Want to lighten it up? Swap the sour cream for Greek yogurt and use reduced-fat cheese. The texture will be slightly different, but it’s still delicious.
Equipment Needed
You don’t need a fancy kitchen to make this casserole. Here’s what you’ll need:
- 9×13-inch baking dish — glass or ceramic works best for even heat distribution. I use a Pyrex dish I’ve had for years.
- Large mixing bowl — for combining the casserole ingredients
- Medium bowl — for the topping mixture
- Whisk — for beating the egg and mixing the wet ingredients
- Rubber spatula — for scraping every bit of that delicious filling into the dish
- Measuring cups and spoons — accuracy matters here
- Cheese grater — if you’re shredding your own cheese (which I highly recommend)
- Rolling pin or food processor — for crushing the crackers. A zip-top bag and your hands work too!
If you don’t have a 9×13 dish, you can use a 10-inch cast iron skillet or a 3-quart casserole dish. Just adjust the baking time slightly — a wider dish will cook faster, a deeper one will need a few extra minutes. I’ve used both, and they work beautifully.
One tip: if you’re using a glass dish, reduce the oven temperature by 25°F to prevent the edges from burning before the center is done. Learned that one the hard way!
Preparation Method

Let’s get cooking! This comes together faster than you’d think.
- Preheat your oven to 350°F (175°C). Grease your 9×13 baking dish with butter or non-stick spray. I like to use butter — it adds a little extra flavor to the edges.
- Drain the whole kernel corn. Open both cans, pour the corn into a colander, and let it drain thoroughly. You want to get as much liquid out as possible — excess water will make your casserole runny. Pat it dry with paper towels if you’re feeling ambitious.
- In your large mixing bowl, combine the wet ingredients. Add the cream of mushroom soup, sour cream, melted butter, and beaten egg. Whisk until smooth and well combined. It should look pale yellow and creamy.
- Add the corn, cheese, and seasonings. Stir in both types of corn, the shredded cheddar, chopped onion, salt, pepper, and garlic powder if using. Fold everything together gently until the cheese is evenly distributed. Don’t overmix — you want some texture, not a paste.
- Pour the mixture into your prepared baking dish. Use your rubber spatula to spread it evenly. The filling should be about 1.5 inches deep. Give the dish a gentle shake to level it out.
- Make the topping. In your medium bowl, combine the crushed crackers and melted butter. Stir until every crumb is coated. Add the remaining 1/2 cup of shredded cheddar and toss gently. The mixture should look like coarse, buttery sand with some bigger chunks.
- Sprinkle the topping evenly over the casserole. Don’t press it down — let it sit loosely on top. This is what creates that gorgeous, crunchy crust.
- Bake for 30-35 minutes. The casserole is done when the edges are bubbly and the topping is golden brown. If the topping is browning too quickly (around the 20-minute mark), tent the dish loosely with aluminum foil for the remaining time.
- Let it rest for 10 minutes before serving. This is crucial! The casserole needs time to set up. If you cut into it right away, it will be runny. Those 10 minutes make all the difference between a perfect slice and a soupy mess.
Sensory Cues: When it’s done, the kitchen will smell like butter and toasted crackers — that warm, comforting scent that makes everyone wander into the kitchen asking “What’s for dinner?” The top should be deep golden brown, and you’ll see little bubbles of cheese peeking through the cracks. The edges will be slightly darker and caramelized. Perfect.
Cooking Tips & Techniques
After making this casserole more times than I can count, I’ve collected a few tricks that make a real difference.
Don’t skip the resting time. I know it’s tempting to dig in right away, but those 10 minutes of rest are non-negotiable. The casserole needs time to firm up so it holds its shape. I once served it after only 5 minutes, and it was more like corn soup than casserole. Learn from my impatience!
Toast the cracker topping separately. Here’s a pro tip: if you want an extra-crunchy topping, toast the buttered cracker crumbs on a baking sheet for 5-7 minutes before sprinkling them on the casserole. Then bake as directed. The topping stays crunchier because it’s already partially cooked. I do this when I’m making it for company.
Watch your oven temperature. Every oven runs a little differently. If yours runs hot, check the casserole at 25 minutes. If it runs cool, you might need 40 minutes. The golden-brown topping is your best indicator — don’t rely solely on the timer.
Room temperature ingredients matter. Cold sour cream and cold egg can make the filling lumpy and uneven. Take them out of the fridge 30 minutes before you start cooking. It’s a small step that makes a big difference in texture.
Shred your own cheese. I know it’s more work, but pre-shredded cheese contains cellulose (wood pulp, basically) to prevent clumping. That same ingredient prevents smooth melting. Freshly shredded cheddar melts into a silky, cohesive sauce instead of a grainy mess. Trust me on this one.
Variations & Adaptations
This recipe is wonderfully flexible. Here are some ways to make it your own:
- Spicy Southwest Version: Add 1 can of drained diced green chiles, 1/2 teaspoon cumin, and 1/4 teaspoon cayenne pepper to the filling. Top with crushed tortilla chips instead of crackers. My brother-in-law requests this version every Thanksgiving.
- Loaded Baked Potato Style: Add 1 cup of cooked, crumbled bacon and 1/2 cup chopped green onions to the filling. Use a mix of cheddar and Monterey Jack cheese. It tastes exactly like a loaded baked potato, but in casserole form.
- Vegetable-Packed Version: Fold in 1 cup of frozen peas and carrots (thawed) or 1 cup of chopped bell peppers. This is great for sneaking extra veggies past picky eaters — the corn and cheese mask the vegetable flavor beautifully.
- Dairy-Free Adaptation: Use dairy-free sour cream, dairy-free cream of mushroom soup (Pacific Foods makes a good one), and vegan cheddar shreds. Use olive oil instead of butter for the topping, and use dairy-free crackers. The texture will be slightly different, but it’s still creamy and satisfying.
- Slow Cooker Method: Mix all the filling ingredients and pour into a greased slow cooker. Cook on low for 3-4 hours or high for 1.5-2 hours. About 30 minutes before serving, sprinkle the cracker topping on and cook uncovered. The topping won’t get as crunchy, but the convenience is worth it.
I once made a version with leftover ham and frozen peas — it was a hit with everyone except my vegetarian niece. So now I keep a small portion without meat for her. It’s easy to customize half the dish before adding the topping.
Serving & Storage Suggestions
This casserole is incredibly versatile when it comes to serving.
Serving Temperature: Serve it hot, straight from the oven, after that crucial 10-minute rest. It’s also delicious at room temperature — I’ve packed it for potlucks and picnics many times. The flavors actually deepen as it cools slightly.
Presentation: Scoop it onto plates with a large spoon or spatula. Garnish with a sprinkle of fresh parsley or chives if you’re feeling fancy. It looks beautiful with that golden topping and creamy interior.
What to Serve With It: This casserole pairs beautifully with roasted chicken, grilled pork chops, or a simple green salad. For a complete meal, serve it alongside some crispy garlic chicken or honey glazed ham. It’s also perfect as a side dish for holiday dinners — think Thanksgiving, Christmas, or Easter.
Storage: Leftovers keep in the refrigerator for 3-4 days in an airtight container. The topping will soften over time, but the flavor stays delicious. To reheat, pop individual portions in the microwave for 1-2 minutes, or reheat the whole dish in a 350°F oven for 15-20 minutes.
Freezing Instructions: This casserole freezes beautifully. Assemble the entire dish (without the topping), cover tightly with foil, and freeze for up to 3 months. When ready to bake, thaw overnight in the refrigerator, then add the topping and bake as directed. You can also freeze baked leftovers — just wrap individual portions in plastic wrap and foil.
Flavor Development: Here’s a little secret — this casserole tastes even better the next day. The flavors meld together overnight, creating a deeper, more cohesive taste. I often make it a day ahead for special occasions. Just add the topping right before baking.
Nutritional Information & Benefits
Let’s be real — this is comfort food, not health food. But it does have some redeeming qualities.
Estimated Nutritional Values (per serving, based on 8 servings):
- Calories: 385
- Total Fat: 24g
- Saturated Fat: 14g
- Cholesterol: 85mg
- Sodium: 720mg
- Total Carbohydrates: 32g
- Dietary Fiber: 2g
- Sugars: 6g
- Protein: 12g
Health Highlights: Corn is a good source of fiber, vitamin C, and antioxidants like lutein and zeaxanthin, which are great for eye health. The cheese provides calcium and protein. And while it’s not low-calorie, it’s a satisfying dish that can help you feel full and content with a reasonable portion.
Dietary Considerations: This recipe is vegetarian (if you use cream of mushroom soup). It can be made gluten-free with simple substitutions. It’s not dairy-free or low-carb, but the variations section offers alternatives.
Potential Allergens: This recipe contains dairy (butter, cheese, sour cream), gluten (crackers, cream of mushroom soup), and eggs. Check your specific brands if you have allergies.
My personal philosophy? Food is about more than numbers on a page. This casserole brings people together, makes kids smile, and fills bellies with warmth. That has value beyond calories. Serve it alongside a big green salad or some roasted vegetables, and you’ve got a balanced, satisfying meal.
FAQs
Can I make this cheesy corn casserole ahead of time?
Absolutely! You can assemble the entire casserole (without the topping) up to 24 hours in advance. Cover and refrigerate. When you’re ready to bake, add the topping and bake as directed. You may need to add 5-10 minutes to the baking time since you’re starting from cold.
Can I use fresh or frozen corn instead of canned?
Yes, but you’ll need to adjust. For fresh corn, cut the kernels from 4-5 ears of corn and blanch them in boiling water for 2 minutes. For frozen corn, thaw and drain it well. You’ll still need the creamed corn for texture — fresh or frozen corn won’t provide that creamy element.
Why is my casserole runny?
This usually happens for one of three reasons: you didn’t drain the canned corn well enough, you didn’t let the casserole rest after baking, or you used low-fat sour cream (which has more water content). Next time, pat the drained corn dry with paper towels, and definitely let it rest for the full 10 minutes.
Can I use a different type of cracker for the topping?
Definitely! Buttery crackers like Ritz are classic, but you can use saltines, club crackers, or even crushed potato chips for a different texture. Just adjust the butter amount — saltines need less butter since they’re thinner. Start with 3 tablespoons and add more if needed.
What’s the best way to reheat leftovers?
The microwave works fine for individual portions (1-2 minutes on high). For larger amounts, reheat in a 350°F oven for 15-20 minutes. The topping will never be as crunchy as day one, but the flavor is still fantastic. If you want to revive the crunch, sprinkle a few fresh crushed crackers on top before reheating.
Conclusion
This kid-approved cheesy corn casserole with buttery cracker topping is more than just a recipe — it’s a reminder that sometimes the simplest things are the best. My nephew’s question taught me that day: don’t overthink it. Good food comes from good ingredients, a little patience, and the willingness to try something different.
I love this recipe because it’s forgiving. It works for busy weeknights, potlucks, holiday tables, and everything in between. It pleases picky eaters and food snobs alike. And it makes your kitchen smell like comfort — that warm, buttery, cheesy aroma that says “you’re home.”
So go ahead and make it your own. Add bacon, leave out the onion, swap the cheese, or keep it exactly as written. However you make it, I hope it brings the same warmth to your table that it brings to mine. And if you try it, I’d love to hear about it. Drop a comment below and tell me how it turned out — or what twist you added. Happy cooking!
Pin This Recipe!
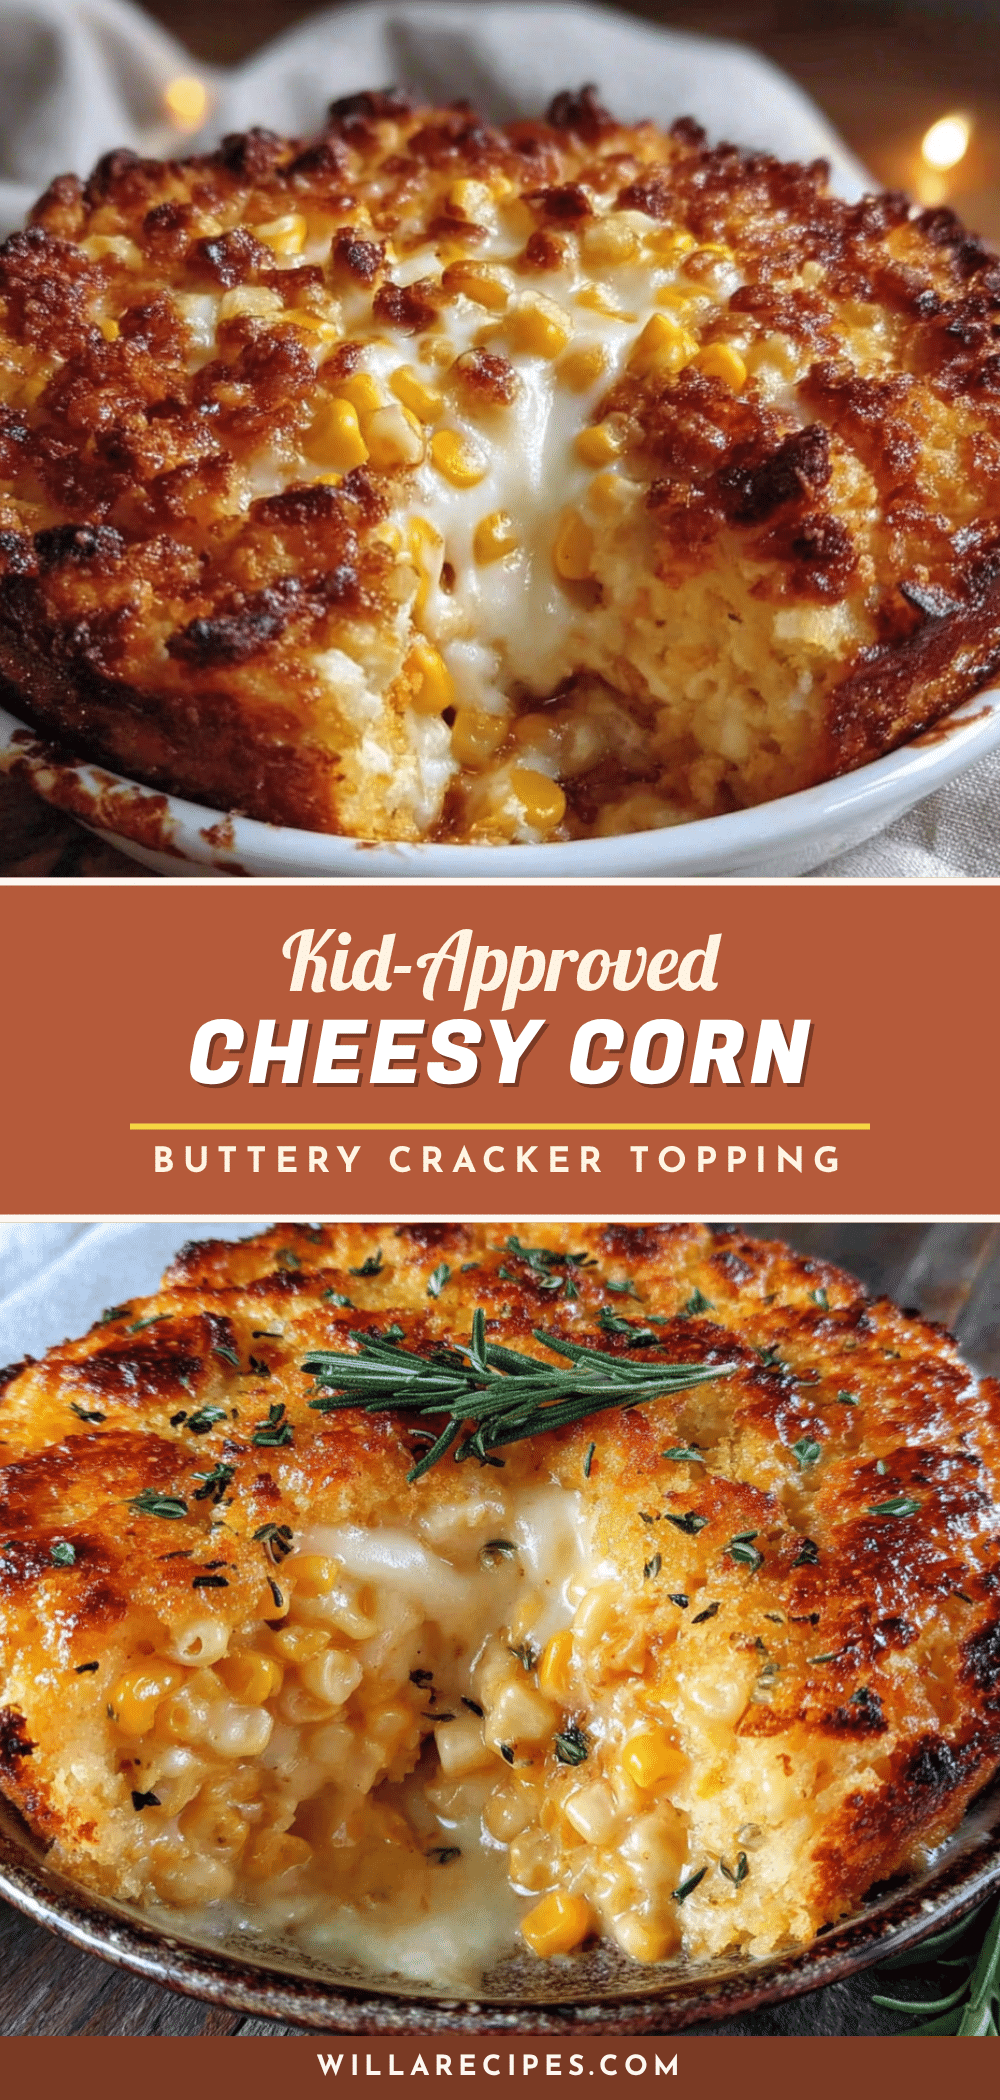
Kid-Approved Cheesy Corn Casserole: Easy Buttery Cracker Topping

This cheesy corn casserole with a buttery cracker topping is a quick, easy, and budget-friendly comfort food that pleases both kids and adults. With simple pantry ingredients and a creamy, cheesy filling, it’s perfect for weeknight dinners or holiday tables.
- Prep Time: 10 minutes
- Cook Time: 30-35 minutes
- Total Time: 45 minutes
- Yield: 8 servings 1x
- Category: Side Dish
- Cuisine: American
Ingredients
- 2 cans (15.25 oz each) whole kernel corn, drained
- 1 can (14.75 oz) creamed corn
- 1 can (10.5 oz) condensed cream of mushroom soup
- 1 cup sour cream (full-fat recommended)
- 1/2 cup unsalted butter, melted (1 stick)
- 1 large egg, lightly beaten
- 2 cups shredded sharp cheddar cheese
- 1/4 cup finely chopped onion (about half a medium onion)
- 1/2 teaspoon salt
- 1/4 teaspoon black pepper
- 1/4 teaspoon garlic powder (optional)
- 1 sleeve (about 40 crackers) Ritz or similar buttery crackers, crushed
- 1/4 cup unsalted butter, melted (for topping)
- 1/2 cup shredded sharp cheddar cheese (for topping)
Instructions
- Preheat your oven to 350°F (175°C). Grease a 9×13-inch baking dish with butter or non-stick spray.
- Drain the whole kernel corn thoroughly in a colander. Pat dry with paper towels if desired.
- In a large mixing bowl, combine the cream of mushroom soup, sour cream, melted butter, and beaten egg. Whisk until smooth and creamy.
- Stir in both types of corn, the shredded cheddar, chopped onion, salt, pepper, and garlic powder (if using). Fold gently until evenly combined.
- Pour the mixture into the prepared baking dish and spread evenly with a rubber spatula. The filling should be about 1.5 inches deep.
- In a medium bowl, combine the crushed crackers and melted butter for the topping. Stir until every crumb is coated. Add the remaining 1/2 cup of shredded cheddar and toss gently.
- Sprinkle the topping evenly over the casserole. Do not press it down.
- Bake for 30-35 minutes, until the edges are bubbly and the topping is golden brown. If the topping browns too quickly, tent with aluminum foil.
- Let the casserole rest for 10 minutes before serving. This allows it to set properly.
Notes
For best results, use room temperature sour cream and egg. Shred your own cheddar cheese for smoother melting. Do not skip the 10-minute resting time after baking to allow the casserole to set. If using a glass baking dish, reduce oven temperature by 25°F. To make gluten-free, use gluten-free cream of mushroom soup and gluten-free crackers. Leftovers keep in the refrigerator for 3-4 days and reheat well.
Nutrition
- Serving Size: 1 serving (1/8 of ca
- Calories: 385
- Sugar: 6
- Sodium: 720
- Fat: 24
- Saturated Fat: 14
- Carbohydrates: 32
- Fiber: 2
- Protein: 12
Keywords: cheesy corn casserole, buttery cracker topping, easy corn casserole, kid-friendly casserole, comfort food, side dish, holiday side dish


