There used to be a tiny Greek place on the corner of 7th and Walnut, run by a woman named Eleni, that made these garlic butter chicken thighs that I still dream about. When she retired and the spot turned into a vape shop, I honestly felt a little lost. I mean, where else was I going to get that perfect balance of crispy skin and garlicky, buttery sauce that my kids would actually eat without a single complaint?
After twelve tries — and one particularly sad attempt that my youngest described as “sad chicken” — I finally cracked the code. The secret wasn’t some fancy technique or imported ingredient. It was simpler than that. It was about getting the heat right and not rushing the garlic. Let me tell you, the first time I nailed it, my husband walked in and said, “Did you go back to that Greek place?” That was the moment I knew I had it.
This recipe is for every parent who’s tired of cooking two different dinners. You know that feeling when you just want everyone at the table to eat the same thing without negotiations? Yeah, this is that recipe. It’s the kind of meal that turns a hectic Tuesday into something that feels a little bit special, without breaking the bank or making you slave over the stove.
So here it is — my version of Eleni’s magic, made for real families on real budgets. I hope it becomes a staple in your kitchen the way it has in mine.
Why You’ll Love This Recipe
Look, I’ve tested a lot of chicken thigh recipes over the years. Some are too fussy, some are too dry, and some just don’t deliver on flavor. This one hits all the right notes, and here’s why it’s become a weekly staple in my house:
- Quick & Easy: From start to finish, you’re looking at about 20 minutes. That’s less time than it takes to order takeout and wait for delivery.
- Simple Ingredients: You probably have most of these in your pantry right now. No trips to specialty stores or hunting down obscure spices.
- Perfect for Family Dinners: It’s the kind of meal that pleases picky eaters and adults alike. My kids actually ask for seconds — that’s a win in my book.
- Crowd-Pleaser: I’ve served this at casual dinner parties and potlucks, and it always gets devoured. People can’t believe how simple it is.
- Unbelievably Delicious: The crispy skin, the rich garlic butter sauce, the tender meat — it’s comfort food that feels indulgent without being heavy.
What sets this recipe apart is the technique. Most people rush the garlic and end up with a bitter, burnt mess. I’ll show you exactly how to get that golden, fragrant garlic that makes the whole kitchen smell amazing. Plus, I’ve figured out how to get the skin perfectly crispy without drying out the meat — a trick that took me way too many attempts to perfect.
This isn’t just another chicken recipe. It’s the one that makes you close your eyes after the first bite and forget about the chaos of your day. It’s comfort food, reimagined for busy families who still want something delicious on the table.
What Ingredients You Will Need
This recipe uses simple, budget-friendly ingredients that work together to create something truly special. Most of these are pantry staples, so you can whip this up on a whim without a special shopping trip.
- Boneless, skin-on chicken thighs (6-8 thighs, about 1.5 lbs / 680g): I prefer skin-on for that crispy texture. If you can only find boneless skinless, it’ll still taste great, but you’ll miss that golden crunch. Look for thighs that are similar in size so they cook evenly.
- Unsalted butter (4 tablespoons / 56g): I use unsalted so I can control the salt level. Kerrygold is my go-to for its rich flavor, but any good quality butter works.
- Garlic (6-8 cloves, minced): Fresh garlic is non-negotiable here. The pre-minced stuff in a jar won’t give you the same flavor. Trust me, I tried it once and regretted it.
- Olive oil (2 tablespoons / 30ml): Helps prevent the butter from burning and adds a bit of fruity flavor. A good extra virgin olive oil is nice, but regular is fine.
- Chicken broth (1/2 cup / 120ml): Adds moisture and helps create that luscious pan sauce. Low-sodium is best so you can season to taste.
- Dried oregano (1 teaspoon): Adds a subtle herbaceous note that complements the garlic beautifully. You can use fresh if you have it — just double the amount.
- Paprika (1/2 teaspoon): Gives the chicken a beautiful color and a hint of smokiness. Smoked paprika is amazing here if you have it.
- Salt and black pepper (to taste): I use kosher salt for better control. Don’t be shy with the pepper — it balances the richness.
- Fresh parsley (2 tablespoons, chopped, for garnish): Optional but recommended. It adds a pop of color and freshness.
- Lemon wedges (for serving): A squeeze of lemon right before eating brightens everything up. My kids love squeezing their own.
Substitution notes: If you need a dairy-free option, use a good plant-based butter. For a gluten-free version, make sure your chicken broth is certified gluten-free. You can also swap the oregano for thyme or rosemary if that’s what you have on hand.
Equipment Needed
You don’t need a lot of fancy equipment for this recipe, which is part of the beauty of it. Here’s what you’ll need:
- Large skillet (12-inch / 30cm): Cast iron is my first choice because it holds heat so well and gives you that perfect sear. But a good non-stick or stainless steel pan works too. Just make sure it’s large enough to hold the chicken in a single layer without crowding.
- Tongs: Essential for flipping the chicken without piercing the skin and losing those precious juices. I have a pair that I use for almost everything.
- Sharp knife and cutting board: For mincing the garlic and chopping the parsley. A microplane also works great for garlic if you want it extra fine.
- Measuring spoons and cups: For accuracy, especially with the butter and broth. I learned the hard way that eyeballing butter can lead to a greasy mess.
- Paper towels: For patting the chicken dry. This step is crucial for crispy skin, so don’t skip it.
If you don’t have a cast iron skillet, don’t worry. A good non-stick pan will work just fine. Just make sure it’s oven-safe if you decide to finish the chicken in the oven — though for this 20-minute version, we’re keeping it all on the stovetop.
Preparation Method

Alright, let’s get cooking. This comes together fast, so I like to have everything prepped and ready before I turn on the heat. Trust me, you don’t want to be mincing garlic while your chicken is burning.
- Pat the chicken dry (1 minute): Take your chicken thighs out of the package and pat them thoroughly dry with paper towels. This is the single most important step for crispy skin. Season both sides generously with salt, pepper, paprika, and dried oregano. Let them sit at room temperature while you prep the other ingredients.
- Heat the pan (2 minutes): Place your skillet over medium-high heat and add the olive oil. Wait until the oil is shimmering but not smoking — about 2 minutes. You can test it by flicking a drop of water into the pan; if it sizzles immediately, you’re good to go.
- Sear the chicken (6-8 minutes): Place the chicken thighs skin-side down in the hot skillet. Don’t crowd the pan — work in batches if needed. Let them cook undisturbed for 4-5 minutes until the skin is deep golden brown and crispy. Flip using your tongs and cook for another 2-3 minutes on the other side. The chicken should be cooked through (internal temperature of 165°F / 74°C) but still juicy.
- Remove and rest (2 minutes): Transfer the chicken to a plate and tent loosely with foil. Don’t skip this step — it keeps the chicken warm while you make the sauce and allows the juices to redistribute.
- Make the garlic butter sauce (3 minutes): Reduce the heat to medium-low. Add the butter to the skillet and let it melt, scraping up any browned bits from the bottom of the pan. Add the minced garlic and cook for about 30 seconds, stirring constantly. You want it fragrant but not brown — burnt garlic is bitter and will ruin the dish.
- Finish the sauce (1 minute): Pour in the chicken broth and bring to a gentle simmer. Let it cook for about a minute, stirring occasionally, until it thickens slightly. Taste and adjust seasoning with salt and pepper.
- Combine and serve (1 minute): Return the chicken thighs to the skillet, spooning the garlic butter sauce over the top. Let them warm through for about a minute. Garnish with fresh parsley and serve immediately with lemon wedges on the side.
Your chicken should be golden brown on the outside, tender and juicy on the inside, and coated in a rich, garlicky butter sauce. The smell alone will have everyone gathering in the kitchen.
Cooking Tips & Techniques
I’ve made this recipe more times than I can count, and I’ve definitely made my share of mistakes along the way. Here’s what I’ve learned:
- Don’t skip the drying step. Moisture is the enemy of crispy skin. I once got distracted and forgot to pat the chicken dry, and the skin turned out rubbery and sad. Lesson learned.
- Let the pan get hot enough. If you add the chicken to a pan that’s not hot enough, it will stick and steam instead of sear. You want that satisfying sizzle when the chicken hits the pan.
- Don’t move the chicken too early. Let it cook undisturbed for a full 4-5 minutes before trying to flip. It will release easily when it’s ready. If it sticks, it needs more time.
- Watch the garlic carefully. Garlic goes from fragrant to burnt in about 15 seconds. Keep it moving in the pan and pull it off the heat if you need to. I’ve ruined a whole batch by answering a text message — don’t be like me.
- Use a meat thermometer if you have one. Chicken thighs are forgiving, but for perfect results, aim for 165°F (74°C) at the thickest part. If you don’t have one, cut into the thickest thigh to check — the juices should run clear.
One more thing: if you’re cooking for a crowd, you can keep the finished chicken warm in a 200°F (93°C) oven while you make a second batch. Just place them on a baking sheet in a single layer.
Variations & Adaptations
This recipe is a great base for experimentation. Here are some variations I’ve tried and loved:
- Lemon Herb Version: Add the zest of one lemon and a tablespoon of fresh thyme leaves along with the garlic. Finish with a squeeze of lemon juice. It’s bright and fresh — perfect for spring.
- Spicy Kick: Add 1/2 teaspoon of red pepper flakes along with the garlic, or stir in a tablespoon of hot sauce at the end. My husband loves this version, though the kids prefer the original.
- Creamy Garlic Butter: Stir in 1/4 cup (60ml) of heavy cream at the end for an even richer sauce. This turns it into a decadent treat that’s amazing with mashed potatoes.
- Bone-In Version: Use bone-in, skin-on thighs and increase the cooking time to about 10-12 minutes per side. The bone adds more flavor, but it takes a bit longer.
- One-Pan Meal: Add some green beans or asparagus to the skillet after removing the chicken. Sauté them in the garlic butter sauce for 3-4 minutes until tender. It’s an easy way to get your veggies in.
For dietary needs, you can easily make this dairy-free by using a plant-based butter. I’ve tried it with Miyoko’s and it works beautifully. Just keep an eye on it as plant-based butters can burn a bit faster.
Serving & Storage Suggestions
This dish is incredibly versatile when it comes to serving. Here’s how I like to do it:
- Serving Temperature: Serve hot, straight from the skillet. The sauce should be bubbling and the chicken glistening.
- What to Serve With It: Mashed potatoes are my go-to — they soak up that garlic butter sauce like a dream. Buttered egg noodles, rice, or crusty bread are also excellent choices. For veggies, a simple green salad or steamed broccoli rounds out the meal perfectly.
- Storage: Leftover chicken keeps well in an airtight container in the refrigerator for up to 3 days. The flavors actually meld together and get even better overnight.
- Reheating: The best way to reheat is in a skillet over medium-low heat with a splash of chicken broth or water to loosen the sauce. Cover with a lid to keep the chicken moist. The microwave works in a pinch, but the skin won’t be as crispy.
- Freezing: You can freeze the cooked chicken and sauce in a freezer-safe container for up to 3 months. Thaw overnight in the refrigerator before reheating.
Honestly, this is one of those dishes that tastes even better the next day. I often make a double batch just so we can have leftovers for lunch.
Nutritional Information & Benefits
Here’s an approximate nutritional breakdown per serving (based on 4 servings, using 2 thighs per serving):
- Calories: 380-420
- Protein: 32g
- Fat: 28g (including 10g saturated fat)
- Carbohydrates: 3g
- Fiber: 0g
- Sugar: 0g
- Sodium: 450-550mg (varies based on broth and added salt)
Chicken thighs are a great source of protein, iron, and B vitamins. While they’re higher in fat than chicken breasts, that fat is what keeps them juicy and flavorful. The garlic in this recipe offers anti-inflammatory benefits and may support immune health. This dish is naturally low-carb and gluten-free, making it suitable for a variety of dietary preferences. If you’re watching your sodium, use low-sodium broth and go easy on the added salt.
From a wellness perspective, this is the kind of meal that feels indulgent but fits perfectly into a balanced diet. It’s real food, made with simple ingredients, that nourishes both body and soul.
Conclusion
This kid-approved garlic butter chicken thighs recipe has become a true staple in our home, and I hope it becomes one in yours too. It’s proof that you don’t need complicated techniques or fancy ingredients to create something truly memorable. With just a few pantry staples and 20 minutes, you can put a dinner on the table that brings everyone together.
I love this recipe because it’s forgiving, adaptable, and always delivers. Whether you’re feeding picky eaters, impressing guests, or just treating yourself to a comforting meal, this dish never disappoints. The crispy skin, the fragrant garlic, the rich buttery sauce — it’s everything I want in a weeknight dinner.
Now I’d love to hear from you! Have you tried this recipe? Did you add your own twist? Drop a comment below and let me know how it turned out. And if you loved it, don’t forget to share this post with a friend who needs a new go-to dinner idea. Happy cooking, friends!
Frequently Asked Questions
Can I use chicken breasts instead of thighs?
Yes, you can, but the cooking time will be different. Chicken breasts cook faster and can dry out more easily. I recommend using boneless, skinless breasts and cooking them for about 4-5 minutes per side, depending on thickness. Check for an internal temperature of 165°F (74°C). The sauce will still be delicious, but you won’t get that same crispy skin.
How do I prevent the garlic from burning?
This is the most common mistake I see. The key is to add the garlic after you’ve turned the heat down to medium-low. Cook it for just 30 seconds, stirring constantly. If the pan seems too hot, take it off the heat for a few seconds while you stir. Burnt garlic turns bitter and can ruin the whole dish, so err on the side of caution.
Can I make this recipe dairy-free?
Absolutely! Swap the butter for a good quality plant-based butter. I’ve had great results with Miyoko’s and Earth Balance. Just keep in mind that plant-based butters can burn more easily, so watch the heat carefully. The rest of the ingredients are naturally dairy-free.
How do I get the skin extra crispy?
Three things: pat the chicken very dry, let the pan get hot enough before adding the chicken, and don’t move it around once it’s in the pan. If you want even crispier skin, you can start the chicken in a cold pan and let it slowly render the fat as the pan heats up. This takes a bit longer but gives you incredibly crispy results.
Can I double this recipe?
Yes, but you’ll need to cook the chicken in batches to avoid overcrowding the pan. Overcrowding lowers the pan temperature and causes the chicken to steam instead of sear. Once all the chicken is cooked, you can make the sauce in the same pan — just make sure to scrape up all those delicious browned bits first.
Pin This Recipe!
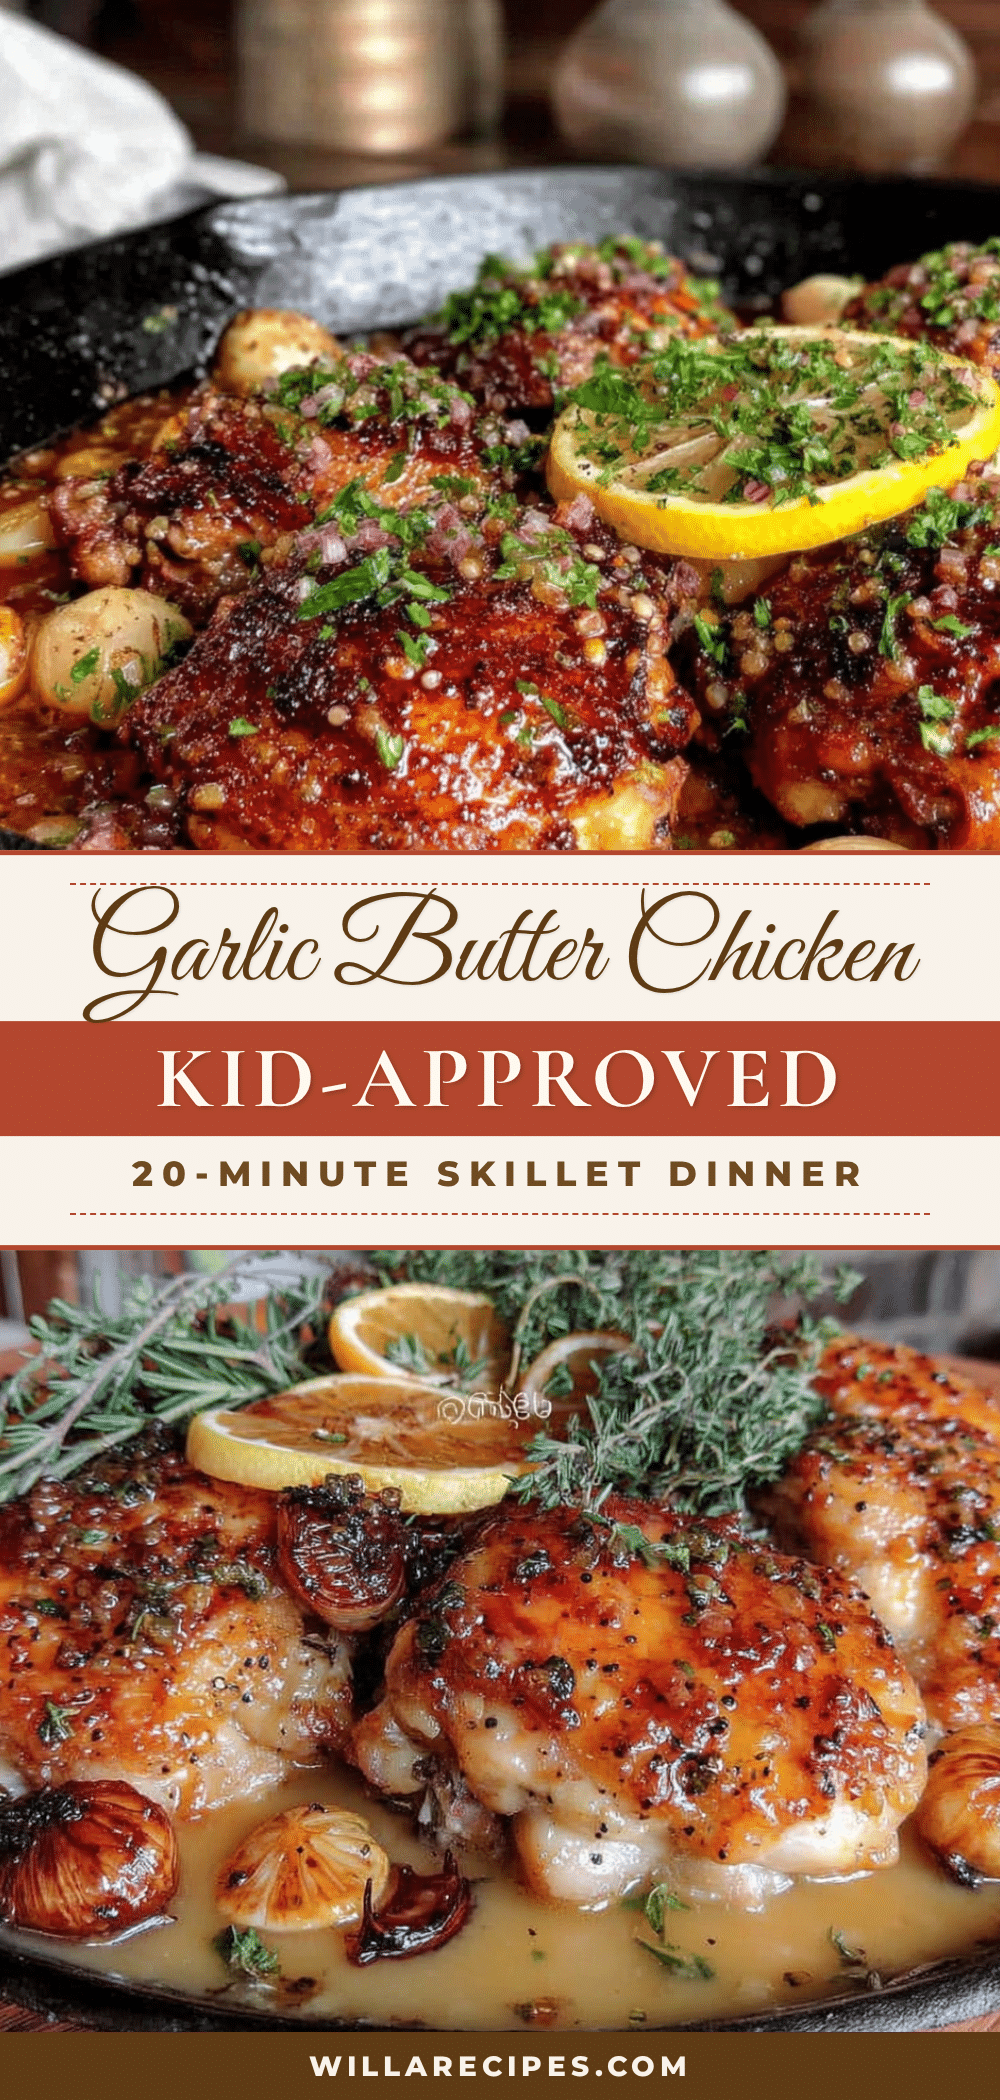
Kid-Approved Garlic Butter Chicken Thighs: Easy 20-Minute Skillet Dinner

A quick and easy skillet dinner featuring crispy-skinned chicken thighs in a rich garlic butter sauce, perfect for busy weeknights and picky eaters.
- Prep Time: 5 minutes
- Cook Time: 15 minutes
- Total Time: 20 minutes
- Yield: 4 servings 1x
- Category: Main Course
- Cuisine: American
Ingredients
- 6–8 boneless, skin-on chicken thighs (about 1.5 lbs / 680g)
- 4 tablespoons unsalted butter (56g)
- 6–8 cloves garlic, minced
- 2 tablespoons olive oil (30ml)
- 1/2 cup chicken broth (120ml)
- 1 teaspoon dried oregano
- 1/2 teaspoon paprika
- Salt and black pepper to taste
- 2 tablespoons fresh parsley, chopped (for garnish)
- Lemon wedges (for serving)
Instructions
- Pat the chicken thighs dry with paper towels. Season both sides generously with salt, pepper, paprika, and dried oregano. Let sit at room temperature while prepping other ingredients.
- Heat a large skillet over medium-high heat and add olive oil. Wait until the oil is shimmering but not smoking (about 2 minutes).
- Place chicken thighs skin-side down in the hot skillet. Cook undisturbed for 4-5 minutes until skin is deep golden brown and crispy. Flip and cook for another 2-3 minutes on the other side until cooked through (internal temperature of 165°F / 74°C).
- Transfer chicken to a plate and tent loosely with foil. Let rest for 2 minutes.
- Reduce heat to medium-low. Add butter to the skillet, scraping up browned bits. Add minced garlic and cook for about 30 seconds, stirring constantly, until fragrant but not brown.
- Pour in chicken broth and bring to a gentle simmer. Cook for about 1 minute, stirring occasionally, until slightly thickened. Season with salt and pepper to taste.
- Return chicken thighs to the skillet, spooning garlic butter sauce over the top. Warm through for about 1 minute. Garnish with fresh parsley and serve immediately with lemon wedges.
Notes
Pat chicken very dry for crispy skin. Don’t crowd the pan; cook in batches if needed. Watch garlic carefully to avoid burning. For extra crispy skin, start chicken in a cold pan and let fat render slowly. Leftovers keep in the refrigerator for up to 3 days; reheat in a skillet with a splash of broth.
Nutrition
- Serving Size: 2 thighs per serving
- Calories: 400
- Sodium: 500
- Fat: 28
- Saturated Fat: 10
- Carbohydrates: 3
- Protein: 32
Keywords: garlic butter chicken thighs, easy skillet dinner, 20-minute meal, kid-friendly chicken, crispy chicken thighs, family dinner


