There used to be this tiny bakery tucked between a dry cleaner and a vintage shop on the corner of Elm and 4th. It was called The Gilded Whisk, and it made a gingerbread cheesecake bar that I still dream about. When they closed—suddenly, with a handwritten sign taped to the door one Tuesday morning—I honestly felt a little lost. That first bite of their bars was like winter in dessert form: spicy, creamy, and somehow light despite being so rich. After twelve tries—and one truly disastrous batch that tasted like a candle factory—I finally got it.
What I didn’t expect was that my version would end up being even better for my everyday life. You see, the original was a butter-and-cream-heavy indulgence that left me feeling sluggish. So I started playing around. I swapped in Greek yogurt for some of the cream cheese. I cut the sugar by a third and let the molasses do the heavy lifting. I even snuck in a little whole wheat flour. And you know what? The texture got creamier. The gingerbread flavor got bolder. My neighbor Karen, who has no filter, told me these were “dangerously good” and asked for the recipe. Maybe you’ve been there—chasing a food memory that feels just out of reach. I promise, this is the one worth chasing.
Why You’ll Love This Recipe
These Lightened-Up Gingerbread Cheesecake Bars are the kind of dessert that makes you forget you’re eating something better for you. I’ve tested this recipe at least seven times with different fat ratios, and this version hits the sweet spot between indulgence and everyday enjoyment.
- Quick & Easy : Comes together in about 30 minutes of active prep, then the oven does the rest. Perfect for holiday parties or a Tuesday night craving.
- Simple Ingredients : Nothing weird here—just pantry staples like molasses, cream cheese, and spices you probably already have.
- Perfect for the Holidays : Great for Thanksgiving dessert table, Christmas cookie swaps, or a cozy night in with a mug of tea.
- Crowd-Pleaser : My friend’s kids devoured these, and my dad (who hates “healthy desserts”) asked for seconds. That’s the ultimate test.
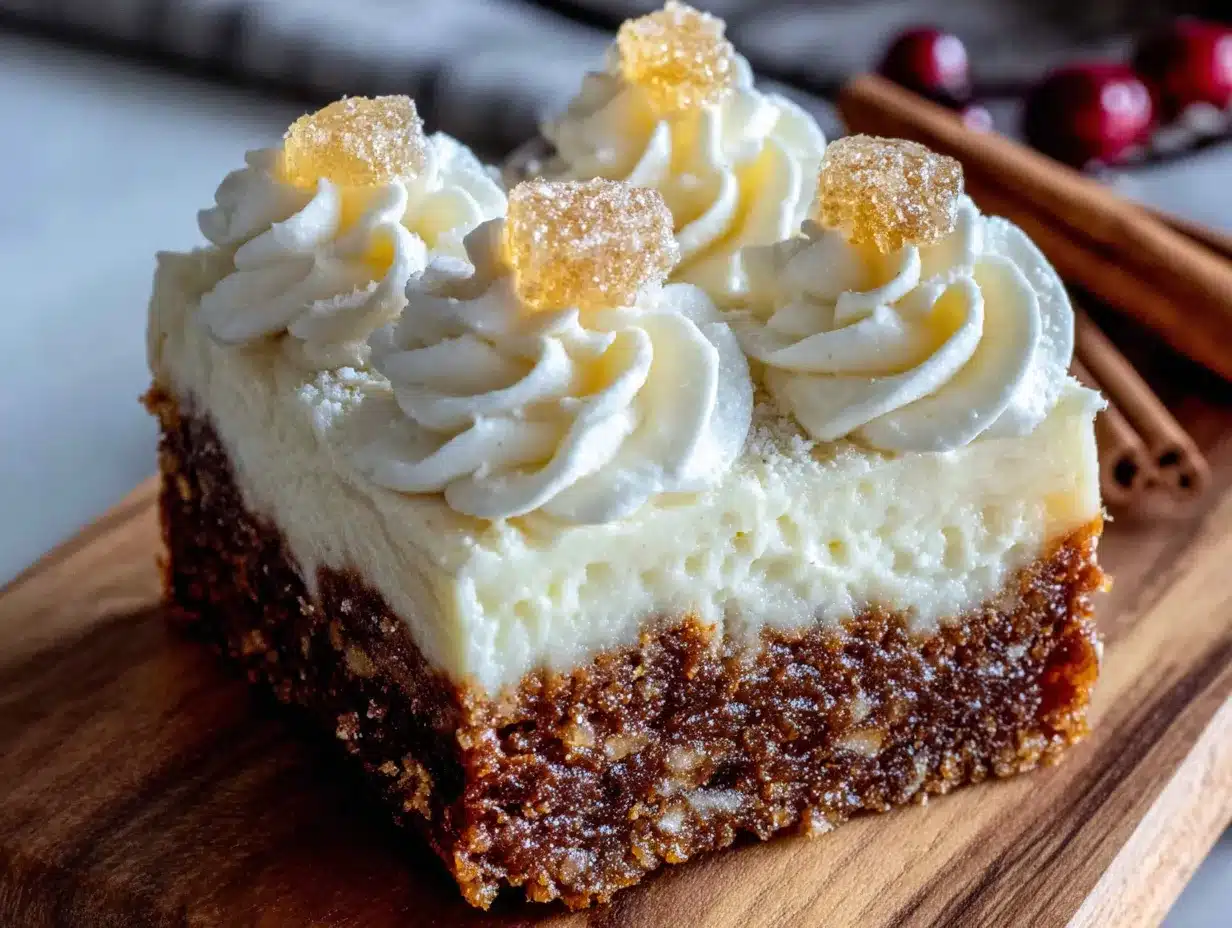
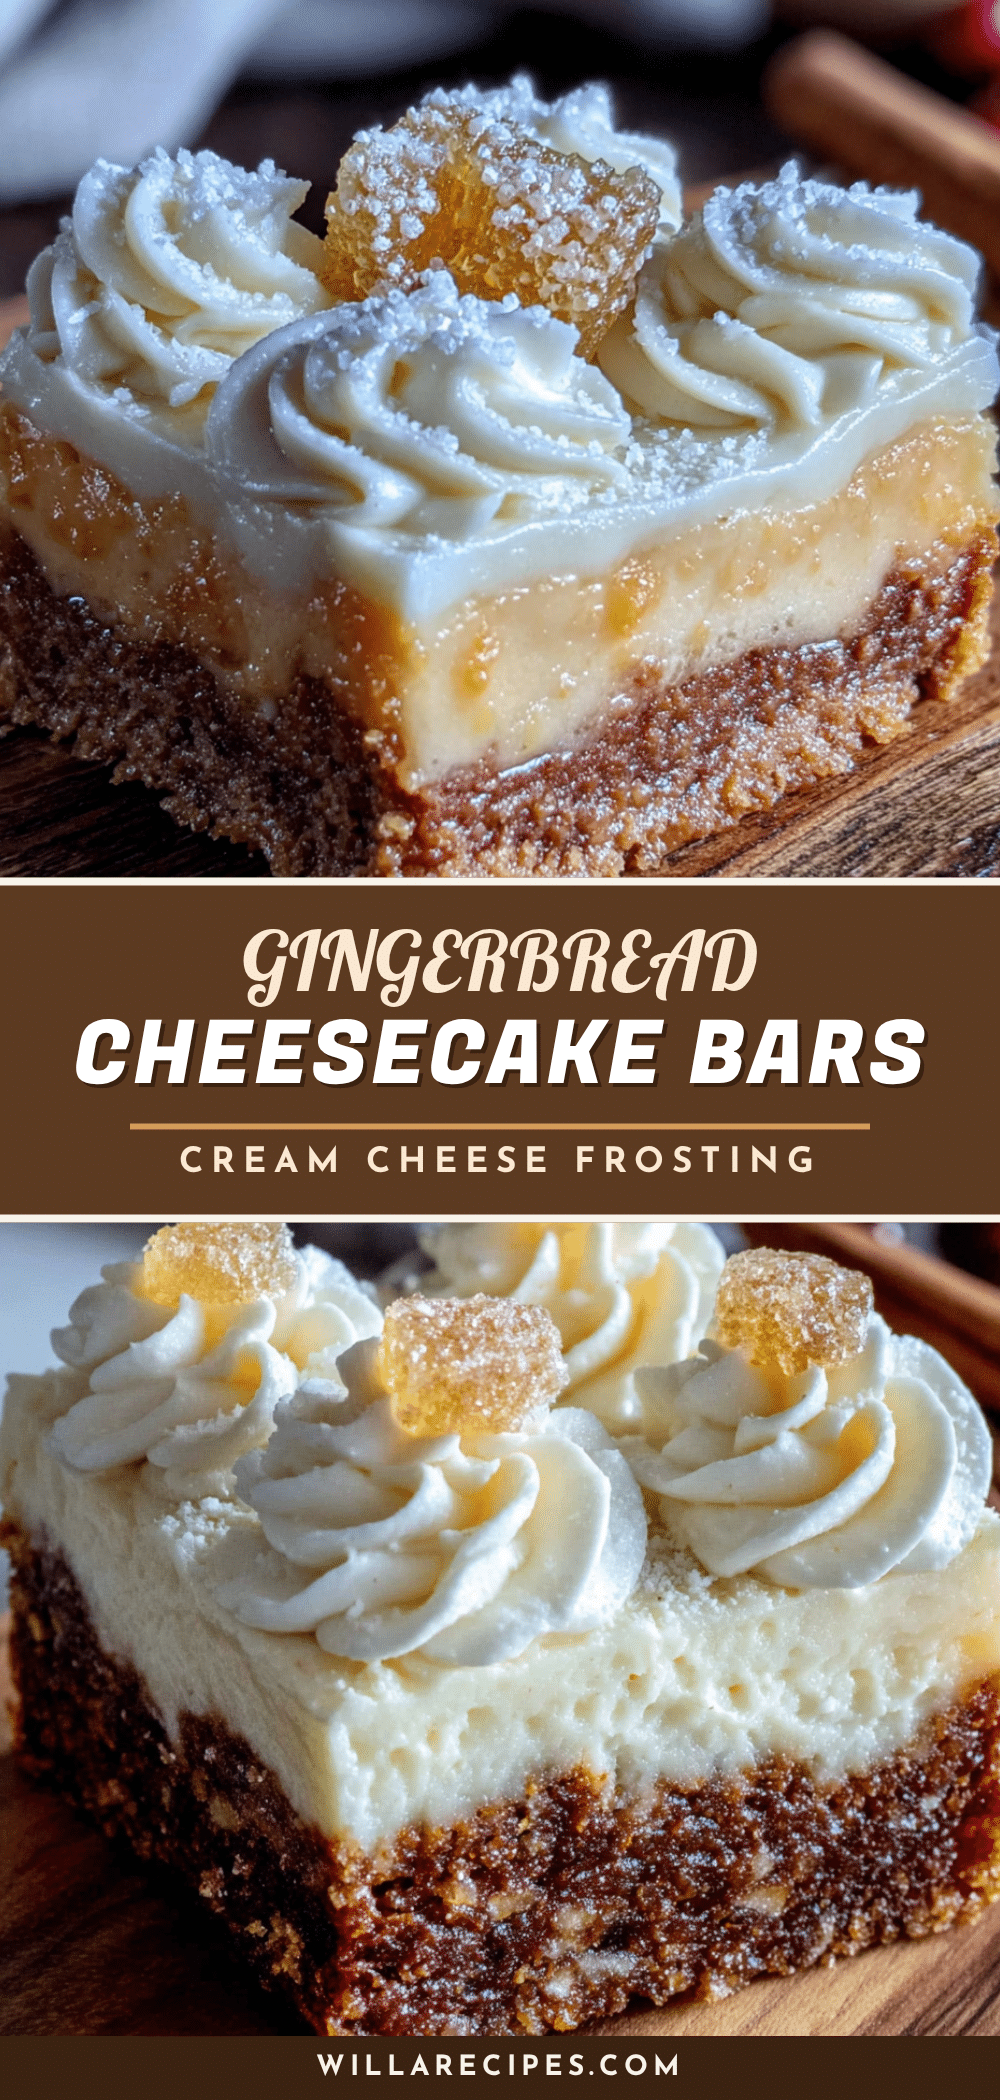
- Unbelievably Delicious : The texture is this perfect contrast—a crisp, spiced crust, a creamy cheesecake layer, and that tangy cream cheese frosting on top. It’s next-level comfort food without the food coma.
What makes these different from every other gingerbread cheesecake bar out there? It’s the balance. I use a combination of full-fat and reduced-fat cream cheese so you don’t lose that luscious mouthfeel. The gingerbread layer gets its deep flavor from fresh ginger and a little black pepper—trust me on that one. And the frosting? It’s lightened with a touch of Greek yogurt, but you’d never guess. This isn’t just another version. It’s the version I’ve been making for three years now, and I still get excited every time.
What Ingredients You Will Need
This recipe uses simple, wholesome ingredients to deliver that bold gingerbread flavor and creamy cheesecake texture without the usual heavy feeling. Most of these are pantry staples, but I’ve added a few notes to help you pick the best ones.
For the Crust
- 1 ½ cups (180g) ginger snap cookies, crushed (I prefer Nabisco for consistent texture)
- 2 tablespoons (30g) unsalted butter, melted
- 1 tablespoon (15ml) molasses (adds depth and helps bind)
- Pinch of salt
For the Gingerbread Cheesecake Layer
- 16 oz (450g) cream cheese, softened (use 8 oz full-fat and 8 oz reduced-fat for best results)
- ½ cup (100g) granulated sugar
- ¼ cup (50g) packed light brown sugar
- 2 large eggs, room temperature
- ¼ cup (60ml) molasses
- ¼ cup (60g) plain Greek yogurt (full-fat or 2% works best)
- 1 teaspoon vanilla extract
- 1 ½ teaspoons ground ginger
- 1 teaspoon ground cinnamon
- ½ teaspoon ground cloves
- ¼ teaspoon ground nutmeg
- ¼ teaspoon black pepper (this is my secret ingredient—trust me)
- Pinch of salt
For the Cream Cheese Frosting
- 4 oz (113g) cream cheese, softened
- 2 tablespoons (30g) unsalted butter, softened
- 1 cup (120g) powdered sugar
- 1 tablespoon (15ml) plain Greek yogurt
- ½ teaspoon vanilla extract
- Pinch of salt
Ingredient Tips: Look for molasses that’s unsulphured—Grandma’s or Brer Rabbit are my go-to brands. For the ginger, freshly ground is ideal, but pre-ground works fine. If you only have full-fat cream cheese, that’s okay too; the yogurt will still lighten things up. And if you’re dairy-sensitive, you can use dairy-free cream cheese and yogurt, but the texture will be slightly less firm.
Equipment Needed
You don’t need a fancy kitchen for these bars, but a few specific tools make the process smoother. I’ve learned the hard way that using the wrong pan can ruin the texture.
- 9×9-inch baking pan (8×8 works too, but bars will be thicker and need a few extra minutes)
- Parchment paper (for easy lifting—don’t skip this or you’ll be scraping)
- Electric hand mixer or stand mixer (a whisk works but your arm will hate you)
- Food processor or zip-top bag (for crushing cookies—I use a bag and a rolling pin, very therapeutic)
- Mixing bowls (at least 2 medium-sized)
- Rubber spatula (for scraping every last bit of cheesecake batter)
- Offset spatula (optional but makes spreading the frosting so much easier)
- Measuring cups and spoons
Budget-friendly tip: No food processor? No problem. Put the ginger snaps in a zip-top bag, seal it, and go to town with a rolling pin or even a heavy skillet. It’s a great way to work out some frustration before baking.
Preparation Method
Let me walk you through this step by step. I’ve included all the little cues I wish someone had told me the first time.
- Preheat and prep. Preheat your oven to 350°F (175°C). Line your 9×9-inch pan with parchment paper, leaving an overhang on two opposite sides. This is your lifting handle later—don’t skip it.
- Make the crust. In a food processor or zip-top bag, crush the ginger snaps into fine crumbs. You should have about 1 ½ cups. Transfer to a bowl, add the melted butter, molasses, and salt. Stir until it looks like wet sand. Press this mixture firmly into the bottom of your prepared pan. Use the bottom of a glass to get it even. Bake for 8 minutes, then set aside to cool slightly. Your kitchen will smell incredible right about now.
- Start the cheesecake layer. In a large bowl, beat the softened cream cheese with an electric mixer on medium speed until smooth—about 2 minutes. Scrape the bowl. Add both sugars and beat for another 2 minutes until fluffy. Don’t overbeat or you’ll incorporate too much air, which can cause cracking.
- Add the wet ingredients. Add the eggs one at a time, beating on low after each just until combined. Then add the molasses, Greek yogurt, and vanilla. Mix on low until smooth. Scrape the bowl again.
- Add the spices. In a small bowl, whisk together the ginger, cinnamon, cloves, nutmeg, black pepper, and salt. Add to the cheesecake batter and mix on low until just combined. Taste a tiny bit—if you’re brave—to check the spice level. It should be warm and bold but not overpowering.
- Bake the cheesecake. Pour the batter over the crust and spread it even. Tap the pan on the counter a few times to release air bubbles. Bake at 350°F (175°C) for 32-38 minutes. The edges should be set but the center should still jiggle slightly when you gently shake the pan. That jiggle is your friend—it means a creamy texture. Overbaking leads to cracks.
- Cool completely. Let the bars cool in the pan on a wire rack for 1 hour. Then transfer to the refrigerator and chill for at least 4 hours, preferably overnight. This step is crucial—warm cheesecake is a mess. Cold cheesecake slices like a dream.
- Make the frosting. When the bars are fully chilled, make the frosting. Beat the softened cream cheese and butter together until smooth. Add the powdered sugar, Greek yogurt, vanilla, and salt. Beat on low until combined, then increase to medium for 1 minute until fluffy. Spread over the chilled bars using an offset spatula.
- Slice and serve. Use the parchment overhang to lift the entire block out of the pan. Slice into 16 squares. For clean cuts, wipe your knife between each slice. I use a chef’s knife, but a sharp serrated knife works too.
Cooking Tips & Techniques
I’ve made this recipe more times than I can count, and I’ve definitely learned a few things the hard way. Here’s what I wish I’d known from the start.
The room temperature rule is real. Cold cream cheese creates lumps that no amount of beating will fix. Leave it on the counter for 30-40 minutes before starting. Same goes for the eggs—warm eggs incorporate more smoothly into the batter. I’ve forgotten this step and ended up with a grainy texture. Don’t be like me.
Don’t skip the water bath alternative. Traditional cheesecake uses a water bath to prevent cracking. For these bars, I place a shallow pan of hot water on the lower oven rack while they bake. The steam keeps the oven moist and reduces the chance of cracks. It’s a game-changer I stumbled upon after my third cracked batch.
Watch the edges. The outer inch of the cheesecake will set faster than the center. If the edges start browning too much before the center is done, tent the pan loosely with foil for the last 10 minutes. This happened to me during a holiday baking marathon, and the foil saved the batch.
The jiggle test is your best friend. When you gently shake the pan, the center should wobble like Jell-O, not slosh like soup. If it’s sloshing, it needs more time. If it’s completely firm, it’s overbaked. That perfect jiggle means creamy, dreamy texture.
Chill time is non-negotiable. I know you’re impatient—I am too. But cutting into warm cheesecake bars is like trying to slice butter with a spoon. Four hours minimum in the fridge. Overnight is better. The flavors actually meld and deepen overnight. Trust the process.
Variations & Adaptations
One of the best things about this recipe is how flexible it is. I’ve tried several variations over the years, and they all turned out delicious in their own way.
Gluten-Free Version: Use gluten-free ginger snaps for the crust. I’ve tried this with Simple Mills brand and it worked beautifully. The texture is slightly more crumbly but still holds together. Just make sure your molasses and spices are certified gluten-free if that’s a concern.
Dairy-Free Adaptation: Swap the cream cheese for a high-quality dairy-free version (I like Kite Hill for its tang). Use coconut oil instead of butter in the crust, and use a dairy-free yogurt alternative. The texture will be slightly softer, so chill for an extra hour before slicing.
Pumpkin Spice Twist: During fall, I sometimes swap the gingerbread spices for a pumpkin spice blend and add ¼ cup of pumpkin puree to the cheesecake batter. Reduce the molasses to 2 tablespoons to balance the moisture. It’s like a pumpkin cheesecake bar with a gingerbread soul.
No-Frosting Option: If you want to cut down on sugar or just prefer a cleaner bar, skip the frosting entirely. Dust the tops with powdered sugar and a pinch of cinnamon before serving. My husband actually prefers them this way—he says the frosting distracts from the gingerbread flavor.
Spicy Ginger Kick: For those who love heat, add ½ teaspoon of finely grated fresh ginger to the cheesecake batter along with the ground spices. It adds a bright, zingy note that cuts through the richness beautifully. I tried this on a whim and now it’s my secret weapon.
Serving & Storage Suggestions
These bars are at their best when served cold or at cool room temperature. I like to take them out of the fridge about 15 minutes before serving to take the chill off slightly. The frosting softens just enough to be luscious without getting messy.
Presentation ideas: Slice into neat squares and arrange on a white platter for maximum contrast. Sprinkle a little cinnamon or crushed ginger snaps on top for texture. A dollop of whipped cream on the side never hurts, especially during the holidays.
What to serve with them: A cup of hot coffee or chai tea is the perfect pairing. The bitterness of coffee balances the sweetness of the bars. For a dessert spread, serve alongside a simple fruit salad or dark chocolate truffles. I once brought these to a Friendsgiving and they disappeared before the pumpkin pie.
Storage instructions: Store in an airtight container in the refrigerator for up to 5 days. The flavors actually get better on day two as the spices meld with the cheesecake. I’ve never had them last longer than 4 days in my house, but they should be fine for a full week.
Freezer tips: These freeze beautifully. Slice the bars, place them on a parchment-lined baking sheet, and freeze until solid (about 2 hours). Then transfer to a freezer-safe container with layers of parchment between them. They’ll keep for up to 3 months. Thaw in the refrigerator overnight before serving. The frosting stays perfectly creamy—I’ve tested this multiple times.
Reheating note: Don’t microwave these unless you want a puddle. If you prefer them slightly warm, let them sit at room temperature for 30 minutes. The texture stays intact and the spices become more aromatic.
Nutritional Information & Benefits
Here’s the honest breakdown for one bar (based on 16 servings). These numbers are estimates and will vary based on your specific ingredients.
| Nutrient | Amount per Bar |
|---|---|
| Calories | 215 |
| Total Fat | 12g |
| Saturated Fat | 7g |
| Cholesterol | 52mg |
| Sodium | 180mg |
| Total Carbohydrates | 24g |
| Dietary Fiber | 1g |
| Sugars | 18g |
| Protein | 4g |
Health highlights: The Greek yogurt adds protein and probiotics while reducing fat. Molasses is a good source of iron, calcium, and magnesium—surprising for a dessert ingredient. The ginger and cinnamon have anti-inflammatory properties, so you’re basically eating wellness bars. Okay, almost.
Dietary considerations: This recipe contains gluten, dairy, and eggs. For a gluten-free version, see the variations section. For dairy-free, use the adaptations mentioned above. These bars are lower in sugar than traditional cheesecake bars, with about 30% less sugar than standard recipes.
My perspective: I don’t believe in “guilt-free” desserts—that implies you should feel guilty in the first place. These bars are a treat, plain and simple. But they’re a treat that won’t leave you crashing an hour later. They satisfy that deep craving for something rich and spiced without the heaviness. That’s the sweet spot I was aiming for.
Conclusion
These Lightened-Up Gingerbread Cheesecake Bars have become my signature holiday dessert, and I’m honestly a little proud of that. They carry the memory of that little bakery on Elm Street, but they’ve evolved into something that fits my life now—busy, health-conscious, but still unwilling to compromise on flavor. The first time I made the final version, I sat down with a cup of coffee and took a bite. And I closed my eyes. That’s when I knew I’d gotten it right.
I hope you make these your own. Maybe you’ll add extra ginger like I do. Maybe you’ll skip the frosting and dust them with cinnamon. Maybe you’ll serve them at a holiday party and watch people’s faces light up. That’s the best part of cooking, honestly—sharing something that makes people feel good.
If you try these, I’d love to hear about it. Drop a comment below and tell me how they turned out, or if you made any fun variations. And if you’re looking for more holiday treats that won’t weigh you down, you might enjoy these healthy pumpkin bars or this lightened-up eggnog bread. Happy baking, friends!
Frequently Asked Questions
Can I make these bars ahead of time?
Absolutely. In fact, they’re better made a day ahead. The flavors deepen and the texture sets perfectly. Just prepare through step 7, chill overnight, then add the frosting and slice the next day.
Why did my cheesecake layer crack?
This usually happens from overbaking or overmixing. Make sure you stop beating once the ingredients are combined, and pull the bars out when the center still has a slight jiggle. The water bath trick I mentioned in the tips section really helps too.
Can I use store-bought ginger snaps for the crust?
Yes, and I actually prefer them. Homemade ginger cookies can be too soft for a crust. Nabisco or Anna’s ginger thins work perfectly. Just crush them into fine crumbs for the best texture.
How do I get clean slices?
Use a sharp knife and wipe it clean with a damp paper towel between each cut. I also recommend refrigerating the bars for at least 4 hours—overnight is even better. A warm cheesecake is a messy cheesecake.
Can I freeze these with the frosting on?
Yes, the frosting freezes beautifully. Just make sure the bars are fully chilled before freezing, and wrap them tightly in plastic wrap followed by foil. They’ll keep for up to 3 months. Thaw in the fridge overnight.
Pin This Recipe!
Lightened-Up Gingerbread Cheesecake Bars
These Lightened-Up Gingerbread Cheesecake Bars are the kind of dessert that makes you forget you’re eating something better for you. They combine a crisp, spiced crust, a creamy cheesecake layer, and a tangy cream cheese frosting for a next-level comfort food experience without the food coma.
- Prep Time: 30 minutes
- Cook Time: 32-38 minutes
- Total Time: 4 hours 30 minutes (including chilling)
- Yield: 16 servings 1x
- Category: Dessert
- Cuisine: American
Ingredients
- 1 ½ cups (180g) ginger snap cookies, crushed
- 2 tablespoons (30g) unsalted butter, melted
- 1 tablespoon (15ml) molasses
- Pinch of salt
- 16 oz (450g) cream cheese, softened (use 8 oz full-fat and 8 oz reduced-fat)
- ½ cup (100g) granulated sugar
- ¼ cup (50g) packed light brown sugar
- 2 large eggs, room temperature
- ¼ cup (60ml) molasses
- ¼ cup (60g) plain Greek yogurt (full-fat or 2%)
- 1 teaspoon vanilla extract
- 1 ½ teaspoons ground ginger
- 1 teaspoon ground cinnamon
- ½ teaspoon ground cloves
- ¼ teaspoon ground nutmeg
- ¼ teaspoon black pepper
- Pinch of salt
- 4 oz (113g) cream cheese, softened
- 2 tablespoons (30g) unsalted butter, softened
- 1 cup (120g) powdered sugar
- 1 tablespoon (15ml) plain Greek yogurt
- ½ teaspoon vanilla extract
- Pinch of salt
Instructions
- Preheat your oven to 350°F (175°C). Line your 9×9-inch pan with parchment paper, leaving an overhang on two opposite sides.
- In a food processor or zip-top bag, crush the ginger snaps into fine crumbs. Transfer to a bowl, add the melted butter, molasses, and salt. Stir until it looks like wet sand. Press this mixture firmly into the bottom of your prepared pan. Bake for 8 minutes, then set aside to cool slightly.
- In a large bowl, beat the softened cream cheese with an electric mixer on medium speed until smooth—about 2 minutes. Scrape the bowl. Add both sugars and beat for another 2 minutes until fluffy.
- Add the eggs one at a time, beating on low after each just until combined. Then add the molasses, Greek yogurt, and vanilla. Mix on low until smooth. Scrape the bowl again.
- In a small bowl, whisk together the ginger, cinnamon, cloves, nutmeg, black pepper, and salt. Add to the cheesecake batter and mix on low until just combined.
- Pour the batter over the crust and spread it even. Tap the pan on the counter a few times to release air bubbles. Bake at 350°F (175°C) for 32-38 minutes. The edges should be set but the center should still jiggle slightly when you gently shake the pan.
- Let the bars cool in the pan on a wire rack for 1 hour. Then transfer to the refrigerator and chill for at least 4 hours, preferably overnight.
- When the bars are fully chilled, make the frosting. Beat the softened cream cheese and butter together until smooth. Add the powdered sugar, Greek yogurt, vanilla, and salt. Beat on low until combined, then increase to medium for 1 minute until fluffy. Spread over the chilled bars using an offset spatula.
- Use the parchment overhang to lift the entire block out of the pan. Slice into 16 squares. For clean cuts, wipe your knife between each slice.
Notes
The room temperature rule is real. Cold cream cheese creates lumps. Leave it on the counter for 30-40 minutes before starting. Don’t skip the water bath alternative: place a shallow pan of hot water on the lower oven rack while baking to prevent cracking. Watch the edges; if they start browning too much, tent the pan loosely with foil for the last 10 minutes. The jiggle test is your best friend—the center should wobble like Jell-O. Chill time is non-negotiable; 4 hours minimum, overnight is better. For clean slices, use a sharp knife and wipe it clean between each cut.
Nutrition
- Serving Size: 1 bar
- Calories: 215
- Sugar: 18
- Sodium: 180
- Fat: 12
- Saturated Fat: 7
- Carbohydrates: 24
- Fiber: 1
- Protein: 4
Keywords: gingerbread cheesecake bars, lightened-up cheesecake, holiday dessert, gingerbread dessert, cream cheese bars, healthy cheesecake


