My niece Lily asked me last October why we couldn’t just use yogurt instead of pudding for the Halloween dirt cups. I started to explain why that wouldn’t work — then stopped. Honestly, I had no good reason except that I’d always done it the other way. She was eight and had just watched me wrestle with a box of instant pudding mix, and she pointed out that the yogurt was right there in the fridge. I sighed, grabbed a spoon, and told her fine — we’d try it her way, but I wasn’t promising anything.
The first batch came together in about four minutes. Lily stirred the crushed Oreos into the yogurt with way too much enthusiasm — some of it ended up on the counter, let me tell you — and we layered them into little cups. She was the one who insisted on adding the gummy worms sticking out like they were escaping. I stood there watching her arrange them with total seriousness, and I thought, this is probably going to taste weird. It didn’t. The texture was lighter, the sweetness was more balanced, and honestly? I liked it better than the original.
Maybe you’ve been there — stuck on a recipe that everyone expects, afraid to mess with it. That’s exactly where I was. But that afternoon taught me something I keep coming back to: sometimes the best version of a classic comes from letting someone who doesn’t know the “rules” show you a new way. These lightened-up Halloween dirt cups are exactly that. They’re creamy, crunchy, a little bit spooky, and they come together in five minutes flat. I’ve made them three times since that day, and every time I do, I think about how wrong I was to doubt her.
Why You’ll Love This Recipe
These lightened-up Halloween dirt cups aren’t just a healthier version of the classic — they’re genuinely better. I’ve tested this with a dozen different people now, from my sister-in-law who swears by full-fat everything to my neighbor who’s been doing Whole30 for two years. Every single person went back for seconds. Here’s what makes them stand out:
- Quick and Easy : Five minutes from start to finish. No kidding. You don’t even need to turn on the stove.
- Simple Ingredients : Greek yogurt, Oreos, and gummy worms. That’s it. No pudding mix, no milk, no extra sugar.
- Perfect for Halloween : Kids love assembling them, and they look adorable on any party table. Great for classroom treats or spooky movie nights.
- Crowd-Pleaser : Even people who say they don’t like yogurt end up scraping the cup clean. The texture fools everyone.
- Unbelievably Delicious : The yogurt gets creamy and thick, the Oreos add that signature crunch, and the gummy worms bring the fun. It’s comfort food that doesn’t leave you feeling heavy.
What makes this recipe different from every other dirt cup out there is the yogurt swap. Most versions use instant pudding made with whole milk, which adds a ton of sugar and a heavy texture. Greek yogurt gives you protein, tanginess, and that same creamy consistency without the guilt. I use Fage 2% for the thickest result, but any plain Greek yogurt works. You won’t miss the pudding — I promise. This is comfort food reimagined: lighter, faster, and somehow even more satisfying. Perfect for impressing your kid’s classmates without spending hours in the kitchen.
What Ingredients You Will Need
This recipe uses just three main ingredients, plus a couple optional extras if you want to get fancy. Everything is a pantry staple or an easy grab from any grocery store. Here’s what you need:
For the Creamy Base
- 2 cups plain Greek yogurt (I prefer Fage 2% for thickness, but Chobani works too — just avoid nonfat, it gets too runny)
- 2 tablespoons honey or maple syrup (optional, if you want a little extra sweetness — I usually skip it because the Oreos add plenty)
- 1 teaspoon vanilla extract (adds warmth and rounds out the tanginess)
For the “Dirt”
- 12 chocolate sandwich cookies (Oreos are the classic, but any chocolate cream cookie works — I’ve used the store brand and it’s fine)
- 2 tablespoons unsalted butter, melted (optional — this helps the crumbs clump together for a more realistic dirt texture)
For the Spooky Decorations
- 12-15 gummy worms (the sour ones add a nice tangy contrast, but regular ones work too)
- Optional: candy eyeballs, small pumpkin candies, or sprinkles for extra flair
Ingredient Selection Tips
Look for Greek yogurt that’s thick and creamy — I’ve noticed the European-style brands tend to be denser. If your yogurt seems watery, strain it through a cheesecloth for 10 minutes before using. For the cookies, you can use regular Oreos or the Double Stuf version — either works, but Double Stuf adds a little more sweetness. If you’re making these for a classroom party, check the gummy worm package for common allergens like gelatin or artificial dyes. Some brands offer vegan gummy worms if that’s a concern.
Substitution Guidance
Use dairy-free coconut yogurt for a vegan version — just make sure it’s thick and plain. For a gluten-free option, use gluten-free chocolate sandwich cookies (they’re available at most health food stores now). You can also swap the honey with agave or stevia if you’re watching sugar intake. The recipe is super forgiving.
Equipment Needed
You don’t need much for this one. Here’s the short list:
- Small mixing bowl (for crushing the cookies — I use a ceramic bowl, but metal or glass works fine)
- Fork or spoon (for mashing — or you can use a food processor if you want super fine crumbs)
- 4 small cups or glasses (clear plastic cups look best for showing off the layers, but any small container works — I’ve used mason jars and even shot glasses for mini versions)
- Measuring cups and spoons (eyeballing is fine for this recipe, but measuring helps with consistency)
- Ziploc bag (optional — if you want to crush the cookies without making a mess, seal them in a bag and smash with a rolling pin. Works great and contains the mess)
I’ve made these dirt cups using just a fork and a coffee mug before — it’s that flexible. If you’re making a big batch for a party, a food processor speeds things up considerably. For the cups themselves, I found a pack of 6-ounce clear plastic cups at the dollar store that work perfectly. Just wash and reuse them if you’re feeling eco-conscious.
Preparation Method
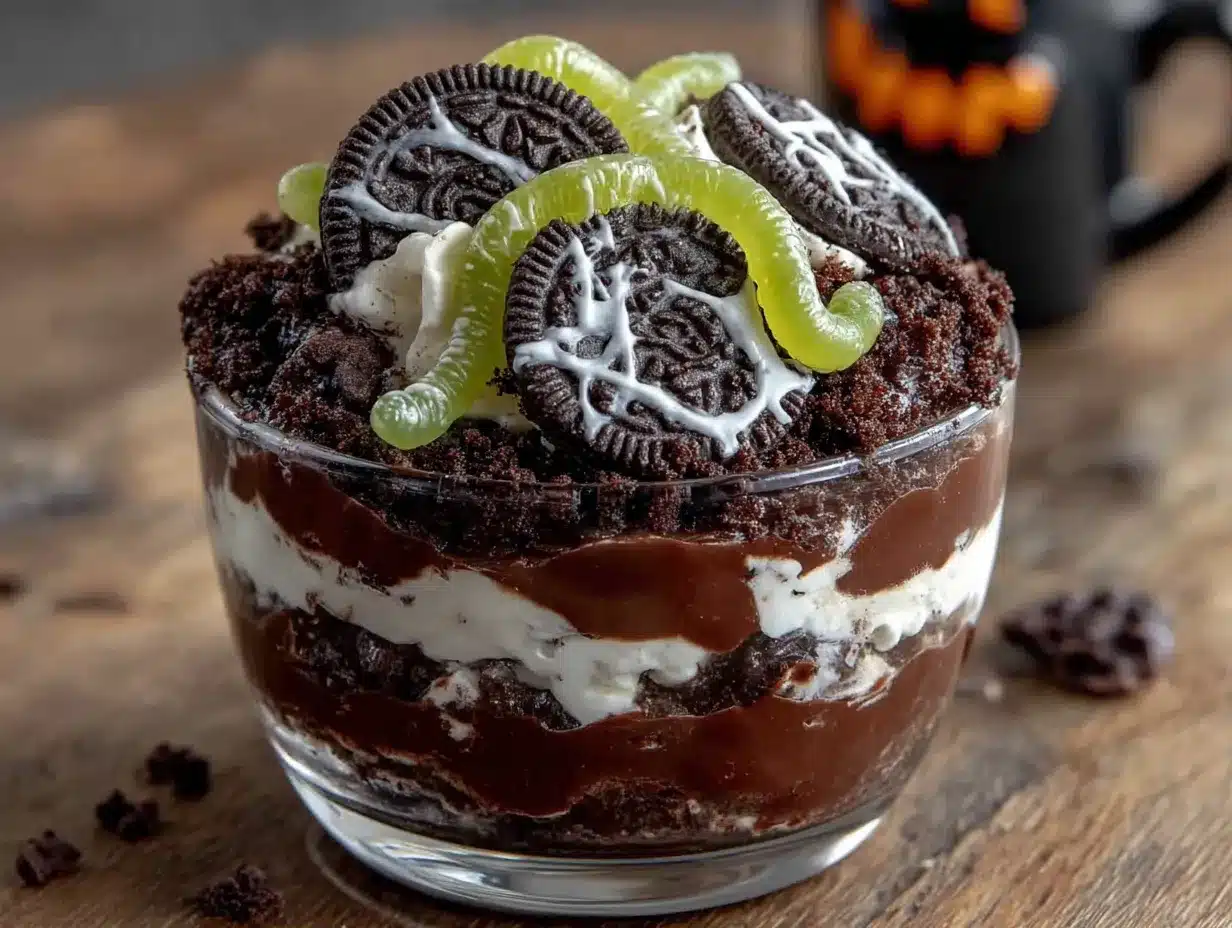
- Crush the cookies (2 minutes)
Place the chocolate sandwich cookies in a ziploc bag and seal it tight. Use a rolling pin or the bottom of a heavy pan to crush them into small crumbs. You want a mix of fine powder and tiny chunks — not completely dust, because the texture is part of the fun. If you’re using a food processor, pulse 4-5 times and check the consistency. I personally like leaving a few bigger pieces for that authentic “dirt” look.
- Mix the yogurt base (1 minute)
Spoon the Greek yogurt into a medium bowl. Add the vanilla extract and honey if you’re using it. Stir until everything is combined and smooth. Taste it — if you want it sweeter, add a little more honey. If you’re using plain yogurt, don’t skip the vanilla; it makes a big difference in flavor. The mixture should be thick enough to hold its shape when you spoon it.
- Layer the cups (2 minutes)
Start with a spoonful of cookie crumbs at the bottom of each cup — about 1 tablespoon each. Then add a layer of yogurt, filling the cup about halfway. Add another thin layer of crumbs, then more yogurt until the cup is almost full. You want at least three layers total for the best visual effect. Leave about half an inch at the top for the final crumb layer.
- Add the worms and top crumbs (30 seconds)
Press a gummy worm into the top of each cup so it looks like it’s crawling out. Stick it in at an angle — straight up and down looks too neat. Sprinkle the remaining cookie crumbs over the top, covering the yogurt completely. If you want, add a second worm poking out from the side. I’ve found that two worms per cup is the sweet spot for visual appeal without overwhelming the texture.
- Chill and serve (optional but recommended)
Pop the cups in the fridge for at least 15 minutes before serving. This helps the flavors meld and the yogurt firm up a bit. If you’re serving them immediately, they’re still delicious — just a little softer. For parties, I make them the night before and keep them covered in the fridge. The cookies soften slightly overnight, which actually makes the texture more like real dirt. Don’t leave them more than 24 hours, though, or the gummy worms start getting weirdly hard.
Cooking Tips & Techniques
Here’s the thing about these lightened-up Halloween dirt cups — they’re almost impossible to mess up, but a few small tricks make them truly great. I learned most of these the hard way, usually when I was rushing and something went slightly wrong.
Don’t over-crush the cookies. I made this mistake the first time I tried using a food processor. I let it run for 30 seconds and ended up with chocolate dust. The problem is that dust doesn’t look like dirt — it looks like cocoa powder. You want visible chunks. Pulse, check, pulse again. If you’re doing it by hand, stop when you can still see small pieces of cookie.
Use full-fat or 2% Greek yogurt. I know, I know — the whole point is lightened-up. But nonfat Greek yogurt is too thin and watery for this recipe. The layers will bleed into each other and you’ll end up with a grayish mess. Trust me, I’ve done it. The 2% version has enough fat to stay thick and creamy, and the calorie difference is minimal. If you absolutely must use nonfat, strain it through a cheesecloth for 20 minutes first.
Warm the honey slightly. If you’re adding honey, microwave it for 10 seconds before mixing it into the yogurt. Cold honey doesn’t incorporate well — you’ll end up with little sticky blobs that are impossible to distribute evenly. Warm honey slides right in.
Make it a multitasker. While you’re crushing the cookies, let the yogurt sit out on the counter for 5 minutes. Room-temperature yogurt mixes more smoothly and tastes creamier. It’s a small thing, but it makes a difference.
Watch the worms. Gummy worms vary wildly in size. The long, thin ones work best for poking out of the top. The fat, stubby ones are better for hiding inside the layers. If you only have fat ones, cut them in half lengthwise before using.
Variations & Adaptations
One of the best things about this recipe is how easy it is to change up. Here are some variations I’ve tried and loved:
Vegan Version
Use a thick coconut-based yogurt (I like Culina or So Delicious) and vegan chocolate sandwich cookies. Most store-brand cookies are accidentally vegan, actually — check the label. For the gummy worms, look for brands that use pectin instead of gelatin. They’re becoming much easier to find. The texture is slightly different — coconut yogurt is a little thinner — but the taste is still fantastic.
Peanut Butter Cup Version
Add a layer of peanut butter between the yogurt and the cookie crumbs. Use 1 tablespoon of creamy peanut butter per cup, spread it thin. Top with crushed peanut butter cookies instead of regular Oreos. This version is richer and more decadent, but still lighter than the original. I made this for a friend’s Halloween party and it was the first thing to disappear.
Berry Swirl Version
Swirl in 2 tablespoons of raspberry jam or strawberry preserves into the yogurt before layering. The tartness of the berries cuts through the sweetness of the cookies beautifully. It also adds a nice red streak that looks like blood — very Halloween-appropriate. Use seedless jam for a smoother texture, or leave the seeds in for authenticity.
Pumpkin Spice Version
Mix 1/4 cup pumpkin puree and 1/2 teaspoon pumpkin pie spice into the yogurt before layering. Use ginger snaps instead of Oreos for the crumb layer. This tastes like fall in a cup and works great for Thanksgiving parties too. The pumpkin adds extra creaminess and a beautiful orange color.
Serving & Storage Suggestions
These lightened-up Halloween dirt cups are best served cold, straight from the fridge. The contrast between the cool yogurt and the crunchy cookie crumbs is part of what makes them so satisfying. I like to serve them in clear cups so everyone can see the layers — it’s half the fun.
Presentation Ideas
For a Halloween party, arrange the cups on a black platter or a tray lined with fake spiderwebs. Add a few extra gummy worms scattered around for drama. You can also stick a small plastic spider or bat on the edge of each cup for an extra spooky touch. If you’re serving them at a school party, write each kid’s name on the cup with a permanent marker to avoid confusion.
What to Serve With Them
These dirt cups pair well with other Halloween treats like pumpkin muffins or apple cider donuts. For drinks, try warm apple cider or a simple hot chocolate. If you’re serving adults, a cinnamon-spiced latte works beautifully. The lightness of the yogurt makes them a good palate cleanser after heavier party foods like pizza or chili.
Storage Instructions
Cover the cups with plastic wrap or transfer them to an airtight container. They’ll keep in the refrigerator for up to 3 days. The cookie crumbs will soften over time, which some people actually prefer — it creates a more uniform texture. If you want to keep the crunch, store the crushed cookies separately and add them just before serving.
Reheating
You don’t need to reheat these — they’re meant to be served cold. If you’ve stored them and the yogurt seems too firm, let them sit at room temperature for 5-10 minutes before serving. The flavors actually develop and deepen after a day in the fridge. I’ve found they taste even better on day two.
Freezer Notes
I don’t recommend freezing these. The yogurt gets icy and separates when thawed, and the gummy worms turn into rock-hard candy. If you need to make them ahead, just keep them refrigerated.
Nutritional Information & Benefits
Here’s the nutritional breakdown for one serving (based on 4 cups using 2% Greek yogurt and regular Oreos):
| Nutrient | Amount |
|---|---|
| Calories | 210 |
| Protein | 12g |
| Carbohydrates | 28g |
| Fat | 7g |
| Saturated Fat | 3g |
| Fiber | 1g |
| Sugar | 16g |
| Sodium | 180mg |
The real star here is the protein. Each serving has 12 grams from the Greek yogurt, which is more than double what you’d get from traditional pudding-based dirt cups. That protein helps keep you full and satisfied, so you’re less likely to reach for a second one. The calcium from the yogurt is also great for bone health.
Compared to a traditional dirt cup made with instant pudding and whole milk, this version saves you about 150 calories and 10 grams of sugar per serving. That’s a big difference, especially if you’re serving these to kids. The cookies and gummy worms still add sugar, of course — this isn’t a health food. But it’s a smarter choice that doesn’t sacrifice any of the fun.
If you’re watching your sugar intake, use the honey sparingly or skip it altogether. The Oreos provide plenty of sweetness on their own. For a lower-carb option, use sugar-free chocolate sandwich cookies and plain Greek yogurt with no added sweetener.
Conclusion
These lightened-up Halloween dirt cups have become my go-to for every fall gathering, and I honestly can’t imagine going back to the pudding version. They’re faster, lighter, and somehow more satisfying — that tangy yogurt against the sweet, crunchy Oreos is a combination I didn’t know I needed. Every time I make them, I think about Lily standing on a stool in my kitchen, covered in cookie dust, telling me her idea like it was the most obvious thing in the world.
I hope you give these a try, and I hope you customize them until they feel like yours. Swap in different cookies, try a new yogurt flavor, add sprinkles or candy corn or whatever makes you smile. That’s the whole point of a recipe like this — it’s a starting point, not a rulebook. If you make them, I’d love to hear how they turned out. Drop a comment below and tell me what variations you tried, or tag me in your photos. And if you have your own story about being proven wrong by a kid in the kitchen, I’d love to hear that too.
Happy Halloween, friends. Go make some dirt.
Frequently Asked Questions
Can I make these dirt cups ahead of time?
Yes! You can assemble them up to 24 hours in advance. Just keep them covered in the refrigerator. The cookie crumbs will soften slightly, which some people actually prefer. If you want to keep the crunch, store the crushed cookies separately and add them just before serving.
Can I use flavored yogurt instead of plain?
Absolutely. Vanilla Greek yogurt works great and adds extra sweetness. You can also use honey-flavored or even strawberry yogurt for a different twist. Just keep in mind that flavored yogurts have more sugar, so adjust your sweetener accordingly.
What if I don’t have clear cups?
No problem at all. Any small bowl, glass, or even a mason jar works. The clear cups just make the layers visible, which adds to the Halloween fun. If you’re using opaque containers, consider adding a label or a fun Halloween sticker to dress them up.
Can I freeze these for later?
I don’t recommend freezing them. The Greek yogurt gets icy and separates when thawed, and the gummy worms turn into hard candy. These are best enjoyed fresh from the refrigerator within 3 days of making them.
Are these safe for kids with nut allergies?
Generally yes, but always check the labels on your specific brands. Oreos are made in a facility that processes peanuts, so if you’re concerned, look for a nut-free certified brand. The yogurt and honey are typically nut-free, but again, check the packaging to be safe. Gummy worms may be processed on shared equipment, so read labels carefully.
Pin This Recipe!
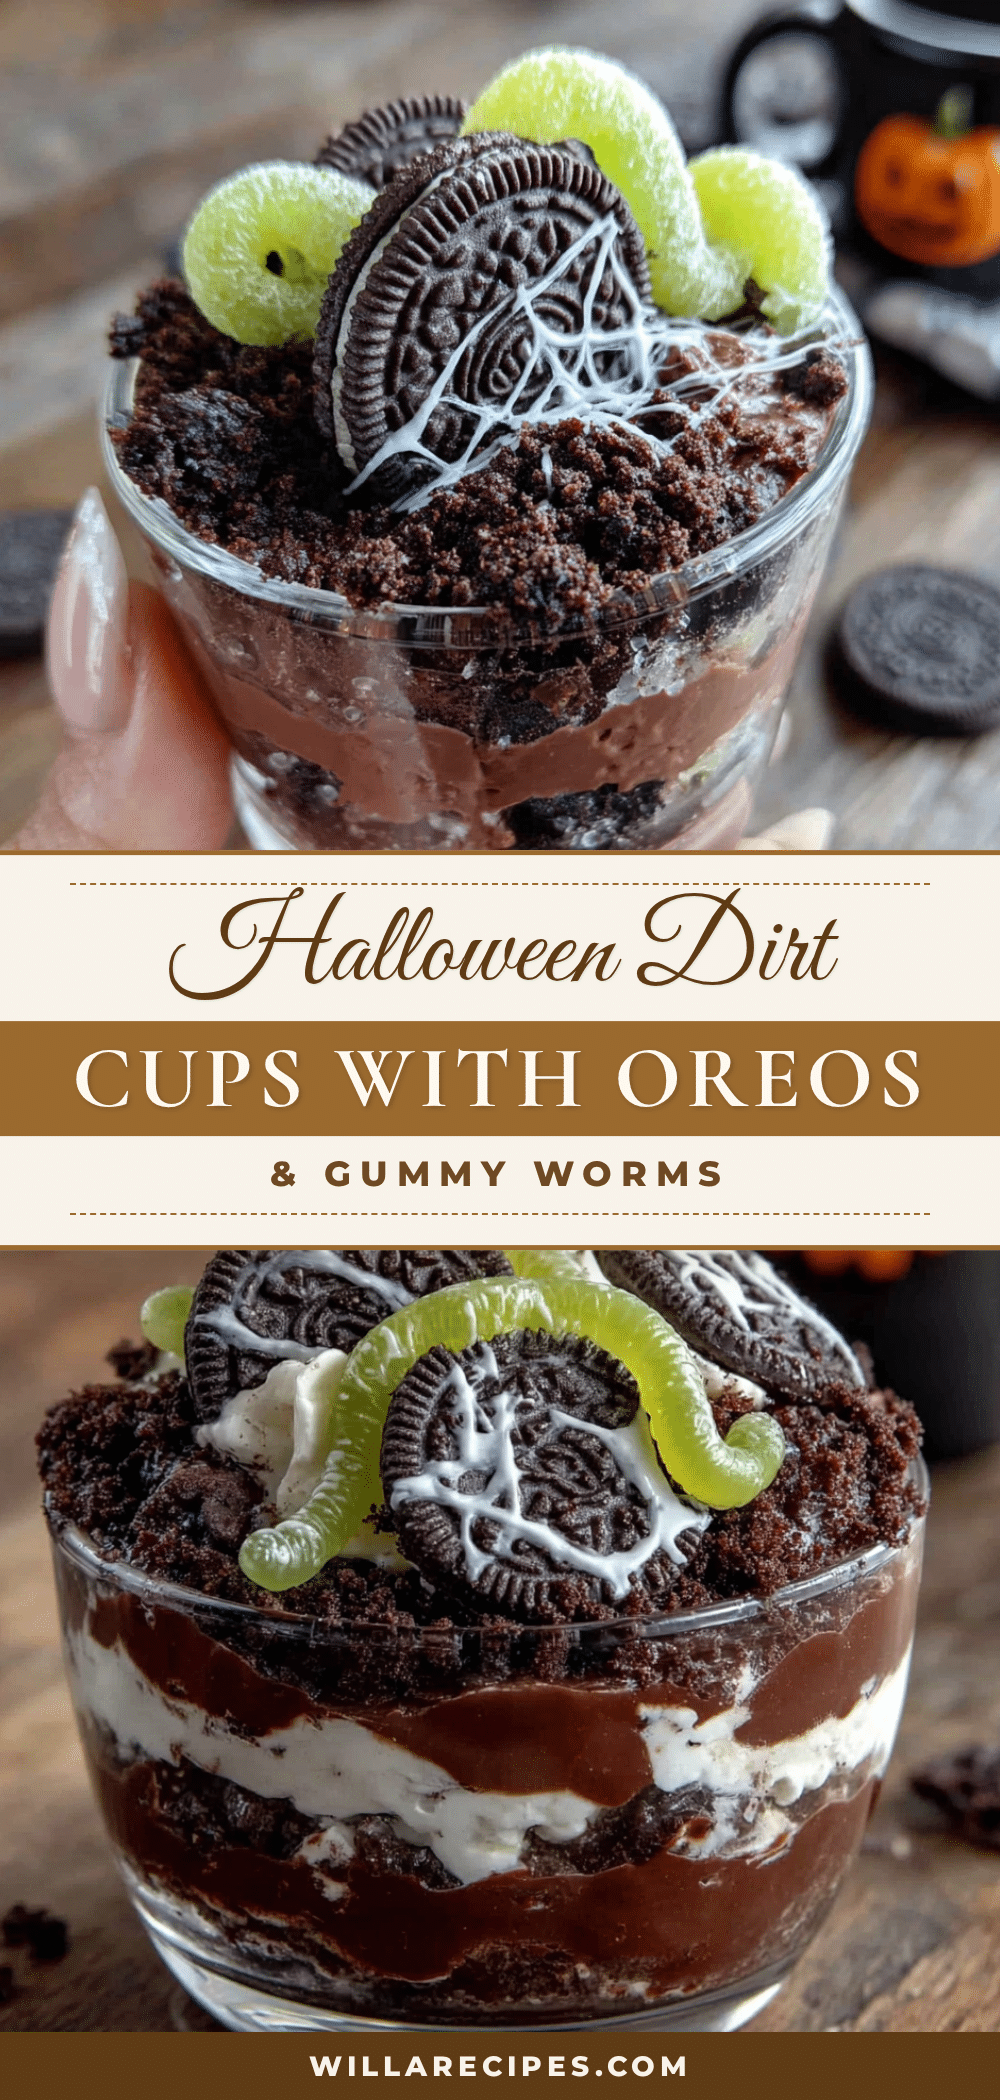
Lightened-Up Halloween Dirt Cups: Easy 5-Minute Dessert
These lightened-up Halloween dirt cups are a healthier twist on the classic dessert, made with Greek yogurt, crushed Oreos, and gummy worms. They come together in just five minutes and are perfect for Halloween parties or spooky movie nights.
- Prep Time: 5 minutes
- Cook Time: 0 minutes
- Total Time: 5 minutes
- Yield: 4 servings 1x
- Category: Dessert
- Cuisine: American
Ingredients
- 2 cups plain Greek yogurt (preferably 2% or full-fat)
- 2 tablespoons honey or maple syrup (optional)
- 1 teaspoon vanilla extract
- 12 chocolate sandwich cookies (e.g., Oreos)
- 2 tablespoons unsalted butter, melted (optional)
- 12–15 gummy worms
- Optional: candy eyeballs, small pumpkin candies, or sprinkles
Instructions
- Crush the cookies: Place the chocolate sandwich cookies in a ziploc bag and seal it tight. Use a rolling pin or the bottom of a heavy pan to crush them into small crumbs. You want a mix of fine powder and tiny chunks. Alternatively, pulse in a food processor 4-5 times.
- Mix the yogurt base: Spoon the Greek yogurt into a medium bowl. Add the vanilla extract and honey (if using). Stir until everything is combined and smooth. Taste and adjust sweetness if desired.
- Layer the cups: Start with a spoonful of cookie crumbs at the bottom of each cup (about 1 tablespoon). Add a layer of yogurt, filling the cup about halfway. Add another thin layer of crumbs, then more yogurt until the cup is almost full. Leave about half an inch at the top for the final crumb layer.
- Add the worms and top crumbs: Press a gummy worm into the top of each cup at an angle so it looks like it’s crawling out. Sprinkle the remaining cookie crumbs over the top, covering the yogurt completely. Add a second worm if desired.
- Chill and serve: Refrigerate the cups for at least 15 minutes before serving to allow the flavors to meld. For best results, make them the night before and keep covered in the fridge. Serve cold.
Notes
For a vegan version, use dairy-free coconut yogurt and vegan chocolate sandwich cookies. For gluten-free, use gluten-free chocolate sandwich cookies. If using nonfat yogurt, strain it through a cheesecloth for 20 minutes to avoid watery layers. Warm the honey slightly before mixing for easier incorporation. Store covered in the refrigerator for up to 3 days; do not freeze.
Nutrition
- Serving Size: 1 cup
- Calories: 210
- Sugar: 16
- Sodium: 180
- Fat: 7
- Saturated Fat: 3
- Carbohydrates: 28
- Fiber: 1
- Protein: 12
Keywords: Halloween dirt cups, lightened-up dessert, Greek yogurt dessert, no-bake dessert, easy Halloween treat, 5-minute dessert


