My neighbor Sarah wasn’t trying to impress anyone. I’d stopped by to borrow a mixing bowl on a random Tuesday afternoon, and the smell of warm peanut butter and chocolate hit me before I even knocked. She answered the door with flour on her cheek and a cookie sheet in her hand, completely unfazed by the fact that she’d just created something that smelled like heaven.
“Oh, these are just peanut butter blossoms,” she said, shrugging like it was nothing. “I make them all the time.”
I took one bite standing in her kitchen, and honestly, I almost asked for the recipe before I’d even finished chewing. They were soft, perfectly peanut-buttery, and topped with that iconic Hershey Kiss that makes everything better. But here’s the thing — Sarah also happens to be a nutritionist. When I asked her how she made them taste so good without feeling guilty afterward, she smiled and said, “I have my tricks.”
So I did what any reasonable person would do. I watched her make them again the next week, took notes, and then spent the next month tweaking and testing until I got it just right. These lighter peanut butter blossom cookies with Hershey Kiss are the result of that obsession. They’ve got all the nostalgia of the classic cookie — the soft peanut butter base, the melty chocolate center — but with simple swaps that make them feel a little better for you. Maybe you’ve been there, looking for a cookie that satisfies that craving without derailing your week. These are it.
I’ve been making them for birthdays, bake sales, and random Tuesdays ever since. They never last long.
Why You’ll Love This Recipe
These aren’t just another peanut butter blossom cookie. They’re the version I actually feel good about eating for breakfast with my coffee — not that I’m judging if you do that too. Here’s what makes them special:
- Quick & Easy: From mixing bowl to cooling rack in under 30 minutes. No chilling, no complicated steps, no stress.
- Simple Ingredients: You probably have everything in your pantry right now. No weird health-food store trips required.
- Perfect for Everyday: They work for after-school snacks, office treats, or a quiet night in with a cup of tea.
- Crowd-Pleaser: I’ve served these to kids, grandparents, and my picky cousin who “doesn’t like healthy cookies.” They disappear every single time.
- Unbelievably Delicious: The texture is soft and tender, the peanut butter flavor is front and center, and that chocolate kiss on top? Pure magic.
What makes these different from every other peanut butter blossom recipe out there is the balance. I tested them with whole wheat pastry flour, a touch less sugar, and a clever swap that keeps them moist without needing a stick of butter. The result is a cookie that tastes indulgent but doesn’t leave you feeling heavy. It’s the kind of cookie that makes you close your eyes after the first bite — and then reach for another one without guilt.
What Ingredients You Will Need
This recipe uses simple, wholesome ingredients to deliver that classic peanut butter blossom flavor without the fuss. Most of these are pantry staples, which makes these cookies perfect for spontaneous baking sessions.
For the Cookie Dough
- Creamy peanut butter — ½ cup (130g). I recommend using a natural, no-stir variety like Skippy Natural or Jif Natural. Avoid the oily, separated kind here — it can make the cookies too greasy.
- Unsalted butter — ¼ cup (56g), softened. This is one of the places we cut back. Using less butter than traditional recipes keeps the cookies lighter while the peanut butter does the heavy lifting for flavor.
- Granulated sugar — ⅓ cup (66g). We’re using less sugar than classic recipes, but it’s still enough to give the cookies structure and sweetness.
- Light brown sugar — ¼ cup (50g), packed. Adds moisture and a hint of molasses flavor that pairs beautifully with peanut butter.
- Large egg — 1, room temperature. Helps bind everything together. If you’re in a hurry, place the egg in a bowl of warm water for 5 minutes.
- Vanilla extract — 1 teaspoon. Pure vanilla makes a difference here. Skip the imitation stuff if you can.
- Whole wheat pastry flour — 1 cup (120g). This is my secret weapon. It gives the cookies a tender crumb with a little extra fiber. You can use all-purpose flour if that’s what you have.
- Baking soda — ½ teaspoon. Helps the cookies spread just enough.
- Baking powder — ¼ teaspoon. Adds a little lift for a softer texture.
- Salt — ¼ teaspoon. Balances the sweetness and enhances the peanut butter flavor.
- Hershey Kisses — 24, unwrapped. You’ll need one per cookie. Milk chocolate is classic, but dark chocolate kisses work beautifully here too.
- Granulated sugar — 2 tablespoons, for rolling. This gives the cookies that slightly crackly, sparkly exterior.
- Mixing bowls — One medium for dry ingredients, one large for wet ingredients. I use my grandmother’s old ceramic bowls, but glass or metal work fine.
- Electric hand mixer or stand mixer — A hand mixer is perfect here. You can mix by hand if you’re patient, but the peanut butter makes the dough a little stiff.
- Cookie scoop or tablespoon — A 1.5-tablespoon cookie scoop gives you evenly sized cookies. If you don’t have one, use a regular spoon and try to make them uniform.
- Baking sheet — A light-colored, rimmed baking sheet works best. Dark sheets can cause the bottoms to brown too quickly.
- Parchment paper or silicone baking mat — Non-stick is essential here. The cookies are tender and can stick to bare metal.
- Cooling rack — Lets air circulate so the bottoms don’t get soggy.
- Small bowl — For the rolling sugar.
- Preheat your oven to 350°F (175°C). Line a baking sheet with parchment paper or a silicone mat. This is non-negotiable — the cookies will stick without it.
- Whisk the dry ingredients. In a medium bowl, combine 1 cup whole wheat pastry flour, ½ teaspoon baking soda, ¼ teaspoon baking powder, and ¼ teaspoon salt. Whisk until evenly distributed. Set aside.
- Cream the butter and sugars. In a large bowl, beat ¼ cup softened unsalted butter, ⅓ cup granulated sugar, and ¼ cup packed light brown sugar together with an electric mixer on medium speed until light and fluffy — about 2 minutes. Scrape down the sides of the bowl halfway through.
- Add the wet ingredients. Beat in ½ cup creamy peanut butter, 1 large egg, and 1 teaspoon vanilla extract. Mix until smooth and combined. The dough will look a little glossy — that’s normal.
- Fold in the dry ingredients. Add the flour mixture to the wet ingredients. Mix on low speed until just combined. Don’t overmix here, or the cookies will be tough. A few streaks of flour are okay.
- Chill the dough (optional but recommended). If your dough feels too soft to handle, pop it in the fridge for 15 minutes. This makes rolling easier and helps the cookies hold their shape. If you’re in a rush, skip it — just know the cookies may spread a tiny bit more.
- Roll the dough balls. Scoop rounded tablespoons of dough (about 1.5 tablespoons each) and roll them into smooth balls between your palms. You should get 24 even-sized balls.
- Coat in sugar. Roll each dough ball in the 2 tablespoons of granulated sugar until completely coated. This gives the cookies that classic crackly top.
- Place on baking sheet. Arrange the dough balls 2 inches apart on the prepared baking sheet. They’ll spread as they bake, so give them room.
- Bake for 8-10 minutes. The cookies should look puffed and lightly golden around the edges. The centers will still look soft and slightly underdone — that’s perfect. They’ll continue to set as they cool.
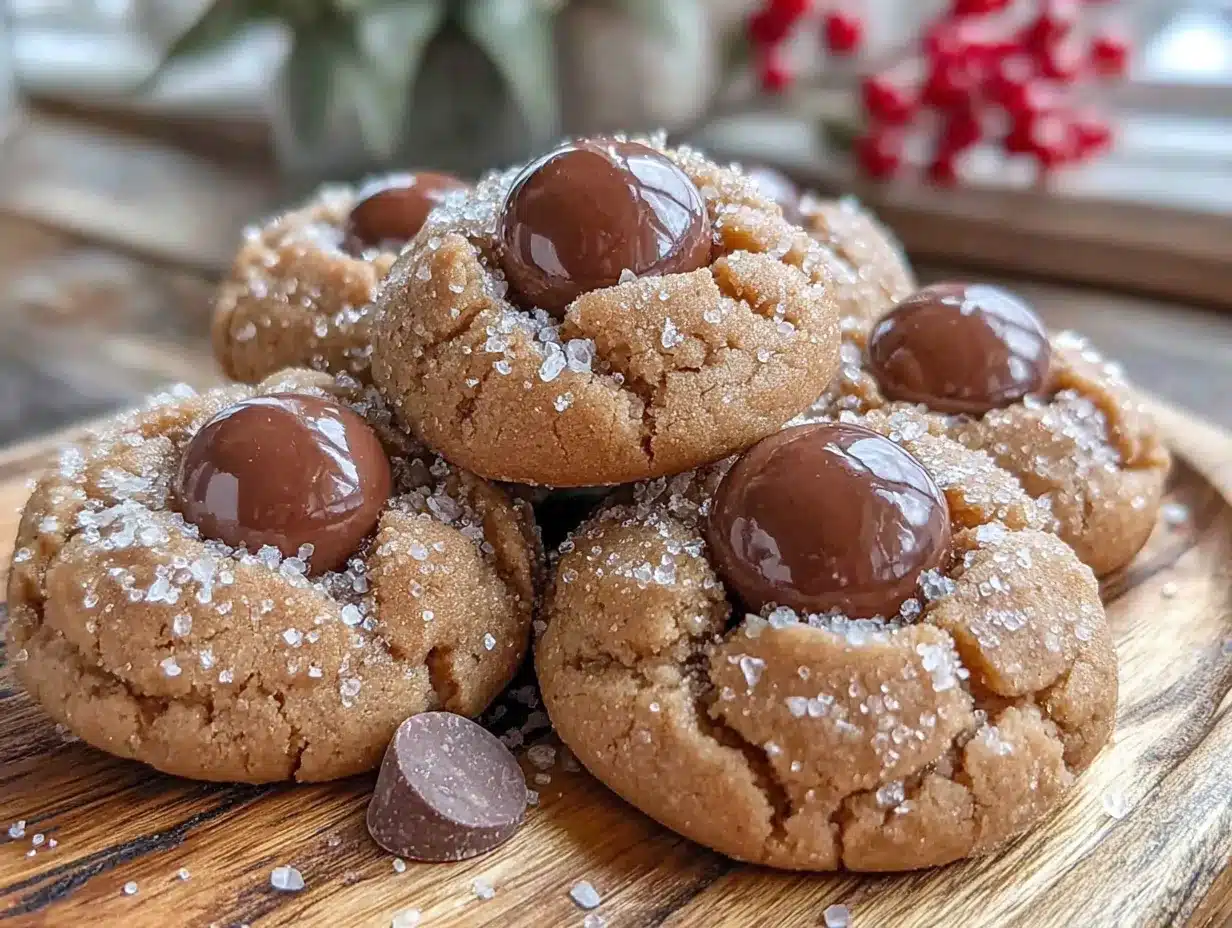
- Add the Hershey Kisses immediately. As soon as the cookies come out of the oven, gently press one unwrapped Hershey Kiss into the center of each cookie. The warmth will soften the chocolate slightly, creating that iconic look. Press just until the cookie cracks around the edges — don’t push all the way through.
- Cool on the baking sheet for 5 minutes. This allows the cookies to set up enough to transfer without breaking. Then move them to a wire rack to cool completely.
- With a cold glass of milk — classic for a reason.
- Alongside a cup of coffee or chai tea for an afternoon pick-me-up.
- Crumbled over vanilla ice cream for an impromptu sundae.
- Stacked on a plate for bake sales, potlucks, or holiday cookie exchanges.
- Room temperature: Store in an airtight container for up to 5 days. Place a slice of bread in the container to keep them soft — the cookies will absorb the moisture. Replace the bread every other day.
- Refrigerator: They’ll keep for up to a week in the fridge, but the texture gets slightly firmer. Let them sit at room temperature for 10 minutes before eating.
- Freezer: These freeze beautifully. Place cooled cookies in a single layer in a freezer-safe bag or container, separating layers with parchment paper. They’ll keep for up to 3 months. Thaw at room temperature for 15 minutes, or pop them in a 300°F oven for 5 minutes to warm through.
For Topping
If you’re gluten-sensitive, you can substitute a 1:1 gluten-free baking flour blend. Just make sure it contains xanthan gum for structure. For a dairy-free version, use a plant-based butter stick (I like Miyoko’s) — just make sure it’s softened, not melted.
Equipment Needed
You don’t need a fancy kitchen to make these cookies. Here’s what you’ll need:
I’ve made these cookies with a cheap baking sheet and a wooden spoon before — they still turned out great. Don’t overthink the equipment.
Preparation Method
Let’s get baking. This recipe makes 24 cookies, and the whole process takes about 25 minutes from start to finish.
Pro tip: If the chocolate kisses start to slide around, the cookies are too warm. Let them sit another minute or two before pressing the kisses in. I learned this the hard way after a batch of sideways kisses!
Cooking Tips & Techniques
After making these cookies more times than I can count, I’ve picked up a few tricks that make a real difference. Here’s what I wish I’d known from the start.
Don’t overbake. This is the number one mistake I see. Pull the cookies out when the edges are set but the centers still look soft and slightly puffy. They’ll continue baking on the hot sheet. Overbaked peanut butter blossoms turn dry and crumbly — nobody wants that.
Room temperature ingredients matter. If your butter or egg is cold, the dough won’t come together smoothly. You’ll end up overmixing trying to get it right, which leads to tough cookies. Let your butter sit out for 20 minutes and run the egg under warm water for 5 minutes.
Measure your peanut butter correctly. Scoop it into a measuring cup and level it off. Don’t just eyeball it — too much peanut butter makes the cookies greasy and flat. Too little and they’re dry.
Use a timer for the kisses. I once got distracted and left the kisses sitting in the warm cookies for 10 minutes. They melted into sad little chocolate puddles. Press them in within the first 30 seconds of the cookies coming out of the oven for the best result.
Batch baking strategy. While one tray bakes, roll the next batch of dough balls. This way, you’re not waiting around. I usually bake two trays at a time, swapping their positions halfway through for even browning.
I once forgot to add the sugar to the dough entirely. The cookies were… edible. Barely. Learn from my mistakes — double-check your ingredients before you start mixing!
Variations & Adaptations
One of the best things about this recipe is how flexible it is. Here are some ways to make it your own.
Dark Chocolate Lovers
Swap the milk chocolate Hershey Kisses for dark chocolate ones. The bitterness of dark chocolate cuts through the sweetness of the cookie beautifully. I actually prefer this version — it feels even more grown-up and satisfying.
Gluten-Free Option
Use a 1:1 gluten-free baking flour blend in place of the whole wheat pastry flour. I’ve tested this with Bob’s Red Mill 1:1 Baking Flour, and it works perfectly. The cookies are slightly more delicate, so handle them gently.
Vegan Version
Replace the butter with a plant-based stick (like Miyoko’s), use a flax egg (1 tablespoon ground flaxseed mixed with 3 tablespoons water, let sit for 5 minutes), and swap the Hershey Kisses for a vegan chocolate brand like Enjoy Life. The texture is a little softer, but the flavor is still spot-on.
Add Some Crunch
Mix ¼ cup of finely chopped peanuts into the dough before rolling. It adds a nice textural contrast and extra peanut flavor. I do this when I want a little more substance in each bite.
Holiday Twist
Use seasonal Hershey Kisses — the candy cane ones around Christmas or the pumpkin spice ones in fall. They add a fun flavor twist that makes these cookies feel festive without changing the base recipe.
My personal favorite variation? I swap half the whole wheat pastry flour for oat flour (just blitz rolled oats in a blender). It gives the cookies a slightly nutty, wholesome flavor that I absolutely love.
Serving & Storage Suggestions
These cookies are best enjoyed slightly warm, when the chocolate kiss is still a little soft and the cookie is tender. But honestly, they’re delicious at any temperature.
Serving ideas:
Storage instructions:
The flavors actually develop a little more after a day or two. I’ve been known to hide a few in the back of the freezer for emergency cookie cravings — and they always taste just as good as fresh.
Nutritional Information & Benefits
Here’s the approximate nutritional breakdown for one cookie (based on 24 cookies):
| Nutrient | Amount per Cookie |
|---|---|
| Calories | 105 |
| Total Fat | 6g |
| Saturated Fat | 2.5g |
| Cholesterol | 12mg |
| Sodium | 85mg |
| Total Carbohydrates | 12g |
| Dietary Fiber | 1g |
| Sugars | 7g |
| Protein | 3g |
These cookies are lighter than traditional peanut butter blossoms, with about 30% less sugar and 25% less butter. The whole wheat pastry flour adds a little fiber, and the peanut butter provides protein and healthy fats. They’re not health food — let’s be real — but they’re a smarter choice when you want something sweet.
For those watching their sugar intake, you can reduce the rolling sugar to 1 tablespoon or skip it entirely. The cookies won’t have that sparkly look, but they’ll still taste great.
Conclusion
These lighter peanut butter blossom cookies with Hershey Kiss are proof that you don’t have to choose between delicious and wholesome. They’ve got everything you love about the classic — the soft peanut butter cookie, the melty chocolate center, the nostalgic joy of biting into one — but they’re made with a little more thoughtfulness.
I love these cookies because they remind me that small changes add up. A little less sugar, a little more fiber, a smarter fat choice — and you still get a cookie that makes people’s eyes light up. That’s the kind of cooking I believe in.
I’d love to hear how these turn out for you. Did you try a variation? Did your family devour them in record time? Drop a comment below and let me know. And if you’re looking for more lighter takes on classic treats, check out my healthy chocolate chip cookies or these lighter banana bread muffins — they’ve got the same vibe of indulgence without the guilt.
Happy baking, friend. Go make someone’s day with a warm cookie and a chocolate kiss on top.
Frequently Asked Questions
Can I use natural peanut butter that separates?
I wouldn’t recommend it. The oil in natural peanut butter can make the cookies greasy and cause them to spread too much. Stick with a no-stir creamy peanut butter for the best texture.
Why did my cookies spread too much?
This usually happens if the dough was too warm or the butter was too soft. Try chilling the dough for 15-20 minutes before rolling. Also, make sure your baking soda and baking powder are fresh — old leavening agents can cause spreading.
Can I use crunchy peanut butter instead?
Absolutely. It adds a nice texture. Just keep in mind that the dough might be a little harder to roll into smooth balls because of the peanut pieces. It won’t affect the taste at all.
How do I keep the Hershey Kiss from melting completely?
Press the kiss into the cookie within 30 seconds of it coming out of the oven. If you wait too long, the cookie cools and the chocolate won’t stick. If you press too early, the chocolate melts into a puddle. The sweet spot is about 20-30 seconds after baking.
Can I make these cookies ahead of time for a party?
Yes! You can make the dough up to 3 days ahead and keep it in the fridge. Roll and bake when you’re ready. Or bake the cookies completely and store them in an airtight container for up to 5 days. They actually taste even better on day two.
Pin This Recipe!
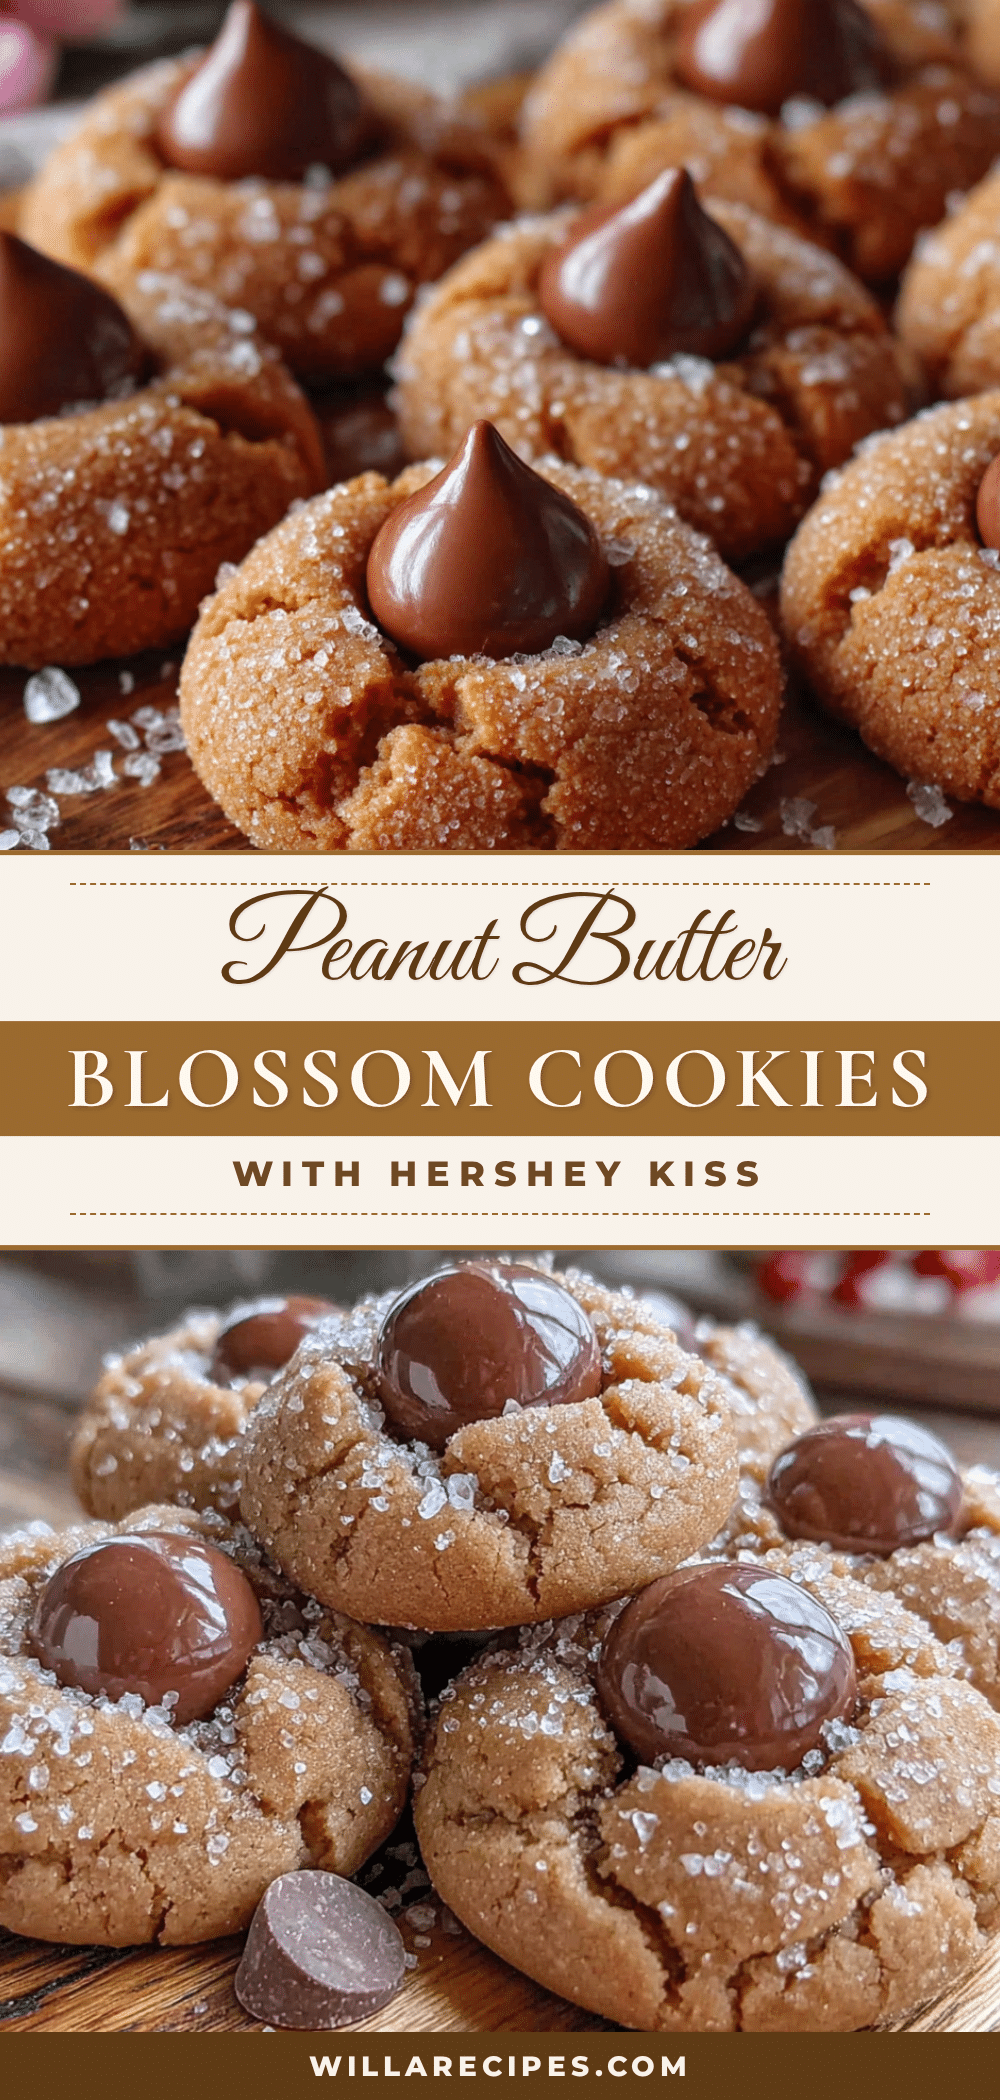
Lighter Peanut Butter Blossom Cookies with Hershey Kiss

These lighter peanut butter blossom cookies with Hershey Kiss have all the nostalgia of the classic cookie—a soft peanut butter base and melty chocolate center—but with simple swaps that make them feel a little better for you. Quick, easy, and perfect for any occasion.
- Prep Time: 15 minutes
- Cook Time: 10 minutes
- Total Time: 25 minutes
- Yield: 24 cookies 1x
- Category: Dessert
- Cuisine: American
Ingredients
- ½ cup (130g) creamy peanut butter (no-stir variety like Skippy Natural or Jif Natural)
- ¼ cup (56g) unsalted butter, softened
- ⅓ cup (66g) granulated sugar
- ¼ cup (50g) light brown sugar, packed
- 1 large egg, room temperature
- 1 teaspoon vanilla extract
- 1 cup (120g) whole wheat pastry flour (or all-purpose flour)
- ½ teaspoon baking soda
- ¼ teaspoon baking powder
- ¼ teaspoon salt
- 24 Hershey Kisses, unwrapped (milk or dark chocolate)
- 2 tablespoons granulated sugar (for rolling)
Instructions
- Preheat your oven to 350°F (175°C). Line a baking sheet with parchment paper or a silicone mat.
- In a medium bowl, whisk together 1 cup whole wheat pastry flour, ½ teaspoon baking soda, ¼ teaspoon baking powder, and ¼ teaspoon salt. Set aside.
- In a large bowl, beat ¼ cup softened unsalted butter, ⅓ cup granulated sugar, and ¼ cup packed light brown sugar with an electric mixer on medium speed until light and fluffy, about 2 minutes. Scrape down the sides halfway through.
- Beat in ½ cup creamy peanut butter, 1 large egg, and 1 teaspoon vanilla extract until smooth and combined.
- Add the flour mixture to the wet ingredients. Mix on low speed until just combined. Do not overmix.
- If the dough feels too soft, chill in the fridge for 15 minutes (optional but recommended).
- Scoop rounded tablespoons of dough (about 1.5 tablespoons each) and roll into smooth balls. You should get 24 balls.
- Roll each dough ball in 2 tablespoons granulated sugar until completely coated.
- Place dough balls 2 inches apart on the prepared baking sheet.
- Bake for 8-10 minutes, until puffed and lightly golden around the edges. Centers will still look soft.
- Immediately after removing from the oven, gently press one unwrapped Hershey Kiss into the center of each cookie.
- Cool on the baking sheet for 5 minutes, then transfer to a wire rack to cool completely.
Notes
Don’t overbake—pull cookies when edges are set but centers are soft. Room temperature ingredients matter for proper mixing. Measure peanut butter correctly. Press Hershey Kisses within 30 seconds of baking for best results. For gluten-free, use a 1:1 gluten-free baking flour blend. For dairy-free, use plant-based butter. For vegan, use plant-based butter, flax egg, and vegan chocolate.
Nutrition
- Serving Size: 1 cookie
- Calories: 105
- Sugar: 7
- Sodium: 85
- Fat: 6
- Saturated Fat: 2.5
- Carbohydrates: 12
- Fiber: 1
- Protein: 3
Keywords: peanut butter blossom cookies, lighter cookies, Hershey Kiss cookies, easy cookie recipe, healthier cookies, peanut butter cookies


