I was standing in the spice aisle of a grocery store last December when it hit me—that sharp, warm smell of ginger and cloves coming from the holiday display. And suddenly I was seven years old, sitting on a cracked vinyl stool in my Aunt Lena’s tiny kitchen, watching her crush whole cloves with the bottom of a coffee mug because she’d lost her mortar and pestle somewhere in the move. She made gingerbread from scratch every Christmas Eve, and I’d always get to lick the wooden spoon. That woman could make anything taste like a hug, even when she was rushing between three jobs and a leaky radiator.
The thing is, I’ve spent years trying to capture that exact feeling in my own kitchen. Not just the taste of gingerbread, but that specific warmth—the kind that settles in your chest and makes you slow down for a minute. But let’s be real: most of us don’t have three hours to spend on a complicated dessert on a Tuesday night. I mean, I barely have three hours to do laundry half the time. So I started messing around with a faster version, something that kept the soul of Aunt Lena’s gingerbread but didn’t require a whole afternoon and a therapy session afterward.
These quick gingerbread cheesecake bars with cream cheese frosting are what came out of those experiments. They’re not fancy. They’re not fussy. But that first bite—the way the spiced crumb crust gives way to that silky, tangy cheesecake layer—honestly, it gets me every time. Maybe you’ve been there, standing in your kitchen at 8 p.m. on a Wednesday, craving something that feels like the holidays but doesn’t demand your whole evening. These bars are for that moment. They’re for the nights when you need a little bit of magic, fast.
Why You’ll Love This Recipe
I’ve tested this recipe more times than I care to admit—some batches were too dry, some were too sweet, and one memorable disaster involved the cheesecake layer sliding off the crust like it was going to a party by itself. But after dozens of trials (and a few panicked phone calls to my cousin who actually went to culinary school), I landed on a version that works every single time. Here’s what makes these bars special:
- Quick & Easy: From start to finish, these are on your table in about 30 minutes of active time. The hardest part is waiting for them to chill, honestly.
- Simple Ingredients: No hunting down obscure spices or specialty flours. You probably have most of this in your pantry right now.
- Perfect for Weeknights: Need a dessert that feels special but doesn’t require a complicated timeline? This is it. Make them after dinner, and they’re ready by the time you’ve finished your coffee.
- Crowd-Pleaser: I’ve brought these to potlucks, family dinners, and book club meetings. They disappear faster than anything else on the table.
- Unbelievably Delicious: The contrast between the warm gingerbread spices and the cool, creamy cheesecake is honestly next-level. It’s like a gingerbread cookie and a cheesecake had a baby, and that baby is perfect.
What sets these bars apart from other recipes is the balance. Most gingerbread desserts lean too heavy on the molasses or skimp on the spices. I spent a lot of time getting the ratios right—enough ginger to feel festive, enough cinnamon for warmth, and a touch of clove that doesn’t overpower everything. And the cream cheese frosting? It’s not an afterthought. It’s tangy and smooth, cutting through the sweetness of the gingerbread layer just enough to make every bite interesting. This isn’t just another holiday dessert recipe. It’s the one you’ll actually want to make on a random Tuesday in November when you’re craving something cozy.
What Ingredients You Will Need
This recipe uses straightforward ingredients that work together to create something greater than the sum of their parts. The beauty here is in the simplicity—no weird specialty items, just pantry staples that transform into something special. Let’s break down what you’ll need and why each ingredient matters.
For the Gingerbread Crust
- 1 ½ cups graham cracker crumbs (about 12 full sheets, crushed fine) — I prefer Honey Maid brand for consistent texture, but any plain graham cracker works. You can also use ginger snap cookies for an extra punch of ginger flavor.
- ¼ cup brown sugar, packed — Light or dark both work. Dark brown sugar adds deeper molasses notes, which I personally love for this recipe.
- 1 teaspoon ground ginger — Freshly opened jars have the best punch. If your ginger has been sitting in the cabinet for two years, it’s time for a new one.
- ½ teaspoon ground cinnamon — Ceylon cinnamon is milder and sweeter; Cassia is more intense. Either works here.
- ¼ teaspoon ground cloves — A little goes a long way. Cloves can dominate quickly, so measure carefully.
- 6 tablespoons unsalted butter, melted — Salted butter works if that’s what you have, just reduce any added salt elsewhere in the recipe.
For the Cheesecake Layer
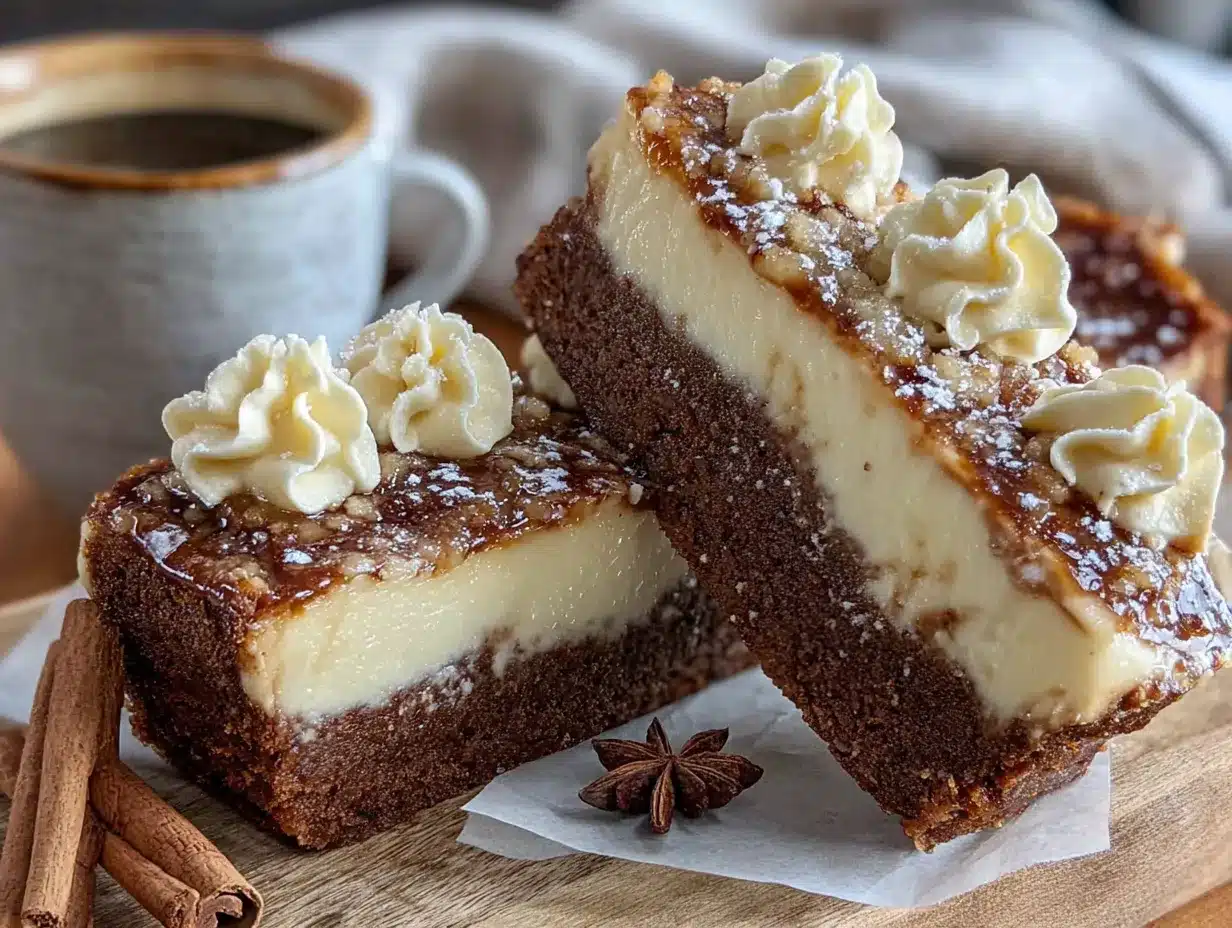
- 16 ounces cream cheese, softened to room temperature — Full-fat is non-negotiable here. Low-fat versions create a less creamy texture and can make the bars weepy. I recommend Philadelphia brand for consistent results.
- ½ cup granulated sugar — Regular white sugar keeps the cheesecake layer clean and simple.
- 2 large eggs, room temperature — Cold eggs can seize the cream cheese mixture, causing lumps. Set them out 30 minutes before starting, or place them in a bowl of warm water for 5 minutes.
- 1 teaspoon vanilla extract — Pure vanilla extract makes a noticeable difference over imitation. Trust me on this one.
- 2 tablespoons all-purpose flour — This helps stabilize the cheesecake and prevents cracking as it bakes.
For the Cream Cheese Frosting
- 4 ounces cream cheese, softened — Same deal as above—full-fat, room temperature.
- 2 tablespoons unsalted butter, softened — Let it sit out alongside the cream cheese so they blend smoothly.
- 1 cup powdered sugar — Sift it if you want an extra-smooth frosting, but honestly, I skip that step most of the time and it’s fine.
- ½ teaspoon vanilla extract — Adds warmth and depth to the frosting.
- 1-2 tablespoons milk or heavy cream — Use as needed to reach your desired consistency. Heavy cream makes a richer frosting.
Optional Garnishes
- Crystallized ginger, finely chopped — Adds a lovely chewy texture and extra ginger kick on top.
- Cinnamon stick pieces — For presentation, if you’re feeling fancy.
- A light dusting of ground cinnamon or nutmeg — Just before serving for visual appeal.
One quick note about molasses—you might notice there’s no molasses in this recipe, which is unusual for gingerbread. I made that choice deliberately. Molasses can make desserts heavy and dense, and it competes with the cream cheese layer. Instead, the brown sugar in the crust provides enough of that warm, caramelized flavor while keeping the bars light enough to feel like a treat rather than a brick.
Equipment Needed
You don’t need a professional kitchen to pull these off. Here’s what you’ll actually use:
- 9×9-inch baking pan — An 8×8 works too, but your bars will be slightly thicker and may need a couple extra minutes of baking time. I use a metal pan because it conducts heat evenly, but glass works fine.
- Parchment paper — Absolutely essential for easy removal. Leave overhang on two opposite sides so you can lift the whole block out cleanly.
- Electric hand mixer or stand mixer — You can mix by hand if you have strong arms, but a mixer makes the cream cheese layer silky smooth with less effort. I’ve done it both ways, and the mixer wins every time.
- Medium mixing bowls — One for the crust, one for the cheesecake layer, one for the frosting.
- Measuring cups and spoons — Precise measurements matter, especially for the spices.
- Rubber spatula — For scraping every last bit of cheesecake batter into the pan. Waste not, want not.
- Sharp knife — For clean cuts through the bars. Run it under hot water and wipe between cuts for the neatest slices.
If you don’t have a 9×9 pan, you can use a 9×13 pan—just know your bars will be thinner and bake about 5-7 minutes faster. And if you’re really in a pinch, disposable aluminum pans from the grocery store work fine. I’ve used them when traveling to family gatherings, and nobody noticed the difference.
Preparation Method
Let’s get into the actual making of these bars. I’ll walk you through each step with the exact timing and sensory cues so you know exactly what you’re looking for.
Step 1: Prep Your Pan and Oven
Preheat your oven to 350°F (175°C). Line your 9×9 baking pan with parchment paper, leaving about 2 inches of overhang on two opposite sides. This creates handles that let you lift the entire block of bars out later. Lightly spray the parchment with non-stick cooking spray, just to be safe. I learned this the hard way after one batch stuck so badly I had to eat it with a spoon straight from the pan—which, honestly, wasn’t the worst outcome.
Step 2: Make the Crust
In a medium bowl, combine the graham cracker crumbs, brown sugar, ginger, cinnamon, and cloves. Stir with a fork until the spices are evenly distributed throughout the crumbs—you don’t want any pockets of pure ginger. Pour in the melted butter and stir until every crumb is moistened. The mixture should look like wet sand and hold together when you squeeze a handful. Press this mixture firmly into the bottom of your prepared pan. Use the bottom of a measuring cup or a flat glass to really pack it down. A loose crust will crumble when you cut the bars later. Bake the crust for 8 minutes, then remove it from the oven and set it aside to cool slightly while you make the filling.
Step 3: Make the Cheesecake Layer
In a large mixing bowl, beat the softened cream cheese with an electric mixer on medium speed until it’s smooth and completely lump-free—about 2 minutes. Scrape down the sides and bottom of the bowl with your spatula. Add the granulated sugar and beat for another minute until the mixture is light and fluffy. Add the eggs one at a time, beating on low speed after each addition just until incorporated. Over-beating at this stage incorporates too much air, which can cause the cheesecake to puff up and crack as it bakes. Add the vanilla extract and flour, then mix on low until just combined. The batter should be smooth, pale, and slightly thick—like a very luxurious yogurt.
Step 4: Assemble and Bake
Pour the cheesecake batter over the pre-baked crust. Use your spatula to spread it evenly all the way to the edges. Give the pan a gentle tap on the counter to release any air bubbles that might have formed. Bake for 22-25 minutes, or until the edges look set and the center jiggles slightly when you gently shake the pan. The top should be pale golden, not brown. If the center still looks liquid and sloshy, give it another 2-3 minutes. Every oven runs a little differently—mine runs hot, so I start checking at 20 minutes.
Step 5: Cool and Chill
Remove the pan from the oven and place it on a wire rack. Let it cool completely at room temperature—about 45 minutes to an hour. Don’t rush this step. If you put warm cheesecake in the fridge, condensation will form on top and make the frosting slide right off. Once the pan is cool to the touch, cover it with plastic wrap and refrigerate for at least 3 hours, but overnight is better. The bars need time to set up properly. I know waiting is the worst part, but I promise it’s worth it.
Step 6: Make the Frosting
About 30 minutes before you’re ready to serve, make the frosting. In a medium bowl, beat the softened cream cheese and butter together until smooth and creamy—about 2 minutes. Add the powdered sugar and vanilla, then beat on low speed until the sugar is incorporated. Increase the speed to medium and beat for another minute until the frosting is fluffy. Add milk or cream one tablespoon at a time until you reach a spreadable consistency. You want it thick enough to hold its shape but soft enough to spread easily.
Step 7: Frost and Slice
Spread the frosting evenly over the chilled cheesecake layer. Use an offset spatula or the back of a spoon to create swoops and swirls if you want that rustic look. Sprinkle with chopped crystallized ginger or a light dusting of cinnamon if you’re using it. Lift the entire block out of the pan using the parchment handles. Use a sharp knife to cut into 16 equal bars (4 rows by 4 rows). Wipe the knife clean between cuts for the neatest edges. Serve cold or at room temperature—both are delicious.
Cooking Tips & Techniques
Over the course of testing this recipe, I made plenty of mistakes so you don’t have to. Here are the most important lessons I learned:
Room temperature ingredients matter more than you think. Cold cream cheese creates lumps that no amount of beating will fully smooth out. Cold eggs can seize the batter and make it grainy. I set everything on the counter 30-45 minutes before I start mixing. If I forget (which happens more often than I’d like), I cut the cream cheese into cubes and microwave it in 5-second bursts until it’s soft but not warm.
Don’t overmix the cheesecake batter. I know it’s tempting to keep beating until everything looks perfectly smooth, but overmixing incorporates too much air. Those air bubbles expand in the oven and create cracks in the surface. Mix just until the ingredients come together, then stop. A few tiny lumps in the batter will smooth out during baking.
Press the crust firmly. This is the step most people rush, and it shows. If the crust isn’t packed tight, it will crumble when you cut the bars. Use the bottom of a glass or a measuring cup and really lean into it. I press until the crumbs feel almost like a solid surface.
Check for doneness with a gentle jiggle. The center of the cheesecake should wobble slightly when you shake the pan, like set Jell-O. If it’s completely firm, it’s overbaked. If it ripples like liquid, it needs more time. The residual heat will continue cooking the center after you pull it out, so a slight jiggle is exactly what you want.
Patience with chilling is non-negotiable. I once tried to speed things up by putting the pan in the freezer for an hour instead of the fridge for three. The texture was off—kind of icy and separated. The fridge gives you that dense, creamy, luxurious texture that makes cheesecake worth eating. Don’t skip this step.
Variations & Adaptations
One of the best things about this recipe is how flexible it is. Here are some variations I’ve tried and loved:
Gluten-Free Version: Swap the graham crackers for gluten-free ginger snaps or gluten-free graham crackers. I’ve used both, and honestly, the ginger snap version might be even better because it adds extra spice. Just check the package to make sure your brand is certified gluten-free if that matters to you. Use a gluten-free all-purpose flour blend in place of the regular flour in the cheesecake layer—King Arthur’s Measure for Measure works perfectly.
Dairy-Free Adaptation: Use vegan cream cheese (I like Miyoko’s or Kite Hill) and vegan butter in both the crust and the frosting. The texture will be slightly less dense, but the flavor is still fantastic. For the cheesecake layer, use a vegan cream cheese alternative and add an extra tablespoon of flour to help with structure.
Extra Spicy Gingerbread: If you’re like me and want more ginger punch, add an extra teaspoon of fresh grated ginger to the cheesecake batter. Stir it in after the eggs. The fresh ginger adds a bright, almost peppery heat that plays beautifully with the warm spices in the crust. You can also use crushed ginger snaps in the crust instead of graham crackers for double the ginger flavor.
Pumpkin Spice Variation: In the fall, I sometimes swap the gingerbread spices for pumpkin pie spice—same amount, just a different blend. Add ¼ cup of pumpkin puree to the cheesecake batter along with the eggs. Reduce the flour to 1 tablespoon to account for the extra moisture. It’s a completely different dessert, but equally delicious.
Chocolate Gingerbread Bars: For the chocolate lovers out there, add 2 tablespoons of cocoa powder to the crust mixture and drizzle melted dark chocolate over the finished bars before serving. The combination of chocolate, ginger, and cream cheese is unexpectedly perfect.
Serving & Storage Suggestions
These bars are versatile when it comes to serving. Here’s what I’ve found works best:
Serving Temperature: I actually prefer these bars cold, straight from the fridge. The cheesecake layer is firmer and the flavors seem more concentrated. But my husband likes them at room temperature, where the cream cheese frosting gets a little softer and almost melts in your mouth. Both are valid choices. If you’re serving them at a party, let them sit out for about 15 minutes before serving so they’re not ice-cold.
Presentation Ideas: Cut the bars into neat squares and arrange them on a white platter for maximum visual contrast. Sprinkle a few pieces of crystallized ginger on top or dust with a light snowfall of powdered sugar. For holiday gatherings, I sometimes add a tiny sprig of rosemary to each bar—it looks festive and the herbal note complements the gingerbread spices.
What to Serve With: A dollop of whipped cream on the side is never a bad idea. For drinks, these bars pair beautifully with hot coffee, spiced chai, or a cold glass of milk. If you’re feeling indulgent, a scoop of vanilla ice cream alongside a warm bar is basically heaven.
Storage Instructions: Store the bars in an airtight container in the refrigerator for up to 5 days. Place a sheet of wax paper between layers if you’re stacking them. The flavors actually deepen after a day or two—the spices meld together and the whole thing tastes more cohesive. I honestly think day-old bars are even better than fresh ones.
Freezing Instructions: These freeze beautifully. Wrap individual bars tightly in plastic wrap, then place them in a freezer-safe bag or container. They’ll keep for up to 3 months. To thaw, transfer a bar to the refrigerator overnight or let it sit at room temperature for about 30 minutes. The cream cheese frosting might be slightly less fluffy after freezing, but the taste is still fantastic.
Nutritional Information & Benefits
Let’s be honest—these are a treat, not a health food. But here’s the estimated nutritional breakdown per bar (based on 16 servings):
| Nutrient | Amount per Bar |
|---|---|
| Calories | 285 |
| Total Fat | 18g |
| Saturated Fat | 11g |
| Cholesterol | 75mg |
| Sodium | 220mg |
| Total Carbohydrates | 27g |
| Dietary Fiber | 0.5g |
| Sugars | 20g |
| Protein | 5g |
On the plus side, ginger has anti-inflammatory properties and can help with digestion. Cinnamon may help regulate blood sugar. And cream cheese provides some calcium and protein. But honestly, I eat these because they make me happy, not because they’re a superfood. Life is about balance—eat your vegetables, and then have a gingerbread cheesecake bar. You deserve it.
Dietary Considerations: This recipe contains gluten, dairy, and eggs. For gluten-free and dairy-free options, see the variations section above.
Frequently Asked Questions
Can I make these bars ahead of time?
Absolutely. In fact, I recommend it. These bars need at least 3 hours to chill, but making them a day ahead is even better. The flavors meld together overnight, and the texture becomes more cohesive. Just wait to add the frosting until a few hours before serving, or the frosting can get a little weepy from condensation.
Why did my cheesecake layer crack?
Cracks usually happen for one of three reasons: overmixing the batter (too much air), overbaking (the center gets too dry), or a drastic temperature change (moving from hot oven to cold counter). To prevent cracks, mix gently, pull the pan out when the center still jiggles slightly, and let it cool gradually at room temperature before refrigerating.
Can I use a different pan size?
Yes, but the baking time will change. An 8×8 pan will give you thicker bars that need 2-4 extra minutes in the oven. A 9×13 pan will give you thinner bars that bake about 5-7 minutes faster. Keep an eye on the center jiggle test regardless of pan size.
How do I get clean cuts when slicing?
Use a sharp knife and run it under hot water between each cut. Wipe the blade dry with a clean towel after each slice. This prevents the cheesecake from sticking to the knife and dragging through the frosting. For the neatest results, chill the bars for at least 4 hours before slicing.
Can I skip the frosting?
You can, but I wouldn’t recommend it. The cream cheese frosting balances the spices and adds moisture. Without it, the bars can taste a bit dry. If you want a lighter option, try a dusting of powdered sugar and a dollop of whipped cream instead. But honestly, the frosting is what makes these bars special.
Conclusion
These quick gingerbread cheesecake bars with cream cheese frosting have become my go-to dessert for those nights when I need something that feels special without requiring a whole production. They’ve got the warmth of Aunt Lena’s gingerbread, the richness of a proper cheesecake, and the convenience of a bar cookie that comes together in about 30 minutes of active work. That’s a pretty good deal, if you ask me.
I hope you give these a try, and I hope they become part of your own little traditions—whether that’s a Tuesday night treat, a holiday gathering centerpiece, or just something to get you through a long week. Feel free to play around with the spices, swap in different crusts, or pile on extra toppings. That’s the beauty of a recipe like this—it’s a starting point, not a rulebook.
If you make these, I’d love to hear about it. Drop a comment below and tell me how they turned out, what variations you tried, or just share your own kitchen story. And if you’re looking for another quick dessert that hits the spot, you might enjoy these no-bake pumpkin cheesecake bars or this easy lemon bars recipe for a completely different flavor profile. Happy baking, friends—go make something that makes you happy.
Pin This Recipe!
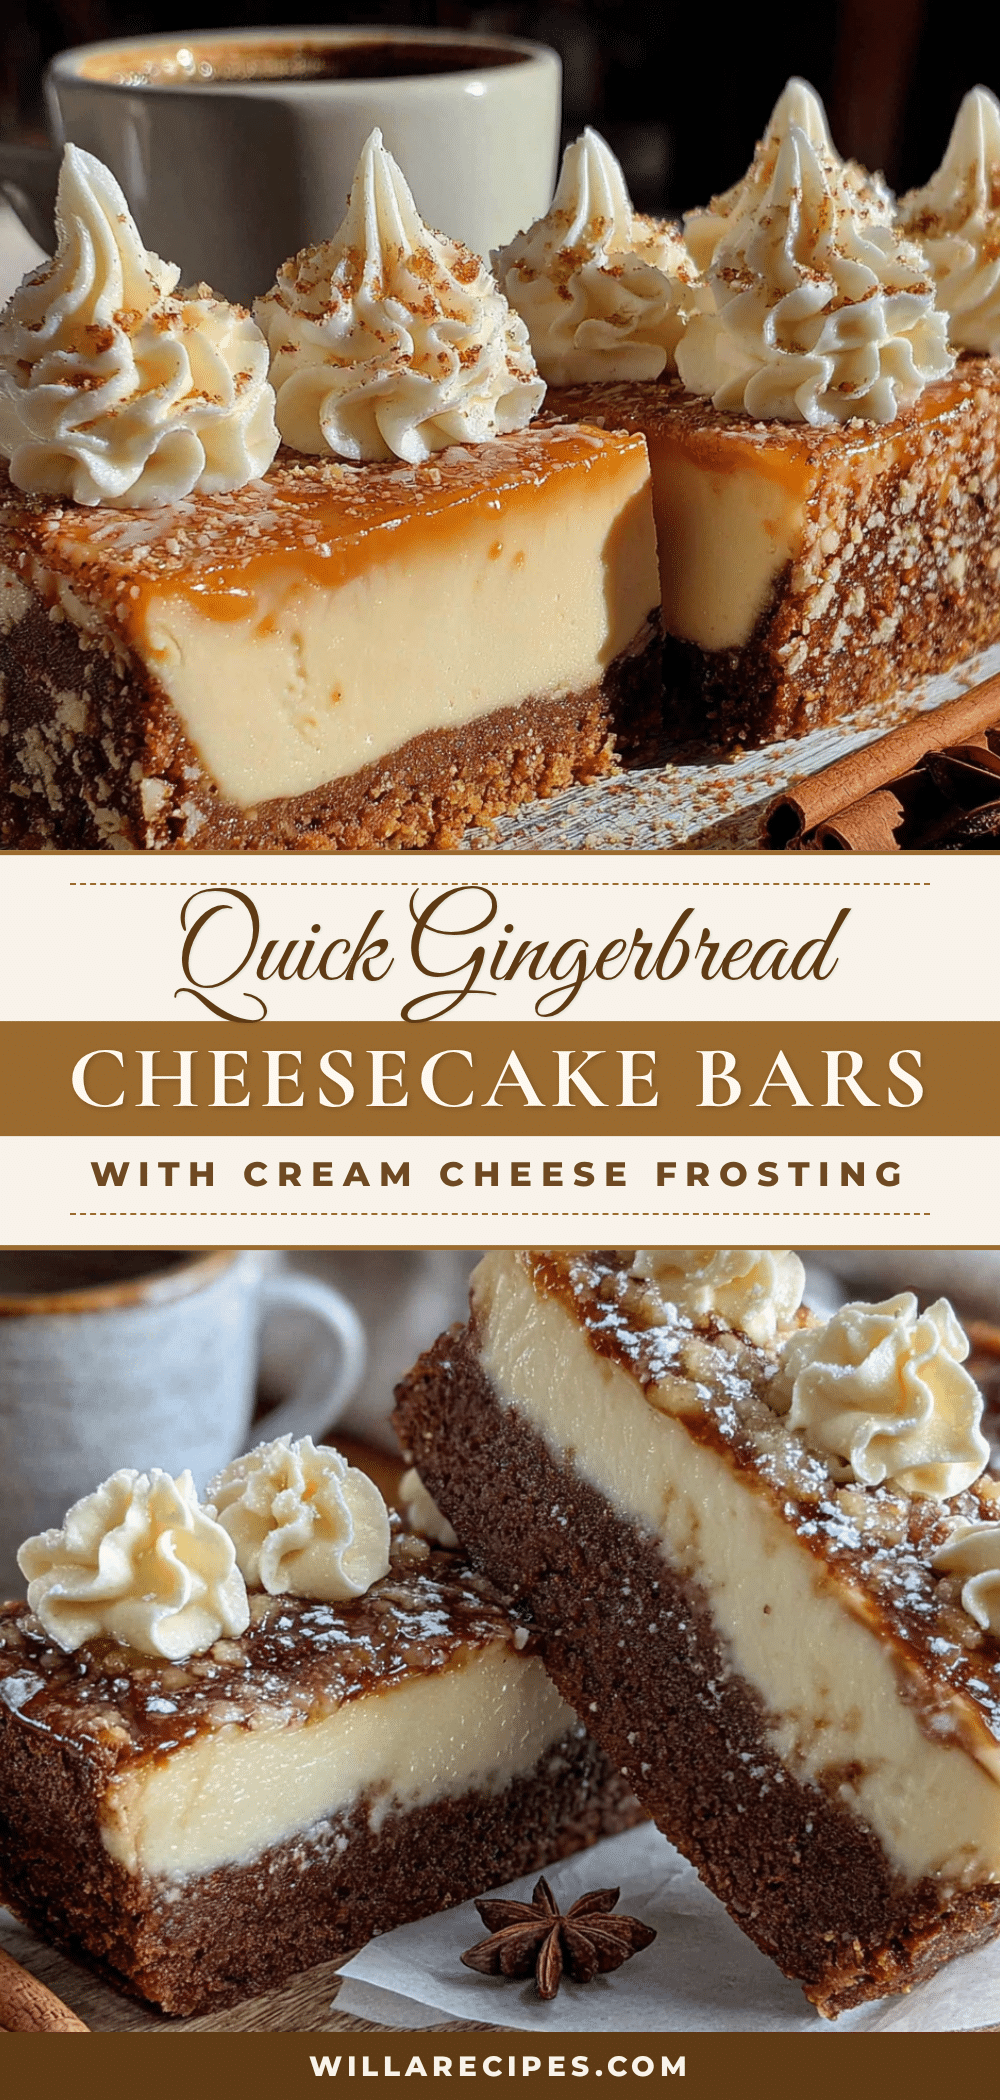
Quick Gingerbread Cheesecake Bars: Easy 30-Min Recipe
These quick gingerbread cheesecake bars with cream cheese frosting are a fast and easy dessert that captures the warm, spicy flavor of gingerbread with a creamy cheesecake layer. Perfect for weeknights or holiday gatherings, they come together in about 30 minutes of active time.
- Prep Time: 30 minutes
- Cook Time: 30 minutes
- Total Time: 4 hours (including chilling)
- Yield: 16 bars 1x
- Category: Dessert
- Cuisine: American
Ingredients
- 1 ½ cups graham cracker crumbs (about 12 full sheets, crushed fine)
- ¼ cup brown sugar, packed
- 1 teaspoon ground ginger
- ½ teaspoon ground cinnamon
- ¼ teaspoon ground cloves
- 6 tablespoons unsalted butter, melted
- 16 ounces cream cheese, softened to room temperature
- ½ cup granulated sugar
- 2 large eggs, room temperature
- 1 teaspoon vanilla extract
- 2 tablespoons all-purpose flour
- 4 ounces cream cheese, softened
- 2 tablespoons unsalted butter, softened
- 1 cup powdered sugar
- ½ teaspoon vanilla extract
- 1–2 tablespoons milk or heavy cream
- Crystallized ginger, finely chopped (optional)
- Cinnamon stick pieces (optional)
- A light dusting of ground cinnamon or nutmeg (optional)
Instructions
- Preheat your oven to 350°F (175°C). Line a 9×9-inch baking pan with parchment paper, leaving about 2 inches of overhang on two opposite sides. Lightly spray the parchment with non-stick cooking spray.
- In a medium bowl, combine the graham cracker crumbs, brown sugar, ginger, cinnamon, and cloves. Stir with a fork until the spices are evenly distributed. Pour in the melted butter and stir until every crumb is moistened. Press this mixture firmly into the bottom of the prepared pan. Bake the crust for 8 minutes, then remove it from the oven and set it aside to cool slightly.
- In a large mixing bowl, beat the softened cream cheese with an electric mixer on medium speed until smooth and lump-free, about 2 minutes. Scrape down the sides and bottom of the bowl. Add the granulated sugar and beat for another minute until light and fluffy. Add the eggs one at a time, beating on low speed after each addition just until incorporated. Add the vanilla extract and flour, then mix on low until just combined.
- Pour the cheesecake batter over the pre-baked crust. Spread it evenly to the edges. Give the pan a gentle tap on the counter to release air bubbles. Bake for 22-25 minutes, or until the edges look set and the center jiggles slightly when you gently shake the pan.
- Remove the pan from the oven and place it on a wire rack. Let it cool completely at room temperature, about 45 minutes to an hour. Once cool, cover with plastic wrap and refrigerate for at least 3 hours, preferably overnight.
- About 30 minutes before serving, make the frosting. In a medium bowl, beat the softened cream cheese and butter together until smooth and creamy, about 2 minutes. Add the powdered sugar and vanilla, then beat on low speed until incorporated. Increase speed to medium and beat for another minute until fluffy. Add milk or cream one tablespoon at a time until you reach a spreadable consistency.
- Spread the frosting evenly over the chilled cheesecake layer. Sprinkle with chopped crystallized ginger or a light dusting of cinnamon if desired. Lift the entire block out of the pan using the parchment handles. Use a sharp knife to cut into 16 equal bars (4 rows by 4 rows). Serve cold or at room temperature.
Notes
Room temperature ingredients are crucial for a smooth cheesecake layer. Don’t overmix the batter to avoid cracks. Press the crust firmly to prevent crumbling. Chill for at least 3 hours for best texture. For gluten-free, use gluten-free graham crackers or ginger snaps and gluten-free flour. For dairy-free, use vegan cream cheese and butter.
Nutrition
- Serving Size: 1 bar
- Calories: 285
- Sugar: 20
- Sodium: 220
- Fat: 18
- Saturated Fat: 11
- Carbohydrates: 27
- Fiber: 0.5
- Protein: 5
Keywords: gingerbread cheesecake bars, quick dessert, holiday dessert, cream cheese frosting, easy cheesecake bars


