Let’s be honest for a second. Deviled eggs are already the perfect party food. They’re creamy, tangy, and somehow always the first thing to disappear from the table. But these Spooky Halloween Deviled Eggs with Olive Spiders? They take things to a whole new level of fun. I’m not just talking about a little paprika sprinkle on top. I’m talking about savory, briny black olives transformed into creepy-crawly spiders that are just as delicious as they are spooky.
Here is why this recipe is a total game-changer:
- Quick & Easy: These come together in under 30 minutes, making them perfect for last-minute Halloween party prep.
- Simple Ingredients: You likely already have eggs, mayo, and mustard in your fridge. The only special guest is a can of black olives.
- Perfect for Halloween: Whether it’s a spooky soiree, a classroom party, or just a fun family dinner, these eggs are the star of the show.
- Crowd-Pleaser: Kids love the creepy spider look, and adults devour them because they honestly taste incredible.
- Unbelievably Delicious: The salty pop of the olive against the smooth, rich yolk filling is a flavor combo you didn’t know you needed.
What makes this version different from the rest? It’s the technique. I spent a whole afternoon testing different ways to keep the olive spiders from sliding off the eggs. The secret? A tiny dab of the yolk mixture acts like glue to hold those legs in place. It’s a small trick, but it makes a world of difference when you’re trying to set up a platter without everything tumbling over.
This recipe isn’t just good—it is the kind that makes people stop, pull out their phones, and take a picture before they take a bite. It’s comfort food with a creepy twist, and it brings that little jolt of Halloween magic to your table without any stress.
What Ingredients You Will Need
This recipe uses simple, everyday ingredients to create something that looks like it crawled straight out of a haunted house. The magic is all in the presentation, but the flavor is pure classic deviled egg perfection.
- For the Deviled Eggs:
- 6 large eggs (room temperature is best for even cooking)
- 3 tablespoons mayonnaise (I prefer Hellmann’s or Duke’s for a rich, tangy base)
- 1 teaspoon yellow mustard (adds a classic tang and that beautiful yellow color)
- 1/2 teaspoon white vinegar (a little acidity brightens the whole filling)
- 1/4 teaspoon salt (fine sea salt works best)
- 1/8 teaspoon black pepper (freshly ground, if you have it)
- Pinch of paprika (for dusting, plus a little extra color)
- For the Olive Spiders:
- 1 can (6 oz) large pitted black olives, drained (look for the jumbo or colossal size for bigger, scarier spiders)
- 1 can (6 oz) sliced black olives, drained (these become the legs)
A quick note on the olives. You want the large, whole pitted olives for the spider bodies. Don’t get the small ones—they’re too tiny to look like anything but a speck. The sliced olives are perfect for the legs because they are already cut into little rounds that you can slice into thin strips. If you can only find whole olives, you can slice them yourself, but the pre-sliced ones save so much time.
For the best texture, make sure your eggs are fully hard-boiled. Overcooked eggs get that weird green ring around the yolk, and nobody wants that. I’ll walk you through my foolproof method in the preparation section so you get perfect, bright yellow yolks every single time.
Equipment Needed
You don’t need any fancy gadgets for this recipe. Just a few basics you probably already own.
- Medium saucepan: For boiling the eggs. A heavy-bottomed pan helps distribute heat evenly.
- Mixing bowl: For mashing the yolks and mixing the filling.
- Fork or potato masher: To break down the cooked yolks into a smooth paste.
- Piping bag or zip-top bag: For neatly filling the egg whites. A zip-top bag with a corner snipped off works perfectly if you don’t have a piping bag.
- Sharp paring knife: For slicing the olives into legs. A dull knife will just squish them.
- Cutting board: For prepping the olives.
- Serving platter: Something dark or Halloween-themed really makes the white eggs and black spiders pop.
I’ve used both a piping bag and a zip-top bag for this recipe. Honestly, the zip-top bag is easier to clean and gives you just as much control. Just make sure you don’t overfill the bag, or you’ll end up with filling squeezing out the top instead of the tip. Trust me on that one—I learned the hard way.
Preparation Method
Alright, let’s get spooky. Follow these steps, and you’ll have a platter of creepy-crawly deviled eggs that will haunt your guests’ dreams—in the best way possible.
- Hard-boil the eggs: Place your 6 large eggs in a single layer in your saucepan. Cover them with cold water by about an inch. Bring the water to a rolling boil over high heat. Once it’s boiling hard, cover the pot, turn off the heat, and let it sit for exactly 12 minutes. This is the sweet spot for fully cooked yolks without that nasty green ring.
- Ice bath: While the eggs are sitting, fill a bowl with ice and cold water. When the 12 minutes are up, use a slotted spoon to transfer the eggs to the ice bath. Let them chill for at least 5 minutes. This stops the cooking immediately and makes them a breeze to peel.
- Peel the eggs: Gently tap each egg on the counter to crack the shell all over. Roll it between your palms to loosen the shell, then peel under cold running water. The water helps slide the shell right off. Pat the peeled eggs dry with a paper towel.
- Slice the eggs: Using a sharp knife, slice each egg in half lengthwise. Wipe the knife clean between cuts for neat edges. Gently pop the yolks out into your mixing bowl. Arrange the white halves on your serving platter, cut side up.
- Make the filling: Add the mayonnaise, yellow mustard, white vinegar, salt, and pepper to the bowl with the yolks. Mash everything together with a fork until it’s completely smooth. Taste it and adjust the seasoning if needed. I sometimes add an extra pinch of salt if the yolks taste a little flat.
- Fill the eggs: Spoon the yolk mixture into your piping bag or zip-top bag. If using a zip-top bag, press the mixture into one corner and snip off about 1/4 inch from the tip. Pipe the filling into each egg white half, mounding it slightly. You want a nice, generous swirl of filling.
- Create the spider bodies: Take your large pitted black olives and slice them in half lengthwise. Each half will become one spider body. You’ll have 12 halves for your 12 egg halves. Set them aside.
- Create the spider legs: Grab your sliced black olives. Take each slice and cut it into thin strips. Each slice should give you about 4-5 little leg pieces. You need 8 legs per spider, so plan accordingly. It sounds fiddly, but it goes fast once you get into a rhythm.
- Assemble the spiders: Here’s the trick I mentioned earlier. Dab a tiny bit of the yolk filling onto the back of a spider body (the olive half). This acts as glue. Press the olive half, cut side down, onto the center of a filled egg. Now, use the tip of your knife to gently press 4 leg strips into the filling on each side of the spider body. You want them to look like they are crawling out from under the olive.
- Add the eyes: This is optional but so fun. Dab a tiny speck of mayonnaise onto the back of the spider body (the olive half). Press a tiny piece of black olive or a poppy seed onto the mayo for each eye. It gives the spiders a little personality.
- Dust with paprika: Lightly sprinkle paprika over the entire platter. It adds a pop of color and a little smoky flavor.
- Chill before serving: Pop the platter in the fridge for at least 30 minutes before serving. This lets the flavors meld and helps the spiders stay put.
One thing I always do is make a few extra spiders on the side. Kids (and let’s be honest, adults) love to rearrange them or add more legs. It keeps them entertained while you finish the rest of the party prep.
Cooking Tips & Techniques
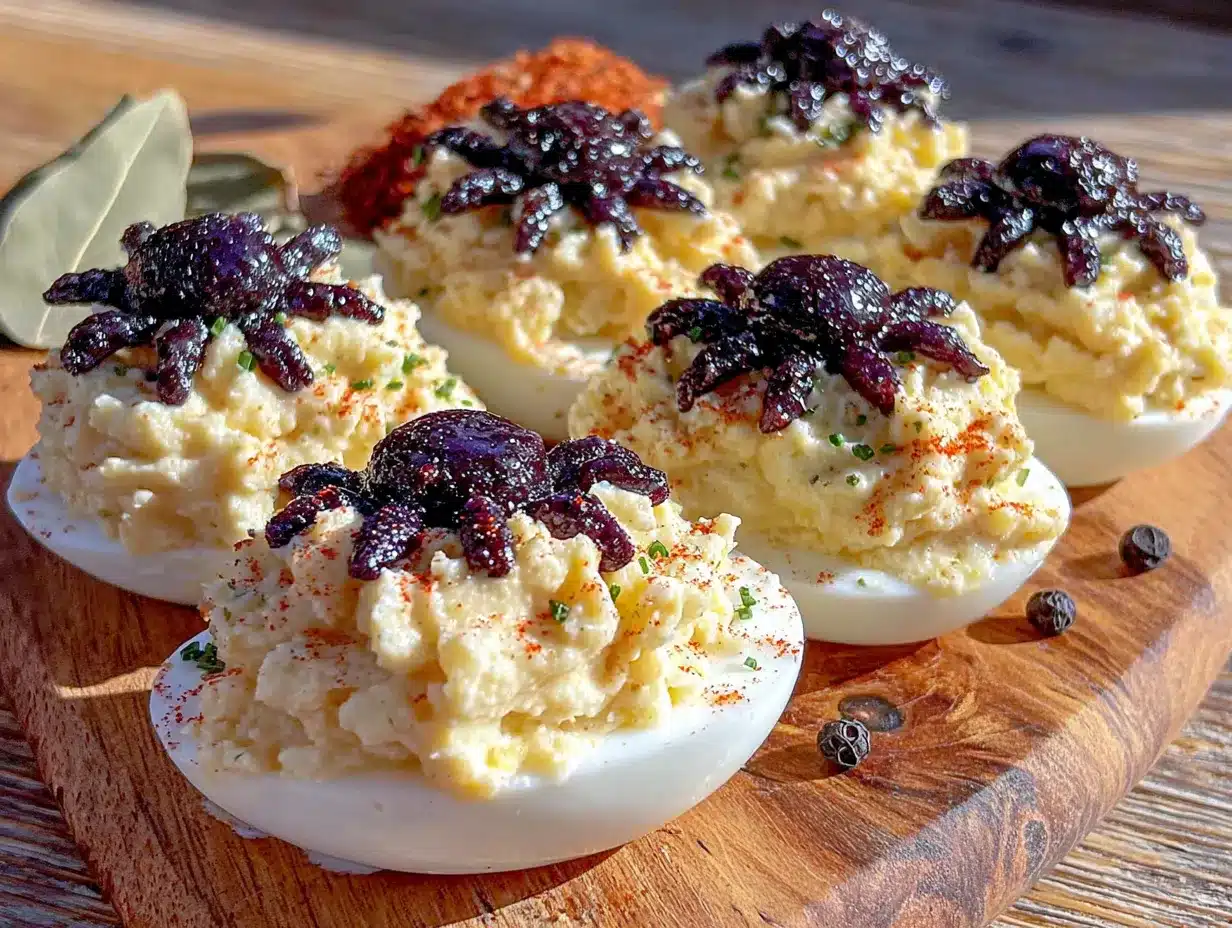
I’ve made these Spooky Halloween Deviled Eggs more times than I can count, and I’ve learned a few things the hard way. Here are my best tips to make sure yours turn out perfect.
The biggest mistake? Overcooking the eggs. I know I said 12 minutes, but every stove is a little different. If you have an electric stove that holds heat, try 11 minutes. If you have gas, 12 is perfect. The key is the ice bath. If you skip it, the eggs keep cooking, and that green ring appears. I once forgot the ice bath and ended up with grayish yolks. The deviled eggs still tasted fine, but they looked sad next to the bright yellow ones I made the next week.
Another common issue: The olive spiders sliding off. The dab of yolk mixture as glue is non-negotiable. I tried using just the olive alone, and they rolled right off the eggs. I tried using a toothpick to anchor them, but it looked messy. The yolk glue is invisible and works perfectly. Just make sure your filling isn’t too runny. If it is, add a little more yolk or a pinch of salt to firm it up.
Timing is everything. You can hard-boil the eggs and make the filling a day ahead. Keep the whites and filling separate in the fridge. Assemble the spiders right before serving. This way, the eggs stay fresh and the olives don’t dry out. I learned this after assembling everything the night before a party and waking up to slightly shriveled spider legs. They still looked spooky, but not in the way I wanted.
For consistent spider legs: Use a very sharp knife. Dull knives squish the olive slices and make them look like little green blobs instead of legs. Take your time with this step. It’s the most tedious part, but it’s also what makes the biggest visual impact.
Multitasking strategy: While the eggs are boiling and sitting in the ice bath, prep your olives. Slice the large olives in half and cut the sliced olives into leg strips. It saves you a good 10 minutes and keeps your workflow smooth.
Variations & Adaptations
This recipe is incredibly flexible. Here are a few ways to make it your own.
Dietary Variations: Need a dairy-free version? Use a vegan mayonnaise like Follow Your Heart or Just Mayo. The rest of the ingredients are naturally dairy-free. For a lower-fat option, swap half the mayo with plain Greek yogurt. It adds a nice tang and cuts the calories. I tried this for a friend who was watching her waistline, and honestly, I couldn’t tell the difference.
Flavor Twists: Want to spice things up? Add a dash of hot sauce or a pinch of cayenne pepper to the yolk mixture. It gives the spiders a little bite. For a smoky flavor, swap the regular paprika for smoked paprika. I did this once on a whim, and the smoky flavor paired beautifully with the briny olives. You could also add a teaspoon of pickle relish or chopped dill pickles for a tangy crunch.
Different Spiders: Don’t have black olives? You can use green olives stuffed with pimentos for a different look. The spiders will be green instead of black, which is actually kind of cool for a Frankenstein theme. You can also use capers for the eyes instead of poppy seeds. They’re a little bigger and add a nice salty pop.
Seasonal Adaptations: In the summer, I sometimes add a little fresh dill or chives to the yolk mixture. It makes the deviled eggs taste brighter and more garden-fresh. In the fall, a pinch of nutmeg or cinnamon in the filling adds a warm, cozy note that’s perfect for a Halloween party.
Personal Variation: My favorite twist? I add a teaspoon of sriracha to the yolk mixture and top each spider with a tiny sliver of jalapeño. It’s not for the faint of heart, but it’s a huge hit with my spice-loving friends. It turns the deviled eggs from a cute Halloween snack into a bold, memorable appetizer.
Serving & Storage Suggestions
These Spooky Halloween Deviled Eggs are best served chilled, straight from the fridge. The cold temperature keeps the filling firm and the olive spiders crisp. Arrange them on a dark platter or a bed of black kale to make the white eggs and black spiders really pop. I like to add a few fake spider webs around the platter for extra Halloween flair.
What to serve with them: These deviled eggs are the star of the show, but they pair beautifully with other finger foods. Try them alongside mini pumpkin pies, ghost-shaped cookies, or a bowl of spicy pumpkin soup. For drinks, a crisp apple cider or a dark stout beer complements the savory, briny flavors perfectly.
Storage Instructions: These are best eaten within 24 hours of assembly. Store any leftovers in an airtight container in the refrigerator. The olive spiders might lose a little of their crispness after a day, but they’ll still taste great. Do not freeze deviled eggs. The texture of the filling will become watery and grainy when thawed.
Reheating: You don’t need to reheat these. Serve them cold. If you’ve stored them in the fridge, just take them out about 15 minutes before serving to take the chill off. This lets the flavors come through more clearly.
How flavors develop: The filling actually gets better after a few hours in the fridge. The mayo and mustard meld with the egg yolks, and the salt and pepper mellow out. If you can, make the filling a day ahead and let it sit in the fridge before piping. The spiders themselves are best assembled fresh, but the filling can be prepped in advance.
One last tip: If you’re taking these to a party, transport the assembled eggs on a flat platter with a lid. The spiders are delicate, and a bumpy car ride can send them tumbling. I learned this the hard way when I arrived at a friend’s house with a platter of deviled eggs that looked like a spider massacre. Not a great look for a Halloween party.
Nutritional Information & Benefits
These Spooky Halloween Deviled Eggs are surprisingly nutritious. Here’s a rough breakdown per deviled egg half (based on the recipe as written):
- Calories: ~70
- Protein: 5g
- Fat: 5g
- Carbohydrates: 1g
- Sodium: ~180mg
Health Benefits: Eggs are a fantastic source of high-quality protein and essential nutrients like choline, which is great for brain health. The yolks contain vitamin D and healthy fats that keep you full and satisfied. Black olives are rich in healthy monounsaturated fats and antioxidants, including vitamin E. They also provide a good dose of iron and fiber.
Dietary Considerations: This recipe is naturally gluten-free, low-carb, and keto-friendly. It’s also vegetarian if you use a plant-based mayo. The main allergens are eggs and olives, so be mindful if you’re serving guests with food sensitivities. The olives can be high in sodium, so if you’re watching your salt intake, you can rinse them before using them.
I love that these deviled eggs are a treat that doesn’t feel completely indulgent. They’re perfect for a Halloween party where you want to serve something fun and festive without derailing your healthy eating goals. Plus, the protein keeps everyone satisfied so they don’t binge on candy later.
Conclusion
These Spooky Halloween Deviled Eggs with Olive Spiders are more than just a cute party trick. They are a genuinely delicious appetizer that happens to look like it crawled out of a haunted house. The creamy, tangy filling is the perfect canvas for the salty, briny olives, and the spider design is so simple that anyone can pull it off.
I love this recipe because it brings people together. I have seen kids who refuse to eat eggs suddenly grab three of these because they look so fun. I have seen adults light up when they realize the spiders are just olives. It is a recipe that sparks joy and conversation, and that is the best kind of food to share.
I encourage you to make this recipe your own. Try different fillings, experiment with different olives, or add a little spice. The base is so forgiving that you can really play around. And when you do, I would love to hear about it. Leave a comment below and tell me how your spiders turned out. Did you add extra legs? Did you make them extra spicy? Share your story and a photo if you have one.
So go ahead, get your hands a little messy, and make some spooky magic in your kitchen. Your Halloween party will thank you. And honestly, so will your taste buds.
Frequently Asked Questions
Can I make these Spooky Halloween Deviled Eggs ahead of time?
Yes, you can prepare the hard-boiled eggs and the yolk filling up to two days in advance. Store the peeled egg whites and the filling separately in the fridge. Assemble the spiders and fill the eggs no more than a few hours before serving for the best texture and appearance.
How do I keep the olive spiders from falling off?
The trick is to use a tiny dab of the yolk filling as glue. Just place a small amount on the cut side of the olive half before pressing it onto the egg white. This holds the spider body in place perfectly. Also, make sure your filling is firm enough to hold the legs.
Can I use a different type of olive for the spiders?
Absolutely. While black olives give the most classic spider look, you can use green olives stuffed with pimentos for a different color. You can also use kalamata olives for a more intense, briny flavor. Just keep in mind that the color and size will change the look of your spiders.
Are these deviled eggs suitable for a keto diet?
Yes, this recipe is naturally low-carb and keto-friendly. Each deviled egg half contains about 1 gram of carbohydrates, mostly from the olives. The high fat and protein content make them a perfect snack for those following a ketogenic diet.
How long will these deviled eggs last in the fridge?
These are best eaten within 24 hours of assembly. The olive spiders may lose some of their crispness after a day, and the filling can become a little watery if stored too long. Store them in an airtight container in the refrigerator for up to 2 days, but the quality is best on the first day.
Pin This Recipe!
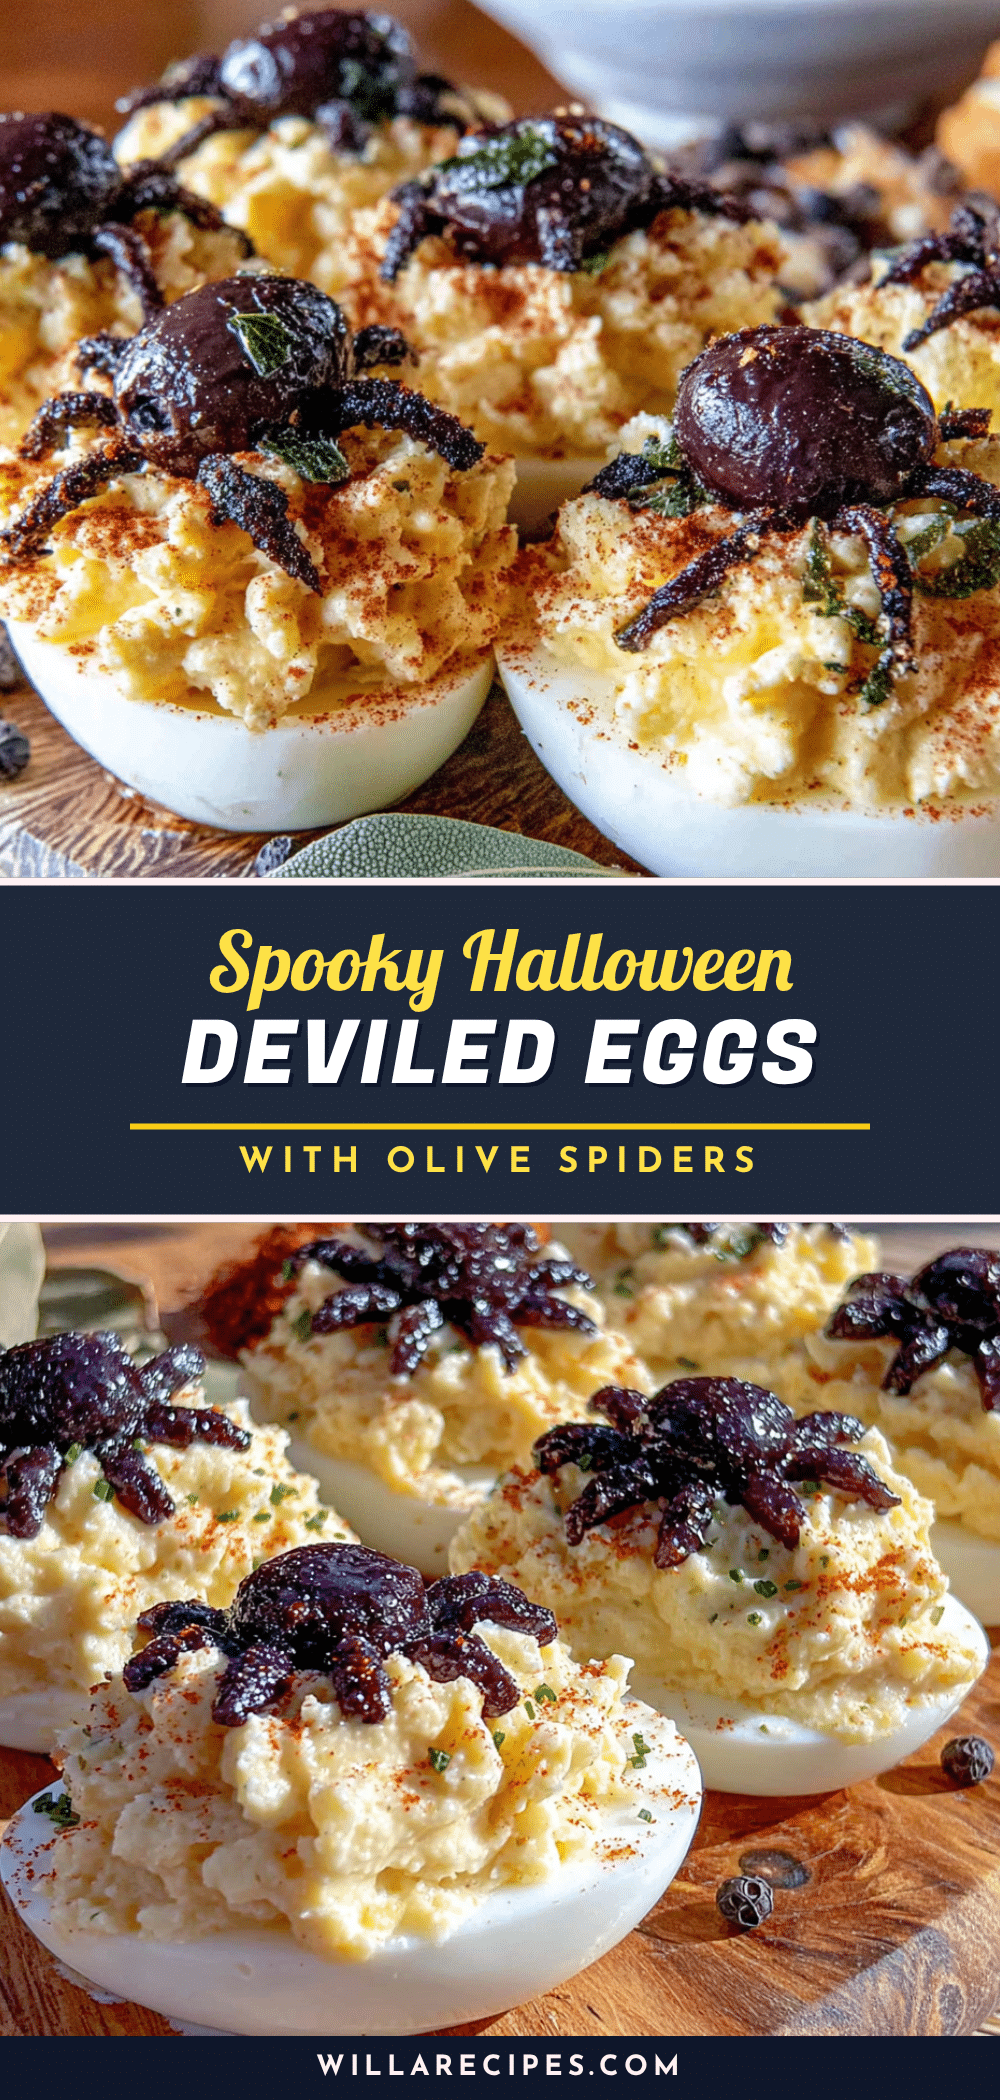
Spooky Halloween Deviled Eggs: Best Olive Spider Recipe
These Spooky Halloween Deviled Eggs with Olive Spiders are creamy, tangy, and topped with savory black olive spiders. They’re quick, easy, and perfect for Halloween parties.
- Prep Time: 15 minutes
- Cook Time: 12 minutes
- Total Time: 27 minutes
- Yield: 12 deviled egg halves (6 servings) 1x
- Category: Appetizer
- Cuisine: American
Ingredients
- 6 large eggs (room temperature)
- 3 tablespoons mayonnaise (Hellmann’s or Duke’s)
- 1 teaspoon yellow mustard
- 1/2 teaspoon white vinegar
- 1/4 teaspoon fine sea salt
- 1/8 teaspoon freshly ground black pepper
- Pinch of paprika (for dusting)
- 1 can (6 oz) large pitted black olives, drained
- 1 can (6 oz) sliced black olives, drained
Instructions
- Hard-boil the eggs: Place 6 large eggs in a single layer in a saucepan. Cover with cold water by about an inch. Bring to a rolling boil over high heat. Once boiling, cover the pot, turn off the heat, and let sit for exactly 12 minutes.
- Ice bath: While eggs sit, fill a bowl with ice and cold water. After 12 minutes, transfer eggs to the ice bath using a slotted spoon. Let chill for at least 5 minutes.
- Peel the eggs: Gently tap each egg on the counter to crack the shell all over. Roll between palms to loosen, then peel under cold running water. Pat dry with a paper towel.
- Slice the eggs: Slice each egg in half lengthwise. Pop yolks into a mixing bowl. Arrange white halves on a serving platter, cut side up.
- Make the filling: Add mayonnaise, yellow mustard, white vinegar, salt, and pepper to the yolks. Mash with a fork until smooth. Taste and adjust seasoning if needed.
- Fill the eggs: Spoon yolk mixture into a piping bag or zip-top bag. If using a zip-top bag, press mixture into one corner and snip off about 1/4 inch from the tip. Pipe filling into each egg white half, mounding slightly.
- Create the spider bodies: Slice large pitted black olives in half lengthwise. Each half becomes one spider body. Set aside.
- Create the spider legs: Take sliced black olives and cut each slice into thin strips (about 4-5 strips per slice). You need 8 legs per spider.
- Assemble the spiders: Dab a tiny bit of yolk filling onto the back of a spider body (olive half). Press the olive half, cut side down, onto the center of a filled egg. Use the tip of a knife to gently press 4 leg strips into the filling on each side of the spider body.
- Add the eyes (optional): Dab a tiny speck of mayonnaise onto the back of the spider body. Press a tiny piece of black olive or a poppy seed onto the mayo for each eye.
- Dust with paprika: Lightly sprinkle paprika over the entire platter.
- Chill before serving: Refrigerate for at least 30 minutes before serving.
Notes
Use a tiny dab of yolk filling as glue to keep olive spiders from sliding off. For best results, assemble spiders just before serving. Eggs can be hard-boiled and filling made a day ahead; store whites and filling separately in the fridge.
Nutrition
- Serving Size: 1 deviled egg half
- Calories: 70
- Sodium: 180
- Fat: 5
- Saturated Fat: 1.5
- Carbohydrates: 1
- Protein: 5
Keywords: Halloween deviled eggs, olive spiders, spooky appetizer, Halloween party food, deviled eggs recipe


