I had sworn off shaped cookies for years. Honestly, I found them fussy, the kind of project that sounded fun in theory but left you elbow-deep in sticky dough at 11 PM wondering why you didn’t just make a sheet pan of drop cookies like a normal person. Then my friend Maria texted me a photo last October. It was a picture of a peanut butter cookie shaped like a turkey, complete with candy corn feathers and little candy eyes. I rolled my eyes, typed “cute,” and hit send.
She showed up at our annual Friendsgiving three days later with a platter of these things. I watched her set them down, and I watched people—grown adults, mind you—actually gasp. Not the polite “oh how nice” gasp. I mean a real, delighted, “I need one of those right now” gasp. By the time I got to the table, half the feathers were missing off the turkeys. Someone had already eaten the candy corn right off the cookies. It was chaos. Beautiful, buttery, peanut-buttery chaos.
I tried one. And then I tried another. And then I asked Maria for the recipe, which she texted me with a single sentence: “Told you so.”
So here we are. I’m not saying I was wrong about shaped cookies. I’m saying I was wrong about this specific shaped cookie. These adorable turkey-shaped peanut butter cookies are the real deal—easy enough to make with kids, impressive enough to steal the show at any gathering, and delicious enough that you won’t mind eating the evidence. If you’ve been on the fence about making a themed cookie for your next party, let me be the one to push you off. You’ll thank me later.
Why You’ll Love This Recipe
Let me tell you why these little turkeys have earned a permanent spot in my fall baking rotation. I’ve tested this recipe at three different parties now, and the reaction is always the same—people can’t stop grabbing them.
- Quick & Easy: From start to finish, you’re looking at about 30 minutes of active time. The dough comes together in one bowl, no electric mixer required if you’ve got a good arm and a sturdy spoon. Perfect for those “I need a party treat in an hour” moments.
- Simple Ingredients: You probably have everything in your pantry right now. Peanut butter, sugar, an egg, some vanilla—that’s the cookie base. The decorations are just candy corn, candy eyes, and a few chocolate chips. No specialty baking store required.
- Perfect for Hosting: These are made for gatherings. They’re portable, they’re individually portioned, and they double as a centerpiece. I’ve brought them to Friendsgiving, Halloween parties, and even a casual game night. They always disappear first.
- Crowd-Pleaser: Kids love the turkey shape. Adults love the peanut butter flavor. Everyone loves the candy corn. I’ve watched people who claim they “don’t do themed food” reach for a second one.
- Unbelievably Delicious: The cookie itself is soft, chewy, and deeply peanut-buttery with that classic crisscross pattern on top. It’s not just a vehicle for decorations—it’s a genuinely good cookie that happens to look like a turkey.
What makes this recipe different from all the other turkey cookies out there? It’s the texture. I spent three batches getting the dough just right—soft enough to shape without cracking, firm enough to hold the candy decorations while baking. No sinking candy corn. No spreading into blobs. These turkeys hold their shape and their decorations. That’s the difference between a cookie that looks cute in the photo and a cookie that actually works at your party.
Honestly, this is the kind of recipe that makes you feel like a baking genius without actually having to be one. You just shape, decorate, bake, and watch people’s faces light up. It’s comfort food turned into edible art, and it takes almost no effort.
What Ingredients You Will Need
This recipe uses simple, pantry-friendly ingredients to create a soft, chewy peanut butter cookie that’s sturdy enough to hold decorations. No complicated shopping list here—just the basics, plus a few seasonal candies for the turkey design.
For the Cookie Dough
- 1 cup creamy peanut butter (I recommend Skippy or Jif for consistent texture; natural peanut butter that separates can make the cookies too greasy)
- 1 cup granulated sugar (plus extra for rolling)
- 1 large egg (room temperature, so it mixes in smoothly)
- 1 teaspoon vanilla extract (pure vanilla adds warmth, but imitation works fine)
- ½ teaspoon baking soda (helps the cookies puff slightly without spreading too much)
- ¼ teaspoon salt (skip this if your peanut butter is salted)
For the Turkey Decorations
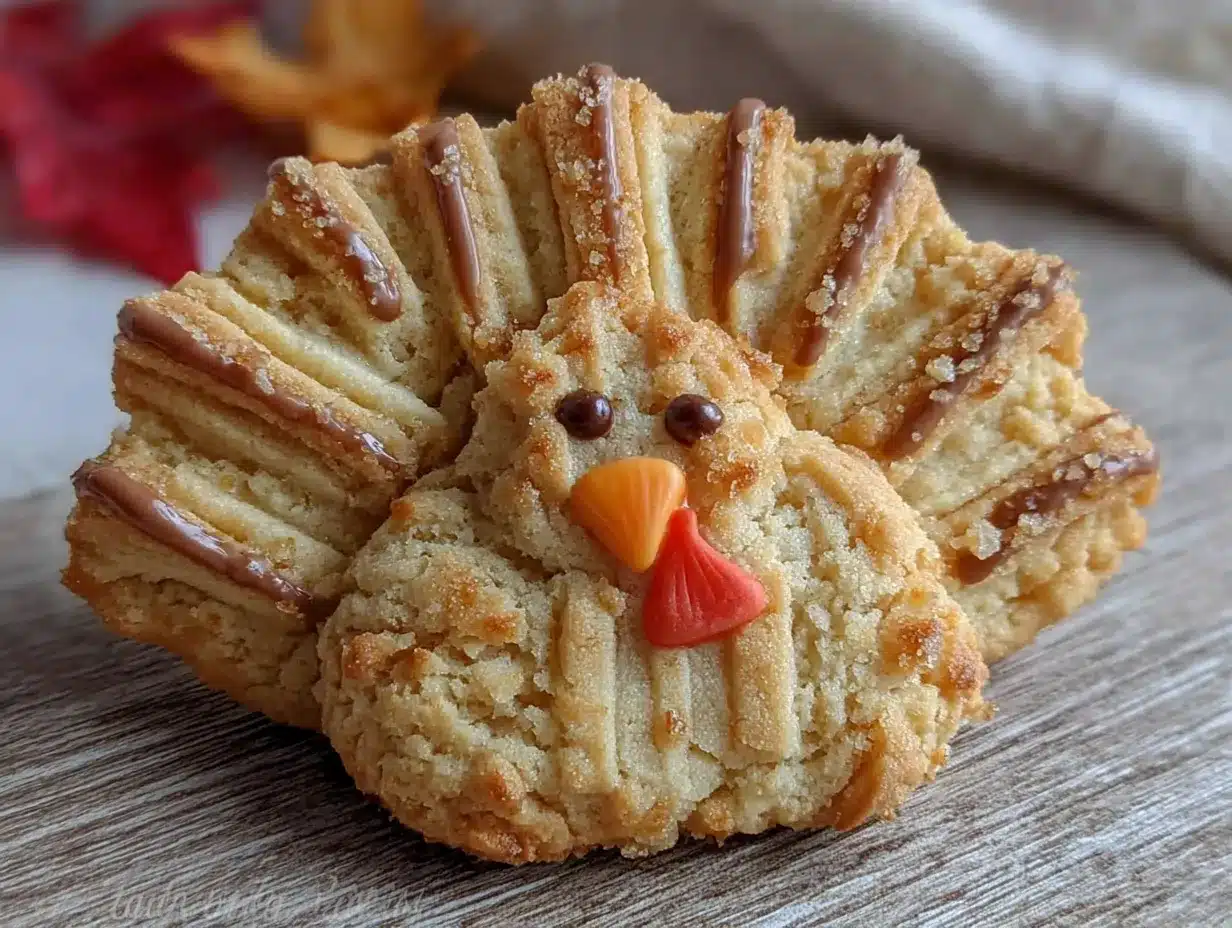
- 48 candy corn pieces (about half a standard bag; look for fresh, soft candy corn—stale ones crack when you push them into the dough)
- 24 candy eyes (available in the baking aisle or online; you can also use mini chocolate chips if you can’t find them)
- 24 mini chocolate chips (for the beak; orange or red M&Ms work too if you want a colored beak)
- 24 red candy-coated chocolates (like red M&Ms, for the wattle—that’s the red dangly bit under the beak)
Ingredient Notes & Substitutions: If you’re using natural peanut butter, stir it really well and consider adding an extra tablespoon of sugar to help with structure. For a nut-free version, sunflower seed butter works surprisingly well—just note the cookies will be darker and slightly more fragile. I’ve tried it with almond butter too, and while the flavor is different, the texture holds up fine. Just make sure whatever nut or seed butter you use is well-stirred and not too oily.
For the candy corn, I’ve found that the name-brand ones from Brach’s hold up best during baking. Store-brand candy corn sometimes melts into puddles instead of keeping their shape. If you’re making these ahead, store-bought candy eyes are easiest, but you can pipe white royal icing dots with a tiny black dot in the center if you want to go fully homemade.
One more thing—don’t skip the extra sugar for rolling. That little coating gives the cookies a slightly crackly exterior and a bit of sparkle that makes them look even more festive on the platter.
Equipment Needed
You don’t need much for this recipe, which is part of the appeal. Here’s what you’ll need:
- Large mixing bowl (any bowl works, but a wide one makes mixing easier)
- Wooden spoon or sturdy spatula (for mixing the dough by hand)
- Measuring cups and spoons (standard set)
- Baking sheet (I use a light-colored metal sheet for even browning; dark sheets can over-brown the bottoms)
- Parchment paper or silicone baking mat (parchment is easier for cleanup; silicone mats work great too)
- Small bowl (for the extra sugar for rolling)
- Wire cooling rack (essential for cooling the cookies properly so the candy doesn’t slide off)
- Toothpick or small offset spatula (helpful for placing the candy eyes and tiny decorations)
If you don’t have candy eyes, don’t worry. I’ve made these with just mini chocolate chips for the eyes and a tiny dab of frosting to hold them on. The cookies still look adorable. And if you don’t have a wire cooling rack, you can cool them on a clean cutting board or even a sheet of parchment—just give them a few extra minutes to set before moving them.
One tip I learned the hard way: use a baking sheet without high sides. The cookies need to be close to the heat source to bake evenly, and a rimmed sheet can block some of that heat. A standard half-sheet pan works perfectly.
Preparation Method
This recipe makes about 24 turkey-shaped cookies. The process is straightforward, but there are a few tricks to getting the turkeys to hold their shape and keep their decorations intact.
Step 1: Preheat and Prepare
Preheat your oven to 350°F (175°C). Line a baking sheet with parchment paper or a silicone baking mat. Don’t skip this—ungreased sheets will cause the cookies to spread and lose their shape.
Step 2: Make the Dough
In a large mixing bowl, combine 1 cup creamy peanut butter, 1 cup granulated sugar, 1 large egg, 1 teaspoon vanilla extract, ½ teaspoon baking soda, and ¼ teaspoon salt. Stir everything together with a wooden spoon until a soft, cohesive dough forms. It will look a little crumbly at first, but keep mixing—it comes together. If it feels too dry, add 1 tablespoon of milk or water. If it feels too sticky, add 1 tablespoon of flour.
Step 3: Shape the Cookie Base
Scoop out about 1 tablespoon of dough (roughly 20 grams) and roll it into a ball. Place the sugar for rolling in a small bowl, then roll each ball in the sugar until coated. Place the sugared balls on the prepared baking sheet, spacing them about 2 inches apart. You’ll fit about 8 cookies per sheet.
Step 4: Form the Turkey Body
Here’s the important part. Take each sugared ball and gently flatten it into a disc about ½ inch thick. The disc should be slightly wider at the bottom and narrower at the top—like a teardrop shape. This is the turkey’s body. Don’t flatten it too thin, or the cookie will spread too much during baking. A ½-inch thickness is perfect.
Step 5: Add the Feathers
Take 3 pieces of candy corn and arrange them in a fan pattern at the top of each disc, with the pointed ends facing inward toward the center of the cookie. The candy corn should be pressed gently into the dough so they’re about halfway submerged. This keeps them from falling off during baking. I like to arrange them in a slight arc, like a real turkey’s tail feathers.
Step 6: Add the Face
Press two candy eyes into the lower half of the cookie, just above where the beak will go. Place one mini chocolate chip in the center of the face, pointy side down, for the beak. Finally, press one red candy-coated chocolate just below the beak for the wattle. Press everything in gently but firmly—you want the decorations to stay put.
Step 7: Bake
Bake the cookies at 350°F (175°C) for 8 to 10 minutes. The cookies should look puffed and lightly golden around the edges but still soft in the center. Don’t overbake—they continue to set as they cool. The candy corn will soften slightly but should hold its shape.
Step 8: Cool Completely
Let the cookies cool on the baking sheet for 5 minutes. This is crucial—moving them too soon will cause the candy decorations to slide off. After 5 minutes, transfer them to a wire cooling rack to cool completely. The cookies will firm up as they cool, and the candy will set into place.
Cooking Tips & Techniques
I’ve made these cookies enough times to know exactly where things can go wrong. Let me save you from my mistakes.
The dough consistency is everything. If your peanut butter is too oily, the dough will spread into flat puddles instead of holding the turkey shape. If it’s too dry, the cookies will crack. The fix? Use commercial peanut butter like Jif or Skippy. They have the perfect balance of fat and stabilizers. If you only have natural peanut butter, drain off the excess oil before measuring, and add an extra tablespoon of sugar to help with structure.
Don’t skip the sugar coating. That extra layer of sugar isn’t just for looks—it helps the cookies hold their shape by creating a slightly crisp exterior that prevents spreading. I tried a batch without it, and the turkeys turned into amorphous blobs. Not cute.
Chill the dough if you’re working slowly. If you’re making a double batch or taking your time with the decorations, pop the bowl of dough in the fridge for 15 minutes. Warm dough is softer and harder to shape. Cold dough holds the candy corn in place much better.
Press candy corn in at an angle. Instead of pushing them straight down, angle them slightly outward so the feathers fan out like a real turkey tail. This makes the cookies look more dynamic and less like a science project.
Watch the bake time. Every oven runs differently. My old oven took exactly 9 minutes; my new one takes 8. Start checking at 8 minutes. The cookies are done when the edges are set and lightly golden but the centers still look slightly soft. They’ll finish setting on the sheet.
One batch at a time. I know it’s tempting to cram as many cookies as possible onto one sheet, but overcrowding leads to uneven baking and spreading. Stick to 8 cookies per standard baking sheet. Your patience will be rewarded with perfectly shaped turkeys.
Variations & Adaptations
These turkey cookies are endlessly customizable. Here are a few variations I’ve tried and loved:
Chocolate Turkey Cookies
Swap ¼ cup of the peanut butter for ¼ cup of unsweetened cocoa powder. Add 2 tablespoons of milk to compensate for the dryness. The chocolate version is rich and fudgy, and the candy corn really pops against the dark cookie. My nephew declared these “the best thing I’ve ever eaten,” which is high praise from a seven-year-old.
Gluten-Free Version
Use certified gluten-free peanut butter and substitute the all-purpose flour with a 1:1 gluten-free baking flour blend. The cookies will be slightly more delicate, so handle them gently when transferring to the cooling rack. I’ve used Bob’s Red Mill 1:1 with great results.
Vegan Turkey Cookies
Replace the egg with a flax egg (1 tablespoon ground flaxseed mixed with 3 tablespoons water, let sit for 5 minutes). Use a vegan peanut butter and check that your candy corn is vegan-friendly (most brands are). The texture is slightly cakier, but they still hold the turkey shape beautifully.
Fall Spice Twist
Add ½ teaspoon of pumpkin pie spice or cinnamon to the dough. The warm spices complement the peanut butter and make the cookies taste even more like fall. I did this on a whim last November, and now I can’t go back to plain.
Mini Turkey Bites
Use a teaspoon scoop instead of a tablespoon for smaller cookies. Bake for 6 to 7 minutes instead of 8 to 10. These are perfect for kids’ parties or cookie exchanges where you want people to try a little bit of everything.
Serving & Storage Suggestions
These cookies are best served at room temperature, straight from the cooling rack. The candy corn softens slightly during baking but firms back up as the cookies cool, giving you that perfect chewy-crunchy contrast.
For a party platter: Arrange the cookies on a large wooden board or festive platter, with the turkey faces facing outward. I like to scatter a few extra candy corn pieces around the platter for color. They also look adorable arranged in a circle around a bowl of dip or a small pumpkin centerpiece.
What to serve alongside: These pair beautifully with a warm apple cider or a pumpkin spice latte. For a dessert table, they complement pumpkin bars, apple crisp, or a simple vanilla ice cream. I’ve also served them with a side of caramel dipping sauce, which sounds extra but is absolutely worth it.
Storage: Store the cookies in an airtight container at room temperature for up to 5 days. Layer them between sheets of parchment paper to prevent the candy decorations from sticking together. Do not refrigerate—the moisture in the fridge can make the cookies soggy and cause the candy corn to become sticky.
Freezing: You can freeze the baked cookies for up to 3 months. Place them in a single layer on a baking sheet and freeze until solid, then transfer to a freezer-safe container with parchment between layers. Thaw at room temperature for about 30 minutes before serving. The candy corn might lose a bit of its crunch, but the cookies will still taste delicious.
Make-ahead tip: You can prepare the dough up to 2 days in advance and keep it wrapped in plastic in the refrigerator. When you’re ready to bake, let the dough sit at room temperature for 10 minutes to soften slightly, then shape and decorate as usual. This is a lifesaver when you’re hosting a party and want to spread out the prep work.
Nutritional Information & Benefits
Per cookie (based on 24 servings): approximately 120 calories, 7g fat, 14g carbohydrates, 3g protein, 8g sugar. These numbers are estimates and will vary based on the specific brands you use.
While these are definitely a treat, there are a few redeeming qualities. Peanut butter provides protein and healthy monounsaturated fats, which help keep you full and satisfied. The cookies are also free from artificial colors (unless you count the candy corn, which is admittedly not exactly natural).
For those with dietary restrictions, this recipe is naturally dairy-free (most peanut butters don’t contain dairy) and can easily be made gluten-free or vegan with the substitutions I mentioned earlier. Just double-check your candy corn labels—some brands use gelatin, which isn’t vegetarian or vegan.
I’m not going to pretend these are health food. They’re cookies. But they’re cookies made with real ingredients, and they bring genuine joy to a party table. Sometimes that’s its own kind of nutrition.
Conclusion
So there you have it—the cookie that turned me from a shaped-cookie skeptic into a full-on convert. These adorable turkey-shaped peanut butter cookies are everything you want in a party treat: easy to make, impossible to resist, and guaranteed to make people smile before they even take a bite.
I love that this recipe lets you be creative without requiring any special skills. You don’t need a piping bag or a steady hand. You just need some dough, some candy corn, and a willingness to have fun with your food. That’s the kind of baking I can get behind.
I’d love to see your versions. Tag me when you make them, tell me what variations you tried, and let me know if you managed to keep any on the platter before your guests devoured them all. And if you’re still on the fence about shaped cookies? Trust me. Make these. You’ll understand.
Frequently Asked Questions
Can I use chunky peanut butter instead of creamy?
You can, but the texture will be different. Chunky peanut butter can make the cookies more fragile and harder to shape. If you’re using chunky, pulse it in a food processor a few times to break down the larger pieces, or just embrace the rustic look.
Why did my candy corn melt in the oven?
This usually happens if the candy corn is old or if the oven is too hot. Make sure your candy corn is fresh and soft. Also, check your oven temperature with an oven thermometer—many ovens run hotter than the dial says. If the candy corn is still melting, try pressing it into the cookies after baking, while the cookies are still warm.
Can I make these cookies ahead of time for a party?
Absolutely. You can bake them up to 3 days in advance and store them in an airtight container at room temperature. For best results, add the candy eyes and chocolate chip beak right before serving, as the candy eyes can soften slightly over time.
How do I keep the candy corn from falling off?
Press the candy corn into the dough about halfway. Don’t just lay them on top—really push them in. The dough will grip the candy as it bakes. Also, let the cookies cool completely on the baking sheet before moving them. The candy sets as the cookie cools.
Can I use a different type of cookie dough?
You can experiment with other sturdy cookie doughs, like sugar cookie or shortbread. Just make sure the dough is firm enough to hold the decorations. Avoid soft, spreadable doughs like typical chocolate chip cookie dough—they won’t hold the turkey shape.
Pin This Recipe!
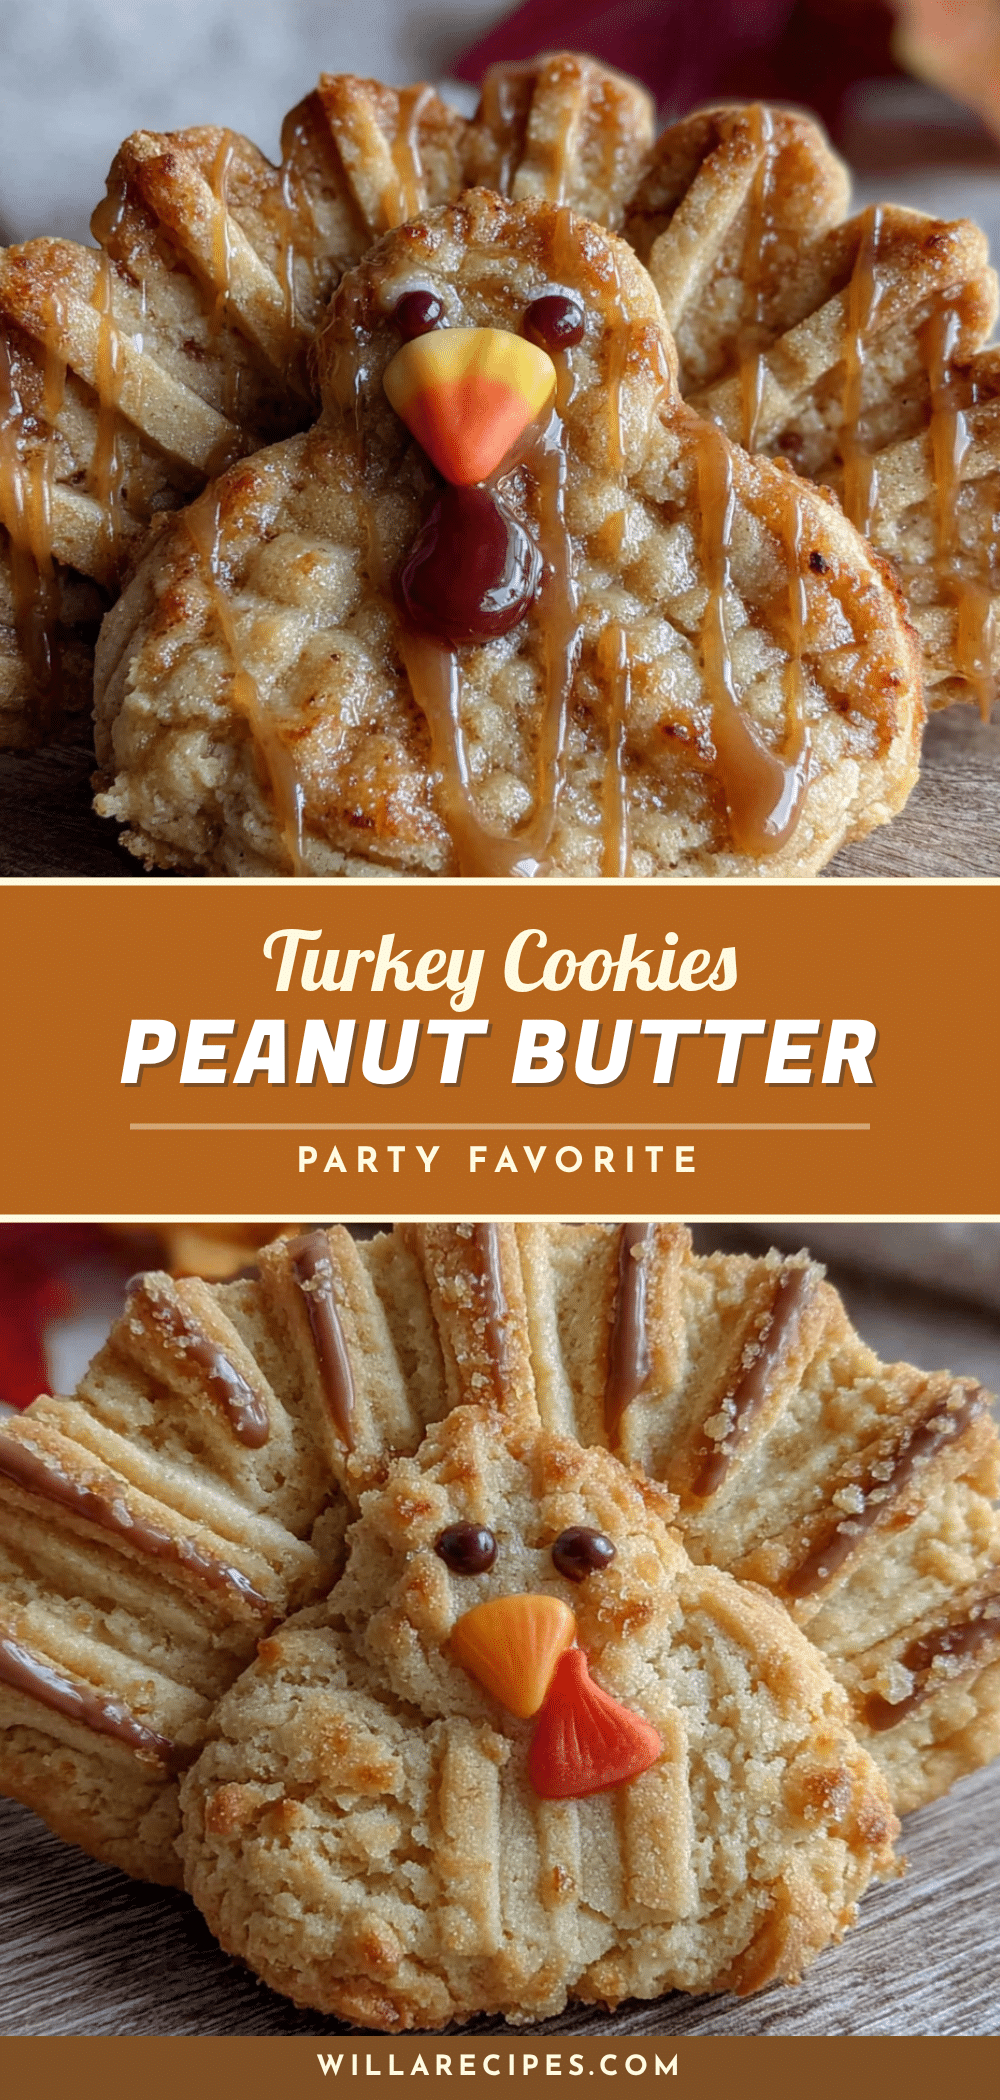
The Best Turkey-Shaped Peanut Butter Cookies Recipe
These adorable turkey-shaped peanut butter cookies are easy to make, perfect for fall gatherings, and guaranteed to impress. Soft, chewy, and decorated with candy corn feathers, they’re a fun and delicious treat for any party.
- Prep Time: 30 minutes
- Cook Time: 10 minutes
- Total Time: 40 minutes
- Yield: 24 servings 1x
- Category: Dessert
- Cuisine: American
Ingredients
- 1 cup creamy peanut butter (recommended: Skippy or Jif)
- 1 cup granulated sugar (plus extra for rolling)
- 1 large egg (room temperature)
- 1 teaspoon vanilla extract
- ½ teaspoon baking soda
- ¼ teaspoon salt (omit if peanut butter is salted)
- 48 candy corn pieces (about half a standard bag)
- 24 candy eyes
- 24 mini chocolate chips
- 24 red candy-coated chocolates (e.g., red M&Ms)
Instructions
- Preheat oven to 350°F (175°C). Line a baking sheet with parchment paper or a silicone baking mat.
- In a large mixing bowl, combine peanut butter, sugar, egg, vanilla, baking soda, and salt. Stir with a wooden spoon until a soft, cohesive dough forms. If too dry, add 1 tablespoon milk or water; if too sticky, add 1 tablespoon flour.
- Scoop about 1 tablespoon (20g) of dough and roll into a ball. Roll each ball in extra sugar to coat. Place on prepared baking sheet, spacing 2 inches apart (about 8 per sheet).
- Flatten each ball into a disc about ½ inch thick, slightly wider at the bottom and narrower at the top (teardrop shape) to form the turkey body.
- Press 3 candy corn pieces into the top of each disc in a fan pattern, pointed ends inward, about halfway submerged.
- Press 2 candy eyes into the lower half of the cookie. Place 1 mini chocolate chip in the center (pointy side down) for the beak. Press 1 red candy-coated chocolate below the beak for the wattle.
- Bake at 350°F (175°C) for 8 to 10 minutes, until puffed and lightly golden around the edges but still soft in the center.
- Cool on the baking sheet for 5 minutes, then transfer to a wire rack to cool completely.
Notes
Use commercial peanut butter (like Jif or Skippy) for best results. Natural peanut butter may cause spreading; drain excess oil and add extra sugar. Chill dough if working slowly. Press candy corn in at an angle for a fan effect. Do not overbake; cookies continue to set as they cool. Store in an airtight container at room temperature for up to 5 days. Freeze baked cookies for up to 3 months.
Nutrition
- Serving Size: 1 cookie
- Calories: 120
- Sugar: 8
- Sodium: 85
- Fat: 7
- Saturated Fat: 1.5
- Carbohydrates: 14
- Fiber: 1
- Protein: 3
Keywords: turkey cookies, peanut butter cookies, Thanksgiving cookies, fall cookies, shaped cookies, candy corn cookies


