My dad swore he hated green bean casserole for thirty-seven years. That’s not an exaggeration—he’d make this face, you know the one, like someone had just offered him a plate of soggy cardboard. Every Thanksgiving, my mom would make her version, and he’d politely push it around his plate. Then, two years ago, I made this version just for myself, a gluten-free experiment I wasn’t even sure would work, and I found him standing at the kitchen counter, fork in hand, eating straight from the baking dish. He didn’t even try to hide it. “This is different,” he mumbled, mouth full. Different, he said. Honestly, I think he was annoyed that I’d proved him wrong without even trying.
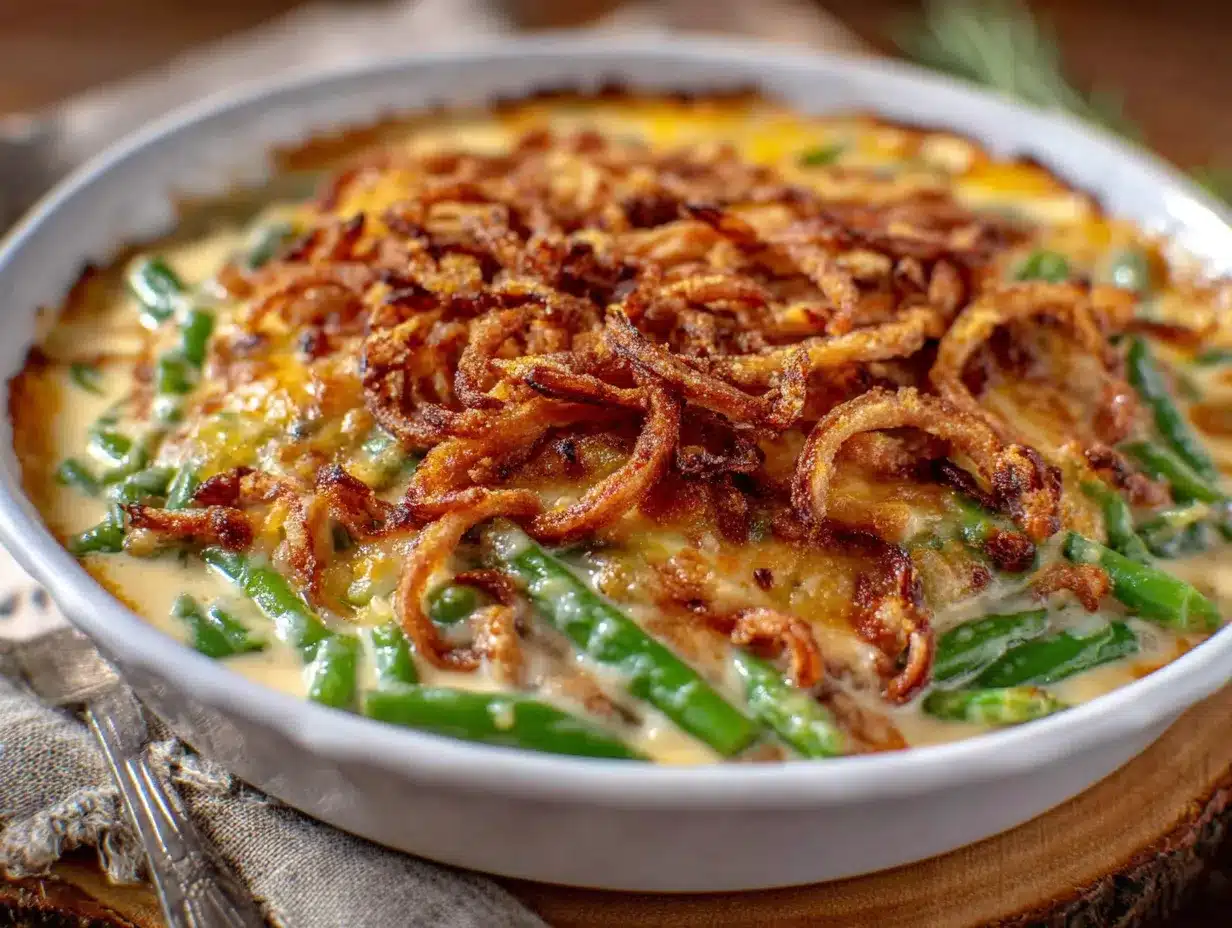
That’s the thing about this Wholesome Gluten-Free Green Bean Casserole. It doesn’t announce itself as a healthier version or a dietary substitute. It just shows up, creamy and golden, with that perfect crunchy topping, and lets you discover for yourself that it’s something special. I made it on a Tuesday, just to test the recipe, and by Wednesday my neighbor Karen was knocking on my door asking if I had any leftovers. (I didn’t. Sorry, Karen.)
The secret, if you can call it that, is that this recipe doesn’t rely on canned cream-of-mushroom soup or those weird fried onions that leave an oily film on your tongue. Instead, it uses real ingredients—fresh mushrooms, wholesome cream, and a crunchy topping made from actual onions and almonds. The result is a casserole that tastes like something you’d be proud to bring to a holiday dinner, but simple enough to make on a random weeknight when you’re craving comfort food. Maybe you’ve been there, standing in front of your pantry, wondering if you could make a green bean casserole that actually tastes good without all the processed stuff. Let me tell you, you absolutely can.
Why You’ll Love This Recipe
This isn’t just another green bean casserole recipe. After testing this dish at least eight times—yes, eight, my family is very patient—I can confidently say this version hits every note you want. Here’s why it works:
- Quick & Easy: Comes together in under 45 minutes, perfect for busy weeknights or last-minute holiday prep. Most of that time is hands-off baking.
- Simple Ingredients: No canned soups, no mystery ingredients, no gluten-filled shortcuts. You’ll find everything at your regular grocery store.
- Perfect for Gatherings: Great for Thanksgiving, Christmas, potlucks, or just a cozy Sunday dinner. It travels well and stays warm for ages.
- Crowd-Pleaser: I’ve served this to gluten-free friends and gluten-loving relatives alike. Everyone goes back for seconds. My dad still won’t admit he likes it, but I’ve caught him eating leftovers cold from the fridge.
- Unbelievably Delicious: The creamy mushroom sauce is rich and savory, the green beans stay tender-crisp, and the topping is crunchy without being greasy. It’s comfort food that actually delivers.
What makes this recipe different from the rest? It’s the technique. Most gluten-free green bean casseroles use a cornstarch slurry that ends up tasting pasty. Instead, I use a roux made with a specific gluten-free flour blend that creates a silky, velvety sauce that clings to every bean. The topping is made from scratch with sliced almonds and crispy onions that you bake yourself—no weird additives, just pure crunchy goodness. It’s comfort food reimagined: healthier, faster, but with the same soul-soothing satisfaction that makes you close your eyes after the first bite.
What Ingredients You Will Need
This recipe uses simple, wholesome ingredients to deliver bold flavor and satisfying texture without the fuss. Most of these are pantry staples, and the few that aren’t are easy to find at any grocery store.
For the Green Bean Casserole Base
- 1 ½ pounds fresh green beans, trimmed and halved (look for bright, firm beans without brown spots; frozen green beans work in a pinch, just thaw and pat dry first)
- 2 tablespoons unsalted butter (I prefer Kerrygold for its rich flavor, but any good butter works; use dairy-free butter if needed)
- 8 ounces cremini mushrooms, sliced (baby bellas work great; white button mushrooms are fine too, but cremini add deeper flavor)
- 1 small yellow onion, diced (about 1 cup; sweet onions also work well here)
- 3 cloves garlic, minced (fresh is best, but jarred minced garlic works in a pinch)
- 3 tablespoons gluten-free all-purpose flour (I recommend Bob’s Red Mill 1-to-1 Baking Flour for best results; do not use coconut flour or almond flour here)
- 1 ½ cups whole milk (adds richness; 2% works too, but avoid skim milk—the sauce won’t be as creamy)
- ½ cup heavy cream (for that luxurious texture; use full-fat coconut milk for a dairy-free version)
- 1 teaspoon salt (plus more for blanching water)
- ½ teaspoon black pepper
- ¼ teaspoon nutmeg, freshly grated (trust me on this—it brightens the whole dish)
- ½ cup grated Parmesan cheese (optional but recommended; adds savory depth; use a dairy-free Parmesan if needed)
For the Crunchy Topping
- 1 cup sliced almonds (adds wonderful crunch and healthy fats; you can also use crushed pecans or walnuts)
- 1 cup gluten-free crispy fried onions (look for these in the specialty foods aisle or make your own by baking thinly sliced onions tossed in oil and salt at 400°F for 15 minutes)
- 2 tablespoons melted butter or olive oil (helps everything get golden and crispy)
- ¼ teaspoon smoked paprika (adds a subtle smoky flavor that pairs beautifully with the mushrooms)
Equipment Needed
You don’t need a fancy kitchen to make this recipe, but having the right tools makes everything easier. Here’s what you’ll need:
- Large pot for blanching the green beans (any 5-quart pot works; I use my trusty old stockpot that’s seen better days but still gets the job done)
- Colander for draining the beans
- Large skillet or sauté pan for making the sauce (a 12-inch pan is ideal; nonstick works but stainless steel gives better browning)
- 9×13-inch baking dish (a 2-quart casserole dish also works; just adjust baking time slightly)
- Mixing bowls (one medium, one small)
- Whisk for making the roux smooth (a wooden spoon works too, but whisking gives you that silky texture)
- Chef’s knife and cutting board
- Measuring cups and spoons
If you don’t have a 9×13-inch dish, you can use a 10-inch cast iron skillet for a rustic presentation—just make sure it’s oven-safe. I’ve also made this in individual ramekins for a fancy dinner party look (bake for about 15 minutes instead of 25).
Preparation Method
Let me walk you through this step by step. I’ve made this recipe so many times I could do it in my sleep, but I’ll share all the little tricks I’ve learned along the way.
- Preheat your oven to 375°F (190°C). This gives it time to come to temperature while you prep everything. Position the rack in the middle of the oven—not too high, not too low.
- Blanch the green beans. Fill your large pot with water and add a generous pinch of salt—it should taste like the sea. Bring it to a rolling boil. Add the trimmed green beans and cook for exactly 3 minutes. You want them bright green and tender-crisp, not mushy. While they cook, fill a large bowl with ice water. When the timer goes off, immediately drain the beans and plunge them into the ice water. This stops the cooking process and locks in that gorgeous green color. Let them sit for 2 minutes, then drain well and pat dry with a clean kitchen towel. (I forgot to do this once and ended up with watery casserole—learn from my mistake!)
- Make the crispy topping. In a small bowl, combine the sliced almonds, gluten-free crispy fried onions, melted butter, and smoked paprika. Toss everything together until well coated. Set aside for now.
- Sauté the aromatics. In your large skillet, melt the butter over medium heat. Add the sliced mushrooms and diced onion. Cook, stirring occasionally, for about 6-8 minutes, until the mushrooms have released their liquid and started to brown, and the onions are translucent. The kitchen should smell amazing at this point. Add the minced garlic and cook for another 30 seconds, just until fragrant—don’t let it burn, or it’ll turn bitter.
- Make the roux. Sprinkle the gluten-free flour over the mushroom mixture. Stir constantly for 1-2 minutes, until the flour is fully incorporated and has a slightly nutty smell. This step is crucial—it cooks out the raw flour taste. The mixture will look thick and paste-like; that’s exactly what you want.
- Add the liquids. Slowly pour in the milk while whisking continuously. Keep whisking until the mixture is smooth—it might look lumpy at first, but keep going, I promise it’ll come together. Add the heavy cream, salt, pepper, and nutmeg. Continue cooking, stirring frequently, for about 3-4 minutes, until the sauce has thickened enough to coat the back of a spoon. It should look like a creamy soup, not a paste. If it seems too thick, add a splash more milk.
- Combine everything. Remove the skillet from heat. Add the blanched green beans and stir gently until they’re fully coated in the creamy mushroom sauce. If using Parmesan cheese, stir it in now. Taste and adjust seasoning—you might want a pinch more salt or pepper.
- Assemble the casserole. Transfer the mixture to your greased 9×13-inch baking dish. Spread it into an even layer. Sprinkle the crispy topping evenly over the top. Don’t press it down—you want it to stay light and crunchy.
- Bake. Place the dish in the preheated oven and bake for 20-25 minutes, until the casserole is bubbly around the edges and the topping is golden brown. The smell at this point is absolutely intoxicating—earthy mushrooms, toasted almonds, and that hint of smoked paprika.
- Rest before serving. Let the casserole sit for 5 minutes after you take it out of the oven. This allows the sauce to set slightly so it doesn’t run all over the plate. I know it’s hard to wait, but trust me on this one.
Cooking Tips & Techniques
After all those test batches, I’ve collected a few hard-won lessons. Let me save you from my mistakes.
Don’t skip the blanching step. I know it seems like extra work, but it’s the difference between green beans that are bright and tender-crisp versus ones that turn olive-green and mushy. The ice bath is non-negotiable—I tried skipping it once, thinking I’d just let them cool on the counter, and ended up with sad, limp beans that kept cooking even after I drained them.
Watch your roux carefully. The first time I made a gluten-free roux, I thought it was supposed to look like glue. It wasn’t. The key is to cook the flour and butter mixture just until it smells toasty and starts to turn a pale golden color. Go too long, and you’ll have a burnt taste you can’t fix. Go too short, and you’ll taste raw flour. You’re looking for about 1-2 minutes of constant stirring.
Use freshly grated nutmeg. I know, I know, it’s a tiny detail. But pre-ground nutmeg loses its punch after a few months, and this dish needs that subtle warmth to balance the earthy mushrooms. A whole nutmeg will last forever in your spice drawer, and a microplane grates it in seconds.
Make the topping while the beans blanch. This is my favorite multitasking trick. While the green beans are boiling and then chilling, I toss together the topping. By the time the beans are drained and dried, the topping is ready to go. It saves about 10 minutes and keeps your workflow smooth.
If your sauce seems thin, don’t panic. It will thicken more as it bakes. I once added extra flour because I thought the sauce was too runny, and ended up with a casserole that was more like a paste. Trust the process—the oven does the work for you.
Variations & Adaptations
One of the best things about this recipe is how flexible it is. Here are some ways I’ve adapted it depending on what I have on hand or who I’m cooking for.
Dairy-Free Version: Swap the butter for olive oil or dairy-free butter, use unsweetened oat milk or full-fat coconut milk instead of whole milk, and replace the heavy cream with coconut cream. The flavor changes slightly—coconut adds a subtle sweetness—but it’s still incredibly creamy and satisfying. I made this for a friend who’s dairy-free, and she asked for the recipe three times.
Protein-Packed Addition: Add 8 ounces of cooked, crumbled turkey sausage or diced chicken breast to the sauce before baking. This turns the casserole into a complete meal. I did this on a random Wednesday when I needed to use up leftover rotisserie chicken, and it was honestly better than the original.
Seasonal Twist: In summer, swap half the green beans for fresh asparagus or snap peas. In fall, add ½ cup of roasted butternut squash cubes. Both variations are absolutely delicious and make the dish feel totally different.
Spicy Kick: Add ¼ teaspoon of red pepper flakes along with the garlic, or stir in a diced jalapeño with the mushrooms. The heat cuts through the creamy sauce beautifully. My brother-in-law, who puts hot sauce on everything, approved this version.
Nut-Free Topping: If you’re cooking for someone with nut allergies, simply omit the almonds and double the crispy onions. You can also use crushed gluten-free pretzels or pumpkin seeds for crunch. I’ve tried all three, and they each bring something different to the table.
Serving & Storage Suggestions
This casserole is best served warm, right after that 5-minute rest. The topping is at its crispiest, and the sauce is perfectly creamy. I like to serve it in a shallow bowl with a generous spoonful—it’s rich enough to be the star of the plate, but it also pairs beautifully with roasted chicken, turkey, or a simple piece of grilled fish.
For holiday meals, this dish holds up wonderfully on a buffet table. I’ve kept it warm in a 200°F oven for up to 30 minutes without any issues. Just cover it loosely with foil if the topping starts to get too dark.
Refrigerator Storage: Leftovers keep well in an airtight container for up to 4 days. The topping will lose some of its crunch, but the flavor actually gets better as the sauce melds with the beans. To reheat, place individual portions in a 350°F oven for 10 minutes, or microwave for 2 minutes. If using the microwave, the topping will be softer—honestly, I still love it that way.
Freezer Instructions: You can freeze the assembled but unbaked casserole for up to 3 months. Prepare everything up to step 8, but don’t add the topping. Cover tightly with foil and freeze. When ready to bake, thaw overnight in the refrigerator, add the topping, and bake as directed, adding 5-10 minutes if needed. I’ve done this for Christmas prep, and it’s a lifesaver.
One thing I’ve noticed: the flavors are even better the next day. Something about the mushrooms and nutmeg melding together overnight makes the second helping somehow more satisfying than the first. Not that I’d know anything about eating leftovers for breakfast.
Nutritional Information & Benefits
This wholesome version of green bean casserole isn’t just delicious—it’s actually good for you. Here’s a rough breakdown per serving (based on 8 servings):
- Calories: 285
- Protein: 9g
- Fat: 18g
- Carbohydrates: 22g
- Fiber: 5g
- Sugar: 8g
Health Benefits: Green beans are packed with vitamins A, C, and K, plus fiber that supports digestive health. Mushrooms are one of the few natural sources of vitamin D, and they’re also rich in antioxidants. Almonds provide healthy fats, vitamin E, and magnesium. By making this dish from scratch, you’re avoiding the preservatives, excess sodium, and artificial flavors found in canned versions. It’s comfort food you can feel good about eating.
Dietary Considerations: This recipe is naturally gluten-free (when using certified gluten-free ingredients), vegetarian, and can easily be made dairy-free. It’s also lower in sodium than traditional versions—you control the salt. If you’re watching your carb intake, this fits well into a balanced diet with about 22g of carbs per serving, most of which come from the green beans and almonds.
Conclusion
This Wholesome Gluten-Free Green Bean Casserole has earned a permanent spot in my recipe rotation. It’s the dish that proved my dad wrong after thirty-seven years, the recipe that made my neighbor knock on my door asking for leftovers, and the comfort food I turn to when I want something that feels indulgent but is actually made from real, wholesome ingredients. It’s not trying to be a healthier version of something else—it’s just really, really good on its own terms.
I hope you’ll give it a try, whether for a holiday gathering or just a Tuesday night when you’re craving something warm and creamy. And please, don’t be afraid to make it your own. Swap in different mushrooms, add some bacon, go heavy on the nutmeg—this recipe is forgiving and rewards creativity. When you make it, I’d love to hear how it turned out. Drop a comment below, share your twist on the topping, or just tell me if you managed to keep it on the table long enough to serve your family. Happy cooking!
Frequently Asked Questions
Can I use frozen green beans instead of fresh?
Yes, you can. Thaw them completely and pat them very dry with paper towels before using. Skip the blanching step since frozen beans are already blanched. Just be aware that frozen beans can release more water during baking, so your casserole might be slightly less creamy.
How do I make this recipe completely dairy-free?
Swap the butter for olive oil or dairy-free butter, use unsweetened oat milk or full-fat coconut milk instead of whole milk, and replace the heavy cream with coconut cream. Omit the Parmesan or use a dairy-free version. The flavor will be slightly different, but still deliciously creamy.
Can I prepare this casserole ahead of time?
Absolutely. Assemble the casserole completely (including the topping) up to 24 hours in advance. Cover and refrigerate. When ready to bake, add about 10 minutes to the baking time since you’re starting from cold. You can also freeze it unbaked for up to 3 months.
Why did my sauce turn out lumpy?
Lumpy sauce usually happens when you add the milk too quickly or don’t whisk enough. Start with a thin stream of milk while whisking constantly. If lumps do form, don’t panic—just keep whisking vigorously. A quick blend with an immersion blender can also save a lumpy sauce.
What gluten-free flour works best for the roux?
I highly recommend Bob’s Red Mill 1-to-1 Baking Flour or King Arthur Measure for Measure. These blends contain xanthan gum, which helps the sauce thicken properly. Avoid single-ingredient flours like rice flour or almond flour—they won’t create the same silky texture.
Pin This Recipe!

Wholesome Gluten-Free Green Bean Casserole: Best Easy Recipe

This creamy, golden green bean casserole is made from scratch with fresh mushrooms, wholesome cream, and a crunchy almond-onion topping. It’s a healthier, gluten-free version that even skeptics will love, perfect for holidays or weeknight comfort food.
- Prep Time: 15 minutes
- Cook Time: 25 minutes
- Total Time: 40 minutes
- Yield: 8 servings 1x
- Category: Side Dish
- Cuisine: American
Ingredients
- 1 ½ pounds fresh green beans, trimmed and halved
- 2 tablespoons unsalted butter
- 8 ounces cremini mushrooms, sliced
- 1 small yellow onion, diced (about 1 cup)
- 3 cloves garlic, minced
- 3 tablespoons gluten-free all-purpose flour (e.g., Bob’s Red Mill 1-to-1 Baking Flour)
- 1 ½ cups whole milk
- ½ cup heavy cream
- 1 teaspoon salt (plus more for blanching water)
- ½ teaspoon black pepper
- ¼ teaspoon freshly grated nutmeg
- ½ cup grated Parmesan cheese (optional)
- 1 cup sliced almonds
- 1 cup gluten-free crispy fried onions
- 2 tablespoons melted butter or olive oil
- ¼ teaspoon smoked paprika
Instructions
- Preheat your oven to 375°F (190°C). Position the rack in the middle of the oven.
- Blanch the green beans: Fill a large pot with water and add a generous pinch of salt. Bring to a rolling boil. Add the trimmed green beans and cook for exactly 3 minutes. Meanwhile, fill a large bowl with ice water. Drain the beans and plunge them into the ice water for 2 minutes. Drain well and pat dry with a clean kitchen towel.
- Make the crispy topping: In a small bowl, combine the sliced almonds, gluten-free crispy fried onions, melted butter, and smoked paprika. Toss until well coated. Set aside.
- Sauté the aromatics: In a large skillet, melt the butter over medium heat. Add the sliced mushrooms and diced onion. Cook, stirring occasionally, for 6-8 minutes, until the mushrooms have released their liquid and started to brown, and the onions are translucent. Add the minced garlic and cook for 30 seconds, until fragrant.
- Make the roux: Sprinkle the gluten-free flour over the mushroom mixture. Stir constantly for 1-2 minutes, until the flour is fully incorporated and has a slightly nutty smell.
- Add the liquids: Slowly pour in the milk while whisking continuously. Add the heavy cream, salt, pepper, and nutmeg. Continue cooking, stirring frequently, for 3-4 minutes, until the sauce has thickened enough to coat the back of a spoon.
- Combine everything: Remove the skillet from heat. Add the blanched green beans and stir gently until fully coated. If using Parmesan cheese, stir it in now. Taste and adjust seasoning.
- Assemble the casserole: Transfer the mixture to a greased 9×13-inch baking dish. Spread into an even layer. Sprinkle the crispy topping evenly over the top.
- Bake: Place the dish in the preheated oven and bake for 20-25 minutes, until the casserole is bubbly around the edges and the topping is golden brown.
- Rest before serving: Let the casserole sit for 5 minutes before serving.
Notes
Don’t skip the blanching step—it keeps the beans bright and tender-crisp. Watch the roux carefully to avoid a burnt or raw flour taste. Use freshly grated nutmeg for the best flavor. If the sauce seems thin, don’t worry; it will thicken as it bakes. For a dairy-free version, swap butter for olive oil or dairy-free butter, use unsweetened oat milk or full-fat coconut milk, and replace heavy cream with coconut cream. Omit Parmesan or use a dairy-free version. The casserole can be assembled up to 24 hours ahead and refrigerated; add 10 minutes to the baking time. Freeze unbaked (without topping) for up to 3 months.
Nutrition
- Serving Size: 1 serving (about 1 c
- Calories: 285
- Sugar: 8
- Sodium: 480
- Fat: 18
- Saturated Fat: 8
- Carbohydrates: 22
- Fiber: 5
- Protein: 9
Keywords: gluten-free green bean casserole, healthy green bean casserole, homemade green bean casserole, dairy-free green bean casserole, holiday side dish


