The Halloween bake sale was in six hours and I’d completely forgotten. I mean, completely. I was standing in my kitchen at 7 AM, still in my pajamas, staring at a mostly empty pantry. Everyone else would be bringing those elaborate themed treats—you know, the ones that look like they took three days and a pastry degree. I had butter, sugar, eggs, cocoa powder, and a vague sense of panic. Let me tell you, that panic was real. I rummaged through my baking drawer and found a bag of powdered sugar that was somehow still fresh. And then it hit me—chocolate crinkle cookies. They’re simple, they’re fast, and honestly, they’re the kind of cookie that makes people close their eyes when they bite into them. But here’s the thing—I needed a twist. Something that looked like I actually planned ahead. That’s when I grabbed a piping bag and some white icing. The spider web design was a last-minute, desperate idea. I mean, I was literally piping webs while the timer was beeping. And you know what happened? Those cookies won. Not just a polite “oh, these are nice” win. I’m talking people asking for the recipe, the plate being empty in twenty minutes, and my neighbor Karen actually coming over the next day to beg for more. So yeah, these cozy spider web chocolate crinkle cookies came from a moment of pure chaos. And honestly, that’s why I keep making them. Because sometimes the best things happen when you’re not trying so hard.
Why You’ll Love This Recipe
Let me be real with you—I’ve tested this recipe about a dozen times. I’ve made them with different cocoa powders, different chilling times, different piping techniques. And this version? It’s the one. Here’s why this recipe is going to become your new fall favorite:
- Quick & Easy: From start to finish, these come together in under an hour. No complicated techniques, no fancy equipment. Just good, honest baking.
- Simple Ingredients: You probably have everything in your kitchen right now. Butter, sugar, eggs, cocoa powder, flour. That’s it. No trips to a specialty store required.
- Perfect for Halloween: These are the star of any spooky gathering. Bake sales, classroom parties, Halloween dinners—they fit right in without being over-the-top.
- Crowd-Pleaser: I’ve served these to kids, adults, picky eaters, and cookie snobs. Every single person goes back for seconds. The combination of fudgy chocolate and delicate icing is irresistible.
- Unbelievably Delicious: The texture is what gets me every time. Crackly, slightly crisp on the outside, but soft and almost brownie-like on the inside. It’s comfort food in cookie form.
What makes these different from every other chocolate crinkle cookie recipe out there? It’s the spider web design, sure. But it’s also the technique. I use a specific chilling method that gives you that perfect crinkle without the cookies spreading too much. And the icing? I’ve figured out the exact consistency so it pipes cleanly and sets beautifully. This isn’t just another Halloween cookie—it’s the one you’ll make year after year. The kind that makes you close your eyes after the first bite because it tastes like everything cozy and good in the world.
What Ingredients You Will Need
This recipe uses simple, wholesome ingredients to deliver that rich, fudgy chocolate flavor and satisfying crinkle texture. Most of these are pantry staples, which makes these cookies perfect for those last-minute baking emergencies—trust me, I know.
For the Cookie Dough
- 1/2 cup (113g) unsalted butter, softened to room temperature (I use Kerrygold for the best flavor, but any good quality butter works)
- 3/4 cup (150g) granulated sugar (adds sweetness and helps create that crinkly top)
- 1/2 cup (100g) packed light brown sugar (adds moisture and a subtle molasses depth)
- 2 large eggs, room temperature (this is important—cold eggs will make the dough stiff)
- 1 teaspoon vanilla extract (pure, not imitation, if you can swing it)
- 1 3/4 cups (220g) all-purpose flour (spooned and leveled—don’t scoop directly from the bag)
- 1/2 cup (45g) unsweetened cocoa powder (I prefer Dutch-process for a darker, richer cookie, but natural works too)
- 1 teaspoon baking powder (helps with that signature crinkle)
- 1/2 teaspoon salt (balances the sweetness and enhances the chocolate)
For the Coating & Decoration

- 1/2 cup (60g) powdered sugar, for rolling (this is what creates the crinkles)
- 1/2 cup (60g) powdered sugar, for the spider web icing
- 2-3 tablespoons milk or water, for thinning the icing
- 1/4 teaspoon vanilla extract, for the icing (optional, but nice)
Ingredient Tips: For the cocoa powder, I’ve tested this with both Dutch-process and natural, and honestly, Dutch-process gives you that deep, dark color that makes the powdered sugar really pop. But if you only have natural cocoa, it’ll still taste amazing—just slightly lighter in color. For the butter, make sure it’s truly softened, not melted. You want it to be cool to the touch but give slightly when you press it. And here’s a pro tip: if your eggs are cold, place them in a bowl of warm water for five minutes before using. It makes a real difference in how the dough comes together.
Substitution Guidance: Need a dairy-free option? Use vegan butter sticks (not the spreadable kind) and a plant-based milk for the icing. For a gluten-free version, swap the all-purpose flour with a 1:1 gluten-free baking blend that contains xanthan gum. I’ve tested it with Bob’s Red Mill, and it works beautifully. Just note that the crinkle might be slightly less pronounced.
Equipment Needed
You don’t need a professional bakery setup for these cookies. Here’s what you’ll actually use:
- Large mixing bowls (one for wet ingredients, one for dry—I use glass bowls because they don’t retain odors)
- Electric hand mixer or stand mixer (a hand mixer works perfectly; I’ve made these with both)
- Baking sheets (two, so you can rotate batches. I use light-colored aluminum sheets for even browning)
- Parchment paper or silicone baking mats (parchment is cheaper, silicone is reusable—both work great)
- Cooling rack (essential for letting the cookies set before piping)
- Small piping bag or zip-top bag (for the spider web design. A zip-top bag with the corner snipped off works perfectly)
- Small round piping tip (size 2 or 3, or just snip a tiny hole in your bag)
- Measuring cups and spoons (get the metal ones—they’re more accurate than plastic)
- Kitchen scale (optional, but I highly recommend it for consistent results. Baking by weight is a game-changer)
If you don’t have a piping bag, don’t stress. I’ve used a sandwich bag more times than I can count. Just fill it with the icing, snip off the tiniest corner you can manage, and you’re good to go. For the baking sheets, if you only have dark ones, just keep an eye on your cookies—they tend to brown faster. You might need to reduce the baking time by a minute or two.
Preparation Method
Alright, let’s get to the good part. I’ve broken this down step by step so you don’t miss a thing. Trust me, I’ve made every mistake possible so you don’t have to.
Step 1: Cream the Butter and Sugars
In a large mixing bowl, beat the softened butter, granulated sugar, and brown sugar together until light and fluffy. This takes about 3-4 minutes with a hand mixer on medium speed. You’re looking for a pale, airy mixture that looks almost like whipped frosting. Don’t rush this step—proper creaming is what gives the cookies their tender texture.
Step 2: Add the Eggs and Vanilla
Add the eggs one at a time, beating well after each addition. Then mix in the vanilla extract. The mixture might look slightly curdled at this point—that’s totally normal. Don’t panic. Just keep mixing until it comes back together and looks smooth and glossy.
Step 3: Combine the Dry Ingredients
In a separate bowl, whisk together the flour, cocoa powder, baking powder, and salt. Make sure there are no lumps—cocoa powder can be stubborn. If you see any, just press them through with the back of a spoon.
Step 4: Mix the Wet and Dry Ingredients
Gradually add the dry ingredients to the wet mixture, mixing on low speed until just combined. Here’s the thing—overmixing will make your cookies tough. Stop as soon as you don’t see any more streaks of flour. The dough will be soft and slightly sticky. That’s exactly what you want.
Step 5: Chill the Dough
Cover the bowl with plastic wrap and refrigerate for at least 30 minutes. This is non-negotiable. Chilling firms up the dough so the cookies don’t spread too much in the oven, and it helps develop that gorgeous crinkle top. I’ve skipped this step before, and let me tell you—flat, sad cookies. Don’t be like me.
Step 6: Preheat and Prepare
Preheat your oven to 350°F (175°C). Line your baking sheets with parchment paper or silicone mats. Place the 1/2 cup of powdered sugar for rolling in a shallow bowl.
Step 7: Shape and Roll
Scoop the dough into 1.5-tablespoon portions (about the size of a golf ball). Roll each portion into a smooth ball between your palms. Then roll each ball generously in the powdered sugar. I mean really coat it—you want a thick, snowy layer. This is what creates those beautiful crinkles as the cookie bakes and expands.
Step 8: Bake
Place the sugar-coated dough balls on the prepared baking sheets, spacing them about 2 inches apart. Bake for 10-12 minutes. The cookies should look puffed and cracked, with the edges set but the centers still slightly soft. They’ll continue to set as they cool. If you overbake them, they’ll lose that fudgy texture, so keep an eye on them.
Step 9: Cool Completely
Let the cookies cool on the baking sheet for 5 minutes, then transfer them to a wire cooling rack. They need to be completely cool before you add the spider web icing—otherwise, the icing will melt and slide right off. I learned this the hard way. Trust me on this one.
Step 10: Make the Spider Web Icing
In a small bowl, whisk together the remaining 1/2 cup of powdered sugar, 2 tablespoons of milk or water, and the vanilla extract if using. You’re looking for a consistency that’s thick but pipeable—think toothpaste, not water. Add more liquid a teaspoon at a time if it’s too thick.
Step 11: Pipe the Spider Webs
Transfer the icing to your piping bag or zip-top bag. Snip off a tiny corner. Starting from the center of each cookie, pipe a small dot. Then pipe 3-4 concentric circles around that center dot. Use a toothpick or a small knife to drag lines from the center outward through the circles, creating the web effect. Wipe the toothpick clean between cookies for the cleanest lines.
Cooking Tips & Techniques
I’ve made these cookies more times than I can count, and I’ve picked up pretty much every trick along the way. Here’s what I wish someone had told me:
The Chilling Situation: I once tried to skip the chilling step because I was in a hurry. Big mistake. The cookies spread into flat, sad discs with barely any crinkle. The dough needs that time in the fridge to firm up the butter and let the flour hydrate. Thirty minutes is the minimum, but an hour is even better. If you’re really pressed for time, pop the shaped dough balls in the freezer for 15 minutes instead.
The Powdered Sugar Coat: Here’s the thing about the powdered sugar—you need to be generous. I mean really roll those dough balls around until they look like snowballs. And here’s a pro tip: roll them twice. Roll once, let them sit for a minute (the moisture from the dough will absorb some of the sugar), then roll again. This double-coating gives you those dramatic, bakery-style crinkles.
The Icing Consistency: Getting the icing right is the trickiest part. Too thick, and it won’t pipe smoothly. Too thin, and it’ll run off the cookies. Aim for a consistency where the icing holds its shape for a second before slowly settling. If you accidentally make it too thin, just add more powdered sugar a tablespoon at a time. Too thick? Add a drop of milk. You’ve got this.
Timing and Multitasking: While the dough is chilling, that’s your window to prep everything else. Line your baking sheets, measure out the powdered sugar for rolling, make the icing. I like to bake one sheet at a time so the oven temperature stays consistent. While one batch is baking, I’m rolling the next batch in sugar. It makes the whole process feel smooth and efficient.
The Toothpick Trick: For the most beautiful spider webs, use a toothpick instead of a knife. The smaller tip gives you more control and creates finer lines. And here’s a little secret—if your lines aren’t perfect, that’s actually fine. Imperfect webs look more organic and creepy-crawly anyway. Embrace the wonkiness.
Variations & Adaptations
One of the best things about this recipe is how adaptable it is. Here are some ways I’ve switched it up over the years:
Gluten-Free Version: I swapped the all-purpose flour for a 1:1 gluten-free baking blend, and honestly, I couldn’t tell the difference. The texture was slightly more delicate, but the crinkle was still there. Just make sure your blend contains xanthan gum, or add 1/4 teaspoon yourself.
Dairy-Free Version: Use vegan butter sticks (not the spreadable tub kind) and a plant-based milk for the icing. I’ve tested this with oat milk and almond milk, and both work beautifully. The cookies might be slightly less tender, but they’re still delicious.
Peppermint Twist: Add 1/2 teaspoon of peppermint extract to the dough along with the vanilla. The combination of chocolate and peppermint is pure holiday magic. I made these for a Christmas party once, and they disappeared faster than anything else on the table.
Spicy Version: Add 1/2 teaspoon of cinnamon and a pinch of cayenne pepper to the dry ingredients. The warmth of the spices pairs beautifully with the deep chocolate flavor. It’s subtle enough that kids won’t notice, but adults will appreciate the complexity.
White Chocolate Drizzle: Instead of the spider web icing, melt some white chocolate chips and drizzle them over the cooled cookies. It’s less intricate but just as beautiful. Plus, it’s faster if you’re short on time.
Halloween Sprinkle Edition: Before the icing sets, sprinkle some orange and black jimmies over the spider webs. It adds a fun crunch and makes the cookies even more festive. My niece absolutely loves these.
Serving & Storage Suggestions
These cookies are best served at room temperature, right after the icing has set. The contrast between the crackly, powdered sugar-coated exterior and the soft, fudgy interior is pure perfection. I like to arrange them on a black or dark orange platter for Halloween—the white spider webs really pop against a darker background.
Storage: Store the cookies in an airtight container at room temperature for up to 5 days. Place a sheet of parchment paper between layers to prevent the icing from smudging. Here’s the thing—the cookies actually get better after a day. The flavors meld together, and the texture becomes even more fudgy. So if you can resist eating them all immediately, they’ll reward you.
Freezing: You can freeze the baked cookies (without the icing) for up to 3 months. Just wrap them tightly in plastic wrap and place them in a freezer-safe bag. When you’re ready to serve, thaw them at room temperature, then add the spider web icing. Or, freeze the unbaked dough balls for up to 2 months. Bake them straight from the freezer, adding an extra minute or two to the baking time.
Reheating: If you want that just-baked warmth, pop a cookie in the microwave for 8-10 seconds. It’ll soften the chocolate and make the cookie taste fresh out of the oven. Just don’t overdo it, or the icing will melt.
Flavor Development: I’ve noticed that the chocolate flavor deepens after a day or two. The powdered sugar coating also settles into the crinkles more, creating an even more dramatic look. So if you’re making these for a party, bake them a day ahead. Your future self will thank you.
Nutritional Information & Benefits
Let’s be honest—these are cookies, not health food. But here’s what you’re working with per cookie (based on 24 cookies):
- Calories: Approximately 145
- Total Fat: 6g
- Saturated Fat: 3.5g
- Carbohydrates: 22g
- Sugar: 15g
- Protein: 2g
- Fiber: 1g
Health Benefits: The cocoa powder is actually the star here. It’s packed with antioxidants called flavonoids, which can help reduce inflammation and support heart health. Dark chocolate in general is known for its mood-boosting properties—there’s a reason chocolate makes everything feel better. Plus, the eggs provide a small amount of protein, and the butter contains vitamin A. I mean, it’s not a salad, but it’s not empty calories either.
Dietary Considerations: These cookies contain gluten, dairy, and eggs. For gluten-free and dairy-free options, check the variations section above. They’re also nut-free as written, which makes them a safe choice for school bake sales and parties.
Potential Allergens: Wheat (gluten), dairy, eggs. If you’re serving these at a gathering, I always recommend labeling them just to be safe.
Conclusion
So here’s the thing about these cozy spider web chocolate crinkle cookies—they’re more than just a Halloween treat. They’re the kind of cookie that brings people together. The kind that makes you feel like you’ve got it all figured out, even when you’re just barely keeping it together. I’ve made these for bake sales, for parties, for quiet nights at home when I needed something sweet. And every single time, they deliver.
I want you to make these your own. Maybe you’ll add a pinch of cinnamon, or swap the spider web for a ghost design. Maybe you’ll double the batch because one never seems to be enough. Whatever you do, just know that this recipe is forgiving. It’s patient. It wants you to succeed.
So go ahead—preheat that oven, get your hands dusty with powdered sugar, and make something that feels like a hug. And when you do, come back and tell me about it. Leave a comment, share a photo, tag me in your creation. I genuinely love seeing how these turn out for other people. Because honestly? That’s the best part of sharing a recipe—watching it come to life in someone else’s kitchen.
Happy baking, friend. You’ve got this.
Frequently Asked Questions
Can I make the dough ahead of time?
Absolutely. You can prepare the dough up to 3 days in advance and keep it covered in the refrigerator. Just let it sit at room temperature for about 10 minutes before rolling—it’ll be easier to handle. You can also freeze the shaped dough balls for up to 2 months and bake them straight from the freezer.
Why didn’t my cookies crinkle?
This usually happens for one of three reasons: the dough wasn’t chilled enough, the powdered sugar coating was too thin, or the oven temperature was too low. Make sure you’re rolling the dough balls generously in powdered sugar—like, really coating them. And don’t skip the chilling step. It’s what creates that dramatic crinkle effect.
Can I use a different icing design?
Of course! The spider web is just one option. You can pipe simple dots, zigzags, or even little ghosts. If you’re feeling creative, use orange food coloring in the icing for a more festive look. The possibilities are endless, and honestly, that’s what makes baking fun.
How do I prevent the icing from smudging?
Make sure the cookies are completely cool before you pipe the icing. If they’re even slightly warm, the icing will melt and slide off. Also, store the cookies in a single layer with parchment paper between layers. If you’re stacking them, wait until the icing has fully set—about 30 minutes at room temperature.
Can I make these cookies smaller or larger?
Yes, just adjust the baking time. For smaller cookies (about 1 tablespoon of dough), bake for 8-10 minutes. For larger cookies (about 2 tablespoons of dough), bake for 12-14 minutes. Keep an eye on them—you want the edges set but the centers still soft. The powdered sugar should look cracked and snowy on top.
Pin This Recipe!
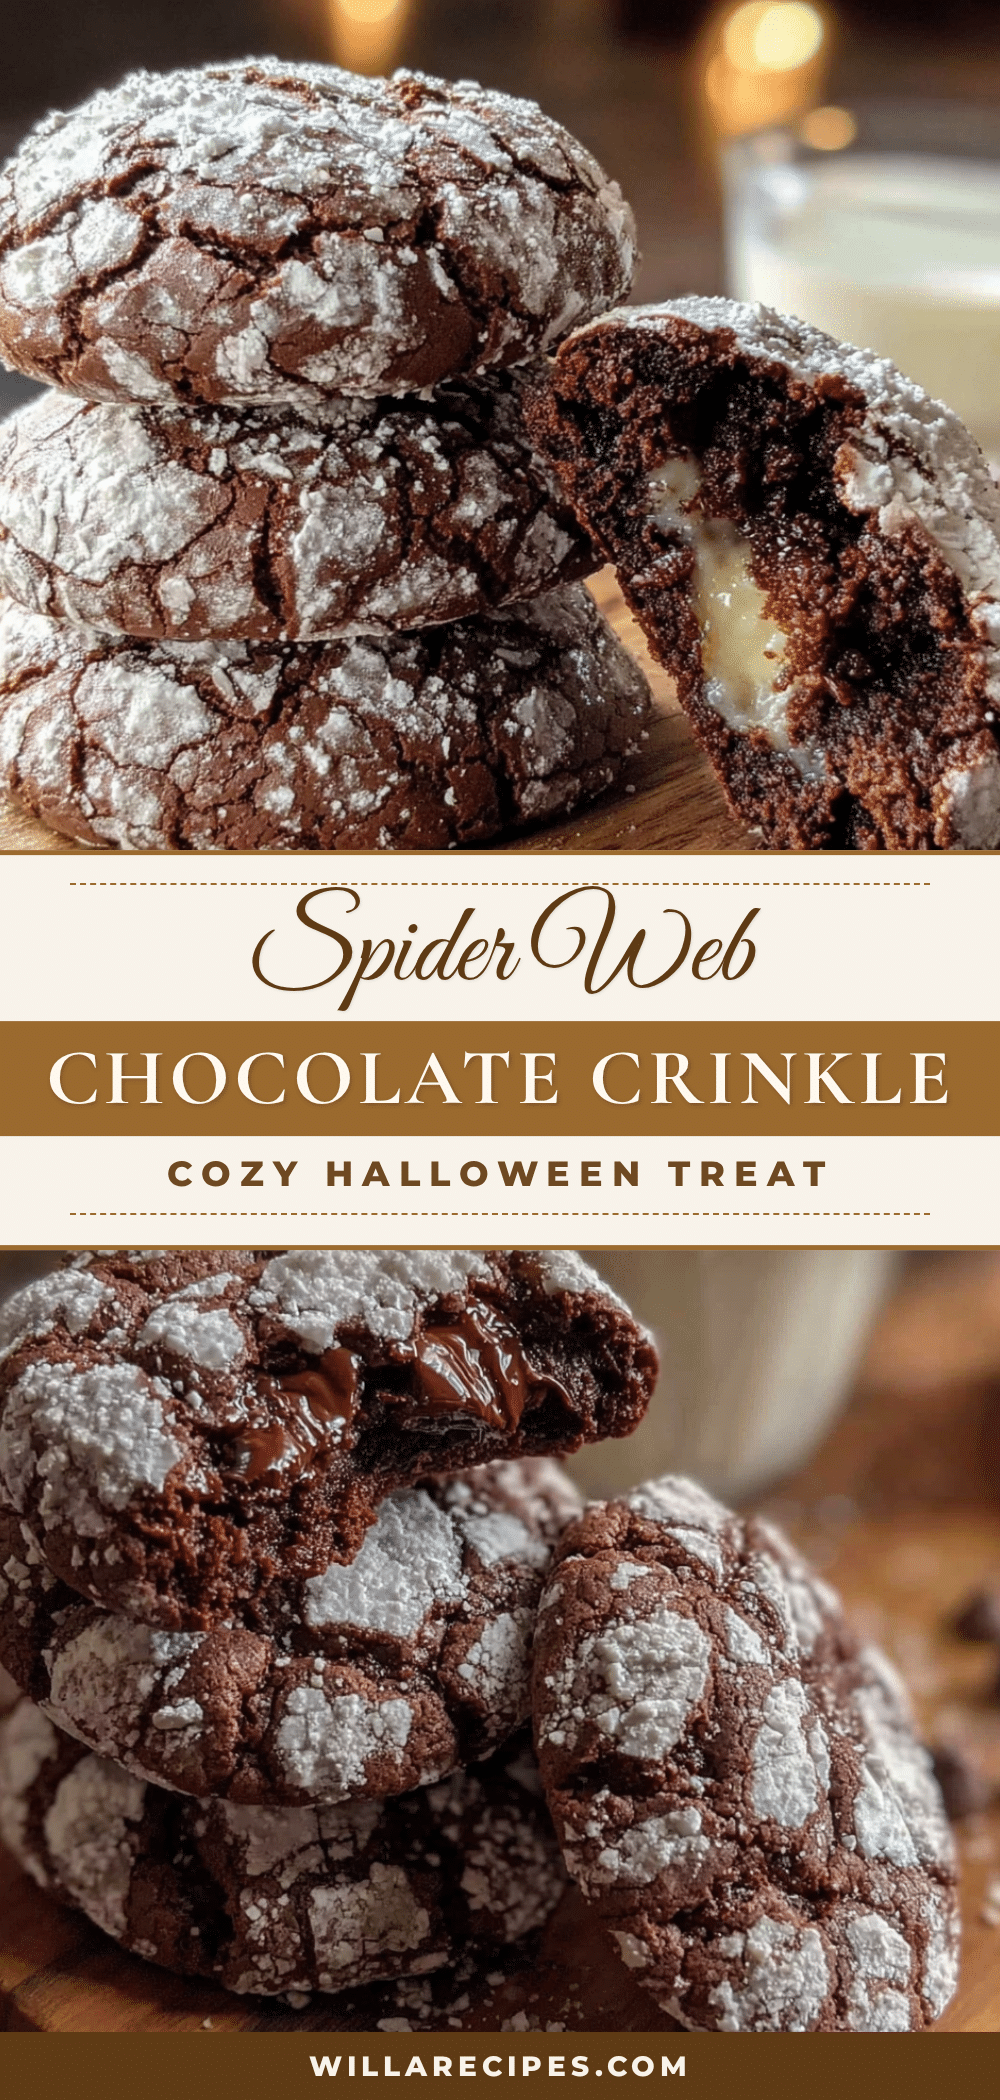
Best Spider Web Chocolate Crinkle Cookies – Easy & Cozy

These fudgy chocolate crinkle cookies are topped with a delicate spider web icing, making them the perfect Halloween treat. Quick to make with simple ingredients, they’re a crowd-pleaser that tastes as good as it looks.
- Prep Time: 20 minutes
- Cook Time: 12 minutes
- Total Time: 1 hour 2 minutes
- Yield: 24 cookies 1x
- Category: Dessert
- Cuisine: American
Ingredients
- 1/2 cup (113g) unsalted butter, softened
- 3/4 cup (150g) granulated sugar
- 1/2 cup (100g) packed light brown sugar
- 2 large eggs, room temperature
- 1 teaspoon vanilla extract
- 1 3/4 cups (220g) all-purpose flour
- 1/2 cup (45g) unsweetened cocoa powder
- 1 teaspoon baking powder
- 1/2 teaspoon salt
- 1/2 cup (60g) powdered sugar, for rolling
- 1/2 cup (60g) powdered sugar, for icing
- 2–3 tablespoons milk or water
- 1/4 teaspoon vanilla extract (optional, for icing)
Instructions
- In a large mixing bowl, beat the softened butter, granulated sugar, and brown sugar together until light and fluffy, about 3-4 minutes.
- Add the eggs one at a time, beating well after each addition. Mix in the vanilla extract.
- In a separate bowl, whisk together the flour, cocoa powder, baking powder, and salt.
- Gradually add the dry ingredients to the wet mixture, mixing on low speed until just combined. The dough will be soft and slightly sticky.
- Cover the bowl with plastic wrap and refrigerate for at least 30 minutes.
- Preheat oven to 350°F (175°C). Line baking sheets with parchment paper or silicone mats. Place 1/2 cup powdered sugar for rolling in a shallow bowl.
- Scoop the dough into 1.5-tablespoon portions (about golf ball size). Roll each into a smooth ball, then roll generously in powdered sugar.
- Place dough balls on prepared baking sheets, spacing 2 inches apart. Bake for 10-12 minutes until puffed and cracked with set edges but soft centers.
- Let cookies cool on baking sheet for 5 minutes, then transfer to a wire rack to cool completely.
- In a small bowl, whisk together remaining 1/2 cup powdered sugar, 2 tablespoons milk or water, and vanilla extract (if using) until thick but pipeable.
- Transfer icing to a piping bag or zip-top bag with a tiny corner snipped off. Pipe a small dot in the center of each cookie, then 3-4 concentric circles around it. Use a toothpick to drag lines from center outward through the circles to create a web effect.
Notes
Chill the dough for at least 30 minutes to prevent spreading. Roll dough balls twice in powdered sugar for dramatic crinkles. Ensure cookies are completely cool before piping icing to prevent melting. For gluten-free, use a 1:1 gluten-free baking blend with xanthan gum. For dairy-free, use vegan butter sticks and plant-based milk.
Nutrition
- Serving Size: 1 cookie
- Calories: 145
- Sugar: 15
- Sodium: 85
- Fat: 6
- Saturated Fat: 3.5
- Carbohydrates: 22
- Fiber: 1
- Protein: 2
Keywords: spider web cookies, chocolate crinkle cookies, Halloween cookies, easy Halloween dessert, fudgy chocolate cookies


