My neighbor, an older woman named Gladys, watched me scraping the innards out of a pumpkin on my front stoop last October and didn’t say anything at first. Then she just shook her head, laughing softly, and walked back inside her house. I thought maybe I’d done something wrong—you know, like I was making a huge mess (which I was). A few minutes later, she came back with a small, weathered baking sheet in her hands and a little brown paper bag. “You’re not going to throw those seeds away, are you?” she asked, pointing at the slimy pile I’d set aside. Honestly, I hadn’t even thought about them. I was so focused on getting the pumpkin carved before my kids lost interest that the seeds were just… pumpkin trash.
She sat down right there on the steps next to me, ignoring the chilly breeze, and showed me how she’d been doing it for decades. It wasn’t a formal cooking lesson—more like a quiet conversation between two people who just happened to be neighbors. She talked about her late husband, how he loved anything with cinnamon, and how a little bit of sugar made the whole house smell like December. I remember thinking how strange it was that a simple seed could hold so much memory for someone. She left me with the baking sheet, a handful of instructions, and that little bag of cinnamon sugar she’d mixed up in her own kitchen. I didn’t even get a chance to thank her properly before she was gone.
That first batch I made was a little bit of a disaster, if I’m being honest. I forgot to dry the seeds long enough, so they came out more chewy than crunchy. But the flavor? That warmth from the cinnamon and the gentle sweetness from the sugar? It was like a hug in a bowl. I tweaked her method over the next few weeks, making batch after batch until I got it just right. Now, every time I bake these cozy cinnamon sugar baked pumpkin seeds, I think of Gladys and that chilly October afternoon. It’s funny how a recipe can come to you through a simple, unplanned moment. And I keep making them because, honestly, they’re the best part of carving a pumpkin—maybe you’ve been there, picking at the seeds before they even hit the oven.
Why You’ll Love This Recipe
After testing this recipe about a dozen times (my family was getting pretty tired of pumpkin seeds, let me tell you), I can confidently say this version is the one. It’s not just another snack—it’s the snack that makes you close your eyes after the first bite. Here’s why this particular method is a game-changer:
- Quick & Easy: From pumpkin to plate in under 45 minutes. Most of that time is just the oven doing the work, so you can get back to your cozy evening.
- Simple Ingredients: You probably already have everything in your pantry. No fancy grocery trips needed for this one.
- Perfect for Fall Evenings: Whether you’re watching a movie, reading a book, or just trying to convince yourself it’s okay to eat a third handful, these seeds fit the mood.
- Crowd-Pleaser: I’ve brought these to potlucks and watched them disappear faster than the store-bought snacks. Kids and adults both go nuts for them.
- Unbelievably Delicious: The texture is perfectly crunchy, and the cinnamon-sugar coating is just right—not too sweet, not too heavy. It’s comfort food in its purest, simplest form.
What makes this recipe different from the rest is the technique. Most recipes either burn the sugar or leave the seeds tasting raw and bland. I figured out that tossing the seeds in a light egg white wash before coating them is the secret. It helps the cinnamon sugar stick without making them soggy. It also gives them that extra little crunch that makes you reach for “just one more.” This isn’t just another version of baked pumpkin seeds—it’s the best version I’ve ever made, and I’m pretty sure you’ll agree after your first batch.
What Ingredients You Will Need
This recipe uses simple, wholesome ingredients to deliver that warm, cozy flavor we’re all craving. Most of these are pantry staples, which makes this recipe perfect for a spontaneous fall afternoon. Let’s break down what you’ll need and why each ingredient matters.
- Fresh Pumpkin Seeds (1 cup / about 120g): Obviously, the star of the show. You can get these from any carving pumpkin, but sugar pumpkins (the smaller, sweeter ones) actually produce tastier seeds. If you’re buying them pre-packaged, look for raw, unsalted seeds. I usually save seeds from my Halloween pumpkin and keep them in the fridge for a day or two until I’m ready to bake.
- Unsalted Butter (2 tablespoons / 28g, melted): Butter adds that rich, nutty flavor that makes these seeds irresistible. I recommend using unsalted so you can control the salt level yourself. If you’re dairy-free, coconut oil works beautifully here—it adds a subtle sweetness that pairs well with the cinnamon.
- Granulated Sugar (2 tablespoons / 25g): This gives the seeds their sweet crunch. You can use brown sugar for a deeper, almost molasses-like flavor, but I prefer white sugar here because it lets the cinnamon shine. For a lower-sugar option, try coconut sugar—it’s less sweet but adds a nice caramel note.
- Ground Cinnamon (1 ½ teaspoons / 4g): The heart of the recipe. Cinnamon brings that unmistakable warmth that screams “fall.” I personally use McCormick for a consistent, bold flavor. If you have a good spice grinder, freshly ground cinnamon from Ceylon sticks is a real treat—it’s sweeter and more delicate than the standard cassia cinnamon.
- Salt (½ teaspoon / 3g): Don’t skip this! A little salt balances the sweetness and makes the flavors pop. I use fine sea salt for even distribution. If you only have kosher salt, use a bit more—about ¾ teaspoon.
- Egg White (1 large): This is my secret weapon. Whisking the egg white until it’s frothy and then tossing it with the seeds helps the cinnamon-sugar mixture stick perfectly. It also creates a light, crispy coating that doesn’t flake off. If you’re vegan, you can substitute 1 tablespoon of aquafaba (the liquid from a can of chickpeas)—it works just as well.
- Vanilla Extract (½ teaspoon / 2ml): Optional, but highly recommended. It adds a subtle warmth that rounds out the cinnamon. I use pure vanilla extract, not imitation, for the best flavor. A little goes a long way.
That’s it! Seven ingredients, most of which you probably already have in your kitchen. The beauty of this recipe is its simplicity—no complicated steps or hard-to-find items. Just pure, cozy goodness.
Equipment Needed
You don’t need a fancy kitchen to make these seeds. Here’s what you’ll need:
- Baking Sheet: A standard half-sheet pan (18×13 inches) works perfectly. Line it with parchment paper for easy cleanup. If you don’t have parchment, a silicone baking mat works great too.
- Mixing Bowls: You’ll need one large bowl for tossing the seeds and one small bowl for whisking the egg white. I use a glass bowl for the egg white because it’s easier to see when it’s frothy.
- Whisk or Fork: For beating the egg white until it’s light and frothy. A whisk works faster, but a fork will do in a pinch.
- Spatula or Wooden Spoon: For mixing the seeds with the coating. I prefer a silicone spatula because it doesn’t scratch the bowl and makes scraping every last bit easy.
- Paper Towels: For drying the seeds after rinsing. This is a crucial step—wet seeds won’t get crispy.
- Colander: For rinsing the seeds and removing any pumpkin guts. A fine-mesh colander is best so the small seeds don’t fall through.
If you don’t have a baking sheet, a cast-iron skillet works surprisingly well. Just keep an eye on the seeds because the skillet retains heat and can brown them faster. I’ve also used a toaster oven for small batches—it works fine, but you’ll need to rotate the pan halfway through for even cooking.
Preparation Method
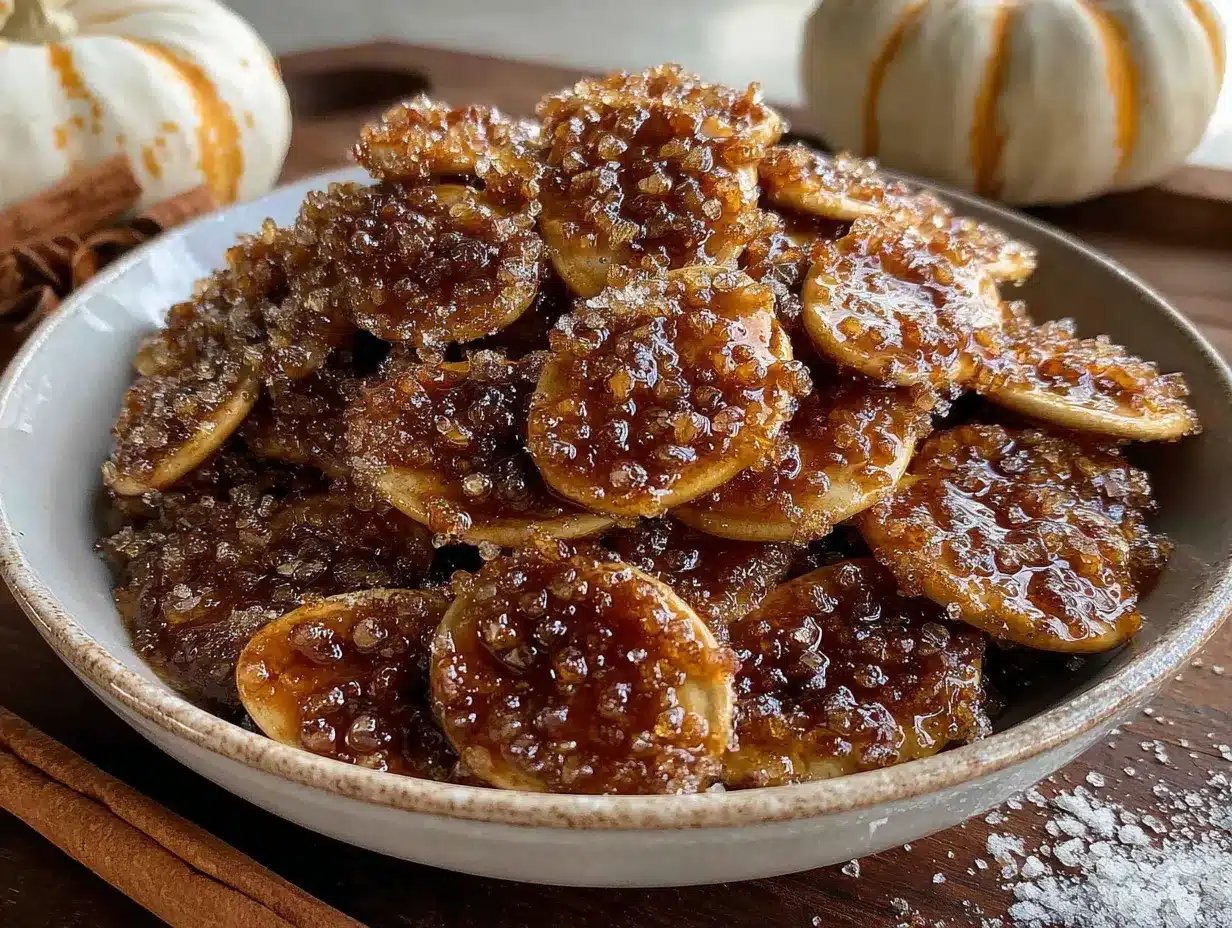
Alright, let’s get to the fun part. Follow these steps, and you’ll have a batch of perfectly crunchy, sweet, and cozy seeds in no time.
- Preheat your oven to 300°F (150°C). This lower temperature is key—it dries the seeds out slowly without burning the sugar. Line a baking sheet with parchment paper and set it aside.
- Clean the seeds. Separate the pumpkin seeds from the stringy pulp. Place them in a colander and rinse under cold water, using your fingers to rub off any remaining bits of pumpkin. Don’t worry if a few tiny strings are left—they’ll crisp up in the oven and add a little extra texture.
- Dry the seeds thoroughly. This is the most important step. Spread the rinsed seeds on a clean kitchen towel or a stack of paper towels. Pat them dry as much as you can. Let them sit for about 10 minutes to air-dry any remaining moisture. If the seeds are even slightly damp, they’ll steam instead of roast, and you’ll end up with chewy seeds. Trust me, I learned this the hard way.
- Whisk the egg white. In a small bowl, add the egg white and whisk vigorously for about 30 seconds until it’s frothy and slightly thickened. You want it to look like soapy bubbles. If you’re using aquafaba, whisk it the same way.
- Combine the dry ingredients. In a separate small bowl, mix together the granulated sugar, ground cinnamon, and salt. Stir until everything is evenly combined. Give it a sniff—that’s what fall smells like.
- Coat the seeds. Place the dried pumpkin seeds in a large mixing bowl. Pour the frothy egg white over them and toss gently with a spatula until every seed is coated. Then, sprinkle the cinnamon-sugar mixture over the seeds and toss again until they’re evenly covered. You should see the coating clinging to each seed.
- Spread on the baking sheet. Pour the coated seeds onto the prepared baking sheet. Use the spatula to spread them into a single, even layer. Try not to let them overlap too much, or they’ll steam instead of roast. If you have a lot of seeds, use two baking sheets.
- Bake for 25-30 minutes. Place the baking sheet on the middle rack of your oven. Bake for 15 minutes, then remove the pan and stir the seeds gently with a spatula. This ensures even cooking. Return to the oven and bake for another 10-15 minutes. The seeds are done when they’re golden brown and feel dry to the touch. They’ll continue to crisp up as they cool, so don’t overbake them.
- Cool completely. Remove the baking sheet from the oven and let the seeds cool on the pan for at least 15 minutes. Don’t skip this step! As they cool, they’ll develop that signature crunch. If you try to eat them while they’re still warm, they’ll seem a little soft—be patient.
- Break apart any clumps. Once cooled, use your hands to gently break apart any seeds that stuck together. You’ll have a beautiful, crunchy, cinnamon-scented pile of goodness.
A quick note: if your seeds aren’t as crunchy as you’d like after cooling, pop them back in a 300°F oven for 5 more minutes. Sometimes humidity can affect the texture, especially on rainy days.
Cooking Tips & Techniques
I’ve made a lot of mistakes with pumpkin seeds over the years, so you don’t have to. Here are my best tips for perfect results every time.
Don’t skip the drying step. I cannot stress this enough. The first time I made these, I was impatient and tossed wet seeds straight into the coating. The result was a sticky, soggy mess that took forever to bake and never got crunchy. Pat them dry with paper towels, then let them sit for a few minutes. Your future self will thank you.
Use low and slow heat. I know it’s tempting to crank the oven up to 350°F to speed things up, but don’t do it. High heat will burn the sugar before the seeds have a chance to dry out properly. 300°F is the sweet spot—it gently toasts the seeds and caramelizes the sugar without scorching anything.
Stir halfway through. This is one of those little steps that makes a big difference. The edges of the pan get hotter than the center, so stirring ensures every seed gets equal time in the heat. I set a timer on my phone so I don’t forget.
Watch for visual cues. Your nose and eyes are better than any timer. When the kitchen starts smelling like a cinnamon bakery, check on the seeds. They should be a warm golden brown, and the sugar coating should look dry, not glossy. If you see any dark spots, pull them out immediately—those seeds are close to burning.
Let them cool completely. This is the hardest part, I know. But if you eat them warm, they’ll taste soft and almost chewy. As they cool, the sugar hardens and the seeds become perfectly crunchy. Give them at least 15 minutes. Use that time to clean up your kitchen or pour yourself a cup of tea.
One more thing: if you’re making a double batch, bake one sheet at a time. Putting two sheets in the oven at once blocks the airflow and leads to uneven cooking. It takes a little longer, but the results are worth it.
Variations & Adaptations
This recipe is a great base for experimenting. Here are a few variations I’ve tried and loved.
Spiced Chai Version: Add ½ teaspoon of ground cardamom, ¼ teaspoon of ground ginger, and a pinch of ground cloves to the cinnamon-sugar mixture. It gives the seeds a warm, chai-like flavor that’s perfect for sipping tea alongside. I made this for a book club meeting, and everyone asked for the recipe.
Savory-Sweet Twist: Reduce the sugar to 1 tablespoon and add ½ teaspoon of smoked paprika and a pinch of cayenne pepper. The smoky heat balances the sweetness beautifully. This is my go-to version when I want something that’s not too sweet—it’s great on salads, too.
Maple Pecan Variation: Replace the granulated sugar with 2 tablespoons of maple syrup and add ¼ cup of chopped pecans to the mix. Toss the seeds with the maple syrup and egg white before adding the cinnamon and salt. The pecans toast alongside the seeds and add a wonderful crunch. This version is a little stickier, so watch it closely in the oven.
Vegan Adaptation: Substitute the egg white with 1 tablespoon of aquafaba (the liquid from a can of chickpeas). Whisk it until frothy, just like you would an egg white. The results are almost identical—I’ve tested this side-by-side, and honestly, I couldn’t tell the difference. Use coconut oil instead of butter, and you’re all set.
Gluten-Free Note: This recipe is naturally gluten-free, as long as you’re using pure spices (some spice blends contain wheat flour as a filler). Check your cinnamon label to be safe. I’ve never had an issue with standard grocery store brands.
Feel free to mix and match these ideas. The base recipe is forgiving, so don’t be afraid to play around. That’s how the best recipes are born!
Serving & Storage Suggestions
These seeds are best served at room temperature, straight from the baking sheet. But they’re also wonderful in so many other ways.
How to Serve: Pile them in a wooden bowl for a cozy snack table. Sprinkle them over a bowl of vanilla ice cream for an easy dessert. Add them to a fall charcuterie board with sharp cheddar, dried apples, and a drizzle of honey. I’ve even crushed them up and used them as a topping for pumpkin pie—it adds the most amazing crunch.
Storage Instructions: Store the cooled seeds in an airtight container at room temperature. They’ll stay fresh and crunchy for up to 2 weeks. I use a glass jar with a tight-fitting lid, but a zip-top bag works too. If you live in a humid climate (like I do), add a silica gel packet to the container to absorb excess moisture. It sounds weird, but it really works.
Freezer Tips: You can freeze these seeds for up to 3 months. Place them in a freezer-safe bag or container, squeeze out as much air as possible, and seal. To serve, let them thaw at room temperature for about 15 minutes. If they’ve lost a bit of crunch, spread them on a baking sheet and warm them in a 300°F oven for 5 minutes. They’ll crisp right back up.
Flavor Development: Here’s something interesting—the cinnamon flavor actually deepens after a day or two. I’ve found that seeds stored overnight taste even better than fresh ones. The spices have time to meld and mellow. So don’t worry if you make them a day ahead for a party. In fact, I recommend it!
Nutritional Information & Benefits
Let’s talk about what’s actually in these little seeds, besides deliciousness.
Estimated Nutritional Values (per ¼ cup serving):
- Calories: 180
- Total Fat: 12g
- Saturated Fat: 3g
- Carbohydrates: 12g
- Fiber: 3g
- Sugar: 6g
- Protein: 7g
Pumpkin seeds are a nutritional powerhouse. They’re packed with magnesium, which is great for muscle function and sleep quality. They also contain zinc, which supports your immune system—perfect for the cold and flu season. The fiber and protein in these seeds make them a satisfying snack that won’t spike your blood sugar.
Dietary Considerations: This recipe is naturally gluten-free and nut-free (unless you add pecans). It can be made vegan with the aquafaba substitution. The only common allergen is eggs, but that’s easily swapped out.
I personally love that this snack feels indulgent but is actually pretty good for you. It’s one of those rare treats that satisfies your sweet tooth while giving your body something useful. A handful of these seeds is way better for you than a candy bar, and honestly, it tastes just as good.
Conclusion
These cozy cinnamon sugar baked pumpkin seeds are more than just a snack—they’re a little piece of fall that you can hold in your hand. They remind me of that afternoon with Gladys, of the first crisp day of the season, and of the simple joy of making something from scratch. I really hope you give them a try.
Don’t be afraid to make them your own. Add a little extra cinnamon if that’s your thing. Toss in some nutmeg. Use brown sugar instead of white. The best recipes are the ones that adapt to your taste. And when you make them, I’d love to hear about it. Drop a comment below and tell me how they turned out, or share your own twist on the recipe. Did you add cardamom? Did you burn the first batch like I did? (It happens to the best of us.) Let’s keep the conversation going—because that’s what cooking is all about, right?
Now go preheat your oven. Your cozy evening awaits!
Frequently Asked Questions
Can I use store-bought pumpkin seeds instead of fresh ones?
Absolutely! Just make sure you buy raw, unsalted pumpkin seeds. You’ll skip the cleaning and drying steps, but the rest of the recipe stays the same. The baking time might be slightly shorter since store-bought seeds are usually drier, so start checking at 20 minutes.
Why did my seeds turn out chewy instead of crunchy?
This usually happens for two reasons: either the seeds weren’t dried thoroughly before coating, or they were underbaked. Next time, pat them extra dry with paper towels and let them air-dry for 10 minutes. Also, make sure you’re baking at 300°F for the full 25-30 minutes, and let them cool completely on the pan.
Can I use a sugar substitute like stevia or monk fruit?
You can, but the texture will be different. Sugar helps create that crunchy coating, and substitutes don’t caramelize the same way. If you’re watching your sugar intake, try using 1 tablespoon of coconut sugar instead—it’s less processed and has a lower glycemic index.
How do I prevent the cinnamon sugar from burning?
The key is the low oven temperature. At 300°F, the sugar caramelizes slowly without burning. Also, stirring the seeds halfway through prevents the ones on the edges from getting too hot. If you notice the seeds browning too quickly, your oven might run hot—try reducing the temperature to 275°F next time.
Can I make these in an air fryer?
Yes! Preheat your air fryer to 300°F. Spread the coated seeds in a single layer in the basket (you might need to work in batches). Cook for 10-12 minutes, shaking the basket halfway through. Keep an eye on them because air fryers can vary. They’ll be done when they’re golden and smell amazing.
Pin This Recipe!
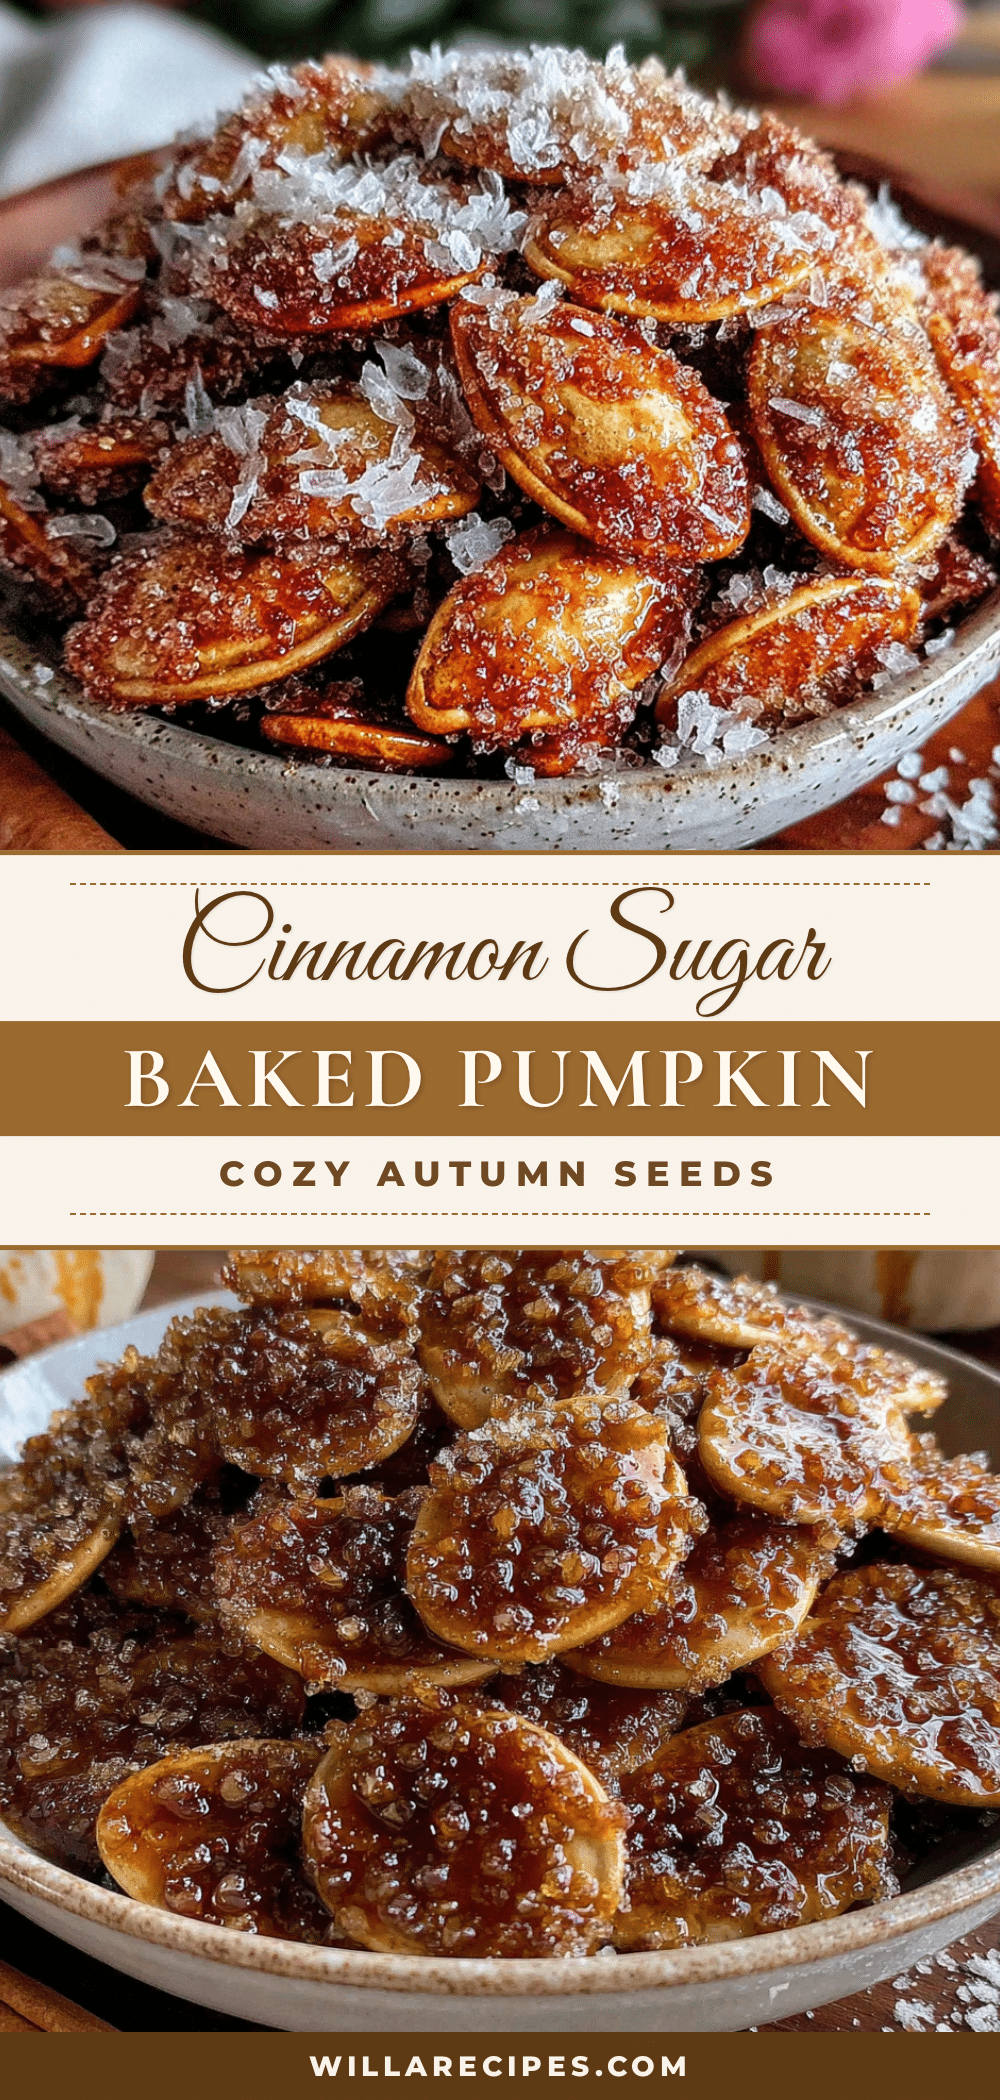
Cozy Cinnamon Sugar Baked Pumpkin Seeds: Easy Fall Treat
These cozy cinnamon sugar baked pumpkin seeds are the perfect fall snack—crunchy, sweet, and warm with cinnamon. Made with simple pantry ingredients, they’re quick to prepare and irresistibly delicious.
- Prep Time: 15 minutes
- Cook Time: 30 minutes
- Total Time: 45 minutes
- Yield: 4 servings 1x
- Category: Snack
- Cuisine: American
Ingredients
- 1 cup fresh pumpkin seeds (about 120g)
- 2 tablespoons unsalted butter, melted (28g)
- 2 tablespoons granulated sugar (25g)
- 1 ½ teaspoons ground cinnamon (4g)
- ½ teaspoon salt (3g)
- 1 large egg white
- ½ teaspoon vanilla extract (2ml, optional)
Instructions
- Preheat your oven to 300°F (150°C). Line a baking sheet with parchment paper.
- Clean the seeds: Separate pumpkin seeds from pulp, rinse in a colander under cold water, and remove any remaining bits.
- Dry the seeds thoroughly: Spread rinsed seeds on a clean towel or paper towels, pat dry, and let air-dry for 10 minutes.
- Whisk the egg white in a small bowl until frothy and slightly thickened (about 30 seconds).
- In another small bowl, mix together granulated sugar, ground cinnamon, and salt.
- Place dried seeds in a large bowl, pour frothy egg white over them, and toss gently. Sprinkle cinnamon-sugar mixture over seeds and toss until evenly coated.
- Spread coated seeds in a single layer on the prepared baking sheet, avoiding overlap.
- Bake for 25-30 minutes, stirring gently after 15 minutes. Seeds are done when golden brown and dry to the touch.
- Cool completely on the baking sheet for at least 15 minutes (they will crisp up as they cool).
- Break apart any clumps with your hands and serve.
Notes
For extra crunch, ensure seeds are thoroughly dried before coating. Use low oven temperature (300°F) to prevent burning sugar. Stir halfway through for even cooking. Seeds can be stored in an airtight container at room temperature for up to 2 weeks, or frozen for up to 3 months.
Nutrition
- Serving Size: 1/4 cup
- Calories: 180
- Sugar: 6
- Sodium: 150
- Fat: 12
- Saturated Fat: 3
- Carbohydrates: 12
- Fiber: 3
- Protein: 7
Keywords: pumpkin seeds, cinnamon sugar, fall snack, baked pumpkin seeds, easy recipe, Halloween snack


