The school Halloween party was in three hours and I’d completely forgotten. My son had reminded me every single day for two weeks, and somehow, on the actual morning, it slipped my mind. Everyone else would be bringing elaborate cupcakes with fondant ghosts, homemade caramel apples, and those perfect little mummy hot dogs. I had a box of yellow cake mix, a bag of white chocolate chips, and—honestly, this is the part that still makes me laugh—a giant bag of candy corn my husband bought as a joke.
I stood in my kitchen, staring at these ingredients like they were a puzzle. The clock was ticking and I could feel that familiar panic rising. You know that feeling when you’re sure you’re about to be the parent who shows up with store-bought cookies? I mean, there’s nothing wrong with store-bought, but my son had been so specific. “Mom, make something cool,” he’d said. Cool. Right.
So I did what any slightly frantic parent would do. I threw things together. Yellow cake mix became the base. White chocolate chips got dumped in because, well, why not? And then I looked at that bag of candy corn and thought, “Let’s be honest, this is either going to be a disaster or the weirdest win of my life.” I folded in a generous handful, pressed the whole thing into a pan, and crossed my fingers so hard they hurt.
When I walked into that classroom with a tray of golden, gooey blondies studded with little orange and yellow triangles, I was still half-convinced I’d made a mistake. The first kid grabbed one, then another, and then suddenly there was a crowd. One mom actually asked me for the recipe, and I had to admit I made it up on the fly. The tray was empty in fifteen minutes. My son gave me a thumbs up from across the room, and honestly, that was the moment this recipe became a permanent part of our family. I’ve made it at least a dozen times since, and it never fails. Maybe you’ve been there—scrambling, hoping, and somehow stumbling onto something amazing.
Why You’ll Love This Recipe
These candy corn blondies are the kind of recipe that makes you look like a baking genius with almost zero effort. I’ve tested this about eight times now, tweaking the ratios and the bake times, and I can say with confidence that this version is the one. Here is why you will absolutely love it:
- Quick & Easy: From start to finish, you are looking at about 35 minutes. That includes prep and baking. For a busy weeknight treat or a last-minute school event, this is your hero.
- Simple Ingredients: You probably have most of this in your pantry right now. No fancy extracts, no obscure flours. Just basic baking staples plus a bag of candy corn.
- Perfect for Fall Gatherings: Halloween parties, Thanksgiving dessert tables, or just a cozy October afternoon. These blondies fit right in without being fussy.
- Crowd-Pleaser: Kids go absolutely wild for them. Adults pretend they are too cool for candy corn, then eat three pieces. I have seen it happen every single time.
- Unbelievably Delicious: The texture is this perfect middle ground between a chewy cookie and a soft cake. The white chocolate chips melt into little pockets of sweetness, and the candy corn gets slightly chewy and caramelized. It is next-level comfort food disguised as a simple bar.
What makes this recipe different from every other blondie out there is the texture trick. Most blondies turn out either too cakey or too dense. By using a boxed cake mix as the base (yes, really), you get this incredibly soft, tender crumb that stays moist for days. Plus, the candy corn doesn’t just sit on top—it bakes right into the batter, so every bite has that little pop of sweetness. This isn’t just another version of a blondie. It is the version that will make people ask, “Wait, what is in these?”
Honestly, this recipe is the kind that makes you close your eyes after the first bite. It is comfort food reimagined—faster, simpler, but with the same soul-soothing satisfaction. Perfect for impressing a classroom full of kids without any stress, or turning a random Tuesday into something memorable.
What Ingredients You Will Need
This recipe uses simple, mostly pantry-staple ingredients to deliver that perfect blondie texture and sweet, nostalgic flavor. Here is everything you need and a few notes on why each one matters.
- 1 box (15.25 oz) yellow cake mix: This is your shortcut to perfection. I prefer Betty Crocker or Duncan Hines for the most consistent results. Do not use a “butter recipe” or “pudding in the mix” variety—plain yellow cake mix works best.
- 2 large eggs, room temperature: Room temperature eggs mix more evenly into the batter, giving you a smoother texture. If you forgot to take them out early, place them in a bowl of warm water for 5 minutes.
- 1/3 cup vegetable oil: Canola or any neutral oil works fine. This keeps the blondies moist without making them greasy. Avoid olive oil—the flavor is too strong here.
- 1 teaspoon vanilla extract: Pure vanilla adds warmth and depth. Imitation vanilla works in a pinch, but pure really does taste better in this recipe.
- 1 cup white chocolate chips: I use Ghirardelli or Toll House. White chocolate chips add creamy sweetness that balances the candy corn. Do not use white baking bars—they melt too much and disappear into the batter.
- 1 ½ cups candy corn: This is the star of the show. Use fresh candy corn for the best texture. Stale candy corn gets hard and crunchy instead of soft and chewy. Brach’s is my go-to brand. You can also use the autumn mix with the little pumpkins if you want extra color.
- Optional: ¼ teaspoon salt: If your cake mix is unsalted, add a pinch of salt to balance the sweetness. Most mixes already have salt, so taste your batter first.
One thing I learned the hard way—do not use the “fun size” or seasonal candy corn that comes in different shapes. The texture is different and they don’t bake the same way. Stick with classic candy corn. Also, if you are making these for a school event, double check the candy corn label. Some brands use gelatin, so if you need a vegetarian version, look for a gelatin-free brand like Brach’s (check the package, as formulations can change).
For a gluten-free option, use a gluten-free yellow cake mix. The texture will be slightly different—a bit more crumbly—but still delicious. Just make sure your candy corn is also gluten-free (most are, but always check the label).
Equipment Needed
You do not need any fancy equipment for these blondies. Here is what you will need:
- 9×13-inch baking pan: This is the ideal size for a full batch. A metal pan gives you the most even bake. Glass or ceramic works too, but you may need to add 3-5 minutes to the baking time.
- Mixing bowls: One large bowl for the batter, one small bowl if you are pre-mixing your dry ingredients (though with a cake mix, you can skip this).
- Whisk or electric mixer: A sturdy whisk works perfectly fine. I actually prefer whisking by hand because it is harder to overmix. If you use an electric mixer, keep it on low speed and stop as soon as everything comes together.
- Spatula: A rubber spatula for scraping down the sides and spreading the batter evenly in the pan.
- Parchment paper or non-stick spray: Parchment paper is my preference because it makes lifting the blondies out of the pan so much easier. If you use spray, make sure it is a baking spray with flour.
- Cooling rack: Essential for letting the blondies cool evenly so they don’t get soggy on the bottom.
If you do not have a 9×13 pan, you can use two 8×8 square pans. Just reduce the baking time by about 5 minutes and check them early. Also, a good tip—if you are using a glass pan, reduce the oven temperature by 25°F. Glass heats up faster and can over-brown the edges.
Preparation Method
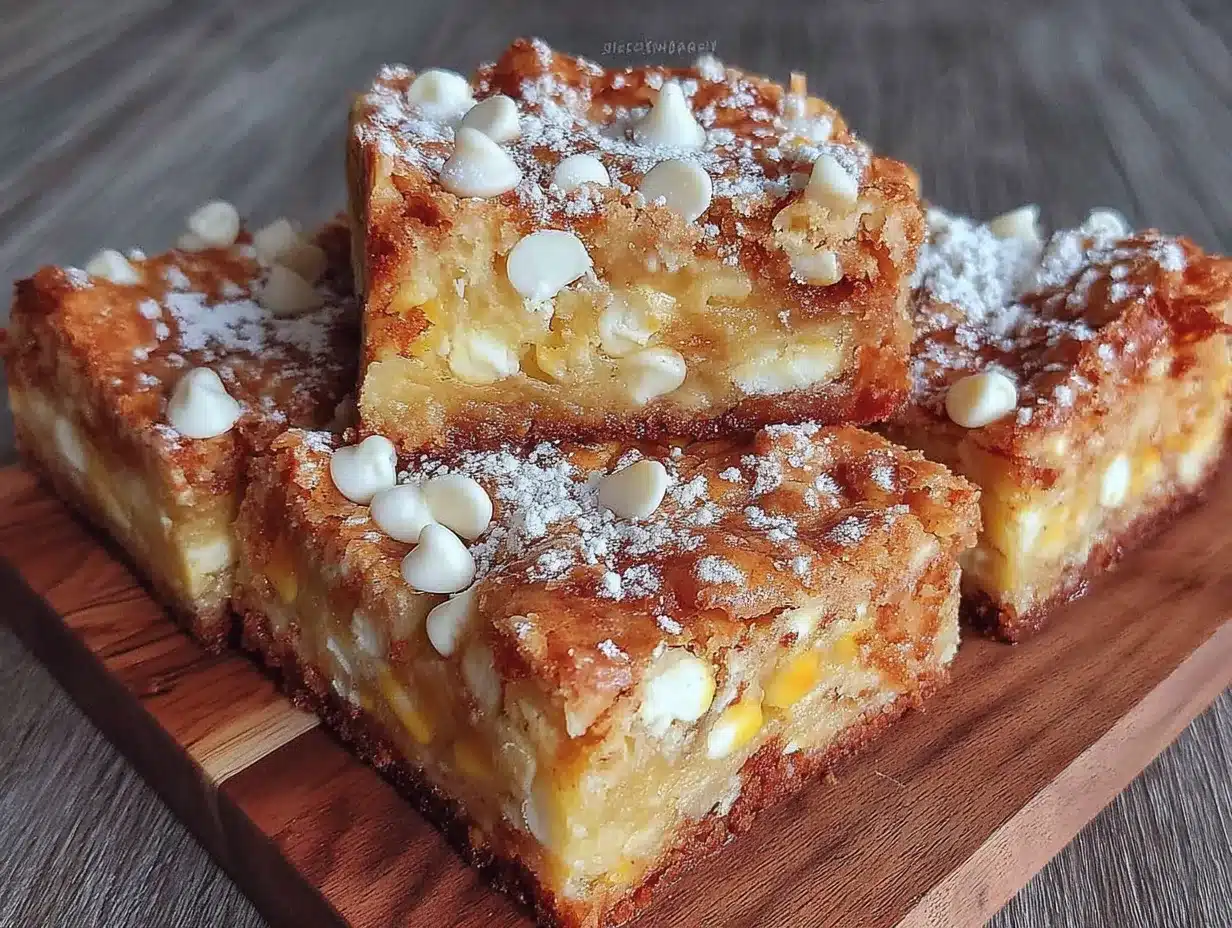
Let me walk you through this step by step. I have made these so many times that I have the process down to a science. Follow along and you will have perfect blondies every time.
- Preheat your oven to 350°F (175°C). This is important—do not skip the preheat. If you put the batter in a cold oven, the texture will be off. While the oven heats, line your 9×13-inch baking pan with parchment paper, leaving a little overhang on two sides. This creates “handles” for lifting the blondies out later. If you are using non-stick spray, apply it evenly to the bottom and sides.
- In a large mixing bowl, combine the yellow cake mix, eggs, vegetable oil, and vanilla extract. Whisk everything together until just combined. You want to see a thick, smooth batter with no dry streaks. Do not overmix—about 30 seconds of whisking is plenty. Overmixing can make the blondies tough. The batter will be quite thick, almost like a cookie dough. That is exactly right.
- Fold in the white chocolate chips. Use your spatula to gently fold them into the batter. Make sure they are evenly distributed. I like to reserve about a quarter cup to sprinkle on top before baking—it makes the blondies look extra pretty.
- Now, the candy corn. This is the trickiest part. Gently fold in 1 ¼ cups of the candy corn, reserving about ¼ cup for the top. Be gentle—you do not want to crush the candy corn. If you stir too aggressively, the candy corn will start to melt and discolor the batter. Just fold until it is evenly distributed. You will see little orange and yellow specks throughout the batter, and that is perfect.
- Transfer the batter to your prepared pan. Use your spatula to spread it evenly. The batter is thick, so you will need to press it into the corners. Do not worry about making it perfectly smooth—a slightly uneven surface gives you nice texture variation. Sprinkle the reserved white chocolate chips and candy corn evenly over the top. Press them down gently so they stick to the batter.
- Bake for 22-26 minutes. The exact time depends on your oven. Start checking at 22 minutes. You want the edges to be golden brown and set. The center will still look slightly soft and puffy—that is okay. It will continue to set as it cools. The biggest mistake people make is overbaking these. If the center looks completely firm and dry, you have gone too far. Insert a toothpick into the center; it should come out with a few moist crumbs, not wet batter.
- Let the blondies cool in the pan on a wire rack for at least 20 minutes. This is crucial. If you try to cut them while they are warm, they will fall apart. The candy corn needs time to set back up after melting in the oven. After 20 minutes, use the parchment paper handles to lift the entire slab out of the pan and transfer to a cutting board. Let them cool completely before cutting—about another 30 minutes.
- Cut into squares. Use a sharp knife and wipe it clean between cuts for neat edges. I cut them into 24 squares for school parties, or 16 larger ones if we are just having them at home.
One more thing—if your kitchen is warm, the candy corn might get a little sticky during mixing. If that happens, pop the bowl in the fridge for 10 minutes before baking. It helps the candy corn hold its shape.
Cooking Tips & Techniques
I have messed up this recipe in almost every way possible, so let me save you the trouble. Here are the things I have learned the hard way.
Do not overbake. I cannot say this enough. The first time I made these, I left them in the oven for 30 minutes because I was distracted by a phone call. They came out dry and the candy corn had basically melted into hard little rocks. The perfect blondie comes out of the oven looking slightly underdone in the center. Trust the process. They will set.
Use fresh candy corn. I made a batch with leftover candy corn from the previous Halloween, and it was a disaster. Old candy corn gets hard and doesn’t soften properly during baking. You end up with crunchy bits that are unpleasant to bite into. Always buy a fresh bag for this recipe.
Room temperature eggs matter. Cold eggs seize the oil and make the batter lumpy. If you are in a hurry, place the eggs in a bowl of warm water for 5 minutes. It makes a real difference in how smoothly everything comes together.
Line your pan properly. I used to just spray the pan and hope for the best. Half the blondies would stick, and I would end up with a crumbled mess. Parchment paper with overhanging edges is a game changer. You lift the whole thing out, cut clean squares, and have zero waste.
Timing is everything. Here is my multitasking strategy: Preheat the oven first. While it heats, mix the dry and wet ingredients. While the batter rests for a minute, line the pan. Fold in the mix-ins. By the time you are done, the oven is ready. Total hands-on time is about 10 minutes.
For consistent results, use an oven thermometer. I learned this the hard way when my oven was running 25°F hot. An inexpensive oven thermometer saved my baking life. Place it on the middle rack and adjust your oven setting accordingly.
Variations & Adaptations
One of the best things about this recipe is how easy it is to change up. Here are some variations I have tried and loved.
- Chocolate Lover’s Version: Swap the white chocolate chips for semi-sweet or milk chocolate chips. The dark chocolate balances the sweetness of the candy corn beautifully. I tried this for a friend who “doesn’t do white chocolate,” and she ate half the pan.
- Fall Harvest Mix: Use the autumn candy corn mix that includes the little candy pumpkins and maple leaves. It gives you more color variety and a slightly different flavor profile. The pumpkins are a little softer, so fold them in extra gently.
- Gluten-Free Adaptation: Use a gluten-free yellow cake mix. I have tested this with King Arthur’s gluten-free mix and it works well. The texture is a bit more delicate, so let them cool completely before cutting. Also, check that your candy corn is certified gluten-free.
- Extra Chewy Version: Add ¼ cup of melted butter to the batter along with the oil. This gives you a denser, chewier texture that some people prefer. Reduce the oil to 2 tablespoons if you do this so the batter doesn’t get too wet.
- Nutty Addition: Fold in ½ cup of chopped pecans or walnuts with the candy corn. The crunch adds a nice contrast to the soft blondie texture. Toast the nuts first for extra flavor—just 5 minutes in a 350°F oven.
I also tried a version with salted caramel chips mixed in, and honestly, it was incredible. The salty-sweet combo with the candy corn is something special. If you see those at the store, grab a bag.
Serving & Storage Suggestions
These blondies are best served at room temperature. The texture is soft and chewy, and the candy corn has that perfect slightly caramelized bite. If you want to get fancy, warm them up for about 10 seconds in the microwave—it makes the white chocolate chips gooey again.
For presentation, I like to arrange them on a white platter with a few extra candy corn scattered around. It looks festive without being over-the-top. For Halloween parties, you can cut them into small squares and serve them in cupcake liners for easy grabbing.
These pair beautifully with a cold glass of milk (obviously) or a hot cup of apple cider. For adults, a cup of coffee or a chai latte is perfect. The sweetness of the blondies balances the bitterness of coffee really well.
Storage: Keep leftover blondies in an airtight container at room temperature for up to 5 days. Place a piece of bread in the container to keep them soft—the bread absorbs excess air and releases moisture. Replace the bread every other day. Do not refrigerate them, as the fridge dries out baked goods.
Freezing: These freeze beautifully. Wrap individual squares in plastic wrap, then place them in a freezer-safe bag. They will keep for up to 3 months. To thaw, leave them at room temperature for about 30 minutes, or microwave for 15-20 seconds. The texture stays remarkably close to fresh.
One thing I have noticed—the flavors actually get better on the second day. The candy corn and white chocolate meld together more, creating this unified sweet flavor that is even more addictive. If you can resist eating them all on day one, you are in for a treat on day two.
Nutritional Information & Benefits
Let’s be real—these are a treat, not a health food. But here is the estimated nutritional breakdown for one blondie (based on 24 servings):
- Calories: 195
- Total Fat: 8g
- Saturated Fat: 3g
- Cholesterol: 18mg
- Sodium: 210mg
- Total Carbohydrates: 30g
- Sugars: 21g
- Protein: 2g
If you are looking for a slightly lighter option, you can use a sugar-free yellow cake mix and sugar-free white chocolate chips. The texture will be a bit different, but it works. I tried this for a friend who is watching her sugar intake, and she was happy with the result.
From a wellness perspective, I think the key is balance. These are perfect for special occasions, holidays, or when you just need a little sweetness in your day. They are meant to be enjoyed, not guilt-tripped over. One blondie is a reasonable serving—the challenge is stopping at one.
Potential allergens: This recipe contains wheat (gluten), dairy (white chocolate chips), and eggs. If you need to avoid any of these, check the variations section for substitution ideas.
Conclusion
These candy corn blondies started as a panic-induced experiment and became one of my most-requested recipes. They are proof that you do not need fancy techniques or exotic ingredients to create something truly special. Sometimes the best recipes come from the most unlikely places—like a forgotten school party and a bag of joke candy.
I love this recipe because it is forgiving. You can tweak it, adapt it, and make it your own. Maybe you add extra white chocolate chips. Maybe you use the autumn mix with the little pumpkins. Maybe you sneak in some dark chocolate because that is your thing. The base is so solid that you cannot really mess it up.
I would love to hear how these turn out for you. Did your kids love them? Did you try a fun variation? Drop a comment below and let me know. And if you share them on social media, tag me—I love seeing your creations. Honestly, the best part of writing this blog is hearing how these recipes become part of your family traditions.
So go ahead, grab that bag of candy corn, and make something wonderful. Your kitchen is about to smell amazing, and your family is about to be very, very happy.
Frequently Asked Questions
Can I use a different cake mix flavor?
Yes, absolutely. White cake mix, vanilla cake mix, or even spice cake mix work well. Avoid chocolate cake mix because the flavor clashes with the candy corn. I tried it once and it was not great.
Why did my candy corn melt into the batter?
This usually happens if the batter is too warm or if you overmix. Make sure your eggs and oil are at room temperature, not warm. Also, fold the candy corn in gently and stop as soon as it is distributed. If your kitchen is very warm, chill the batter for 10 minutes before folding in the candy corn.
Can I make these ahead of time?
Yes, these are great for making a day ahead. In fact, they taste even better on day two. Store them in an airtight container at room temperature. You can also freeze them for up to 3 months.
How do I know when they are done baking?
The edges should be golden brown and set. The center will look slightly puffy and soft—almost underdone. Insert a toothpick into the center; it should come out with a few moist crumbs. If it comes out clean, you have overbaked them. Remember, they continue to cook as they cool in the pan.
Can I leave out the white chocolate chips?
You can, but the blondies will be less sweet and the texture will be slightly different. White chocolate chips add moisture and richness. If you leave them out, consider adding an extra ¼ cup of candy corn to compensate. Or try semi-sweet chips for a different flavor profile.
Pin This Recipe!
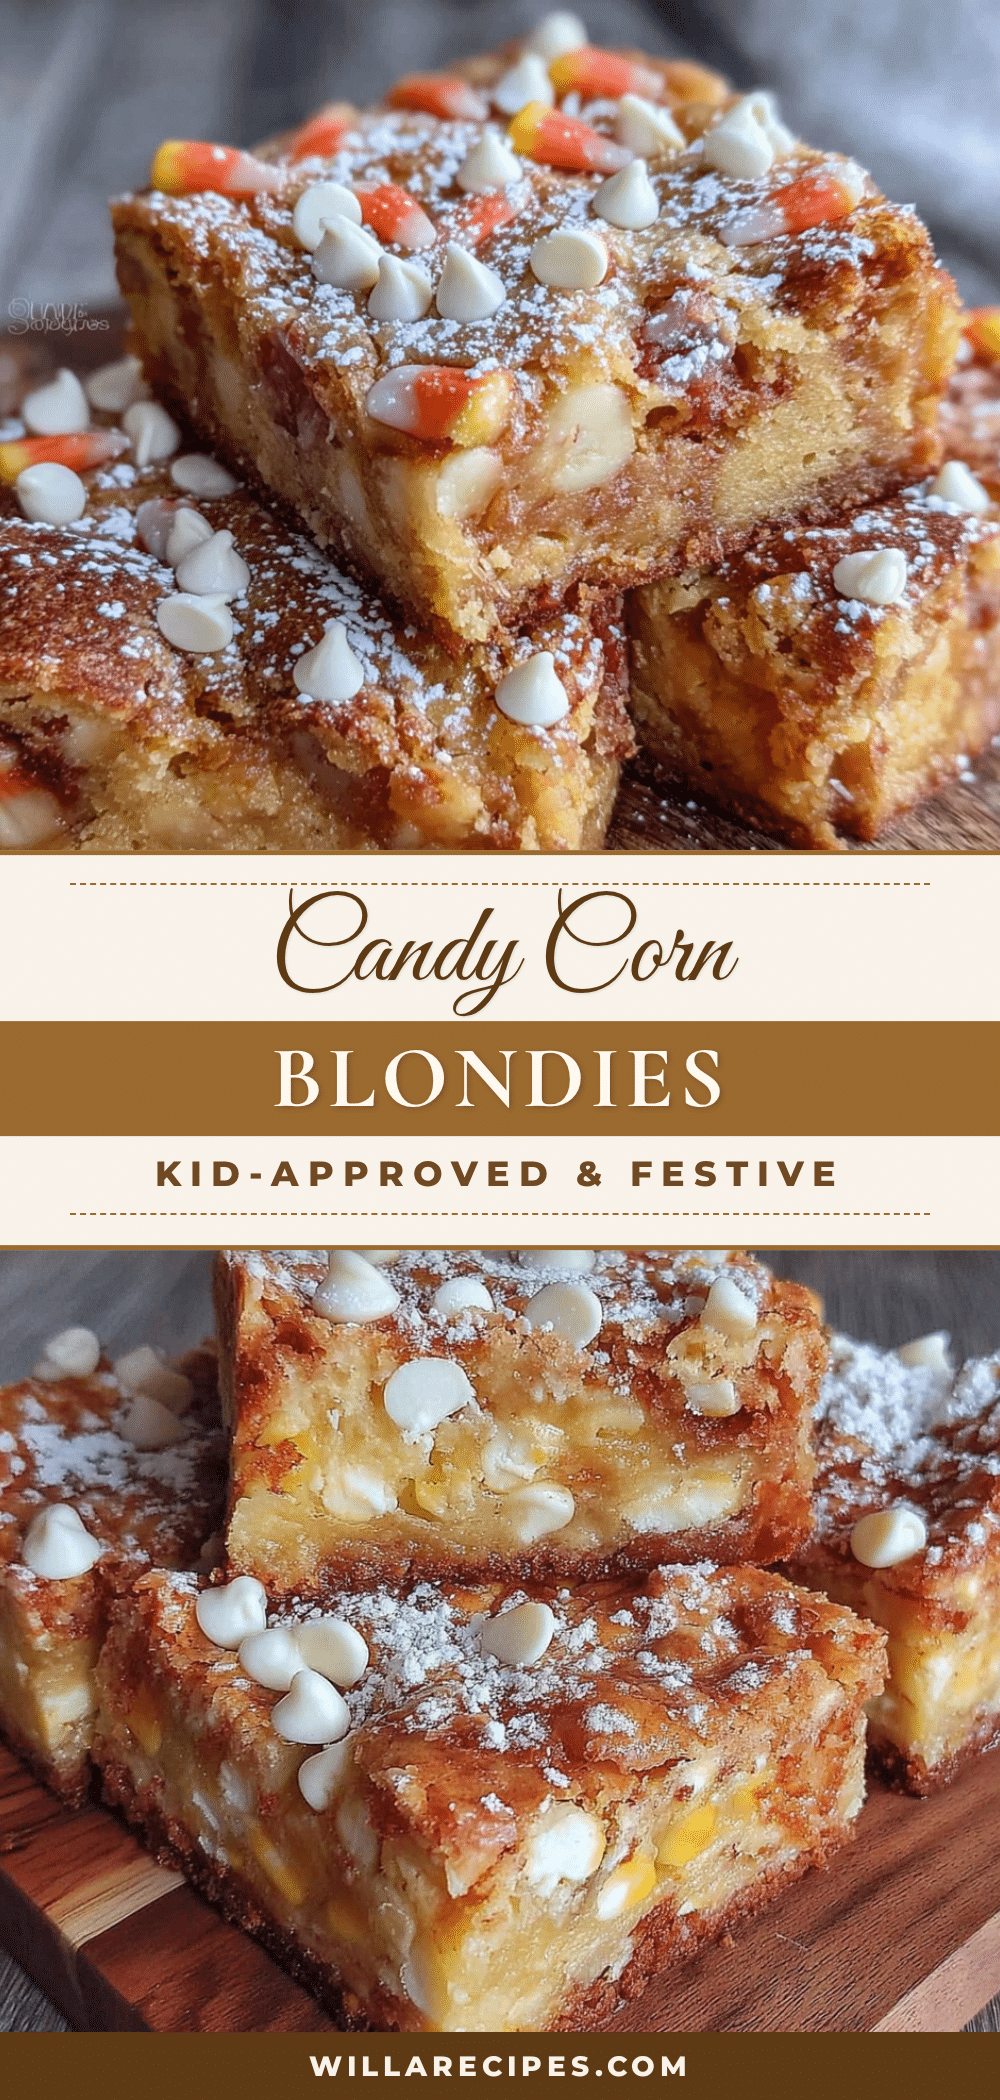
Easy Candy Corn Blondies: Kid-Approved Recipe
These candy corn blondies are the kind of recipe that makes you look like a baking genius with almost zero effort. They are quick, easy, and perfect for fall gatherings, with a soft, chewy texture and sweet, nostalgic flavor.
- Prep Time: 10 minutes
- Cook Time: 22-26 minutes
- Total Time: 35 minutes
- Yield: 24 servings 1x
- Category: Dessert
- Cuisine: American
Ingredients
- 1 box (15.25 oz) yellow cake mix
- 2 large eggs, room temperature
- 1/3 cup vegetable oil
- 1 teaspoon vanilla extract
- 1 cup white chocolate chips
- 1 ½ cups candy corn
- Optional: ¼ teaspoon salt
Instructions
- Preheat your oven to 350°F (175°C). Line a 9×13-inch baking pan with parchment paper, leaving overhang on two sides.
- In a large mixing bowl, combine the yellow cake mix, eggs, vegetable oil, and vanilla extract. Whisk until just combined (about 30 seconds). The batter will be thick.
- Fold in the white chocolate chips, reserving about ¼ cup for the top.
- Gently fold in 1 ¼ cups of the candy corn, reserving about ¼ cup for the top. Be gentle to avoid crushing the candy corn.
- Transfer the batter to the prepared pan and spread evenly. Sprinkle reserved white chocolate chips and candy corn on top, pressing them gently into the batter.
- Bake for 22-26 minutes, until edges are golden brown and center is slightly soft. A toothpick inserted in the center should come out with moist crumbs.
- Let the blondies cool in the pan on a wire rack for at least 20 minutes. Then lift out using parchment handles and cool completely before cutting.
- Cut into squares (24 for school parties, 16 for home).
Notes
Do not overbake. Use fresh candy corn for best texture. Room temperature eggs matter. Line your pan with parchment paper for easy removal. For a gluten-free option, use a gluten-free yellow cake mix and check candy corn label. Store in an airtight container at room temperature for up to 5 days. Freeze for up to 3 months.
Nutrition
- Serving Size: 1 blondie
- Calories: 195
- Sugar: 21
- Sodium: 210
- Fat: 8
- Saturated Fat: 3
- Carbohydrates: 30
- Protein: 2
Keywords: candy corn blondies, easy blondie recipe, fall dessert, Halloween treat, kid-friendly dessert, quick dessert


