I wasn’t expecting baking advice from my accountant, but there I was, knee-deep in tax paperwork, listening to Mr. Henderson describe exactly how to make red velvet crinkle cookies. It was the middle of April, I was stressed, and somehow this quiet man in his seventies started talking about the perfect cookie texture while reviewing my deductions. He said his wife had been making these for forty years, and the secret was not overmixing the dough. I scribbled the recipe on the back of an envelope, and honestly, I forgot about it until holiday baking season rolled around.
That first batch came out lopsided and a little flat. But the second batch? That was the one that made me call Mr. Henderson to thank him. These Easy Red Velvet Crinkle Cookies have that perfect crackled top, a soft and chewy center, and just enough chocolate flavor without being too heavy. They look fancy but come together in under thirty minutes, which is exactly what you need when you’re short on time but want something that feels special.
Maybe you’ve been there, staring at a pile of baking recipes that all require hours of chilling and multiple bowls. These cookies break that mold. They’re straightforward, forgiving, and honestly, they make your kitchen smell incredible. The red color against the powdered sugar is just gorgeous, and every time I make them, someone asks for the recipe. I keep meaning to frame that envelope from Mr. Henderson’s office, but I keep using it instead.
Why You’ll Love This Recipe
Let me tell you why these cookies have earned a permanent spot in my baking rotation. I’ve tested this recipe at least a dozen times, tweaking the flour ratio and baking time until it was just right. My neighbor, who runs a small bakery, even gave it her seal of approval. These cookies deliver on every level without the fuss.
- Quick & Easy: From start to finish, these are ready in 30 minutes. No chilling the dough, no complicated techniques. Perfect for those evenings when a cookie craving hits out of nowhere.
- Simple Ingredients: You probably have most of these in your pantry right now. Cocoa powder, flour, sugar, eggs, butter, and a little red food coloring. Nothing weird or hard to find.
- Perfect for Any Occasion: They work for Valentine’s Day, Christmas, birthday parties, or just a random Tuesday. The red color makes them festive, but the flavor is timeless.
- Crowd-Pleaser: Kids love the crackled look, and adults appreciate the balanced sweetness. I’ve brought these to potlucks and watched them disappear in minutes.
- Unbelievably Delicious: The texture is what gets everyone. That soft, almost fudgy center with a slightly crisp exterior, all dusted with powdered sugar. It’s comfort food at its finest.
What makes this recipe different from the rest is the technique. Instead of chilling the dough for hours, we use melted butter and a specific mixing order that creates the perfect crinkle effect without extra waiting. This isn’t just another red velvet cookie recipe. It’s the one that works every single time, even when you’re tired and just want something good.
These cookies are the kind that make you close your eyes after the first bite. They’re quick enough for a weeknight baking session but impressive enough to share with company. Honestly, they’ve saved me more than once when I needed a dessert in a hurry.
What Ingredients You Will Need
This recipe uses simple, everyday ingredients to create cookies that taste anything but ordinary. Most of these are pantry staples, which makes this perfect for spontaneous baking. Here’s what you’ll need and why each ingredient matters.
- All-purpose flour, 1 ½ cups (190g): This gives the cookies structure. I use Gold Medal or King Arthur for consistent results. Spoon and level your flour, don’t scoop it directly from the bag, or you’ll end up with dry cookies.
- Unsweetened cocoa powder, ¼ cup (20g): Use natural cocoa powder, not Dutch-processed. The acidity helps with the crinkle effect. Hershey’s works great, but any brand is fine.
- Baking powder, 1 teaspoon: This helps the cookies rise and creates that soft texture. Make sure it’s fresh, or your cookies won’t spread properly.
- Salt, ¼ teaspoon: Balances the sweetness and enhances the chocolate flavor. Just regular table salt is fine.
- Unsalted butter, ½ cup (113g), melted: Melted butter is the key to skipping the chilling step. It creates a tender cookie without needing to wait. I let it cool slightly before using.
- Granulated sugar, ¾ cup (150g): Adds sweetness and helps with the crackled top. Regular white sugar works best here.
- Large egg, 1, room temperature: Binds everything together. If your egg is cold, just set it in warm water for five minutes.
- Vanilla extract, 1 teaspoon: Adds warmth and depth. Pure vanilla is better, but imitation works in a pinch.
- Red food coloring, 1 tablespoon (or gel, 1 teaspoon): This gives the cookies their signature red color. I prefer gel food coloring because it’s more concentrated and doesn’t thin the batter. Americolor or Wilton brand are reliable.
- White vinegar, 1 teaspoon: This is the secret ingredient. It reacts with the cocoa powder to deepen the red color and adds a tiny tang that balances the sweetness. Don’t skip it.
- Powdered sugar, ½ cup (60g), for rolling: This creates the crinkled coating. Make sure it’s sifted to avoid clumps.
For substitutions, you can use a plant-based butter stick and a flax egg for a vegan version. The texture will be slightly different, but still delicious. If you’re avoiding artificial colors, try beet powder or natural red food coloring, though the color won’t be as vibrant. For a gluten-free option, swap the all-purpose flour with a 1:1 gluten-free baking blend, like Bob’s Red Mill.
Equipment Needed
You don’t need a fancy kitchen to make these cookies. Here’s what you’ll need, along with some alternatives and tips from my own experience.
- Mixing bowls: One medium bowl for dry ingredients and one large bowl for wet ingredients. I use glass bowls because they’re easy to clean, but any bowl works.
- Whisk: For combining the dry ingredients. A fork works in a pinch, but a whisk is faster.
- Spatula or wooden spoon: For mixing the dough. A silicone spatula is my favorite because it scrapes the bowl clean.
- Measuring cups and spoons: Accurate measurements matter here. I recommend metal measuring cups for dry ingredients and glass for liquids.
- Baking sheet: A standard half-sheet pan works perfectly. Line it with parchment paper or a silicone baking mat for easy cleanup.
- Cookie scoop or tablespoon: For uniform cookies. A #40 scoop (about 1.5 tablespoons) is ideal. If you don’t have one, just use a regular tablespoon.
- Cooling rack: Lets the cookies cool evenly. If you don’t have one, transfer the cookies to a plate after a few minutes.
- Small bowl: For the powdered sugar. A shallow bowl makes rolling easier.
I’ve made these cookies with just a fork and a baking sheet when I was traveling, and they still turned out great. The parchment paper is the one thing I won’t skip because it prevents sticking and makes cleanup so much faster. A silicone mat is a good investment if you bake often, but parchment paper is cheaper and works just as well.
Preparation Method

Follow these steps carefully, and you’ll have beautiful crinkle cookies in about 30 minutes. I’ve included time estimates and visual cues so you know exactly what to look for at each stage.
- Preheat your oven to 350°F (175°C). Line a baking sheet with parchment paper. This takes about 10 minutes, so do it first. While the oven heats, prep your ingredients.
- Whisk the dry ingredients. In a medium bowl, combine 1 ½ cups (190g) all-purpose flour, ¼ cup (20g) cocoa powder, 1 teaspoon baking powder, and ¼ teaspoon salt. Whisk until evenly mixed. The cocoa should be fully incorporated, no streaks left.
- Mix the wet ingredients. In a large bowl, whisk together ½ cup (113g) melted butter and ¾ cup (150g) granulated sugar until smooth. It should look like wet sand. Add 1 large egg, 1 teaspoon vanilla extract, 1 tablespoon red food coloring, and 1 teaspoon white vinegar. Whisk until everything is combined and the color is uniform. The mixture will be a deep red, almost burgundy.
- Combine wet and dry. Pour the dry ingredients into the wet mixture. Stir with a spatula until just combined. Do not overmix. Stop when you no longer see streaks of flour. The dough will be soft and slightly sticky. If it feels too wet, let it rest for 2 minutes to firm up.
- Prepare the coating. Place ½ cup (60g) powdered sugar in a small bowl. Use a fork to break up any clumps. If your powdered sugar is lumpy, sift it first.
- Shape the cookies. Using a cookie scoop or tablespoon, scoop out about 1.5 tablespoons of dough. Roll it into a ball between your palms. The dough should be smooth and round. Drop the ball into the powdered sugar and roll to coat generously. The thicker the coating, the better the crinkle effect. Place on the prepared baking sheet, spacing them about 2 inches apart. You should get about 18 cookies.
- Bake immediately. Place the baking sheet in the preheated oven. Bake for 10 to 12 minutes. At 10 minutes, the cookies will be soft and puffy. At 12 minutes, they’ll be slightly firmer but still tender. The edges should look set, and the tops will have cracked. The centers will look slightly underdone, but that’s perfect.
- Cool on the baking sheet. Let the cookies rest on the hot baking sheet for 3 minutes. This allows them to finish setting up. Then transfer them to a cooling rack. The cracks will become more pronounced as they cool.
- Dust with extra powdered sugar (optional). Once cooled, you can sift a little more powdered sugar on top for a snow-covered look. This is purely for presentation.
A few notes from my trials: If your cookies didn’t crack enough, the dough was probably too warm. Try chilling it for 10 minutes next time. If they spread too much, your butter was too hot when you mixed it. Let it cool to room temperature after melting. And if the powdered sugar disappeared into the dough, you didn’t coat them thickly enough. Roll them until they look completely white.
Cooking Tips & Techniques
After making these cookies more times than I can count, I’ve learned a few things the hard way. Here are my best tips to ensure success every time.
Don’t skip the vinegar. I know it sounds weird in a cookie, but the vinegar reacts with the cocoa powder to deepen the red color and add a subtle tang. Without it, the cookies look more brown than red, and they lose some complexity. I forgot it once, and the difference was noticeable.
Measure your flour correctly. This is the most common mistake I see. Scooping flour directly from the bag packs it down, and you end up with too much. Use a spoon to fluff the flour, then spoon it into your measuring cup and level it off with a knife. This simple step prevents dry, crumbly cookies.
Use gel food coloring. Liquid food coloring works, but it thins the dough and can affect the texture. Gel coloring is more concentrated, so you use less, and it doesn’t change the dough consistency. I learned this after a batch of cookies that spread too much because I added extra liquid coloring to get the red right.
Roll generously in powdered sugar. The crinkle effect happens when the dough expands during baking and the powdered sugar coating cracks. If you skimp on the sugar, the cracks will be small or nonexistent. I roll each ball until it looks like a snowball, completely white. The excess sugar creates those beautiful, dramatic cracks.
Bake one sheet at a time. If you crowd the oven with two baking sheets, the heat circulates unevenly, and your cookies won’t bake consistently. I learned this the hard way when the bottom sheet came out pale and underdone. If you need to bake multiple batches, let the baking sheet cool completely between batches, or the dough will start melting before it hits the oven.
Watch the baking time closely. These cookies go from perfectly soft to overdone in about 60 seconds. Start checking at 10 minutes. The edges should be set, but the centers should still look soft and slightly puffy. They’ll continue cooking on the hot baking sheet after you take them out. If you wait until the centers look fully done, they’ll be overbaked and dry.
Let them cool properly. The 3-minute rest on the baking sheet is crucial. It allows the cookies to firm up enough to transfer without breaking. If you try to move them too soon, they’ll fall apart. If you leave them too long, they’ll stick to the parchment. Set a timer if you need to.
Variations & Adaptations
One of the best things about this recipe is how adaptable it is. Here are some variations I’ve tried and loved.
Chocolate Chip Red Velvet Cookies. Fold in ½ cup (85g) white chocolate chips or semi-sweet chocolate chips before shaping. The white chocolate chips look beautiful against the red dough, and the semi-sweet chips add extra chocolate flavor. I made these for a cookie exchange, and they were the first to go.
Cream Cheese Filled Crinkle Cookies. Make a filling by mixing 4 ounces (113g) softened cream cheese with 2 tablespoons powdered sugar and ½ teaspoon vanilla. Freeze small spoonfuls of the filling on a parchment-lined plate. When shaping the cookies, flatten a dough ball, place a frozen cream cheese piece in the center, and seal the dough around it. Bake as directed. The cream cheese center stays soft and tangy. These are a little more work but totally worth it.
Vegan Version. Substitute the butter with a plant-based butter stick, like Earth Balance. Replace the egg with a flax egg (1 tablespoon ground flaxseed mixed with 3 tablespoons water, let sit for 5 minutes). Use vegan granulated sugar. The texture will be slightly more cake-like, but the crinkle effect still works. I tested this for a friend with dietary restrictions, and she said they were the best vegan cookies she’d ever had.
Gluten-Free Version. Swap the all-purpose flour with a 1:1 gluten-free baking blend that contains xanthan gum. Bob’s Red Mill and King Arthur both make reliable blends. The dough will be a bit stickier, so you might need to chill it for 15 minutes before shaping. The cookies will be slightly more delicate but still delicious.
Peppermint Red Velvet Crinkles. Add ½ teaspoon peppermint extract along with the vanilla. Crush a few candy canes and sprinkle the pieces on top of the cookies right after baking. This is a fantastic holiday variation. I made these for a Christmas party, and everyone thought I’d spent hours on them.
Spiced Red Velvet Crinkles. Add ½ teaspoon cinnamon and ¼ teaspoon nutmeg to the dry ingredients. The warm spices complement the chocolate and add a cozy flavor. This works especially well in the fall or winter.
Serving & Storage Suggestions
These cookies are versatile and easy to serve. Here’s how to get the most out of them.
Serving temperature. These cookies are best at room temperature. The texture is soft and chewy, and the powdered sugar coating stays intact. If you serve them warm, the sugar might melt slightly, but they’re still delicious. For a special treat, warm a cookie in the microwave for 10 seconds and serve with a scoop of vanilla ice cream.
Presentation ideas. Arrange the cookies on a white platter to make the red color pop. Stack them in a pyramid or line them up in rows. For gift giving, place them in a decorative tin or a cellophane bag tied with a ribbon. A dusting of extra powdered sugar right before serving makes them look freshly made.
Complementary dishes and beverages. These cookies pair beautifully with a glass of cold milk, a hot cup of coffee, or a mug of hot chocolate. For a dessert platter, serve them alongside brownies, blondies, or vanilla ice cream. They also work well on a cookie tray with chocolate chip cookies and sugar cookies.
Storage instructions. Store the cookies in an airtight container at room temperature for up to 5 days. Place a piece of bread in the container to keep them soft; the bread absorbs excess moisture and releases it slowly. Change the bread every other day if storing for longer.
Freezer instructions. You can freeze the baked cookies or the unbaked dough. For baked cookies, place them in a single layer in a freezer-safe container, separating layers with parchment paper. Freeze for up to 3 months. Thaw at room temperature for about 30 minutes. For the dough, scoop it into balls, roll them in powdered sugar, and place them on a parchment-lined baking sheet. Freeze until solid, then transfer to a freezer bag. Bake from frozen, adding 2 to 3 minutes to the baking time. This is my favorite method for having fresh cookies on demand.
How flavors develop. These cookies actually taste better the next day. The flavors meld together, and the texture becomes even softer. If you can resist eating them all on day one, you’ll be rewarded on day two. I often make a double batch just so we have leftovers.
Nutritional Information & Benefits
Here’s the estimated nutritional breakdown for one cookie, based on a recipe that yields 18 cookies.
| Nutrient | Amount per Cookie |
|---|---|
| Calories | 145 |
| Total Fat | 7g |
| Saturated Fat | 4g |
| Cholesterol | 25mg |
| Sodium | 65mg |
| Total Carbohydrates | 20g |
| Dietary Fiber | 1g |
| Sugars | 12g |
| Protein | 2g |
These cookies are a treat, but they do offer some small benefits. The cocoa powder contains antioxidants called flavonoids, which can support heart health. The butter provides vitamin A, and the egg adds a little protein. Of course, these are still cookies, so enjoy them in moderation.
For dietary considerations, this recipe contains gluten, dairy, and eggs. For a gluten-free version, use a 1:1 gluten-free flour blend. For a dairy-free version, use plant-based butter. For an egg-free version, use a flax egg as described in the variations section. This recipe is not suitable for a low-carb or keto diet due to the sugar content.
From a wellness perspective, I believe in balance. These cookies are meant to be enjoyed as part of a varied diet. They’re perfect for celebrations, holidays, or those days when you just need something sweet. I don’t stress about the sugar or butter because I know they’re made with real ingredients and lots of love.
Conclusion
These Easy Red Velvet Crinkle Cookies have become a staple in my kitchen for good reason. They’re quick, simple, and absolutely delicious. The crackled tops and soft centers make them feel special, but the 30-minute timeline keeps them accessible for any day of the week. I love that I can whip up a batch after dinner and still have cookies for dessert.
I hope you give this recipe a try and make it your own. Maybe you’ll add white chocolate chips, or a pinch of cinnamon, or a cream cheese filling. That’s the beauty of baking, it’s all about what makes you happy. Mr. Henderson would probably be thrilled to know his wife’s recipe has found its way into so many kitchens.
When you make these cookies, I’d love to hear about it. Leave a comment below and tell me how they turned out, or share a photo on Pinterest. Tag me so I can see your beautiful creations. And if you have a variation that you love, please share it. The best recipes are the ones we pass along and make our own.
Happy baking, friends. These cookies are waiting for you.
Frequently Asked Questions
Why didn’t my cookies crack?
The most common reason is not enough powdered sugar coating. Roll the dough balls until they’re completely white. Another reason could be that the dough was too warm. Try chilling it for 10 to 15 minutes before shaping.
Can I use Dutch-processed cocoa powder?
I don’t recommend it. Natural cocoa powder is acidic, which helps the cookies rise and creates the crinkle effect. Dutch-processed cocoa is alkalized and won’t react the same way. Stick with natural for the best results.
How do I get a more vibrant red color?
Use gel food coloring instead of liquid. Gel is more concentrated, so you get a deeper color without thinning the dough. You can also add an extra ½ teaspoon of vinegar to enhance the red hue.
Can I make the dough ahead of time?
Yes, you can refrigerate the dough for up to 24 hours. Let it sit at room temperature for 10 minutes before shaping, as it will be firmer. You can also freeze the shaped, coated dough balls for up to 3 months and bake them directly from frozen.
Why did my cookies spread too much?
This usually happens when the butter is too warm. Make sure your melted butter has cooled to room temperature before mixing. Also, check that your baking powder is fresh. Old baking powder loses its potency and can cause spreading.
Pin This Recipe!
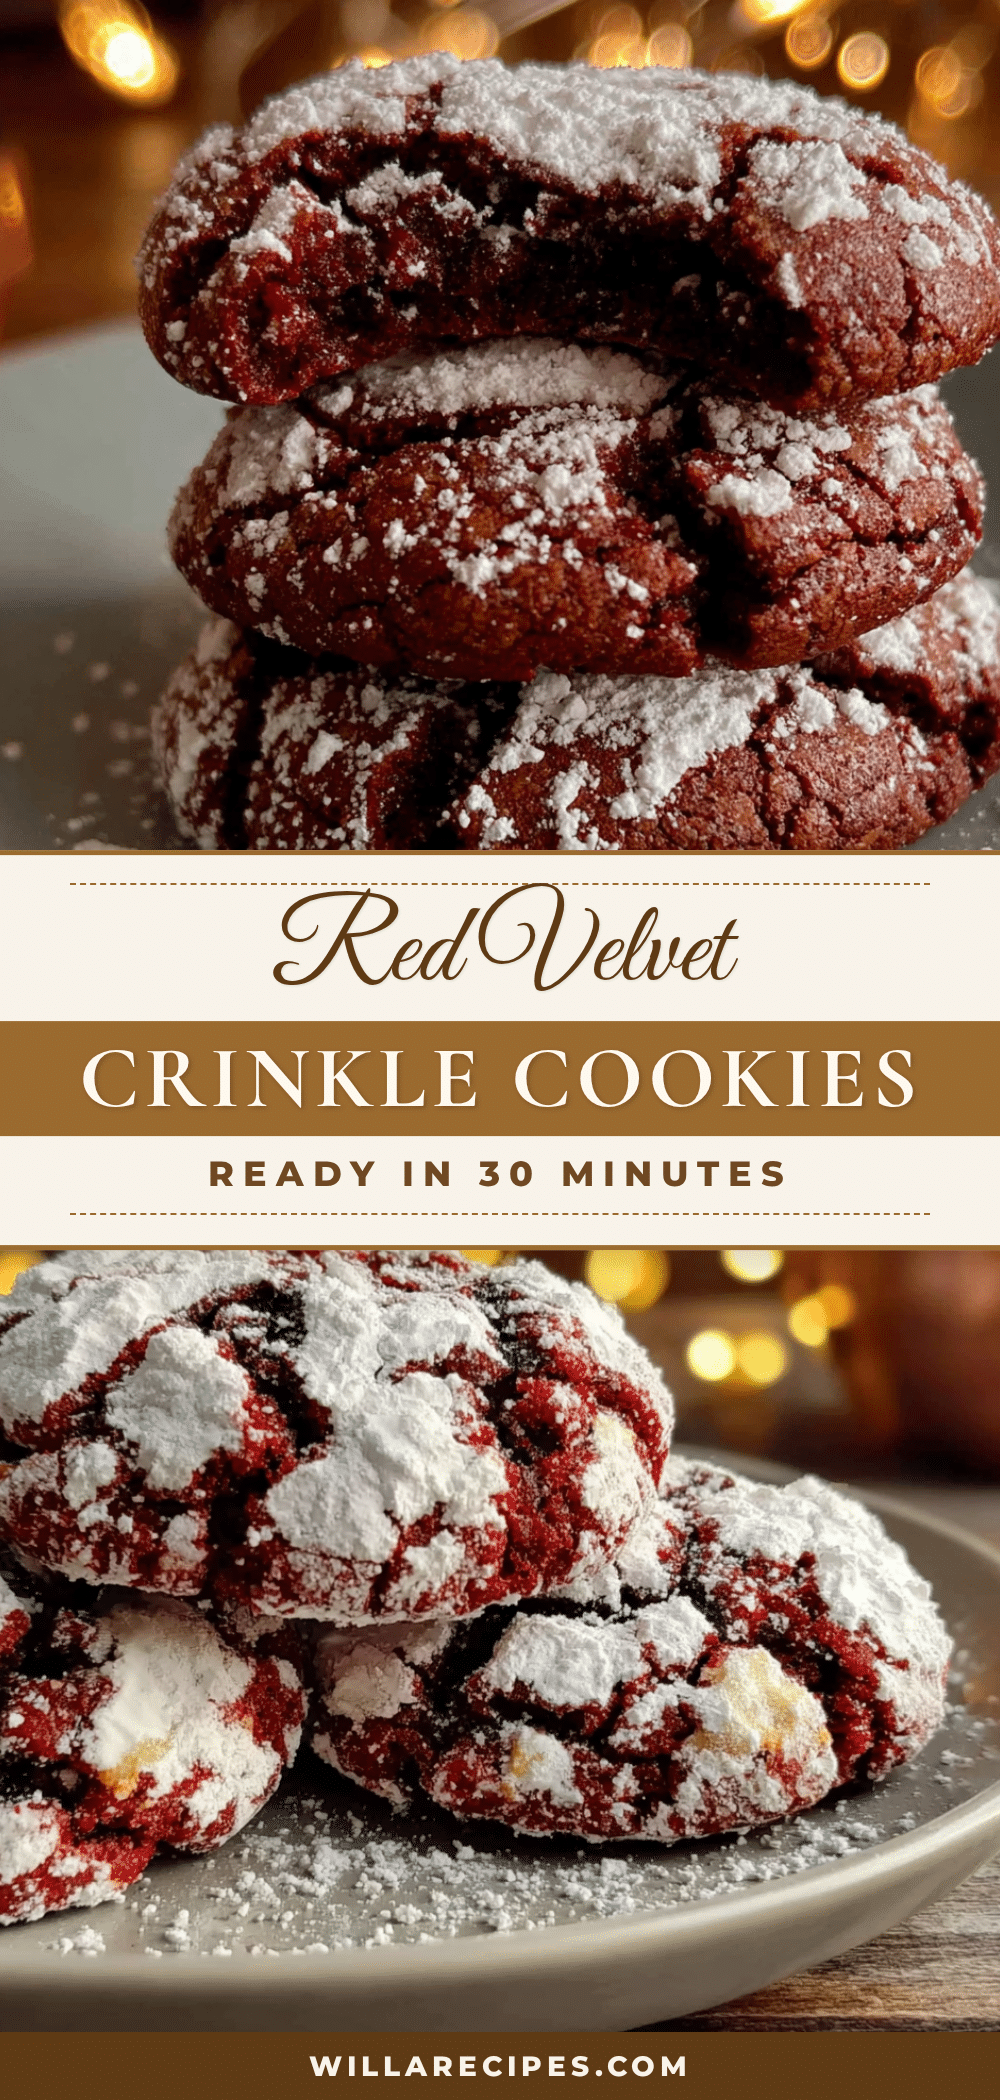
Easy Red Velvet Crinkle Cookies: Best 30-Minute Recipe

These Easy Red Velvet Crinkle Cookies have that perfect crackled top, a soft and chewy center, and just enough chocolate flavor without being too heavy. They look fancy but come together in under thirty minutes, which is exactly what you need when you’re short on time but want something that feels special.
- Prep Time: 15 minutes
- Cook Time: 12 minutes
- Total Time: 27 minutes
- Yield: 18 cookies 1x
- Category: Dessert
- Cuisine: American
Ingredients
- 1 ½ cups (190g) all-purpose flour
- ¼ cup (20g) unsweetened cocoa powder
- 1 teaspoon baking powder
- ¼ teaspoon salt
- ½ cup (113g) unsalted butter, melted
- ¾ cup (150g) granulated sugar
- 1 large egg, room temperature
- 1 teaspoon vanilla extract
- 1 tablespoon red food coloring (or 1 teaspoon gel)
- 1 teaspoon white vinegar
- ½ cup (60g) powdered sugar, for rolling
Instructions
- Preheat your oven to 350°F (175°C). Line a baking sheet with parchment paper.
- In a medium bowl, whisk together the all-purpose flour, cocoa powder, baking powder, and salt until evenly mixed.
- In a large bowl, whisk together the melted butter and granulated sugar until smooth. Add the egg, vanilla extract, red food coloring, and white vinegar. Whisk until combined and the color is uniform.
- Pour the dry ingredients into the wet mixture. Stir with a spatula until just combined. Do not overmix. The dough will be soft and slightly sticky.
- Place the powdered sugar in a small bowl. Use a fork to break up any clumps.
- Using a cookie scoop or tablespoon, scoop out about 1.5 tablespoons of dough. Roll into a ball between your palms. Drop the ball into the powdered sugar and roll to coat generously. Place on the prepared baking sheet, spacing them about 2 inches apart. You should get about 18 cookies.
- Bake immediately for 10 to 12 minutes. At 10 minutes, the cookies will be soft and puffy. At 12 minutes, they’ll be slightly firmer but still tender. The edges should look set, and the tops will have cracked.
- Let the cookies rest on the hot baking sheet for 3 minutes. Then transfer them to a cooling rack. The cracks will become more pronounced as they cool.
- Once cooled, you can sift a little more powdered sugar on top for a snow-covered look (optional).
Notes
Don’t skip the vinegar; it deepens the red color and adds a subtle tang. Measure flour correctly by spooning and leveling. Use gel food coloring for better color without thinning the dough. Roll generously in powdered sugar for the best crinkle effect. Bake one sheet at a time for even baking. Watch the baking time closely; start checking at 10 minutes. Let cookies cool on the baking sheet for 3 minutes before transferring.
Nutrition
- Serving Size: 1 cookie
- Calories: 145
- Sugar: 12
- Sodium: 65
- Fat: 7
- Saturated Fat: 4
- Carbohydrates: 20
- Fiber: 1
- Protein: 2
Keywords: red velvet crinkle cookies, easy cookie recipe, 30-minute cookies, crinkle cookies, red velvet cookies


