Last Tuesday, I was standing in my kitchen staring at the clock—11:47 AM, which meant I had exactly thirteen minutes to pull together three lunchboxes before the carpool line started. The bread was stale. The ham was gone. My youngest was already asking what was for lunch, which is code for “please don’t put that weird thing in my box again.” I opened the fridge and saw turkey, cheese, and a bag of tortillas I’d bought on a whim. I almost closed the door. But then I remembered something my friend Marta told me at the park last spring. She was unpacking her daughter’s lunch and I noticed these neat little spirals instead of sad, flat sandwiches. “Roll them tight,” she said, not looking up. “That’s the whole trick.”
So I grabbed a tortilla, laid down some turkey and cheese, rolled it up tight like she’d said, and sliced it into coins. I tossed them into the lunchbox with some grapes and a handful of crackers. And honest to goodness, when my son came home that afternoon, the lunchbox was empty. Not a crumb. He asked if I could make “the roll-y things” again tomorrow. That was three weeks ago and I haven’t made a regular sandwich since. Maybe you’ve been there—staring at the same lunchbox rotation, wondering if your kids are actually eating what you pack or just trading it for fruit snacks. These turkey cheese wraps changed that for us.
Why You’ll Love This Recipe
Let me tell you why these easy turkey cheese lunchbox wraps have become my go-to for school lunches. I’ve tested this recipe through three different lunchbox phases—the “I only eat beige food” phase, the “everything must be separate” phase, and the current “as long as it’s a spiral I’ll eat it” phase. And honestly, they’ve passed every single test.
- Quick & Easy: Five minutes. That’s it. From fridge to lunchbox in less time than it takes to find a matching lid for a container. Perfect for those mornings when you’re running late or the bus is early.
- Simple Ingredients: You probably have everything already. Turkey, cheese, tortillas. Maybe some cream cheese or spinach if you’re feeling fancy. No special grocery trips required.
- Perfect for School Lunches: These hold up beautifully in a lunchbox. No sogginess. No smashed bread. Just neat little spirals that stay intact until lunchtime.
- Crowd-Pleaser: My kids went from ignoring their sandwiches to actually finishing their lunch. Even my picky eater, who once declared cheese “suspicious,” eats these without complaint.
- Unbelievably Delicious: There’s something about the rolled format that makes everything taste better. The cheese stays perfectly melded with the turkey, and the tortilla adds just the right chewiness.
What makes these different from every other wrap recipe? It’s the rolling technique and the way the ingredients layer together. I spent a whole week experimenting with different tortilla brands and cheese thicknesses to find the combination that stays rolled without falling apart. This isn’t just another version—it’s the one that actually works for real families on real mornings. And honestly, there’s something about seeing those little spirals in a lunchbox that feels like a small victory. Like you’ve got this parenting thing figured out, even if just for one meal.
What Ingredients You Will Need
This recipe uses simple, everyday ingredients that you can find at any grocery store. The beauty of these wraps is that the ingredients are flexible—you can swap things based on what your kids like or what you have on hand.
- Flour tortillas (8-inch) — Look for soft, pliable tortillas that won’t crack when rolled. I prefer Mission or Guerrero brand for their flexibility. Whole wheat works great too, just warm them slightly before rolling.
- Deli turkey slices (about 4-6 ounces) — Oven-roasted or smoked turkey works best. I like Boar’s Head or the store-brand oven-roasted turkey from the deli counter. Avoid the pre-packaged shaved turkey—it’s too thin and falls apart.
- Cheese slices (4-6 slices) — Cheddar, provolone, Swiss, or American all work well. I use sharp cheddar because my kids love the flavor. Provolone melts nicely and holds everything together.
- Cream cheese (2 tablespoons, softened) — This is optional but highly recommended. It acts as glue to hold the wrap together and adds a creamy texture. Use full-fat for best results.
- Spinach leaves (optional) — A handful of fresh spinach adds color and nutrients without changing the flavor much. My kids don’t even notice it’s there.
- Mayonnaise or mustard (optional) — A thin spread adds moisture and flavor. My son likes a little honey mustard, while my daughter prefers plain mayo.
Ingredient Selection Tips: For the best texture, choose tortillas that are fresh and flexible. If your tortillas are a day or two old, microwave them for 10 seconds between damp paper towels to make them pliable again. For the cheese, pre-sliced deli cheese works perfectly—just make sure it’s thin enough to roll without cracking. I’ve found that Tillamook sharp cheddar slices have the best flavor and flexibility.
Substitution Guidance: If your family doesn’t eat turkey, ham or roast beef work beautifully. For a vegetarian version, use hummus with roasted vegetables or extra cheese. Dairy-free cheese works but may not hold together as well—add a thin layer of hummus to help everything stick. For gluten-free options, use corn tortillas or gluten-free wraps, but warm them first to prevent cracking.
Equipment Needed
You don’t need much for this recipe, which is part of why I love it. Here’s what you’ll need:
- A sharp knife — A good chef’s knife or serrated bread knife makes clean slices without squishing the wrap. I use my Wusthof chef’s knife and it cuts through everything perfectly.
- A cutting board — Any cutting board works. I prefer a wooden board because it doesn’t slide around as much.
- A butter knife or offset spatula — For spreading cream cheese or mayo evenly across the tortilla.
- Plastic wrap or parchment paper — Wrapping the rolled tortilla tightly helps it hold its shape while you slice it. This is optional but makes cleaner cuts.
- A lunchbox or container — Any airtight container works. I use Bentgo boxes or simple glass containers with snap lids.
Budget-Friendly Options: Don’t have a chef’s knife? A serrated steak knife works surprisingly well for slicing wraps. No offset spatula? The back of a spoon works for spreading cream cheese. And if you don’t have plastic wrap, just roll the wrap tightly and slice immediately—it still works, just be gentle with the cuts.
Personal Experience: I used to skip the plastic wrap step because I was in a hurry. And honestly, the wraps would sometimes unroll a bit when I sliced them. Wrapping them tightly in plastic wrap for just 5 minutes makes a huge difference. The slices come out perfect every time. It’s one of those little steps that seems optional but really isn’t.
Preparation Method
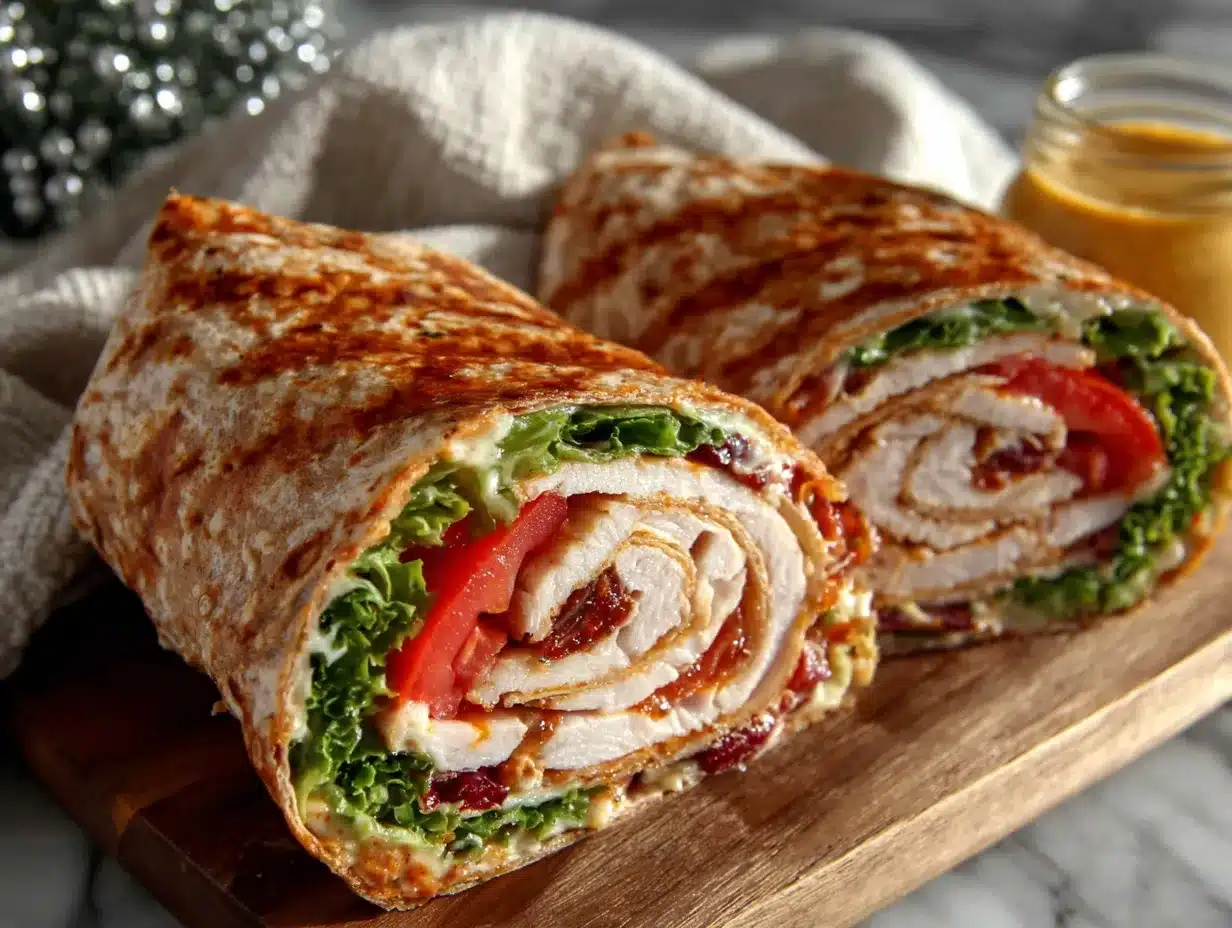
Follow these steps and you’ll have perfect turkey cheese wraps in about five minutes. I’ve included all the little details that make the difference between a wrap that falls apart and one that stays beautifully rolled.
- Warm the tortilla (10 seconds). Place one tortilla on a microwave-safe plate and microwave for 10 seconds. This makes it pliable and prevents cracking. If you’re making multiple wraps, warm each one individually right before you fill it. I learned this the hard way after my first attempt cracked into pieces.
- Spread the cream cheese (30 seconds). Using a butter knife or offset spatula, spread about 1 tablespoon of softened cream cheese evenly over the entire surface of the tortilla. Leave a 1-inch border around the edge. The cream cheese acts as glue and adds moisture. If you’re using mayo or mustard, spread it now too.
- Layer the turkey (30 seconds). Place 2-3 slices of turkey evenly over the cream cheese. Overlap them slightly so there are no gaps. The turkey should cover about 80% of the tortilla surface, leaving that 1-inch border at the edges.
- Add the cheese (15 seconds). Lay 2 slices of cheese on top of the turkey. If you’re using larger slices, you may only need one. Make sure the cheese covers the turkey evenly. For extra flavor, I sometimes use one slice of cheddar and one slice of provolone.
- Add spinach (optional, 10 seconds). If using spinach, place a small handful of leaves on top of the cheese. Don’t overdo it—too many leaves will make the wrap hard to roll. About 5-6 leaves is perfect.
- Roll it tight (30 seconds). Starting from one edge, roll the tortilla tightly. Use your fingers to keep the filling tucked in as you roll. Roll all the way to the end, then press gently to seal. The cream cheese should help it stick. This is the step Marta emphasized—tight rolling is everything.
- Wrap in plastic (5 minutes). Place the rolled wrap on a piece of plastic wrap and roll it up tightly, twisting the ends like a candy wrapper. This helps the wrap hold its shape. Let it rest for 5 minutes at room temperature. If you’re in a rush, 2 minutes works too.
- Slice into coins (1 minute). Using a sharp knife, slice the wrap into 1-inch pieces. A serrated knife works best—it cuts through the tortilla without squishing it. You should get about 6-8 pieces per wrap. For younger kids, slice them smaller—about 3/4-inch pieces.
- Pack in lunchbox (30 seconds). Arrange the slices in a single layer in your lunchbox or container. If stacking, place a piece of parchment paper between layers to prevent sticking.
Sensory Cues: When you roll the tortilla, you should feel it tighten as you go. The cream cheese should create slight resistance but not stickiness. When you slice, the knife should cut through cleanly without dragging. The finished slices should look like neat little spirals with visible layers of turkey, cheese, and tortilla.
Troubleshooting Tips: If your wrap cracks when rolling, the tortilla wasn’t warm enough. Microwave it for 5 more seconds next time. If the slices fall apart, you didn’t roll tightly enough or the cream cheese layer was too thin. If the wrap is too dry, add more cream cheese or a thin layer of mayo.
Cooking Tips & Techniques
After making these wraps at least forty times (I stopped counting after the first month), I’ve picked up some tricks that make the process smoother and the results better. Here are the ones that matter most.
The Tortilla Temperature Trick: Cold tortillas crack. Room temperature tortillas are okay. Warm tortillas are perfect. I microwave mine for exactly 10 seconds—any longer and they get too hot to handle. If you’re making a batch for the week, warm each tortilla individually right before you fill it. I learned this after trying to roll five cold tortillas at once and ending up with a pile of broken pieces.
The Cream Cheese Spreading Method: Let your cream cheese sit out for 10 minutes before using it. Cold cream cheese is difficult to spread and will tear the tortilla. If you forget to take it out ahead of time, microwave it for 5 seconds. Spread it thin and even—about 1/8 inch thick. Too much cream cheese makes the wrap soggy, too little and it won’t hold together.
The Rolling Technique That Changed Everything: Start rolling from the edge closest to you. Use your fingertips to keep the filling tucked in as you roll. Apply even pressure—not too tight or the filling will squeeze out the ends, not too loose or the wrap will fall apart. When you reach the end, press down gently to seal. Marta was right about this being the whole trick.
The Waiting Game: I know you’re in a hurry. But letting the wrapped roll rest for 5 minutes (wrapped in plastic) makes a noticeable difference. The cream cheese sets slightly, the tortilla relaxes, and the whole thing holds together better when sliced. If you slice immediately, the wraps tend to unroll. Trust me on this one.
Common Mistakes I’ve Made: Overfilling is the biggest mistake. It’s tempting to pile on the turkey and cheese, but too much filling makes the wrap impossible to roll and everything falls out. Stick to 2-3 turkey slices and 1-2 cheese slices. Another mistake is using pre-shredded cheese instead of slices—shredded cheese falls out when you slice the wrap. Always use slices.
Variations & Adaptations
One of the best things about this recipe is how adaptable it is. Here are some variations I’ve tried and loved.
The Veggie-Packed Version: Add thin cucumber slices, shredded carrots, or bell pepper strips along with the spinach. My friend Sarah adds avocado slices and her kids go crazy for them. Just be careful not to overfill—stick to one or two veggie additions per wrap.
The Breakfast Wrap Version: Swap the turkey for scrambled eggs and the cheese for cheddar. Add a thin layer of cream cheese and roll it up the same way. My daughter loves these for breakfast on school days. They’re also great for brunch or a quick breakfast on the go.
The Gluten-Free Version: Use gluten-free tortillas or corn tortillas. Corn tortillas are smaller, so you’ll need to adjust the filling amounts. Warm them thoroughly before rolling—they crack more easily than flour tortillas. I’ve also used large lettuce leaves for a low-carb option, though they’re more fragile.
The Dairy-Free Version: Use dairy-free cheese slices and dairy-free cream cheese. Violife and Daiya both make good options. The texture is slightly different but still works well. Add a thin layer of hummus instead of cream cheese for extra flavor and stickiness.
The Flavor Twist: Add a thin layer of pesto, sun-dried tomato spread, or roasted red pepper hummus before adding the turkey. My husband loves the pesto version—it adds so much flavor without extra effort. For kids who like a little sweetness, try a thin layer of honey mustard or raspberry jam.
Personal Variation I Love: I make a Mediterranean version with turkey, provolone, roasted red peppers, and a thin layer of tzatziki sauce. It’s my favorite grown-up lunch option when I’m packing the kids’ wraps. The tzatziki adds moisture and flavor without making the wrap soggy.
Serving & Storage Suggestions
These wraps are designed for lunchboxes, but they work for so much more. Here’s how to serve and store them for best results.
Serving Temperature: Serve cold or at room temperature. They don’t need to be heated—in fact, they hold together better when cool. If you’re serving them for a party or snack, arrange them on a platter with toothpicks in each piece for easy grabbing.
Presentation Ideas: Arrange the slices in a single layer in a bento box or lunch container. Add colorful sides like cherry tomatoes, cucumber slices, apple wedges, or grapes. For a fun lunchbox surprise, pack a small container of ranch dressing or hummus for dipping. My kids love dipping their wraps in ranch—it makes lunch feel special.
Complementary Dishes: These wraps pair beautifully with fresh fruit, vegetable sticks, yogurt tubes, cheese sticks, or a small handful of crackers. For a picnic or party spread, serve them alongside other finger foods like veggie cups, fruit skewers, or mini muffins.
Storage Instructions: Store assembled wraps (unsliced) in the refrigerator for up to 3 days. Wrap them tightly in plastic wrap or place them in an airtight container. If you’ve already sliced them, store the slices in a single layer with parchment paper between layers to prevent sticking. Do not freeze these wraps—the texture of the tortilla and cream cheese changes when thawed and becomes mushy.
Reheating Methods: These wraps are best served cold, but if you prefer them warm, microwave the slices for 10-15 seconds. Be careful not to overheat or the cheese will melt and the wrap will fall apart. For a crispy version, toast the slices in a dry skillet over medium heat for 1-2 minutes per side.
How Flavors Develop: The flavors actually get better after a few hours in the fridge. The cream cheese softens and melds with the turkey, and the tortilla absorbs some of the moisture, making everything taste more cohesive. That’s why these are perfect for make-ahead lunches—they taste even better at lunchtime than they did when you made them.
Nutritional Information & Benefits
These wraps are a balanced lunch option that provides protein, carbohydrates, and healthy fats to keep kids energized through the school day.
| Nutrient | Per Wrap (1 whole wrap) |
|---|---|
| Calories | 280-320 |
| Protein | 18-22g |
| Carbohydrates | 25-30g |
| Fat | 12-16g |
| Fiber | 2-3g |
| Sodium | 600-800mg |
Health Benefits: Turkey is a lean protein source that supports muscle growth and keeps kids full longer. Cheese provides calcium for strong bones and teeth. If you use whole wheat tortillas, you’ll add fiber for digestive health. Adding spinach gives a boost of iron and vitamins A and C without changing the flavor.
Dietary Considerations: These wraps can be made gluten-free by using corn tortillas or gluten-free wraps. For a lower-sodium option, choose low-sodium turkey and cheese. For a lower-fat version, use reduced-fat cheese and turkey breast. The recipe is naturally nut-free, making it safe for school lunch programs with nut restrictions.
Potential Allergens: This recipe contains wheat (tortillas) and dairy (cheese, cream cheese). For dairy-free options, use dairy-free cheese and cream cheese alternatives. For gluten-free options, use corn tortillas or certified gluten-free wraps. Always check labels on deli meats for potential allergens.
Personal Wellness Perspective: I love that these wraps give my kids a balanced lunch without me having to think too hard about it. The protein keeps them going through afternoon classes, and the carbs give them energy for recess. And honestly, knowing they’re eating something I made with real ingredients makes me feel good about what’s in their lunchbox.
Conclusion
These easy turkey cheese lunchbox wraps have honestly changed our lunch routine in ways I didn’t expect. What started as a desperate fridge raid turned into a recipe that my kids actually ask for. They’re quick enough for chaotic mornings, simple enough for anyone to make, and flexible enough to adapt to whatever your family likes.
I love that I can make a batch on Sunday night and have lunches ready for three days. I love that my kids come home with empty lunchboxes. And I love that I don’t have to think about lunch at 7 AM when I’m still on my first cup of coffee. If you try these wraps, I’d love to hear how they work for your family. What fillings did your kids love? Did you discover any tricks that made them even better? Drop a comment below and share your version—I’m always looking for new ideas to try.
Here’s to fewer lunchbox battles and more empty containers at the end of the day. You’ve got this.
Frequently Asked Questions
Can I make these wraps the night before?
Absolutely. In fact, they taste even better after resting overnight. Assemble the wraps, wrap them tightly in plastic wrap, and store them in the refrigerator. Slice them in the morning before packing. They’ll stay fresh for up to 3 days.
How do I keep the wraps from getting soggy in the lunchbox?
The key is not overdoing the spreads. Use a thin layer of cream cheese or mayo—about 1 tablespoon per wrap. Also, make sure your turkey and cheese aren’t too wet. Pat turkey slices dry with a paper towel if they seem moist. And always pack the wraps in a dry container.
Can I use other types of tortillas?
Yes. Whole wheat, spinach, tomato basil, or gluten-free tortillas all work. Just warm them slightly before rolling to prevent cracking. Corn tortillas are smaller, so adjust your filling amounts. For a low-carb option, large lettuce leaves work but are more fragile.
What sides go well with these wraps in a lunchbox?
Fruit like apple slices, grapes, or berries work great. Vegetable sticks with dip, yogurt tubes, cheese sticks, crackers, or a small treat like a cookie or granola bar round out the meal. My kids love when I add a small container of ranch dressing for dipping the wraps.
How do I make these wraps for picky eaters?
Start simple—just turkey and cheese. No spreads, no vegetables. Once they’re used to the wrap format, gradually add cream cheese or a thin layer of mayo. After that, try adding a single spinach leaf. The spiral shape makes everything feel more fun and less intimidating for picky eaters.
Pin This Recipe!

Easy Turkey Cheese Lunchbox Wraps: 5-Minute Kids Lunch

Quick and easy turkey cheese wraps that are perfect for school lunches. Made with simple ingredients like turkey, cheese, and tortillas, these spiral wraps hold together beautifully and are a crowd-pleaser for kids.
- Prep Time: 5 minutes
- Cook Time: 0 minutes
- Total Time: 5 minutes
- Yield: 4 servings 1x
- Category: Lunch
- Cuisine: American
Ingredients
- 4 flour tortillas (8-inch)
- 4–6 ounces deli turkey slices (oven-roasted or smoked)
- 4–6 slices cheese (cheddar, provolone, Swiss, or American)
- 2 tablespoons cream cheese, softened (optional but recommended)
- 1 handful spinach leaves (optional)
- Mayonnaise or mustard (optional)
Instructions
- Warm the tortilla: Place one tortilla on a microwave-safe plate and microwave for 10 seconds to make it pliable.
- Spread the cream cheese: Using a butter knife or offset spatula, spread about 1 tablespoon of softened cream cheese evenly over the entire surface of the tortilla, leaving a 1-inch border around the edge.
- Layer the turkey: Place 2-3 slices of turkey evenly over the cream cheese, overlapping slightly to cover about 80% of the tortilla surface.
- Add the cheese: Lay 2 slices of cheese on top of the turkey, covering it evenly.
- Add spinach (optional): Place a small handful of spinach leaves on top of the cheese (about 5-6 leaves).
- Roll it tight: Starting from one edge, roll the tortilla tightly, using your fingers to keep the filling tucked in. Roll all the way to the end and press gently to seal.
- Wrap in plastic: Place the rolled wrap on a piece of plastic wrap and roll it up tightly, twisting the ends like a candy wrapper. Let it rest for 5 minutes at room temperature.
- Slice into coins: Using a sharp knife (serrated works best), slice the wrap into 1-inch pieces (about 6-8 pieces per wrap). For younger kids, slice into 3/4-inch pieces.
- Pack in lunchbox: Arrange the slices in a single layer in your lunchbox or container. If stacking, place a piece of parchment paper between layers to prevent sticking.
Notes
For best results, warm tortillas before rolling to prevent cracking. Let the rolled wrap rest for 5 minutes wrapped in plastic for cleaner slices. Overfilling is a common mistake—stick to 2-3 turkey slices and 1-2 cheese slices per wrap. These wraps can be stored in the refrigerator for up to 3 days (unsliced, wrapped tightly). Do not freeze.
Nutrition
- Serving Size: 1 whole wrap
- Calories: 300
- Sugar: 2
- Sodium: 700
- Fat: 14
- Saturated Fat: 6
- Carbohydrates: 27
- Fiber: 2
- Protein: 20
Keywords: turkey cheese wraps, lunchbox wraps, kids lunch, easy lunch, 5-minute lunch, school lunch, turkey wraps, cheese wraps, spiral wraps


