It was 10:47 PM on a rainy Tuesday in early October, and I had a very specific craving for something peanut-buttery, chocolatey, and—let’s be honest—a little bit spooky. I didn’t have the energy for a full baking project, you know? The oven felt like too much commitment. But I had a jar of creamy peanut butter, a bag of chocolate chips, and this ridiculous idea that popped into my head while I was staring at the pantry door. What if I could make a Halloween dessert that looked like a spiderweb but required zero oven time? I mean, honestly, that late-night brain is either a genius or a menace, and that night, it was definitely onto something.
The first batch was a happy accident. I was just trying to satisfy that sweet-salty craving, and the spiderweb design happened because I was too lazy to get a piping bag. I just drizzled the chocolate from a fork, and suddenly, it looked like something out of a Halloween party catalog. I stood there in my quiet kitchen, spatula in hand, and thought, “This is it. This is the one.”
These Perfect No-Bake Peanut Butter Spiderweb Bars are now my go-to for every Halloween gathering, movie night, or just a random Tuesday when the craving hits. They’re rich, they’re indulgent, and they look way more impressive than the effort they actually require. Maybe you’ve been there—wanting to bring something festive to a party but running out of time or energy? This recipe is your rescue. Let me show you how it’s done.
Why You’ll Love This Recipe
I’ve tested this recipe about six times now, tweaking the chocolate-to-peanut butter ratio until it was absolutely perfect. I even brought a batch to my neighbor, Mrs. Gable, who is notoriously picky about desserts, and she asked for the recipe before she finished her first square. That’s when I knew this was a winner.
- No Oven Required: Seriously, zero baking. Just a microwave and a fridge. Perfect for those hot October days or when you just don’t want to deal with preheating.
- Simple Ingredients: You probably have everything in your pantry right now. Peanut butter, butter, powdered sugar, graham crackers, and chocolate chips. That’s it.
- Perfect for Halloween Parties: The spiderweb design is such a fun, festive touch. Kids love it, adults love it, and it takes maybe five minutes to decorate.
- Crowd-Pleaser: I’ve yet to meet someone who doesn’t love this combo. It’s like a Reese’s peanut butter cup, but better, and in bar form.
- Unbelievably Delicious: The texture is what gets me every time. The filling is creamy and slightly firm, the chocolate topping is rich and snappy, and the whole thing just melts in your mouth.
What makes this recipe different from the dozens of other no-bake peanut butter bars out there? It’s the technique. I melt the butter and peanut butter together slowly, and I let the mixture cool just slightly before adding the powdered sugar. This prevents the sugar from clumping and gives you that silky-smooth texture. Plus, the spiderweb design isn’t just for show—it ensures every bite has the perfect chocolate-to-filling ratio. This isn’t just another version; it’s the best version.
This recipe is the kind that makes you close your eyes after the first bite. It’s comfort food reimagined—simpler, faster, but with the same soul-soothing satisfaction. Perfect for impressing guests without stress, or turning a simple weeknight into something memorable.
What Ingredients You Will Need
This recipe uses simple, wholesome ingredients to deliver bold flavor and satisfying texture without the fuss. Most of these are pantry staples, which is exactly what you want when a last-minute Halloween craving strikes.
- For the Peanut Butter Filling:
- 1 cup (2 sticks) unsalted butter, melted (I prefer Land O’Lakes for consistent results)
- 1 cup creamy peanut butter (Jif or Skippy work great—avoid natural-style peanut butter as it can separate and make the bars greasy)
- 2 cups powdered sugar, sifted (sifting is key to avoiding lumps)
- 2 cups graham cracker crumbs (about 14 full sheets, crushed finely)
- 1 teaspoon vanilla extract (pure vanilla, not imitation, for the best flavor)
- A pinch of salt (if using salted peanut butter, you can skip this)
- For the Chocolate Topping:
- 1 ½ cups semi-sweet chocolate chips (I recommend Ghirardelli for that glossy finish)
- 2 tablespoons creamy peanut butter (this helps the chocolate set smoothly and adds flavor)
- 1 tablespoon coconut oil or vegetable shortening (optional, but gives the chocolate a beautiful shine)
- For the Spiderweb Decoration:
- ¼ cup white chocolate chips or melting wafers
- ½ teaspoon coconut oil (to thin the white chocolate for drizzling)
Ingredient Tips & Substitutions:
For the graham crackers, you can use gluten-free graham crackers if needed. I’ve done this for a friend with celiac disease, and the texture was still spot-on. If you don’t have graham crackers, crushed digestive biscuits or vanilla wafers work in a pinch, though the flavor will be slightly different.
For a dairy-free version, use vegan butter (like Earth Balance) and dairy-free chocolate chips. The texture holds up beautifully, and honestly, no one will know the difference.
If you’re not a fan of semi-sweet chocolate, milk chocolate chips work wonderfully too. Just know the bars will be sweeter. Dark chocolate lovers can go with 60% cacao chips for a more intense, less sweet finish.
And here’s a pro tip I learned the hard way: don’t use natural peanut butter. I tried it once because I thought it would be healthier, and the bars turned out oily and crumbly. Stick with the processed stuff for this one—it’s worth it.
Equipment Needed
You don’t need any fancy gadgets for this recipe, which is part of the beauty of it. Here’s what you’ll need:
- 9×9-inch baking pan (an 8×8 works too, your bars will just be slightly thicker)
- Parchment paper (for easy lifting and clean-up)
- Large mixing bowl
- Medium microwave-safe bowl
- Measuring cups and spoons
- Rubber spatula
- Fork or small whisk (for the spiderweb design)
- Plastic zip-top bag (for piping the white chocolate, or just use a fork)
If you don’t have a 9×9 pan, you can use a loaf pan or even an 8×8 square pan. Just adjust the thickness. I’ve also made these in a mini muffin tin for bite-sized spiderweb bites—just reduce the chilling time to about 20 minutes.
My personal favorite tool for this recipe is a good-quality rubber spatula. I have this red one that I’ve had for years, and it’s perfectly flexible for pressing the filling into the pan evenly. Don’t overthink the equipment—you probably already have everything you need.
Preparation Method
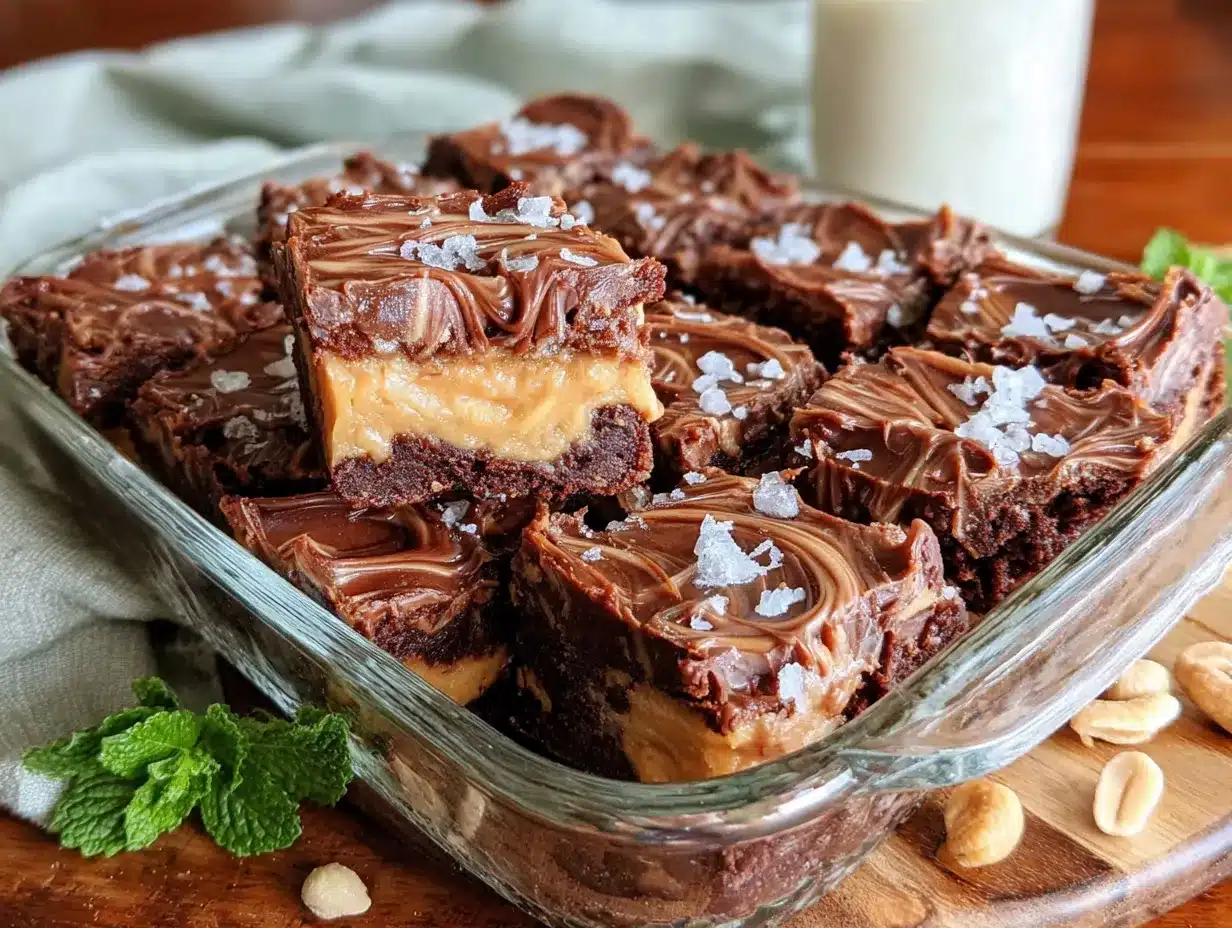
- Prepare the Pan: Line your 9×9-inch baking pan with parchment paper, leaving some overhang on two sides. This will make lifting the bars out later so much easier. Lightly grease the parchment with a tiny bit of butter or cooking spray.
- Make the Crust: In a large bowl, combine 2 cups of graham cracker crumbs with ½ cup of the melted butter. Stir until the crumbs are evenly moistened. Press this mixture firmly into the bottom of your prepared pan. I use the bottom of a measuring cup to really pack it down. Pop this in the fridge while you make the filling.
- Make the Peanut Butter Filling: In the same large bowl (one less dish to wash!), combine the remaining ½ cup melted butter, 1 cup peanut butter, and 1 teaspoon vanilla extract. Stir until smooth. Gradually add the sifted powdered sugar, stirring until fully incorporated. The mixture will be thick and a little sticky—that’s perfect.
- Assemble the Layers: Remove the crust from the fridge. Drop spoonfuls of the peanut butter filling over the crust. Using a spatula or your hands (lightly greased hands work wonders), press the filling into an even layer. It helps to lay a piece of parchment paper over the top and press down with your hands to smooth it out. Return the pan to the fridge for about 15 minutes to firm up.
- Make the Chocolate Topping: In a microwave-safe bowl, combine 1 ½ cups semi-sweet chocolate chips, 2 tablespoons peanut butter, and 1 tablespoon coconut oil. Microwave in 30-second intervals, stirring after each, until smooth and fully melted. Be careful not to overheat—chocolate can seize up if it gets too hot.
- Pour the Chocolate: Remove the pan from the fridge. Pour the melted chocolate over the peanut butter layer. Tilt the pan gently to spread it evenly, or use a spatula. Tap the pan on the counter a few times to release any air bubbles.
- Create the Spiderweb: This is the fun part! Melt the white chocolate chips with ½ teaspoon coconut oil in the microwave, stirring every 15 seconds. Transfer to a small zip-top bag and snip off a tiny corner. Pipe concentric circles (about 4-5 circles) on top of the dark chocolate. Then, using a toothpick or a skewer, drag from the center outward through all the circles to create the web effect. Wipe the toothpick clean between each drag for clean lines.
- Chill: Place the pan in the refrigerator for at least 2 hours, or until fully set. I usually leave them overnight—they’re even better the next day.
- Slice and Serve: Once set, lift the bars out of the pan using the parchment overhang. Place on a cutting board and use a sharp knife to cut into squares. For clean cuts, wipe the knife between each slice. Serve cold or at room temperature.
Cooking Tips & Techniques
I’ve made these bars more times than I can count, and I’ve definitely learned a few things the hard way. Let me save you some trouble.
Don’t Skip the Sifting: I know, sifting powdered sugar feels like an unnecessary step. But trust me, if you skip it, you’ll end up with little lumps of sugar in your filling. It’s not the end of the world, but the texture won’t be as silky. A quick sift takes 30 seconds and makes a huge difference.
Press the Crust Firmly: The graham cracker crust needs to be packed down really well. If it’s too loose, it will crumble when you cut the bars. I use the flat bottom of a glass or a measuring cup to press it down evenly. You want it to feel like a solid, compact layer.
Temperature Matters: When you add the melted butter to the peanut butter, make sure it’s not piping hot. Let it cool for a minute or two. If the mixture is too hot, it can make the powdered sugar clump. Lukewarm is your friend.
The Spiderweb Trick: For the cleanest spiderweb design, work quickly while the chocolate is still wet. If the chocolate starts to set, the lines won’t spread as nicely. Also, wipe your toothpick or skewer between each drag—this prevents the white chocolate from smearing and keeps the lines crisp.
Chill Time is Non-Negotiable: I once tried to rush this process and cut the bars after only an hour in the fridge. Big mistake. They were too soft and messy. Give them the full 2 hours, or even better, overnight. Patience pays off here.
Variations & Adaptations
One of the best things about this recipe is how easy it is to customize. Here are a few variations I’ve tried and loved:
- Gluten-Free Version: Use gluten-free graham crackers or crushed gluten-free vanilla cookies. The texture is identical, and no one will know the difference.
- Dark Chocolate Lovers: Swap the semi-sweet chocolate for dark chocolate (60-70% cacao). The bitterness balances the sweet peanut butter filling beautifully.
- Peanut-Free Option: Use sunflower seed butter (like SunButter) instead of peanut butter. The flavor is slightly different, but it’s still delicious and safe for nut-free households.
- Halloween Candy Crunch: Sprinkle crushed Reese’s Pieces or chopped Halloween candy (like Snickers or KitKats) on top of the chocolate before it sets. It adds a fun crunch and extra sweetness.
- Mint Chocolate Version: Add ½ teaspoon peppermint extract to the chocolate topping. It gives the bars a refreshing, Thin Mint vibe that’s perfect for the holidays.
I once made a batch with crushed pretzels mixed into the crust for a sweet-salty twist. It was incredible, though the pretzels softened a bit after a day in the fridge. If you try that, eat them within 24 hours for the best texture.
Serving & Storage Suggestions
These bars are best served cold, straight from the fridge. The filling is firm and creamy, and the chocolate has that satisfying snap. I love to arrange them on a Halloween-themed platter with a few candy corn scattered around for color.
For a more decadent presentation, serve them with a dollop of whipped cream and a drizzle of caramel sauce. It’s over the top, but hey, it’s Halloween.
Storage: Keep the bars in an airtight container in the refrigerator for up to 5 days. They actually get better after a day or two as the flavors meld together. I’ve also frozen them with great success. Wrap individual bars in plastic wrap, then place them in a freezer-safe bag. They’ll keep for up to 3 months. Just thaw in the fridge for a few hours before serving.
Reheating: Honestly, I prefer them cold. But if you want a softer texture, let them sit at room temperature for about 10 minutes before serving. Do not microwave them—the chocolate will melt and the bars will lose their structure.
One note: if you’re taking these to a party, keep them chilled until you’re ready to serve. They can get a bit soft in a warm room, especially if the chocolate topping starts to melt. A cooler bag with an ice pack works perfectly.
Nutritional Information & Benefits
Let’s be real—these are a treat, not a health food. But here’s the estimated nutritional breakdown for one bar (based on 16 servings):
- Calories: 320
- Fat: 22g
- Saturated Fat: 10g
- Carbohydrates: 28g
- Sugar: 20g
- Protein: 6g
- Fiber: 2g
On the bright side, peanut butter does provide some protein and healthy fats, and dark chocolate is rich in antioxidants. So there’s that! If you’re looking to lighten things up, you can reduce the butter by a couple of tablespoons, but honestly, I think they’re perfect as is.
These bars are not gluten-free unless you use gluten-free graham crackers, and they contain dairy and peanuts. For a dairy-free version, use vegan butter and dairy-free chocolate chips. For a nut-free version, swap the peanut butter for sunflower seed butter.
I personally love that this dessert feels indulgent without being overly complicated. It’s the kind of treat that makes you feel like you’re getting away with something, even though you know exactly what’s in it.
Conclusion
These Perfect No-Bake Peanut Butter Spiderweb Bars are everything I want in a Halloween dessert: easy, impressive, and absolutely delicious. They come together in minutes, require no oven time, and look like you spent hours on them. Honestly, that’s my favorite kind of recipe.
I love that you can customize them to your taste—swap the chocolate, add some candy, or make them gluten-free. They’re forgiving and flexible, which is exactly what you need when you’re juggling a million things during the holiday season.
I hope you give these a try for your next Halloween party, movie night, or just because. And if you do, I’d love to hear about it! Leave a comment below and let me know how they turned out—did you try any fun variations? Did the spiderweb design impress your guests? Share your photos and tag me on social media. I can’t wait to see your spooky creations!
Happy Halloween, and happy no-baking!
Frequently Asked Questions
Can I use crunchy peanut butter instead of creamy?
You can, but the texture will be different. The crunchy bits might make the filling a little less smooth, and the bars won’t cut as cleanly. I recommend creamy for the best results, but if you’re a crunch lover, go for it.
How long do these bars need to set in the fridge?
At least 2 hours, but overnight is best. The longer they chill, the cleaner the slices will be. If you’re in a rush, you can pop them in the freezer for about 45 minutes, but keep an eye on them so they don’t freeze solid.
Can I use milk chocolate instead of semi-sweet?
Absolutely. Milk chocolate will make the bars sweeter and creamier. If you have a sweet tooth, it’s a great swap. Just know the chocolate layer will be softer at room temperature.
My chocolate seized up while melting. What happened?
This usually happens if a tiny bit of water gets into the chocolate, or if it gets overheated. Always use a completely dry bowl and utensils. If it does seize, you can try stirring in a tablespoon of vegetable oil to smooth it out, but it might not be perfect. Next time, melt it slowly and stir often.
Can I make these bars vegan?
Yes! Use vegan butter (like Earth Balance), dairy-free chocolate chips, and ensure your graham crackers are vegan (some brands use honey). The texture will be the same, and they’ll be just as delicious.
Pin This Recipe!
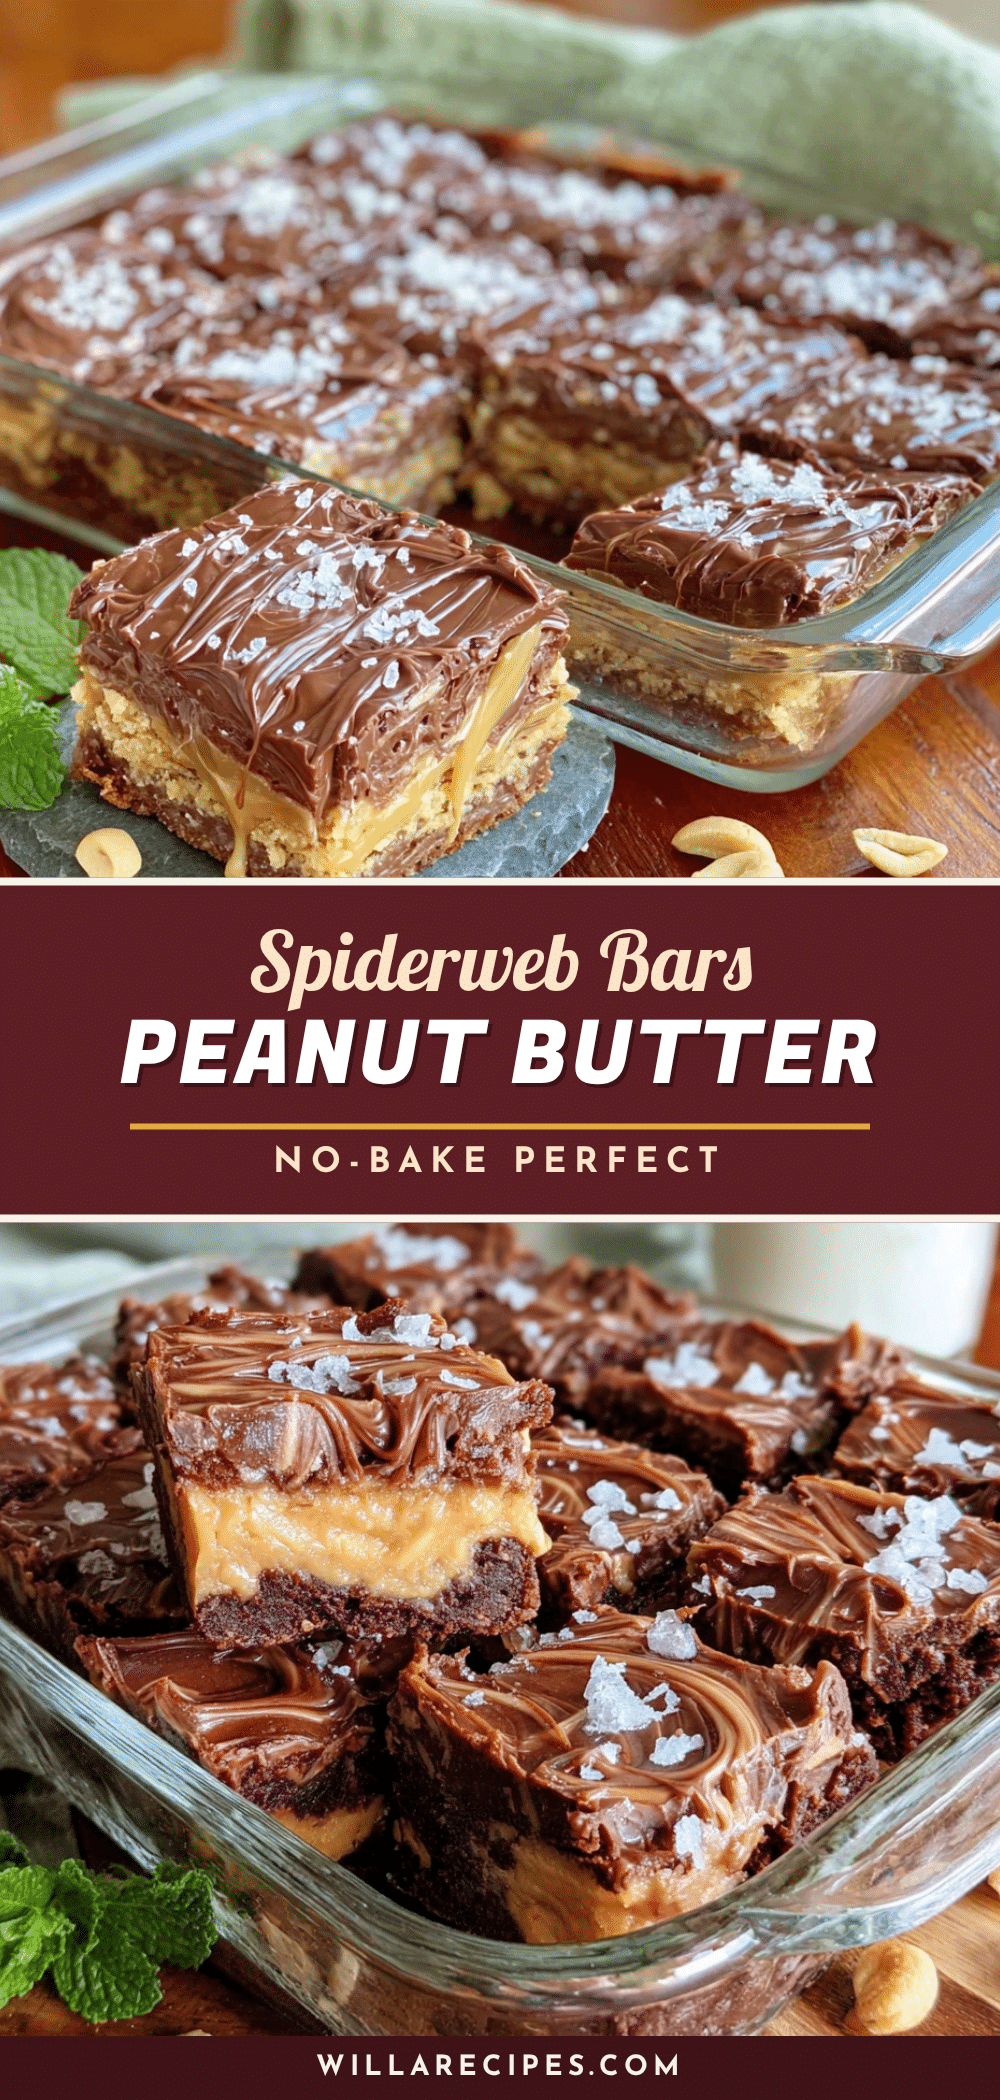
Perfect No-Bake Peanut Butter Spiderweb Bars
These no-bake peanut butter spiderweb bars are a rich, indulgent Halloween dessert that looks impressive but requires minimal effort. With a creamy peanut butter filling, a chocolate topping, and a fun spiderweb design, they’re perfect for parties or a quick treat.
- Prep Time: 20 minutes
- Cook Time: 0 minutes
- Total Time: 2 hours 20 minutes (includes chilling)
- Yield: 16 servings 1x
- Category: Dessert
- Cuisine: American
Ingredients
- 1 cup (2 sticks) unsalted butter, melted
- 1 cup creamy peanut butter (Jif or Skippy recommended)
- 2 cups powdered sugar, sifted
- 2 cups graham cracker crumbs (about 14 full sheets)
- 1 teaspoon vanilla extract
- A pinch of salt (optional, if using unsalted peanut butter)
- 1 ½ cups semi-sweet chocolate chips
- 2 tablespoons creamy peanut butter (for chocolate topping)
- 1 tablespoon coconut oil or vegetable shortening (optional)
- ¼ cup white chocolate chips or melting wafers
- ½ teaspoon coconut oil (for white chocolate)
Instructions
- Line a 9×9-inch baking pan with parchment paper, leaving overhang on two sides. Lightly grease the parchment.
- In a large bowl, combine 2 cups graham cracker crumbs with ½ cup melted butter. Stir until moistened. Press firmly into the bottom of the prepared pan. Refrigerate while making the filling.
- In the same bowl, combine remaining ½ cup melted butter, 1 cup peanut butter, and 1 teaspoon vanilla extract. Stir until smooth. Gradually add sifted powdered sugar, stirring until fully incorporated. The mixture will be thick and sticky.
- Remove crust from fridge. Drop spoonfuls of peanut butter filling over crust. Press into an even layer using a spatula or lightly greased hands. Return to fridge for 15 minutes.
- In a microwave-safe bowl, combine 1 ½ cups semi-sweet chocolate chips, 2 tablespoons peanut butter, and 1 tablespoon coconut oil. Microwave in 30-second intervals, stirring after each, until smooth.
- Remove pan from fridge. Pour melted chocolate over peanut butter layer. Tilt pan to spread evenly. Tap pan on counter to release air bubbles.
- Melt white chocolate chips with ½ teaspoon coconut oil in microwave, stirring every 15 seconds. Transfer to a small zip-top bag and snip off a tiny corner. Pipe concentric circles on top of dark chocolate. Use a toothpick to drag from center outward through circles to create spiderweb effect. Wipe toothpick clean between each drag.
- Refrigerate for at least 2 hours, or overnight, until fully set.
- Lift bars out of pan using parchment overhang. Cut into squares with a sharp knife, wiping knife between slices. Serve cold or at room temperature.
Notes
For best results, use creamy peanut butter (not natural) to avoid oily bars. Sift powdered sugar to prevent lumps. Press crust firmly. Chill at least 2 hours or overnight for clean slices. For gluten-free, use gluten-free graham crackers. For dairy-free, use vegan butter and dairy-free chocolate chips. For nut-free, use sunflower seed butter.
Nutrition
- Serving Size: 1 bar
- Calories: 320
- Sugar: 20
- Sodium: 150
- Fat: 22
- Saturated Fat: 10
- Carbohydrates: 28
- Fiber: 2
- Protein: 6
Keywords: no-bake, peanut butter, chocolate, spiderweb, Halloween, dessert, bars