My friend Jenna asked why I couldn’t just dump everything into one pan and bake it like a bar cookie. I was mid-lecture, explaining the careful science of creaming butter and sugar, the temperamental nature of pumpkin puree, and how you absolutely could not just throw chocolate chips into a single layer and call it a day. I started to explain why that wouldn’t work—then stopped. She was holding my three-year-old daughter, who was nodding along like she was in on some secret. I had nothing but time and a half-can of pumpkin staring at me from the counter. So I shrugged, handed Jenna a spatula, and said, “Fine. You do it.”
She dumped everything—the pumpkin, the butter, the sugar, the flour, the whole bag of chocolate chips—into one bowl, stirred it until it looked like a thick, glorious mess, and pressed it into a greased 9×13 pan. I cringed. I was certain I’d be scraping burnt pumpkin off the bottom of my oven. But then the smell started filling the kitchen. Warm, spicy, sweet—the kind of smell that makes your neighbors conveniently “forget” something so they can knock on your door. I pulled the pan out of the oven, let it cool, and cut a corner piece. It was soft, almost fudgy, with pockets of melted chocolate in every single bite. Honestly, I was wrong. Completely, totally wrong. These perfect pumpkin chocolate chip cookie bars for a crowd were born from my own stubborn refusal to try something new. Now, I make them every single fall. They have become my go-to for every potluck, every family dinner, every time I need to show up with something that disappears in minutes.
Maybe you have been there—stuck in your ways, convinced your grandmother’s recipe is the only way, only to have a friend or a kid prove you totally wrong. That is the magic of cooking, right? You think you are the teacher, but you end up being the student. These bars are proof that sometimes the easiest, most straightforward method wins. They are forgiving, they are fast, and they are absolutely packed with fall flavor. Let me tell you, once you make these, you will never go back to fussy drop cookies again.
Why You’ll Love This Recipe
I have tested this recipe more times than I care to admit. I have made it with fresh pumpkin, canned pumpkin, and even leftover pumpkin pie filling in a pinch (don’t judge—it worked). I have brought it to tailgates, book club meetings, and Thanksgiving dinners. Every single time, someone asks for the recipe. Here is why these bars are different from every other pumpkin chocolate chip recipe out there:
- Made for a Crowd: This recipe bakes in a single 9×13 pan, giving you 24 generous bars. No scooping, no rolling, no multiple batches. Just one pan, one bake, and a whole lot of happy people.
- Incredibly Simple Ingredients: You probably have everything in your pantry right now. Pumpkin puree, butter, sugar, flour, eggs, chocolate chips, and a few warm spices. No weird add-ins or specialty flours.
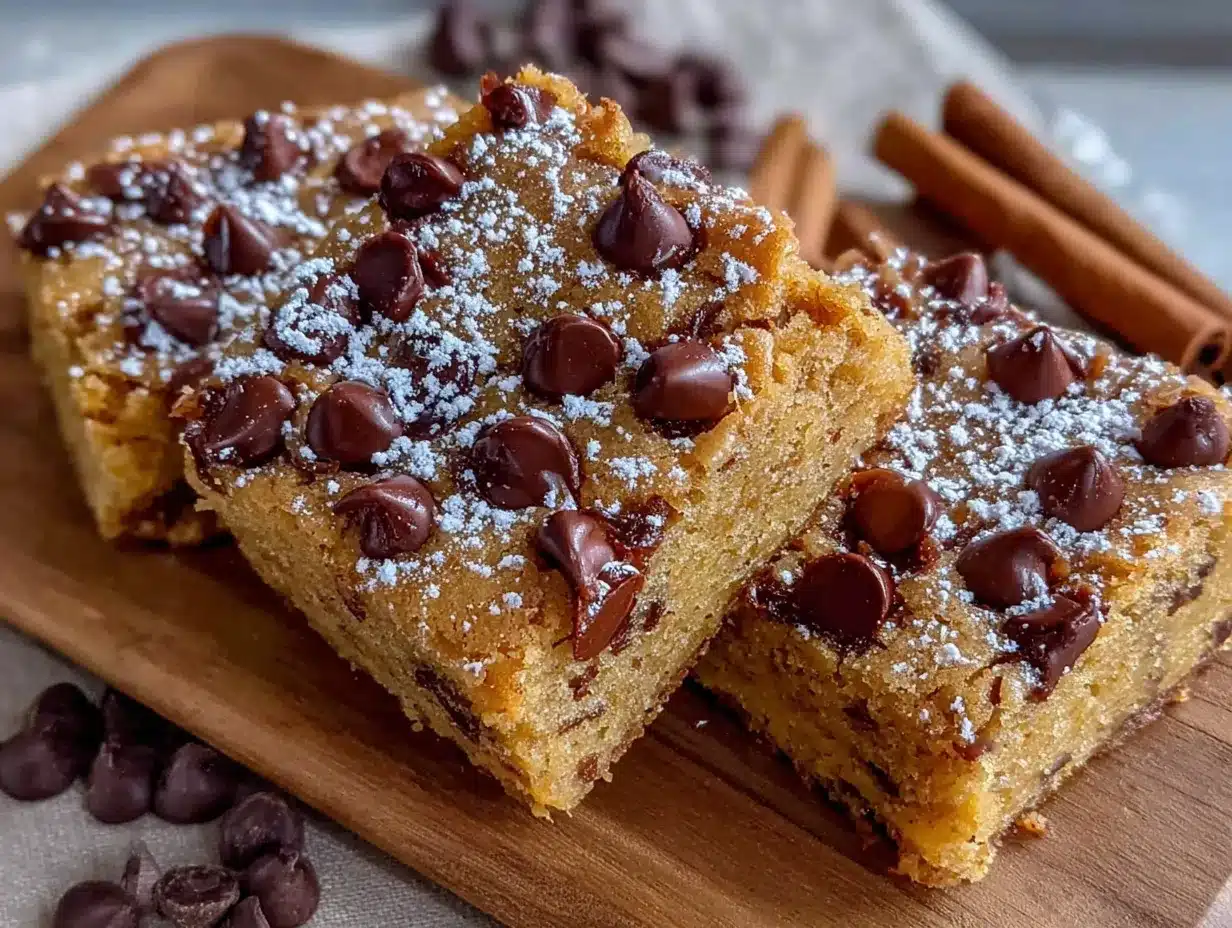
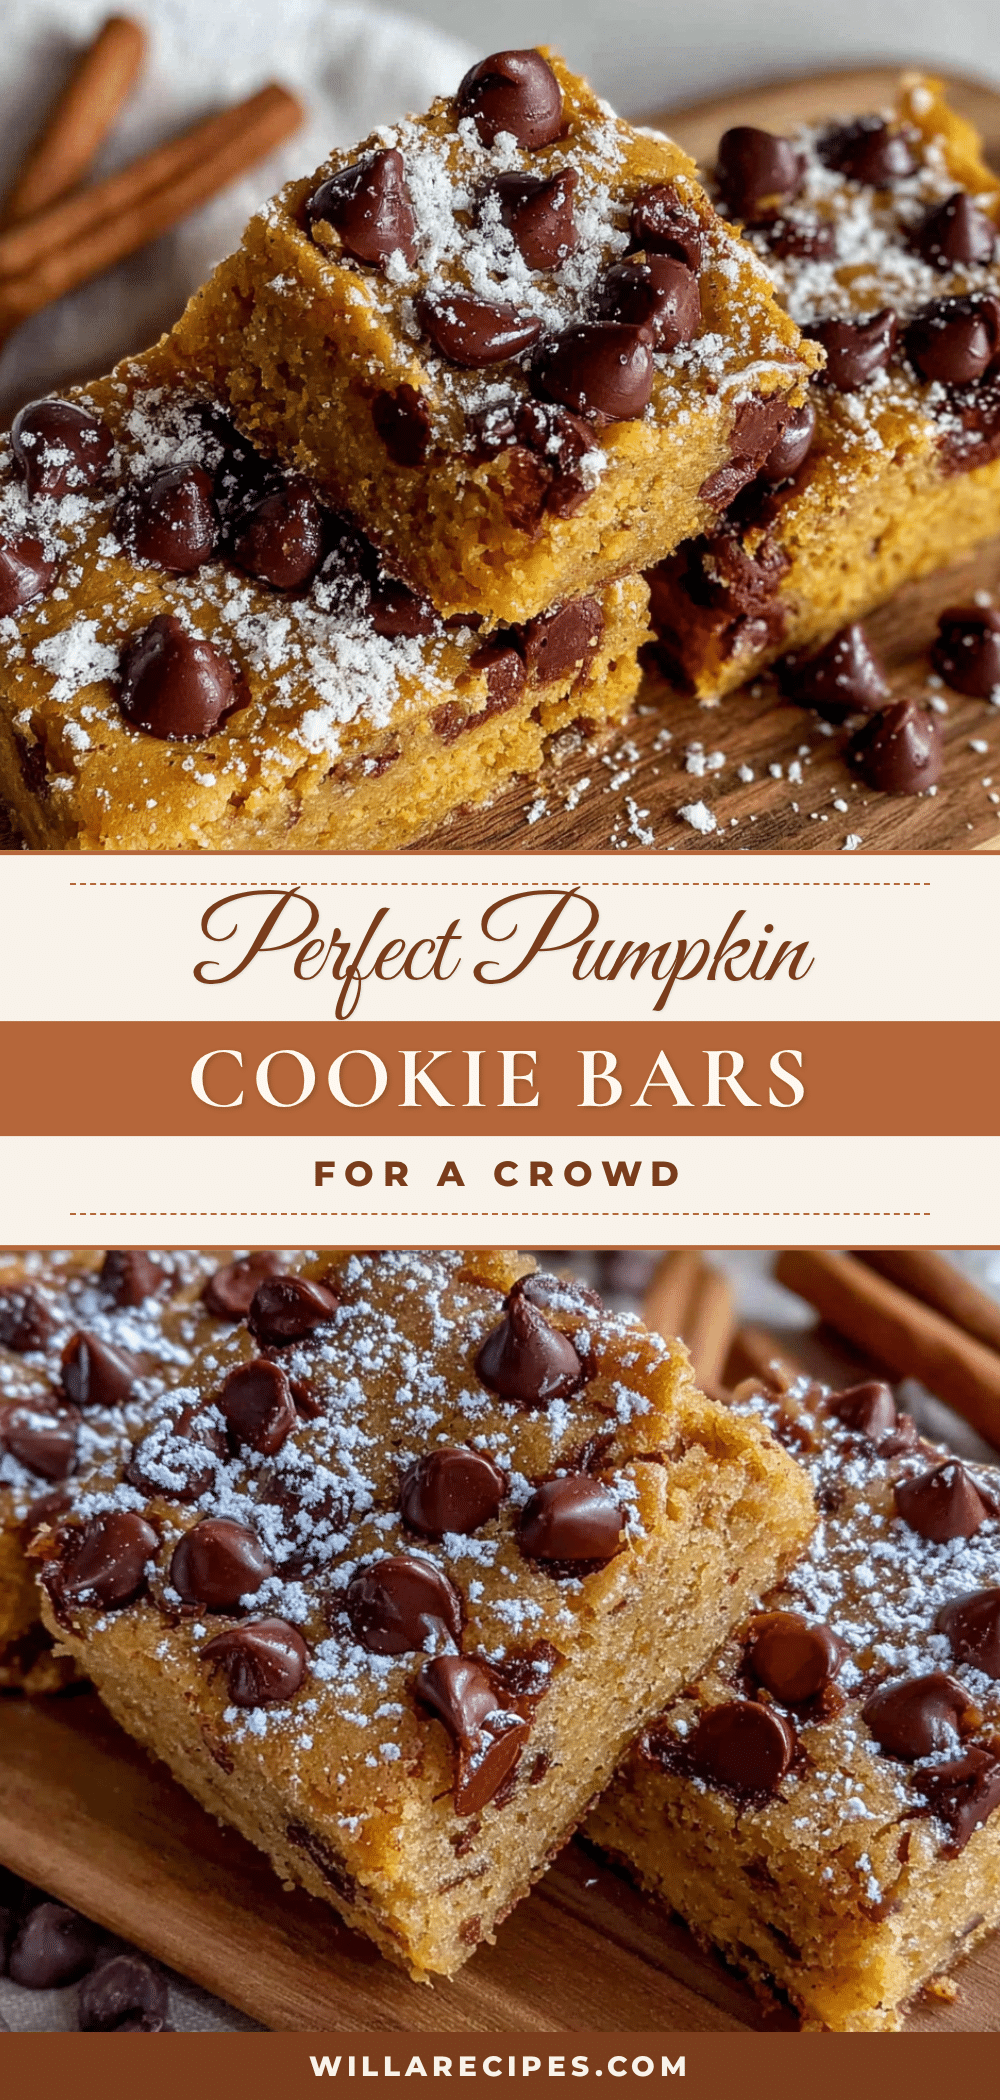
- Foolproof Texture: The bars come out perfectly soft and chewy, almost like a cross between a brownie and a traditional pumpkin cookie. The edges get slightly crisp, while the center stays tender and moist.
- Perfect for Fall Gatherings: Whether you are hosting a Halloween party, a Friendsgiving, or just a cozy Sunday dinner, these bars fit right in. They are festive without being fussy.
- Crowd-Pleaser Guaranteed: Kids love the chocolate chips. Adults love the pumpkin and spice. Everyone loves that they are easy to grab and eat standing up.
- Stress-Free Hosting: You can make these a day ahead. You can freeze them. You can double the recipe and bake in two pans. They are the ultimate make-ahead dessert for busy hosts.
What makes these bars truly special is the texture. Most pumpkin cookie recipes turn out cakey or dry. Not these. The trick is using melted butter and a slightly higher ratio of pumpkin to flour. It creates a bar that is dense, fudgy, and almost brownie-like. Plus, the chocolate chips stay melty and soft, not hard and crunchy. It is comfort food at its finest—simple, honest, and deeply satisfying.
What Ingredients You Will Need
This recipe relies on pantry staples to create something truly special. The ingredients work together to deliver a soft, fudgy bar with a warm spice profile and bursts of chocolate in every bite. Here is everything you need and why each ingredient matters:
For the Bars:
- 1 cup (2 sticks) unsalted butter, melted (Melted butter is the key to that dense, fudgy texture. It eliminates the need for creaming and keeps the bars moist. I prefer using salted butter in a pinch, just reduce the added salt by half.)
- 1 ½ cups granulated sugar (White sugar gives the bars a clean sweetness and helps create that slightly crisp edge. You can substitute coconut sugar for a deeper flavor, but the texture will be slightly less tender.)
- ½ cup packed light brown sugar (Brown sugar adds moisture and a hint of molasses flavor that pairs beautifully with pumpkin and cinnamon. Dark brown sugar works too, but it will make the bars a bit darker and more caramel-like.)
- 2 large eggs, room temperature (Room temperature eggs incorporate more easily into the melted butter, creating a smoother batter. If you forget to take them out early, place them in a bowl of warm water for 5 minutes.)
- 1 ½ cups pumpkin puree (Not pumpkin pie filling! Make sure you grab 100% pure pumpkin puree. Libby’s is my go-to brand because it is consistently thick and not watery. If your puree looks runny, blot it with a paper towel before using.)
- 2 teaspoons vanilla extract (Vanilla rounds out the spices and makes the chocolate taste richer. Use pure vanilla extract if you have it, but imitation works fine in a pinch.)
- 2 cups all-purpose flour (Spoon and level your flour—don’t scoop straight from the bag. Too much flour will make the bars dry and cakey. If you need a gluten-free version, use a 1:1 gluten-free baking blend.)
- 1 teaspoon baking soda (This gives the bars a slight lift without making them puffy. Do not skip it, or your bars will be flat and dense.)
- ½ teaspoon baking powder (Works with the baking soda to create a tender crumb. If you only have baking soda, add an extra ¼ teaspoon.)
- ½ teaspoon salt (Salt balances the sweetness and enhances the pumpkin and spice flavors. I use fine sea salt for even distribution.)
- 2 teaspoons ground cinnamon (The star spice of fall. I use a generous 2 teaspoons, but feel free to adjust to your taste.)
- 1 teaspoon pumpkin pie spice (A shortcut blend of cinnamon, nutmeg, ginger, and cloves. If you don’t have it, use ½ teaspoon nutmeg, ¼ teaspoon ginger, and ¼ teaspoon cloves.)
- ½ teaspoon ground nutmeg (Freshly grated nutmeg is incredible here, but pre-ground works perfectly.)
- 2 cups semi-sweet chocolate chips (I prefer Ghirardelli or Guittard semi-sweet chips because they hold their shape and don’t get waxy. Milk chocolate chips make the bars sweeter, while dark chocolate chips add a nice bitterness. You can also use a mix.)
Optional Add-Ins:
- ½ cup chopped pecans or walnuts (Adds a lovely crunch. Toast them first for extra flavor.)
- ¼ cup white chocolate chips (For a pretty contrast and extra sweetness.)
- 1 tablespoon bourbon or dark rum (A grown-up twist that deepens the spice flavor. Add it with the vanilla.)
Equipment Needed
You do not need any fancy gadgets for this recipe, which is part of the beauty. Here is what you will need:
- 9×13-inch baking pan (A metal pan gives the best edges. Glass or ceramic works too, but you may need to add 5 minutes to the bake time.)
- Parchment paper or aluminum foil (Lining the pan makes lifting the bars out a breeze. I always leave a 2-inch overhang on two sides for easy removal.)
- Large mixing bowl (Any large bowl works. I use a glass one because it is easy to see when the batter is fully mixed.)
- Whisk and rubber spatula (A whisk for the wet ingredients and a spatula for folding in the flour and chips. A wooden spoon works too.)
- Measuring cups and spoons (For accuracy. I cannot stress enough how important it is to measure flour correctly.)
- Cooling rack (Allows air to circulate around the pan so the bars cool evenly. If you don’t have one, just let them cool in the pan.)
If you are baking for a crowd and need to double the recipe, use two pans. Do not try to cram everything into one pan—it will not bake evenly. A good, sharp knife is also helpful for cutting clean squares. I use a chef’s knife and wipe it clean between cuts for the prettiest bars.
Preparation Method
Let us get to the fun part. This recipe comes together in about 10 minutes of active prep time, then the oven does the rest. Follow these steps for perfect bars every time:
- Preheat and Prep: Preheat your oven to 350°F (175°C). Line your 9×13-inch baking pan with parchment paper or aluminum foil, leaving a 2-inch overhang on the two long sides. Lightly grease the parchment with non-stick spray or butter. This step is crucial—without it, your bars will stick to the pan.
- Melt the Butter: In a large microwave-safe bowl, melt the 2 sticks of butter in 30-second increments until fully melted. Let it cool for 2-3 minutes. You do not want it hot, just warm. If the butter is too hot, it will cook the eggs when you add them.
- Combine Sugars and Butter: Add the granulated sugar and brown sugar to the melted butter. Whisk vigorously for about 1 minute until the mixture looks smooth and slightly thickened. It should smell like buttery caramel. Do not skip this step—it helps dissolve the sugar and creates a better texture.
- Add Eggs and Vanilla: Crack the two room-temperature eggs into the butter-sugar mixture. Add the vanilla extract. Whisk until everything is fully combined and the batter looks glossy. It will be thin, and that is fine.
- Add the Pumpkin: Pour in the pumpkin puree and whisk until it is completely incorporated. The batter will turn a beautiful orange color and thicken slightly. If you see any lumps, keep whisking. You want it smooth.
- Mix Dry Ingredients: In a separate medium bowl, whisk together the flour, baking soda, baking powder, salt, cinnamon, pumpkin pie spice, and nutmeg. Whisking ensures the spices and leaveners are evenly distributed. No one wants a bite with all the baking soda in one spot.
- Combine Wet and Dry: Add the dry ingredients to the wet ingredients in two additions. Use a rubber spatula to fold gently after each addition. Mix just until you no longer see streaks of flour. Overmixing will develop gluten and make the bars tough. It is okay if there are a few tiny lumps.
- Fold in Chocolate Chips: Add 1 ¾ cups of the chocolate chips to the batter (reserve the remaining ¼ cup for the top). Fold gently with the spatula until the chips are evenly distributed. The batter will be thick and sticky—that is perfect.
- Transfer to Pan: Scrape the batter into the prepared pan. Use the spatula to spread it into an even layer. It will be thick, so take your time. Sprinkle the reserved ¼ cup of chocolate chips over the top. This makes the bars look bakery-worthy.
- Bake: Place the pan on the center rack of your preheated oven. Bake for 28-32 minutes, or until the edges are golden brown and a toothpick inserted into the center comes out with a few moist crumbs. Do not overbake! The bars will continue to set as they cool. If the toothpick comes out clean, you have gone too far.
- Cool Completely: Let the bars cool in the pan on a wire rack for at least 1 hour. This is the hardest part, I know. But if you cut them while they are warm, they will crumble. Once completely cool, use the parchment overhang to lift the entire block out of the pan. Place it on a cutting board.
- Cut and Serve: Use a sharp knife to cut the bars into 24 squares (6 rows by 4 rows). For cleaner cuts, wipe the knife with a damp paper towel between each slice. Serve immediately or store for later.
Cooking Tips & Techniques
After making these bars dozens of times, I have collected a few tricks that make a real difference. Here are my top tips for success:
- Do Not Overmix: This is the number one mistake I see. Once you add the flour, mix only until it disappears. Overmixing develops gluten, which makes the bars tough and bread-like. You want them tender and fudgy.
- Use Room Temperature Ingredients: Cold eggs can seize the melted butter, creating a lumpy batter. Set your eggs out 30 minutes before you start. If you forget, place them in a bowl of warm water for 5 minutes.
- Check Your Pumpkin: Not all pumpkin puree is created equal. Some brands are more watery than others. If your puree looks thin or has liquid pooling on top, blot it with a paper towel before measuring. Too much moisture will make the bars soggy.
- Bake Until Just Set: The toothpick test is your friend, but interpret it correctly. You want a few moist crumbs clinging to the toothpick, not wet batter. If the toothpick comes out clean, your bars are overbaked and will be dry.
- Cool Before Cutting: I know it is tempting to cut into a warm pan of bars. Resist. The bars need time to set up. Cooling for at least an hour gives them the perfect fudgy texture. If you cut too soon, you will end up with a delicious but messy pile of crumbs.
- Double the Batch for Big Crowds: This recipe scales beautifully. If you are hosting a large gathering, make two pans. They freeze well, so you can even bake them a week ahead.
One of my biggest failures with this recipe happened when I tried to use a glass pan without adjusting the temperature. The edges burned while the center was still raw. Now I always use a metal pan and check the bars at the 28-minute mark. Learn from my mistakes!
Variations & Adaptations
One of the best things about this recipe is how adaptable it is. Here are some of my favorite variations:
- Gluten-Free Version: Substitute the all-purpose flour with a 1:1 gluten-free baking blend that contains xanthan gum. I have used King Arthur Measure for Measure with great results. The texture is slightly more tender, but just as delicious.
- Dairy-Free Version: Use vegan butter (I like Miyoko’s) and dairy-free chocolate chips. The bars will be a bit softer, so let them cool completely before cutting.
- Spice It Up: Add ¼ teaspoon of cayenne pepper or chipotle powder for a warm, spicy kick. The heat pairs beautifully with the pumpkin and chocolate.
- Nutty Crunch: Fold in ½ cup of toasted pecans or walnuts along with the chocolate chips. Toast the nuts in a dry skillet over medium heat for 3-4 minutes until fragrant. Let them cool before adding to the batter.
- White Chocolate Cranberry: Swap the semi-sweet chips for white chocolate chips and add ½ cup of dried cranberries. This version is especially festive for holiday gatherings.
- Pumpkin Chocolate Chip Cookie Cake: Bake the batter in a 9-inch round cake pan for 35-40 minutes. Let it cool completely, then frost with cream cheese frosting for a show-stopping dessert.
I once made a batch with dark chocolate chips and a pinch of smoked sea salt on top. It was a huge hit at a Halloween party. The salt really makes the chocolate and pumpkin pop. Do not be afraid to experiment!
Serving & Storage Suggestions
These bars are incredibly versatile when it comes to serving. Here is how to make them shine:
Serving: Serve the bars at room temperature. They are perfect on their own, but a dollop of whipped cream or a scoop of vanilla ice cream takes them to the next level. For a pretty presentation, cut the bars into clean squares and arrange them on a platter. Dust with a little powdered sugar or cinnamon for a polished look. If you are serving them at a party, place them on a cake stand to give them height.
What to Serve Alongside: These bars pair beautifully with hot apple cider, a warm chai latte, or a cup of strong coffee. For a full fall dessert spread, serve them alongside crispy garlic chicken for a sweet and savory combo, or with a simple pumpkin spice latte. If you are hosting a brunch, they are fantastic next to a fruit salad or a cheese board.
Storage: Store leftover bars in an airtight container at room temperature for up to 4 days. If your kitchen is warm, you can refrigerate them, but let them come to room temperature before serving for the best texture. To freeze, wrap the entire block (or individual bars) tightly in plastic wrap, then in aluminum foil. Freeze for up to 3 months. Thaw overnight in the refrigerator or at room temperature for a few hours.
Reheating: For that fresh-from-the-oven taste, warm individual bars in the microwave for 10-15 seconds. You can also reheat them in a 300°F oven for 5-7 minutes. The chocolate will get melty and the edges will crisp up slightly.
The flavors actually develop and deepen over time. I honestly think these bars taste even better on day two. The spices meld together, and the texture becomes even more fudgy. So do not stress about making them the day of your event—they are a perfect make-ahead dessert.
Nutritional Information & Benefits
Here is an estimated nutritional breakdown for one bar (based on 24 servings):
- Calories: 245
- Total Fat: 12g
- Saturated Fat: 7g
- Cholesterol: 35mg
- Sodium: 160mg
- Total Carbohydrates: 34g
- Dietary Fiber: 2g
- Sugars: 22g
- Protein: 3g
These bars are a treat, but they do offer some surprising benefits. Pumpkin is packed with vitamin A, which is great for eye health and immune function. It is also a good source of fiber and antioxidants. The cinnamon and nutmeg have anti-inflammatory properties. And dark chocolate? It is rich in flavonoids, which are good for heart health. So while these are definitely a dessert, they are not completely empty calories. I love knowing that I am getting a little nutritional boost with every bite.
If you are watching your sugar intake, you can reduce the granulated sugar to 1 cup. The bars will be less sweet, but still delicious. For a lower-fat option, substitute half the butter with unsweetened applesauce. The texture will be slightly more cakey, but still very good.
Frequently Asked Questions
Can I use fresh pumpkin instead of canned?
Yes, you can use fresh pumpkin puree. Just make sure to strain it well. Fresh pumpkin tends to be more watery than canned. Place the puree in a cheesecloth-lined strainer over a bowl for 30 minutes to remove excess liquid. Then measure out 1 ½ cups.
Why did my bars turn out dry?
Dry bars are usually a result of overbaking or overmeasuring the flour. Make sure you spoon the flour into your measuring cup and level it off with a knife. Do not scoop directly from the bag. Also, check your bars at the 28-minute mark. They should look slightly underdone in the center when you pull them out.
Can I make these bars ahead of time?
Absolutely! These bars are perfect for making ahead. Bake them up to 2 days in advance and store them in an airtight container at room temperature. You can also freeze them for up to 3 months. Just wrap them tightly and thaw before serving.
Can I use pumpkin pie filling instead of pumpkin puree?
I do not recommend it. Pumpkin pie filling is pre-sweetened and spiced, which will throw off the sugar and spice balance in this recipe. Stick with 100% pure pumpkin puree for the best results.
How do I get clean cuts on my bars?
Patience is key. Let the bars cool completely before cutting. Use a sharp chef’s knife and wipe it clean with a damp paper towel between each cut. For the cleanest edges, chill the bars in the refrigerator for 30 minutes before slicing.
Conclusion
These perfect pumpkin chocolate chip cookie bars for a crowd are the dessert you will turn to again and again. They are simple enough for a Tuesday night, but impressive enough for a holiday table. They are forgiving, adaptable, and absolutely packed with fall flavor. Every time I make them, I think of that afternoon in my kitchen when Jenna proved me wrong. It is a good reminder that sometimes the best recipes come from letting go of control and trying something new.
I hope you give these bars a try. Customize them to your liking—add nuts, swap the chocolate, or spice them up. Make them for your next gathering and watch them disappear. And when someone asks for the recipe, tell them the story. Tell them about the friend who showed you a better way. That is what cooking is all about, right? Sharing not just food, but the stories behind it.
I would love to hear how your bars turn out. Leave a comment below and let me know what variations you tried. Did you add white chocolate? Did you make them gluten-free? Did your guests go back for seconds? Your experience might inspire someone else to try something new. Happy baking, friends!
Pin This Recipe!
Perfect Pumpkin Chocolate Chip Cookie Bars for a Crowd
These soft, fudgy pumpkin chocolate chip cookie bars are made in a single 9×13 pan, making them perfect for feeding a crowd. They are incredibly simple to make, with a texture that is almost like a cross between a brownie and a traditional pumpkin cookie.
- Prep Time: 10 minutes
- Cook Time: 30 minutes
- Total Time: 1 hour 40 minutes
- Yield: 24 servings 1x
- Category: Dessert
- Cuisine: American
Ingredients
- 1 cup (2 sticks) unsalted butter, melted
- 1 ½ cups granulated sugar
- ½ cup packed light brown sugar
- 2 large eggs, room temperature
- 1 ½ cups pumpkin puree (not pumpkin pie filling)
- 2 teaspoons vanilla extract
- 2 cups all-purpose flour
- 1 teaspoon baking soda
- ½ teaspoon baking powder
- ½ teaspoon salt
- 2 teaspoons ground cinnamon
- 1 teaspoon pumpkin pie spice
- ½ teaspoon ground nutmeg
- 2 cups semi-sweet chocolate chips
- Optional: ½ cup chopped pecans or walnuts
- Optional: ¼ cup white chocolate chips
- Optional: 1 tablespoon bourbon or dark rum
Instructions
- Preheat your oven to 350°F (175°C). Line a 9×13-inch baking pan with parchment paper or aluminum foil, leaving a 2-inch overhang on the two long sides. Lightly grease the parchment with non-stick spray or butter.
- In a large microwave-safe bowl, melt the 2 sticks of butter in 30-second increments until fully melted. Let it cool for 2-3 minutes.
- Add the granulated sugar and brown sugar to the melted butter. Whisk vigorously for about 1 minute until the mixture looks smooth and slightly thickened.
- Crack the two room-temperature eggs into the butter-sugar mixture. Add the vanilla extract. Whisk until everything is fully combined and the batter looks glossy.
- Pour in the pumpkin puree and whisk until it is completely incorporated. The batter will turn a beautiful orange color and thicken slightly.
- In a separate medium bowl, whisk together the flour, baking soda, baking powder, salt, cinnamon, pumpkin pie spice, and nutmeg.
- Add the dry ingredients to the wet ingredients in two additions. Use a rubber spatula to fold gently after each addition. Mix just until you no longer see streaks of flour.
- Add 1 ¾ cups of the chocolate chips to the batter (reserve the remaining ¼ cup for the top). Fold gently with the spatula until the chips are evenly distributed.
- Scrape the batter into the prepared pan. Use the spatula to spread it into an even layer. Sprinkle the reserved ¼ cup of chocolate chips over the top.
- Place the pan on the center rack of your preheated oven. Bake for 28-32 minutes, or until the edges are golden brown and a toothpick inserted into the center comes out with a few moist crumbs.
- Let the bars cool in the pan on a wire rack for at least 1 hour. Once completely cool, use the parchment overhang to lift the entire block out of the pan. Place it on a cutting board.
- Use a sharp knife to cut the bars into 24 squares (6 rows by 4 rows). For cleaner cuts, wipe the knife with a damp paper towel between each slice.
Notes
Do not overmix the batter once flour is added to avoid tough bars. Use room temperature ingredients for best results. Check your pumpkin puree for excess moisture and blot if necessary. Cool completely before cutting to prevent crumbling. Bars can be stored in an airtight container at room temperature for up to 4 days or frozen for up to 3 months.
Nutrition
- Serving Size: 1 bar
- Calories: 245
- Sugar: 22
- Sodium: 160
- Fat: 12
- Saturated Fat: 7
- Carbohydrates: 34
- Fiber: 2
- Protein: 3
Keywords: pumpkin chocolate chip cookie bars, pumpkin bars, cookie bars, fall dessert, crowd-pleaser, easy pumpkin recipe